Utilises Demon form to cast large amount of screen covering crit based  Fireball's while maintaining a strong defence with Powerful Life and Energy shield Recoup. This is a powerful endgame farming build capable of doing juiced maps and Pinnacle bosses.
This guide assumes you are at least level 80.
PoE 2 Build
Shin's Arch-Demon Fireball Infernalist 0.3 UPDATED
Build Overview
Strengths and Weaknesses
- Strong defence
- Screen wide fireballs
- Manic joy
- We BURN, They BURN, EVERYTHING BURNS!
- Expensive to get going (10-20DIV)
- Screen wide fireballs
- Your friends wont like it
- Cannot run "Reduced recovery" Maps


Gear explained:
In this section we will cover the gear and possible chase items you could add.
Unique's: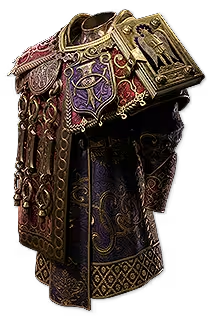 Sacrosanctum is our one and only chest choice as it will allow us to get "Damage taken Recouped as Life is also Recouped as Energy Shield". This one line enabled the Recoup that we use for out survival. Getting one with 30 to Spirit is important as it will allow us to utilise
  Raging Spirits on top of our
  Cast on Critical. At least 10% recoup roll is needed, you can get 12% on corrupted if lucky.
 Blood of the Warrior is the chosen flask as it synergise with our recoup. It will run for its full duration regardless of our life level and will allow any damage we take during its effect to return to us at 30% Recoup. An easy addition.
  Sanguis Heroum is the first unique charm, it will allow us to remove bleed and drop a Consecrated ground which provides us with additional life regeneration.
  Forsaken Bangle is another great source of additional Recoup. This time its 50% of chaos damage prevented returned as Recoup.
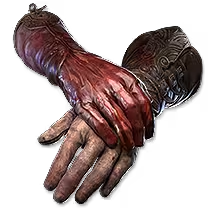 Maligaro's Virtuosity last but definitely not least! This pair of gloves gives our fireballs a massive 250% Bonus critical damage. This is how we can make Fireballs work in the current balance. This 250% Bonus Crit damage is flat and replaces any other bonus crit damage source, so "bonus critical damage" on items and tree is overwritten. Because of this, These gloves should be REPLACED as soon as our total Crit damage bonus is 250% without the gloves.
Non-Unique's:
IMPORTANT: DO NOT GET MANA or Increased MANA rolls. Aim to have all Gear as Energy Shield.
Also, General rule of thumb, If you can fit in increased rarity, go for it! Its an endgame farmer after all.
Amulet: Anoint  Infused Flesh and get a "Damage taken Recouped as life" roll. Try get one with "+ to Level of all Spell Skills" if possible. For the rest of the rolls, focus on resistances and life.
Rings: For the rings we want to get resistances, life and life regen rolls. As high as you can.
Belt: The belt can roll "Fire damage taken recouped as life", so make sure you get one with that roll. For the rest, focus Resistances and life.
Charm: We only have one slot left so get freeze resist.
Boots: Movement speed is a given. Then focus Life regen, Life and Resists.
Helmet: Try to get as much shield and possible so we can get the most out of  Illuminated Crown. Then as normal, focus Life and Resistances.
Wand: Make sure you get a  Dueling Wand as we need the
  Spellslinger skill. Priority is "+ to level of fire spells". Try to get % Damage as extra X to allow for more overall damage output. Other roll can be filled with % increased fire/spell damage.
Focus: The two most important rolls are "+ to level of all spell skills" and "increased critical hit chance"
The rest can be filled by Increased fire/spell damage rolls and any resistances you may still need. You could also try get one with high energy shield to get the most out of  Warding Fetish.
Staff: Any  Chiming Staff for the
  Sigil of Power skill. Even a white one would work.
REPLACE GLOVES!: Once we get to 250%+ Crit damage from gear and passives, we no longer need Maligaro's Virtuosity so its time to get new gloves! Focus on more Critical Damage bonus!
CHASE ITEMS: Headhunter is a no brainer chase item for any build, we can definitely use it well.
 Rathpith Globe will increase our damage to insane levels.
Rakiata's Flow will fit in to a fireball skill quite well, but as of writing this, its very expensive so it fits in this section.
Skill Gems
Support Gem Requirements:
Str 35
Dex 30
Int 130
1
Fireball
2
Spellslinger

3
Flameblast

4
Snap
5
Cast on Critical

6
Elemental Weakness
7
Sigil of Power
8
Raging Spirits
9
Demon Form
Gem Priority


+3
Skills Explained:
Here i will go over each skill and explain its best use. Fireball
Links: Pinpoint Critical > Unleash > Wildshards II > Fire Mastery > Fork
This is our main spell and the button we will be holding down constantly. It is also the skill that will trigger our Cast on Critical Fireball. The Wildshards II and Unleash will make sure we send out large quantities of Fireball's which we will empower with the new Infusing mechanic. Spellslinger
Links: Fireball > Pinpoint Critical > Boundless Energy II > Arbiter's Ignition > Wildshards II
This is the second most pressed button and the skill that allows us to activate  Archon of the Flame. We should be casting this with our main Fireball so that they are simultaneous. I set my main Fireball on my Left-click and Spellslinger on my Right-click so i can just hold both buttons down and go ham with constant casting. So 2 Fireball spells at the same time. Flameblast
Links: Pinpoint Critical > Inevitable Critical > Considered Casting > Momentum > Searing Flame II
This is the boss killer, we cast it every 15 second and it hits like a truck. Make sure you move 2 metres to make use of Momentum. Snap
Links: Harmonic Remnants II > Magnified Area I > Cooldown Recovery II > Fire Mastery > Ignite III
This skill has three uses and is our 3rd most used skill.
First is the Fire Remnant generation it provides when killing a enemy that is currently ignited.
Second is the large AOE explosion that spreads Ignite and damages enemies.
Third and last is the ability to cast it without a target which we use to generate Recoup stacks at map start and while travelling between packs. This is vital to keep our recoup number up.
(see "how it works" section for mor detail on Recoup)Cast on Critical
Links: Fireball > Pinpoint Critical > Fire Mastery > Boundless Energy II > Sione's Temper
Yet another Fireball, this one being cast when we hit enough crits on our other skills, Which happens quite often. Linked with Sione's Temper to allow for some nice screen wide balls!Elemental Weakness
Links: Heightened Curse > Cursed Ground > Focused Curse > Magnified Area II > Rapid Casting II
Our local curse. We can cast two at a time and they are so large that they can cover an entire ritual zone with little issue. I bind this to my Q key so i can constantly cast as i move. Sigil of Power
Links: Prolonged Duration II > Rapid Casting II > Magnified Area II > Cooldown Recovery II
This thing is great. It counts Spellslinger as "Spending mana" so we can stack it to 4 pretty quickly. Its a must have to pop down on boss fights and rituals. Raging Spirits
Links: Infernal Legion III > Fire Exposure > Searing Flame II > Ignite III > Minion Instability
These just do their thing quit nicely, and their thing is making sure more enemies have the ignite debuff for our Snap. The added POP at the end of their life is pretty funny too. ![]() Demon Form
Demon Form
Links: Second Wind II > Cooldown Recovery II
Our demon form. Just cool to have Tbh. Adds a lil spell power and cast speed to our attacks while active.
Passive Tree
main:
123
123
set 1:
20
20
set 2:
20
20
The Tree!
First lets start with the Jewels:
We use 3 Unique jewels that will set you back a few divine. The Most important being the  Heroic Tragedy jewel with the "Line of OLROTH" roll. This is mandatory to reduce our overall mana so that
  Pyromantic Pact total Infernal Flame wont be high. See "How it works" section for more detail.
Next we have  Megalomaniac with
  Unnatural Resilience. You can get whatever other passives you want, but Unnatural Resilience is the main. Unnatural Resilience will allow us to get to 80% fire resistance when paired with
  Molten Carapace and that helps allot with all the fire damage we take.
Last we have  From Nothing with
  Elemental Equilibrium. This allows us to get
  Enduring Archon, Resurging Archon,
  Shredding Force and Warding Fetish without the smaller passives leading up to it.
The other jewel slot should be used to increase our ES and have a 3% recoup roll on it.
The Nodes explained:
For Energy shield:
We grab Enhanced Barrier, Patient Barrier, Illuminated Crown, Warding Fetish, Heavy Buffer and Melding. Melding serves a dual roll as it allows us to decrease our total Mana further. For stun threshold we grab  Eldritch Will, which should be enough to prevent all but the super boosted stuns. We should now have a fair chunky Energy Shield.
Our Recoup Nodes:
We grab Heart Tissue, Loose Flesh, Pliable Flesh, Glazed Flesh and Infused Flesh(anointed) to increase our total Recoup and recoup speed. We also grab Storm Driven to allow additional Energy shield recoup when we deal elemental damage to ourselves, which is always. Next is Soul Bloom which allows us to increase the rate that our Energy shield regenerates while recoup stacks are active.
By far the most important node is  Chaos Inoculation which turns to "Knightly Tenants" with our Heroic Tragedy. This prevents all INT from adding mana.
Our Trigger and Damage Nodes:
Most of our damage comes from "Critical Damage Bonus", so we need to work with that. So we grab  Careful Assassin,
  Stormcharged for Crit chance, then Desensitisation and Shredding Force for the Bonus Crit Damage. For Added Elemental damage we grab Molten Carapace which pairs well with our Unnatural Resilience and Stormcharged. Lastly we grab
  Dynamism for the extra energy for our trigger gems.
Pre-90 & Post-90
If you are level 80, you can get everything except Dynamism and Desensitisation. Get them on your path to 90.
For levels 90+ we have two possible routes:
Crit Chance + Energy Gain Route:
Get  Evocational Practitioner and surrounding small passives. Get the remaining small Recoup nodes next to Heart Tissue and Taut Flesh.
Crit Chance and Crit Damage Route:
Get For the Jugular, True Strike and all but 2 of the smaller passives around them. Use the remaining points for small Recoup nodes next to Heart Tissue and Taut Flesh.
Ascendency:
We grab Pyromantic Pact to trigger our Recoup (See "How it works" for more details") and ![]() Demonic Possession to get our sexy Demon form. We grab
Demonic Possession to get our sexy Demon form. We grab  Altered Flesh and
  Grinning Immolation to Add more Crit Chance and Crit Damage.
A note on ![]() Mastered Darkness: You are more then welcome to use
Mastered Darkness: You are more then welcome to use ![]() Mastered Darkness in place of Grinning Immolation. This however, will make your survivability allot less viable due to the large amount of degen and pressure to maintain high enough recoup at all times. Its personal choice. Go nuts!
Mastered Darkness in place of Grinning Immolation. This however, will make your survivability allot less viable due to the large amount of degen and pressure to maintain high enough recoup at all times. Its personal choice. Go nuts!
Campaign Buff choices:
Act 2: Increased Charm Effect in Valley of Titans
Act 3: Stun Threshold from Venom Crypts
Act 4: Choose the Attributes in Halls of the dead & Get +30% Increased Life recovery from flasks in Abandoned prison
Interlude: Get 15% Increased Global Defences in Qimah
Additional note: You can avoid getting the 5% increased mana from Halls of the Dead but its not a big deal if you do pick it up.
Quest Rewards
Check which quests you’ve completed on your character
Clearfell — Beira of the Rotten Pack
Not Specified1 choice
Hunting Grounds — The Crowbell
Not Specified1 choice
Freythorn — The King in the Mists
Not Specified1 choice
Ogham Farmlands — Una's Hut
Not Specified1 choice
Ogham Manor — Candlemass, the Living Rite
Not Specified1 choice
Keth — Kabala, Constrictor Queen
Not Specified1 choice
Valley of the Titans — Medallion
Not Specified2 choices
Deshar — Final Letter
Not Specified1 choice
The Spires of Deshar — Sisters of Garukhan
Not Specified1 choice
Jungle Ruins — Mighty Silverfist
Not Specified1 choice
The Venom Crypts — Venom Draught
Not Specified3 choices
Jiquani's Machinarium — Blackjaw, the Remnant
Not Specified1 choice
The Azak Bog — Ignagduk, the Bog Witch
Not Specified1 choice
The Molten Vault — The Molten Vault
Not Specified1 choice
Aggorat — Blood Sacrifice
Not Specified1 choice
Journey's End — Captain Hartlin
Not Specified1 choice
Eye of Hinekora — Navali's Rest
Not Specified1 choice
Halls of the Dead — Yama The White
Not Specified1 choice
Halls of the Dead — Tawhoa's Test
Not Specified2 choices
Abandoned Prison — Goddess of Justice
Not Specified2 choices
Halls of the Dead — Tasalio's Test
Not Specified2 choices
Halls of the Dead — Ngamahu's Test
Not Specified2 choices
Wolvenhold — Oswin, the Dread Warden
Not Specified1 choice
The Khari Crossing — Akthi and Anundr
Not Specified1 choice
The Khari Crossing — Molten Shrine
Not Specified1 choice
Qimah — Tabana's Pillar
Not Specified7 choices
Kriar Village — Lythara, the Wayward Spear
Not Specified1 choice
Howling Caves — The Abominable Yeti
Not Specified1 choice
How it Plays
Constant casting is mandatory to maintain our Recoup stacks, But that is easy with the fact we don't need to worry about mana at all. We are constantly casting Fireball, Spellslinger, Snap and Elemental Weakness with the first two ideally being simultaneous casts and the last two rotating.
This allows us very large recoup which out heals most damage incoming and makes for screen wide Fireball's!
How it Works
There are three main mechanics we use in this build and they are Recoup, Triggers and ARCHON. Here ill explain how each work and how they fit in the build.
Recoup:
Recoup is our main defensive sustain, its how we keep our life up for ![]() Demon Form and how we can heal through most damage. With this setup, we also have infinite "mana" with Pyromantic Pact.
Demon Form and how we can heal through most damage. With this setup, we also have infinite "mana" with Pyromantic Pact.
So how does it work?
We use Sacrosanctum to allow recoup to work on Energy shield as well as Life, then we us Pyromantic Pact to damage ourselves to stack Recoup. The Recoup stack is only limited to how much you can damage yourself before the other stacks expire. Recoup lasts a total of 8 seconds per stack and will require constant upkeep to maintain high enough stacks to be a viable counter to our own self damage as well as any other possible damage sources.
This is achieved in two ways.
First, we need to make sure we have NO Additional Mana or % Increased Mana on items. This is because Pyromantic Pact is scaled off total mana amount, and we want the smallest amount of Infernal flame as possible so we can trigger Pyromantic Pact damage on Maximum Infernal Flames. Too much Infernal flames means we cannot trigger the damage enough to get a decent recoup stack, which would mean recoup would be fairly useless. To assist us in minimising our mana we need Heroic Tragedy with "Line of OLROTH" roll. This will replace Chaos Inoculation with "Knightly Tenants" Which prevents all INT from adding mana. Its VERY IMPORTANT we get that jewel.
Secondly, We need to maximise the amount and effectiveness of our recoup. The goal is to have 100% recoup with items like Blood of the Warrior and passive nodes like Infused Flesh and Heart Tissue. But even with 100% that's not enough to maintain the recoup numbers we need. So we need to increase its recoup speed as well. Getting nodes like Soul Bloom, Storm Driven and Pliable Flesh are an absolute must have otherwise the incoming damage will out do the rate we gain ES/Life.
Triggers:
We use Triggers in the form of Cast on Critical and Spellslinger. Both of these require energy to activate and we need to build that energy so we can have them activate often enough to make a big difference in our over all Damage output. Cast on Critical Is simple enough, it triggers energy build up on a critical. With the Critical chance on our main Fireball bring around 30% its not very high. However we make up for that in the sheer amount of Fireball's we send out. So building the Energy to trigger our Cast on Critical is quite easy. Spellslinger works by gaining energy as we cast spells and it can stack up to 4 Fireball casts if we don't use the spell. Unlike Cast on Critical, Spellslinger is manual cast, so we tend to cast our main Fireball then cast Spellslinger as soon as it has any energy. I normally hold down both Right and Left-click with the Fireball and Spellslinger bound so that Spellslinger will be constantly cast.
We invest only slightly in energy nodes, but enough to make sure we get consistent use out of our spells. Dynamism is all we really need.
Archon:
Archon of the Flame is newly added in 0.3. It allows us to become a ARCHON and deal increased fire damage while converting all other elemental damages to Fire.
We gain Archon of the Flame by using a new support gem called Arbiter's Ignition linked to our Spellslinger skill. This allows us to gain archon without spending the 5 passive points normally needed. We improve our Archon with the addition of Resurging Archon and Enduring Archon which we get with our From Nothing with Elemental Equilibrium.
It is beneficial for us to have % Damage as extra X on our wand to maximise the damage Archon can covert to fire.
Changelog
13/01/2025:
Updated overview to show what build is for and what its not for.
06/01/2025:
Added min-max gear goals and written details
Updated Skill gems and written details.
Added levels 75-90 to the passive tree and written details.
07/02/2025: No nerfs, still cookin
21/09/2025: Complete rework on the build. Updating in progress
21/09/2025:
Gearing section updated
Skills section updated
How to play section updated
How it works section updated
Overview updated
Passive tree section ongoing update
22/09/25: Passive tree updated, pending video update.
22/09/25: Video added and guide published to 0.3
Added line for when to replace Maligaro's Virtuosity
Build Planner Export
Export this build variant directly to your game.
Video Guide
Table of Contents
Featured Builds


Become a Creator
Want to earn rewards by sharing your builds with your community?