


 Use your favourite features in-game with our Desktop App
PoE 2 Build
Ultimate Tank - Shield Wall 0.5.5
 Warrior
 Smith of Kitava
Build Overview
This

For map clear, we combine
Defensively, the current setup takes 61% of Physical Damage from Hits as Lightning Damage and another 5% as Fire Damage, allowing our high elemental resistances to mitigate those portions.

Our second weapon set uses
For recovery, we have Life Leech on

Strengths and Weaknesses
- • Strong single-target damage.
- • Huge chain explosions with little investment into AoE.
- • Strong physical and elemental defences.
- • Excellent sustain through Life Leech and recovery on kill.
- • Easy resistance scaling through Smith of Kitava.
- Less SSF-friendly, as the build relies on specific unique items and jewels that can be difficult to obtain without trading.
Build Variants
Level 89 Low Budget
Level 91 Lightng coil swap
Level 95 High Budget
Level 96 Min Maxing
Equipment
Level 89 Low Budget
Level 91 Lightng coil swap
Level 95 High Budget
Level 96 Min Maxing













 Nebuloch consumes Endurance Charges for guaranteed critical hits. Use
  Greater Rune of Alacrityfor 8% increased Skill Speed, which also benefits Shield Wall, and
  Farrul's Rune of the Hunt for damage against Rare and Unique enemies. On your shield, prioritise the highest Armour value possible — this directly scales Shield Wall’s base damage.
 Amor Mandragora Grants a stack of Druidic Prowess per 20 Rage spent, up to three stacks for 30% increased Skill Speed. Our Bear warcry setup builds this buff while generating Endurance Charges.
  Soul Core of Zalatl provides 4% Mana recovered on kill, while
  Soul Core of Jiquani provides 5% Life recovered on kill for extra mapping sustain.
 Constricting Command Look for “Requires 4 fewer Enemies to be Surrounded”, allowing one nearby enemy to activate its powerful bonuses. Prioritise two sockets; a two-socket version with a +30 Spirit corruption is a luxury upgrade.
 Lightning Coil Replaces Cloak of Flame, shifting part of incoming Physical Hit Damage to Lightning instead of Fire. It also provides Life, Dexterity, Armour and Evasion, with Iron Reflexes converting the Evasion into Armour. Make sure you compensate for its negative Lightning Resistance.
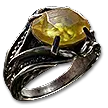
 Ruby Ring Prioritise Fire Resistance, Life and Strength, followed by added Physical and Lightning Damage to Attacks. Smith’s resistance scaling makes Fire Resistance valuable for all three elemental resistances; Fluxes can help convert resistance modifiers to Fire. Added Lightning Damage helps with Shock application.
Amulet
Aim for +3 to Melee Skills, 40+ Spirit, Life and Strength, plus any missing resistances.
Gloves & Boots
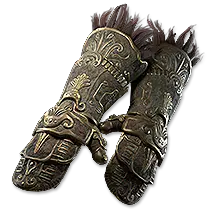
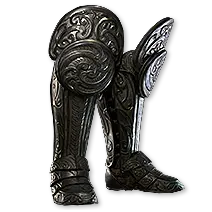
Both should provide Life, Strength and Armour, ideally with Armour applying to Elemental Damage. +2 to Melee Skills is a priority on gloves, while boots should also have good Movement Speed.
Flask & Charms
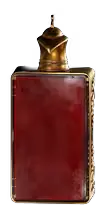
The  Lavianga's Spirits provides passive Mana recovery. Improve it with increased Mana Flask Recovery, including the permanent reward available in Act 4’s Abandoned Prison. Use
  Thawing Charm for Freeze,
  Sanguis Heroum for Bleeding and
  Arakaali's Gift for Poison protection.
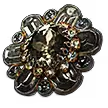 Against the Darkness Look for Notables granting 4% Extra Lightning Damage and +1% Maximum Fire Resistance. Our placement covers seven allocated Notables, providing 28% Extra Lightning Damage and +7% Maximum Fire Resistance.
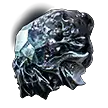
 Heart of the Well Prioritise +1% Maximum Fire Resistances and 15% Extra Lightning Damage. Skill Speed, other Extra Damage bonuses and Critical Damage Bonus are useful additional rolls.
 Undying Hate (amanamu) Placed next to Blood Magic, changing that part of our setup so we use Mana for skill costs. It prevents 20% of immediate Life loss from Hits, then applies 150% of the prevented amount over four seconds. This increases total Life loss but softens the initial spike, giving our Life Leech more time to recover.
 Megalomaniac Ideally, you're looking for one with
  Molten Being, which gives us an extra layer of defense against physical damage. Right now, it's pretty cheap at around 2 to 3 Divines, but that price could change. If you have a larger budget, go ahead and grab one with two good notables instead—either for extra damage or more tankiness.
 From Nothing
  Resonance Now, this one is pretty expensive, and prices are going up even as you're reading this. But it’s worth it because it unlocks some great notables that increase our damage and speed like
  For the Jugular ,
  Chakra of Thought or
  Stylebender , plus it gives us a nice extra layer of defense by taking damage from mana before life thanks to Chakra of Thought
Skill Gems
Level 89 Low Budget
Level 91 Lightng coil swap
Level 95 High Budget
Level 96 Min Maxing
Support Gem Requirements:
Str 55
Dex 40
Int 50

1
Maul


2
Fire Spell on Hit


3
Raise Shield

4
Valako's Charge
Level 18


5
Shield Wall
Level 21


6
Herald of Ash
Level 22


7
Charge Regulation
Level 24


8
Scavenged Plating
Level 21


9
Herald of Blood
Level 21


10
Berserk
Level 21

11
Ferocious Roar
Level 21


Gem Priority


+31
 Shield Wall is our main source of damage, but its supports also help keep the rest of the build running.Life Leech III turns our Physical Damage into recovery. Because the leech continues at full Life, it can help recover subsequent damage and the delayed Life loss from Undying Hate (amanamu).Supercritical takes advantage of Nebuloch: while we have Endurance Charges for guaranteed crits, we benefit from its Critical Damage Bonus without relying on normal Critical Hit Chance.Rapid Attacks II makes placing walls quicker and the build more responsive.Bleed III contributes damage against bosses, but its main purpose here is to enable
  Herald of Blood when we kill bleeding enemies.Armour Break III connects our attacks to our defensive setup: breaking Armour helps build
  Scavenged Plating, while the additional Endurance Charge generation during mapping supports Nebuloch and
  Charge Regulation.
 Ferocious Roar supplies the resources and buffs that make Shield Wall work. We use
  Infernal Cry for extra Fire Damage, while spending Rage generates Endurance Charges and builds Druidic Prowess from our talisman. Enraged Warcry II lets us spend Rage to bypass the cooldown, making the warcry available more frequently while activating those Rage-spending benefits. Raging Cryhelps replenish Rage so we can keep the cycle going. Efficiency II makes repeated use cheaper, and Lifetap takes the cost off our Mana, leaving more available for Shield Wall. Our Life recovery helps cover that cost.
 Heat of the Forge with
  Detonate Dead adds corpse explosions to our melee gameplay, helping clear enemies beyond those directly hit by Shield Wall. Boundless Energy II and Energy Retention help generate more energy so Detonate Dead can contribute more consistently while we attack. Magnified Area II lets each corpse explosion reach more enemies. Bleed III allows those explosions to apply Bleeding too, extending our Herald of Blood interaction beyond Shield Wall own hits.
Herald of Blood helps turn the first kills in a pack into a spreading chain of explosions. Bleed III allows its hits to apply Bleeding to more enemies, helping continue that interaction, while Magnified Area II increases how far the explosions reach. Poison III and Bursting Plague adding another layer of damage overtime
 Herald of Ash adds ignite overkill damage around our kills, helping finish enemies left around the edges of the other explosions. Magnified Area II improves that coverage, while Fire Mastery add +1 level scaling its % overkill damage a bit more
Scavenged Plating and Charge Regulation These turn mechanics we already use into additional defence. Scavenged Plating rewards the Armour Break III from Shield Wall. Charge Regulation uses an Endurance Charge for another Armour bonus..
Passive Tree
Level 89 Low Budget
Level 91 Lightng coil swap
Level 95 High Budget
Level 96 Min Maxing
main:
123
123
set 1:
20
20
set 2:
20
20
Quest Rewards
Check which quests you’ve completed on your character
Clearfell — Beira of the Rotten Pack
+10% to Cold Resistance
Freythorn — The King in the Mists
+30 to Spirit
Ogham Manor — Candlemass, the Living Rite
+20 to maximum Life
Hunting Grounds — The Crowbell
Grants Two Weapon Set Passive Skill Points
Ogham Farmlands — Una's Hut
Grants Two Weapon Set Passive Skill Points
Valley of the Titans — Medallion
30% increased Charm Charges gained
+1 Charm Slot
The Spires of Deshar — Sisters of Garukhan
+10% to Lightning Resistance
Keth — Kabala, Constrictor Queen
Grants Two Weapon Set Passive Skill Points
Deshar — Final Letter
Grants Two Weapon Set Passive Skill Points
The Venom Crypts — Venom Draught
25% increased Stun Threshold
Jiquani's Machinarium — Blackjaw, the Remnant
+10% to Fire Resistance
The Azak Bog — Ignagduk, the Bog Witch
+30 to Spirit
Jungle Ruins — Mighty Silverfist
Grants Two Weapon Set Passive Skill Points
Aggorat — Blood Sacrifice
Grants Two Weapon Set Passive Skill Points
Whakapanu Island — Great White One
+30% increased Global Armour, Evasion and Energy Shield
Eye of Hinekora — Navali's Rest
5% increased Maximum Mana
Halls of the Dead — Tawhoa's Test
+5% to Lightning Resistance
Abandoned Prison — Goddess of Justice
30% increased Mana Recovery from Flasks
Halls of the Dead — Tasalio's Test
+5% to Cold Resistance
Halls of the Dead — Ngamahu's Test
+5% to Fire Resistance
Journey's End — Captain Hartlin
Two Weapon Set Passive Skill Points
Skill Gem(Lv 13)
Delirium Drop
Halls of the Dead — Yama The White
Grants Two Weapon Set Passive Skill Points
The Khari Crossing — Molten Shrine
5% increased Maximum Life
Kriar Village — Lythara, the Wayward Spear
+40 to Spirit
Wolvenhold — Oswin, the Dread Warden
Grants Two Weapon Set Passive Skill Points
The Khari Crossing — Akthi and Anundr
Two Weapon Set Passive Skill Points
Howling Caves — The Abominable Yeti
Grants Two Weapon Set Passive Skill Points
Comments
0Video Guide
Build Planner Export
Export all build variants directly to your game.
Table of Contents
Featured Builds





Become a Creator
Want to earn rewards by sharing your builds with your community?