menu
MobalyticsUse your favourite features in-game with our Desktop App
PoE 2 Build

[0.5.5] Lexd's Shield Wall + Rake Bleed Titan

presentationWarrior
presentationTitan
End Game
Starter
0.5 RotA
Creator
Featured
By Lexd
Updated on Sep 4, 2026
Sep 4, 2026

Build Overview

Lexd's Spear & Shield Bleed Titan 0.5.5: The Forbidden Rites

Hey guys! This is my Spear & Shield Bleed build that I came up with while messing around late in the 0.5 league, at this point in preparation for a proper Sword & Board build for 1.0!

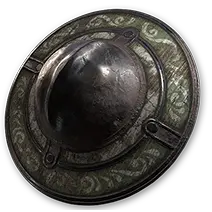
It started as a bit of an experiment but ended up becoming one of my best builds as it has a bunch of survivability through Armour and Life stacking as well as some serious Bleed & Poison damage against pinnacle bosses (one-to-two shot all of them!). All you really need for this build to start working is a high-armour Shield and a decent Spear.

Overall, Herald of Blood does a ton of work when clearing groups of mobs with its chaining-effect due to the Poison III + Bursting Plague + Bleed III combo, which doesn't work remarkably early in the campaign but gets stronger and stronger as you get access to the right support gems (feels very effective sometime during Act III).

We're using Rake to start these Herald of Blood chains to clear mobs, which is a nice combination of guaranteed-Bleed-inflicter and Travel Skill. We can zoom past and sometimes through mobs with this skill, and we want to use the leap-portion of this attack for mobility and more damage. The skill feels pretty good to use throughout the campaign and once you get access to Ancestral Call I, it feels even better.

During the earliest parts of our playthrough we'll be using Rake into Parry, then once you've inflicted the Parry debuff, we consume it with Disengage for some big AoE burst damage, and then we have Frenzy Charges to boost up our Explosive Spears to help finish cleaning up or to throw at the next pack. Rapid Assault makes up the majority of our early-game single-target damage for bossing, which we can also detonate with Explosive Spears to inflict potent bleeds.

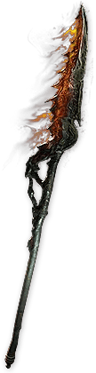
At some point during the campaign we swap over Shield Wall + Fortifying Cry combo for single target damage to hit very hard and inflict respectable bleeds as well, and in the endgame they will always be critically striking due to Nebuloch. It's easy to scale big damage with Nebuloch by just leaning into Critical Damage Bonus and not having to worry about Critical Hit Chance, as long as you have the Endurance Charges to consume to do so. The new secret annointment Thaumaturgic Generator passively generates these Endurance Charges for us, so we no longer have to worry about an "active" way to get them.

QUICK NOTE: this build is largely unaffected by the Shield Wall + Fortifying Cry shotgun nerf. I tested this build using Infernal Cry as a detonator instead, and the damage was still insane. We're relying on Shield Wall inflicting huge Bleeds rather than the shotgun effect, so this build is definitely safe to pursue in 0.5.5.

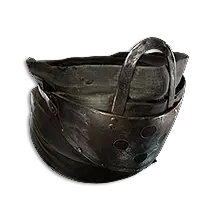
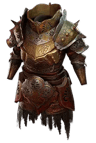
We're getting the majority of our tankiness through armour-stacking with The Brass Dome and various "Armour Applies to Elemental Damage" rolls, though truth be told intense Chaos Damage is a little concerning at times; I'd recommend grabbing even a little "Armour Applies to Chaos Damage" wherever you can to round this out.
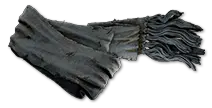
Lastly, Constricting Command is an easy purchase these days; make sure you get the "4 Fewer Enemies to Be Surrounded" roll and you're good to go; we can take advantage of some strong "Surrounded" bonuses on the Passive Skill Tree using this thing.

Also there is an update to Soul Core of Opiloti come 0.5.5; this socket will now give your Martial Weapon 40% increased Bleed Magnitude, which is huge. Grab that in one of your Spear's sockets for sure.

We may see an alternate version of this build based on the changes to Blistering Bond, where we go Avatar of Fire to inflict some serious Ignite + Bleed damage overtime with Saitha's Spear. Keep an eye out for that!
Strengths and Weaknesses

  • Strong clear, as long as corpses are involved (especially for Breach + Ritual encounters)
  • Quite tanky due to Armour Stacking with The Brass Dome and the Titan Ascendancy
  • HUGE single-target Bleed + Poison damage makes pinnacle bosses a breeze
  • Rake is a little jank; helps to "travel" while clearing, but sometimes you can get stuck
  • Delirium mobs do not leave corpses, which much of this clear relies on

Build Variants

Shield & Spear Bleed Warrior: Act 1 Overview

Honestly, early on in this Act you don't really need to buy a Spear straightaway. If you want to get by with Mace Strike and Boneshatter for a bit, you are more than welcome to use this for clearing and bossing. It's super effective for early Warrior playthroughs, but you'll likely want a Spear and start making some solid Spear skill gems around when you get to the Cemetery. You also don't get Rake until The Rust King so Mace Strike and Boneshatter can work for clearing up until then.

However, if you DO want to live the Spear & Shield fantasy as early as possible, it is certainly possible and effective. You will use Spear Stab for your earliest single target damage until you get Rapid Assault towards the end of the Act, and early game clearing involves Parry, Disengage, and Frenzy-enhanced Explosive Spears. Eventually, when you get Rake, it feels natural to use this skill before the other three as it gets you up close and personal to monsters for an easy Parry.

NOTE: Parry is NOT the same as blocking with a Tower Shield; you don't want to sit there channeling it for too long, you want to get the Parry debuff off and do something with it since you can't really block projectiles and isn't really meant for straight Active Blocking.

Overall though, you will mostly be using your Spear for both clearing and bossing at the end of Act 1 with Rake and Rapid Assault + Explosive Spear.

Frankly, a high-armour Shield is not a high priority in this Act. Grab one if you can, but really your Spear is going to be doing the heavy lifting here.

Equipment

item
1
item
4
item
3
item
7
item
6
item
5
item
2
item
8
item
9
item
10
item
item
item
Equipment Priority
+10

Shield & Spear Bleed Warrior: Act 1 Gearing

Your Spear will be the most important piece of equipment in this Act, and will remain something you want to keep updated as you progress through the campaign. Good rolls are any +physical damage rolls and +melee skill rolls. Elemental damage rolls are decent as well, but you're going to want to scale Bleed damage so scaling physical is where we'll want to go eventually. Check the shop for Spear upgrades often, throughout the whole playthrough (unless you get a strong one that you know will last awhile!).

Make sure to grab a Buckler at some point also; we are making good use of Parry this time around early on.

Heavy armour is great, but if you want to wear some DEX/STR pieces, go for it. Just grab whatever you can and stack life, life regen, resistances, etc., but this early in the playthrough it's difficult to actually optimize your defenses so use what you have access to.

Like I said earlier, a high-armour Shield is not your first priority here since we're using a buckler, but you can get one at some point and set it to a separate weapon set if desired. Resonating Shield can actually hit kinda hard with a strong Shield, and this skill will be able to assist in clearing once you socket it with later on so it's definitely something to keep back of mind.

Skill Gems

Support Gem Requirements:

Str 35

Dex 10

Int 5

1

Spear Stab

Level 5

supportrageplayer
2

Rake

Level 4

supportbrutalityplayer
3

Parry

supportsteadfastplayer
supportbrinkplayer
4

Disengage

Level 4

impactshockwavesupportplayer
supportmagnifiedareaplayer
5

Explosive Spear

Level 4

supportelementalarmamentplayer
6

Rapid Assault

Level 5

supportrapidattacksplayer
supportbrutalityplayer
7

Herald of Blood

Level 4

supportpoisonplayer
Gem Priority
+10

Shield & Spear Bleed Warrior: Act 1 Skill Gems & Support Gems

Early on you want to get some Rage generation and solid DPS out of one of your standard attacks with Spear Stab with the Rage I and Rapid Attacks I Support Gems (I swap the latter into Rapid Assaultlater in the Act). If you start out with these two support gems in Mace Strike, totally viable, just switch them over to Spear Stab once you find or buy a decent Spear.

Before you have access to Rake, simply using Disengage and Explosive Spear is strong enough to clear until you do so. Parry can feel a bit awkward at first, but it feels a lot smoother once you get Rake to close the distance between you and the targets quickly to "bait" out melee attacks. Disengage also hits so hard you will often just wipe packs when it is socketed with Impact Shockwave.

Rake itself is decently strong; totally depends on how strong your Spear is as well, but don't feel like you are doing something wrong if Disengage feels like it's doing more work; they're both very strong, and you want to use them hand-in-hand since they synergize so well with creating and closing distance.

NOTE ON CLEARING: Rake gets a significant damage boost when you utilize its dash, as I said earlier, so when you are choosing targets to "leap to," try to select targets a little further from you character in the "back" of crowds and/or ranged mobs.

Herald of Blood won't chain when you get it, but it will still help with clears. So yeah, no chaining effect yet, but we'll get some of that in Act 2.

Prioritize getting Rapid Assault ASAP when you have access to level 5 Skill Gems, and if you happen to get a second one, Resonating Shield next. Really, on bosses all you need to do is spam Rapid Assault until the boss has 4-5 Spears in them, try to get a Parry and Disengage off, then detonate them with Explosive Spear (keep hitting them with Rapid Assault if they happened to get Heavy Stunned as well so you are setup for another big burst quickly). You'll do significantly more damage if you are able to time this detonation with a heavy stun on the boss; watch that stun meter and try to build it up with multiple Rapid Assaults. Spear Stabs in between to maintain Rage if possible.

If you have Resonating Shield for Geonor, the gameplan is the same; just make sure you fully break his armour first and keep that debuff up by tapping Resonating Shield every now and then. This goes for pretty much all the boss fights going forward; maintain that armour break debuff (you can even socket Rapid Assault with Armour Break I at some point if you want, which is what I did for my most recent playthrough), but the fights usually don't last very long. I also socket Resonating Shield with Rage I to help generate and maintain Rage while bossing and clearing, but again that's only if you have a spare level 5 Skill Gem; prioritize getting Rapid Assault first.

Infernal Cry is mostly optional; you don't really need to grab this but if you have a spare skill gem, use it to empower some of your Rapid Assaults and Rakes if desired.

Passive Tree

main:
123
123
set 1:
20
20
set 2:
20
20

Shield & Spear Bleed Warrior: Act 1 Passive Skill Tree

The Notables are arranged in the order you should grab them in this Act: Brutal first, Smash second, Blood Rush third, and Impair fourth.

Should be pretty obvious why we grab these; just keep in mind you get a big damage bonus to heavy-stunned mobs and bosses from Brutal, so try to time your most damaging skills around a heavy stun if necessary.

Quest Rewards

Check which quests you’ve completed on your character
Clearfell — Beira of the Rotten Pack
+10% to Cold Resistance
Hunting Grounds — The Crowbell
Grants Two Weapon Set Passive Skill Points
Freythorn — The King in the Mists
+30 to Spirit
Ogham Farmlands — Una's Hut
Grants Two Weapon Set Passive Skill Points
Ogham Manor — Candlemass, the Living Rite
+20 to maximum Life
Keth — Kabala, Constrictor Queen
Grants Two Weapon Set Passive Skill Points
Valley of the Titans — Medallion
30% increased Charm Effect Duration
+1 Charm Slot
Deshar — Final Letter
Grants Two Weapon Set Passive Skill Points
The Spires of Deshar — Sisters of Garukhan
+10% to Lightning Resistance
Jungle Ruins — Mighty Silverfist
Grants Two Weapon Set Passive Skill Points
The Venom Crypts — Venom Draught
25% increased Stun Threshold
Jiquani's Machinarium — Blackjaw, the Remnant
+10% to Fire Resistance
The Azak Bog — Ignagduk, the Bog Witch
+30 to Spirit
The Molten Vault — The Molten Vault
Reforging Bench
Aggorat — Blood Sacrifice
Grants Two Weapon Set Passive Skill Points
Journey's End — Captain Hartlin
Two Weapon Set Passive Skill Points
Skill Gem(Lv 13)
Delirium Drop
Whakapanu Island — Great White One
+30% increased Global Armour, Evasion and Energy Shield
Eye of Hinekora — Navali's Rest
5% increased Maximum Mana
Halls of the Dead — Yama The White
Grants Two Weapon Set Passive Skill Points
Halls of the Dead — Tawhoa's Test
+5% to Lightning Resistance
Abandoned Prison — Goddess of Justice
30% increased Life Recovery from Flasks
Halls of the Dead — Tasalio's Test
+5% to Cold Resistance
Halls of the Dead — Ngamahu's Test
+5% to Fire Resistance
Halls of the Dead — Tribal Medicine
+30% increased Global Armour, Evasion and Energy Shield
Wolvenhold — Oswin, the Dread Warden
Grants Two Weapon Set Passive Skill Points
The Khari Crossing — Akthi and Anundr
Two Weapon Set Passive Skill Points
The Khari Crossing — Molten Shrine
5% increased Maximum Life
Qimah — Tabana's Pillar
+5% to all Elemental Resistances
Kriar Village — Lythara, the Wayward Spear
+40 to Spirit
Howling Caves — The Abominable Yeti
Grants Two Weapon Set Passive Skill Points

Comments

0

Video Guide

Build Planner Export

Export this build variant directly to your game.

Path of Building Code

Table of Contents

Featured Builds

GL1TCH3D's Yes Build
Updated on Sep 4, 2026
[0.5.5] GL1TCH3D's Gemling Cluster Carry
Updated on Sep 4, 2026
[0.5.5] GL1TCH3D's WH Stormblast Carry
Updated on Sep 4, 2026
[0.5] COC COMET - Stormweaver @animeprincess
Updated on Sep 4, 2026
[0.5.5] Tri's BUTTONSHREDDER Wolfazon
Updated on Sep 4, 2026

Become a Creator

Want to earn rewards by sharing your builds with your community?