menu
MobalyticsUse your favourite features in-game with our Desktop App
PoE 2 Build

[0.5] Lexd's Nightfall Titan Shield Warrior Build feat. The Coming Calamity!

presentationWarrior
presentationTitan
End Game
0.4 TLotD
Creator
By Lexd
Updated on Jul 1, 2026
Jul 1, 2026

Build Overview

0.5 Nightfall Titan Build: Slams, Aftershocks, and Freezes!

Welcome to my Nightfall Titan build everyone! This build is centered around scaling up the slam skill granted by Nightfall, which is called Embrace the Fall, which has a huge base AoE, high base critical hit chance at 15%, and deals a ton of Cold damage.
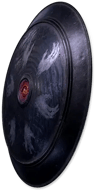
We're basically using that skill to clear in Weapon Set 1, which is focused on cranking up our AoE on the Passive Skill Tree, and when it comes to bossing we simply swap to Weapon Set 2 to trade off some of that AoE for more damage; you don't need to set any skills to specific weapon sets, you literally just make sure you are in Weapon Set 1 while clearing, and Weapon Set 2 for boss fights.

However, Nightfall's skill has an innate cooldown of 4 seconds; we need to work around this by either stacking cooldown reduction, or destroying Ice Crystals with the Slam portion of the attack. I think both methods are legitimate to pursue, but I ended up socketing Grim Pillars and just, manually casting this wherever I want to throw my shield via Soaring Midnight.

How Clearing Works

Essentially, we just cast Grim Pillars where we want to throw Nightfall, then slam down on a mob of enemies while destroying Ice Crystals so that we can reset the cooldown and throw it again. As a baseline, this is a two-button clearing build; and honestly, you could get by with just that. I would recommend just making sure you aren't throwing Nightfall into a terribly crowded situation and that you are side-strafing as you are waiting for it to get into position for your slam.

For bonus points, you can also mark targets with Freezing Mark for an easy Cold Damage buff while clearing. I know I know, now it's a 3 button build, but this makes a noticeable difference and is very helpful for 200% Delirious maps.

Speaking of which, this build is fully-capable of clearing those on such a small budget; only ~30 divs! However, just be very cautious as to where you are actually slamming down while clearing; the AoE is so big with this build that you can honestly just Grim Pillars and chuck Nightfall towards the very edge of groups, and end up wiping pretty much everything on the screen anyway.

How Bossing Works

For bossing, we swap to Weapon Set 2 (don't forget this!), and we basically want to hit the boss with Empowered versions of our Nightfall slams, via Infernal Cry. However, Infernal Cry is getting a lot more Empowered Attacks due to Vruun's Aftermath, so we want to slap down some Grim Pillars, cast an Infernal Cry, and then we are ready to Freezing Mark and Slam away. For bonus points, we also run Refutation, and you can pop this AFTER you cast Grim Pillars so that we can reset the cooldown of your slam after consuming all of your Runic Ward; make sure you get a couple of sockets dedicated to boosting Runic Ward generation. You may also spend time at the beginning of the fight using Resonating Shield to build up some Rage and break the bosses armour.

We're basically fishing for big crits while doing this, which you should see while hitting the target with slam after slam, but sometimes you'll get unlucky and not see some crits. Shouldn't be too often since we are hitting ~52% crit chance with this setup. Garukhan's Resolve is an expensive but VERY USEFUL item for this build in that regard, also for clearing too tbh.

More details below on gearing, skill gems, etc. Read on!
Strengths and Weaknesses

  • Incredible clearing and freezing potential
  • HUGE damage, both for groups and single-target
  • You can call yourself "Captain Wraeclast"
  • You can shout "EXILES, ASSEMBLE!" canonically
  • Not the tankiest build
  • Sometimes inconsistent single-target damage; we're at ~50ish % crit chance, but strings of non-crits on bosses can feel rough (Garukhan's Resolve would solve this completely)

Build Variants

Nightfall Titan Shield Warrior Build: Endgame Overview

As I said in the previous section, we are mostly just slamming through packs with Grim Pillars and Nightfall's skill, Soaring Midnight and Embrace the Fall (slam tooltip not present in the database, sorry!).

That's basically it. As I mention in the video, this isn't the TANKIEST build, but our survivability comes from being a mostly-ranged build since we're usually on the outskirts of the danger as we throw Nightfall into position, we have Refutation to block ALL attacks from ALL directions during riskier slams, and we are simply clearing so aggressively that almost all targets are dead or Frozen when we use Embrace the Fall.

As stated above, bossing is pretty simple; we want to make sure we are in Weapon Set II, and that we Grim Pillars and Infernal Cry some empowered attacks up before we start slammin away.

You can breeze through maps and all endgame activities by just wiping the screen over and over. I would recommend investing in a bit more life than is featured in the gear below; I am playing quite risky but wanted to keep things cheap on the build; might have a late-late endgame update on it later, time permitting.

Equipment

item
2
item
6
item
5
item
7
item
3
item
4
item
1
item
8
item
9
item
10
item
item
item
item
item
Jewels
item
item
item
item
Equipment Priority
+10

Nightfall Titan Shield Warrior Build: Gearing Overview

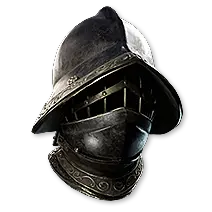
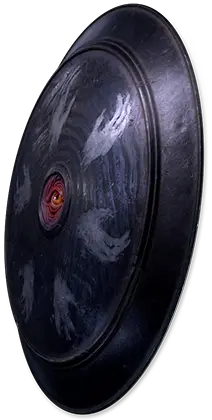
Nightfall is the most important piece of your gear here; big surprise! Ideally and later on down the line, you'd want to get one that has both a level 20 version of the skill Soaring Midnight as well as a decent armour value (1600+), but this will start running the price up to higher levels; tbh you'd probably be better investing in something like a Garukhan's Resolve or Aldur's Legacy for Hrimnor's Hymn.

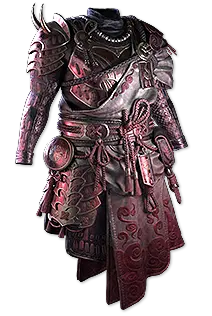
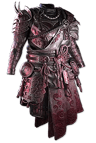
The Coming Calamity is a body armour that grants us Herald of Ice, Herald of Ash, and Herald of Thunder for free, while ALSO removing Elemental Resistances of enemies in your presence. This means negative resistances will not benefit you in anyway, but we don't really need to scale our damage through that method anyway. In the future you can replace this with a strong Rare chestpiece, likely with a +Spirit roll, as honestly Herald of Ice is all you really need to run with the build, the others are just nice bonuses.

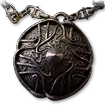
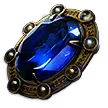
Astramentis is a relatively cheap Unique that can fulfill all the requirements needed for the triple-herald setup from The Coming Calamity. You will likely replace this Amulet in the future for something with +3 Melee Skills and some other desirable stats, but this works for now.

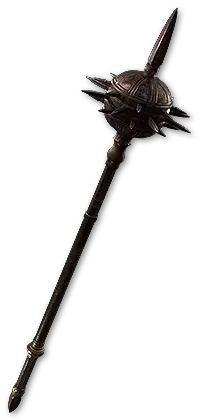
A Rare 2h mace with a strong % increased Elemental Damage with Attacks Roll, +5 Melee Skills Roll, and a % Gained as Extra Cold damage crafted mod is what we're after. Bonus points for the % increased damage with Empowered Attacks Desecration if you want more boss-killing damage, and obviously triple sockets would be awesome. You could go Hrimnor's Hymn if you want to trade off some damage for ASSURED Aftershocks chance, which you can then automated with Cast on Elemental Ailment and Grim Pillars, but I find it to be more effective to go with a Rare mace for more beneficial damage rolls.

QUICK NOTE: try to stack Critical Hit Chance where you can, but you don't want to go too far over ~50% if you want to use Garukhan's Resolve at some point. Feel free to crank it up higher but you may re-itemize once you get that Lineage Support Gem.

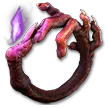
The rest is straightforward; grab Elemental resists where you need them, stack Critical Damage Bonus on items where possible, but also try to grab a lot of Accuracy on your gear so that you miss less targets with the gigantic AoE of the Slams we're throwing out. Breach Ring with increased Cold Damage and other Cold Modifiers I could see being very useful here too.

Skill Gems

Support Gem Requirements:

Str 100

Dex 45

Int 75

1

Soaring Midnight

Level 18

supportaftershockchanceplayertwo
fistofwarsupportplayerthree
supportmomentumplayer
supportelementalarmamentplayertwo
supportverglasplayer
2

Herald of Ice

supportmagnifiedareaplayertwo
supportelementalarmamentplayertwo
supportaddedcolddamageplayer
supportelementalfocusplayer
supportclosecombatplayertwo
3

Herald of Thunder

Level 21

supportelementalarmamentplayertwo
supportlightningmasteryplayer
supportclosecombatplayertwo
supportblindplayertwo
supportelementalfocusplayer
4

Herald of Ash

Level 21

supportmagnifiedareaplayertwo
supportfiremasteryplayer
prolongeddurationsupportplayertwo
5

Freezing Mark

Level 19

supportchargedmarkplayer
prolongeddurationsupportplayertwo
supportrapidcastingplayertwo
supportmarkfordeathplayertwo
supportbreachlordsrift
6

Infernal Cry

supportbloodmagicplayer
supportragingcryplayer
supportenragedwarcryplayertwo
supporttirelessplayer
supportvruunsaftermath
7

Refutation

Level 17

prolongeddurationsupportplayertwo
supportatzirisimpatienceplayer
supportrapidcastingplayertwo
supportmobilityplayer
supportefficiencyplayertwo
8

Resonating Shield

Level 19

supporturukssmeltingplayer
supportrageplayerthree
supportarmourexplosionplayer
supportstyrnsmountain
supportaddedcolddamageplayer
9

Time of Need

Level 19

supportcannibalismplayer
supportprecisionplayer
supportvitalityplayertwo
supportcooldownrecoveryplayertwo
10

Grim Pillars

supportspellcascadeplayer
supportglacierplayer
supportefficiencyplayertwo
supportastralprojectionplayer
supportrapidcastingplayertwo
Gem Priority
+47

Nightfall Titan Shield Warrior Build: Skill & Support Gems

Soaring Midnight and Embrace the Fall are the star players here; the first portion of the attack is the thrown, projectile portion, and the second part of the attack is the teleport and slam down. We are mostly interested in beefing up the teleport + slamdown, so we socket it with things like Aftershock II and Fist of War III (the latter support gem we actually bypass the 14 second cooldown quite often with how we are spec'd).

Momentum is a very strong support gem, allowing us to gain 40% MORE damage if we move far enough while using the skill, which is 2 metres. Melee range is basically ~1 meter so this requirement is basically a non-factor, though I have heard reports of this potentially not working so I will update the guide after some testing if this is not the case. Verglas gives us a strong "Gain % of Damage as Cold Damage" buff everytime we destroy our Grim Pillars, which we should be doing EVERYTIME we Slam to reset the cooldown. This buff also scales with Ice Crystal health, hence why we have some support gems and our annoint aimed at boosting that up.

Grim Pillars, we are spamming this all the time. Always always ALWAYS cast this before you Slam so that you reset the cooldown. There may be situations where you forget, or it may be a little harder to cast them, but you should be hitting them 99% of the time with your slams, or else you have to wait ~4 seconds for the next Embrace the Fall to be usable. Astral Projection is important so that we can cast this wherever we want via our mouse cursor, Spell Cascade is also important so that we create enough Grim Pillars to destroy; without Spell Cascade sometimes enemies can wipe them all out before you have a chance to destroy one. Lastly, Glacier for boosting up their health and therefore our damage through Verglas.

Herald of Ice is granted to us for free from The Coming Calamity, and it is here to help us clear more efficiently; we are freezing and shattering things all the time with Embrace the Fall, and it is socketed in a way to increase it's AoE and damage. There is an alternative route here; if you wanted to create the classic Herald of Ice "chaining effect," you would socket this with Armour Explosion, Stun II, Armour Demolisher II and spec into Shattering Blow with Weapon Set 1 points. You may need to grab some "Phys Damage Gained" on your weapon instead of Cold Damage, but this will create a chaining effect that will assist your clears EVEN MORE, though clearing is already feeling like a breeze.

Herald of Thunder and Herald of Ash are also both granted to us for free from the same chestpiece, and both are socketed to just help with clear once again. Blind II is on Herald of Thunder just for a bit of pseudo-survivability and clear assistance, making mobs less likely to hit and less likely to Evade, while Herald of Ash is just obviously socketed for AoE, Damage, and a longer duration on enemies via Prolonged Duration II.

Freezing Mark is something I am casting quite often while clearing, it is very easy to freeze things everytime your slam and even sometimes with the thrown portion, Soaring Midnight. It's mostly socketed for utility, though Charged Mark is a strong inclusion so that targets create Shocked Ground beneath them when they become Frozen, which is just a huge damage boost for all types of damage.

Breachlord's Rift and Mark for Death II are here as well, for a way to increase our damage against targets with Fully Broken Armour since this will now apply to our Cold and Lightning Damage. However, as someone pointed out, I think it may make sense to swap Breachlord's Rift into Resonating Shield since that effect is not tied to the Support Gem "actually triggering" or anything, just any supported skill that Fully Breaks Armour will make that debuff apply to Cold and Lightning damage. Will update in the near future if this is the case.

Infernal Cry to boost up our Slams, that's basically it. Socketed for mostly utility, though Vruun's Aftermath is a strong inclusion that let's us gain many more Empowered Attacks if we hit enough Grim Pillars while shouting.

Refutation is doing a lot of heavy-lifting with the survivability here, until I can get more life! Socketed for pure cooldown reduction and utility; I use this one riskier Slams or if I get cornered in a bad situation, this doesn't make you invulnerable, but it will save you many times since you are blocking all hit damage from all directions while the buff is active. It also inflicts the "Parried" debuff on targets, making them take 50% MORE Damage, which can assist greatly by helping you wipe out some stronger targets in those high-risk situations, and if you can manage to time this during boss fights as you are slamming, you will also be critting them down a lot faster too.

Resonating Shield is mostly used in boss fights, to Fully Break Armour and buildup Rage in the process. We're not leaning that heavy into Rage on this build but it's still a strong damage boost. Very flexible sockets here, throw in what you want, though I think Rage III is a must, and feel free to try out Breachlord's Rift as we discussed earlier.

Time of Need feels like it contributes to survivability more than other Spirit Gems, though I think I may give Wind Dancer a whirl at some point as well.

Passive Tree

main:
123
123
set 1:
20
20
set 2:
20
20

Quest Rewards

Check which quests you’ve completed on your character
Clearfell — Beira of the Rotten Pack
+10% to Cold Resistance
Freythorn — The King in the Mists
+30 to Spirit
Ogham Manor — Candlemass, the Living Rite
+20 to maximum Life
Hunting Grounds — The Crowbell
Grants Two Weapon Set Passive Skill Points
Ogham Farmlands — Una's Hut
Grants Two Weapon Set Passive Skill Points
Valley of the Titans — Medallion
30% increased Charm Charges gained
+1 Charm Slot
The Spires of Deshar — Sisters of Garukhan
+10% to Lightning Resistance
Keth — Kabala, Constrictor Queen
Grants Two Weapon Set Passive Skill Points
Deshar — Final Letter
Grants Two Weapon Set Passive Skill Points
The Venom Crypts — Venom Draught
25% increased Stun Threshold
Jiquani's Machinarium — Blackjaw, the Remnant
+10% to Fire Resistance
The Azak Bog — Ignagduk, the Bog Witch
+30 to Spirit
Jungle Ruins — Mighty Silverfist
Grants Two Weapon Set Passive Skill Points
Aggorat — Blood Sacrifice
Grants Two Weapon Set Passive Skill Points
Eye of Hinekora — Navali's Rest
5% increased Maximum Mana
Halls of the Dead — Tawhoa's Test
+5% to Lightning Resistance
Abandoned Prison — Goddess of Justice
30% increased Life Recovery from Flasks
Halls of the Dead — Tasalio's Test
+5% to Cold Resistance
Halls of the Dead — Ngamahu's Test
+5% to Fire Resistance
Journey's End — Captain Hartlin
Two Weapon Set Passive Skill Points
Skill Gem(Lv 13)
Delirium Drop
Halls of the Dead — Yama The White
Grants Two Weapon Set Passive Skill Points
The Khari Crossing — Molten Shrine
5% increased Maximum Life
Qimah — Tabana's Pillar
3% increased Movement Speed
Kriar Village — Lythara, the Wayward Spear
+40 to Spirit
Wolvenhold — Oswin, the Dread Warden
Grants Two Weapon Set Passive Skill Points
The Khari Crossing — Akthi and Anundr
Two Weapon Set Passive Skill Points
Howling Caves — The Abominable Yeti
Grants Two Weapon Set Passive Skill Points

Video Guide

Build Planner Export

Export this build variant directly to your game.

Table of Contents

Featured Builds

Scorps Plant Oracle Druid (COMET/BoneCage)
Updated on Jul 28, 2026
[0.5] ED Contagion Lich League Starter (Level 1 to Endgame)
Updated on Jul 28, 2026
[0.5] Temporalis Infinite Loop Autobomber
Updated on Jul 28, 2026
[0.5] Plants Abyssal Lich League Starter (Level 1 to Endgame)
Updated on Jul 28, 2026
[0.5] FULL Adonia's Trifusion Stormweaver Guide
Updated on Jul 28, 2026

Become a Creator

Want to earn rewards by sharing your builds with your community?