menu
MobalyticsUse your favourite features in-game with our Desktop App
PoE 2 Build

[0.4] Doomslayer Deadeye Grenadier - SSF All Content Viable

Lolcohol
Verified
Starter
End Game
SSF
0.4 TLotD
presentationDeadeye
presentationRanger
Updated on Jan 15, 2026
Jan 15, 2026

Build Overview

Mirage Deadeye

A few options are good here. It feels like Cooldown Recovery II, Payload and Deliberation are great choices on whatever you take.

  • Flash Grenade - has a very quick Fuse time so it works as a nice DPS/Utility combo
    • Flash Grenade - Cooldown Recovery II - Multishot II - Magnified Area I - Stun III
  • Explosive Grenade - you'll need to manually detonate with Explosive Shot but can help with Cooldown/Mana issues and also good against bosses
    • Explosive Grenade - Cooldown Recovery II - Deliberation - Multishot II - Elemental Armament II

You can also experiment with other setups like Voltaic Grenade or Cluster Grenade for better clear.

You can also Instil something like Multitasking for better Cooldown Recovery and Skill Effect Duration

Solving Mana

There is an entire section below covering this, but there are some additional options this league, especially if you aren't using Constricting Command
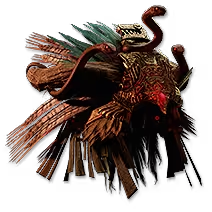
  • Lavianga's Spirits with Lavianga's Brew anoint is great
  • Using Lifetap on Explosive Shot

For Updates in Patch 0.4, see the Changelog at the bottom of the page

PoB: https://pobb.in/Iud7HPyPdg6O
This PoB is VERY rough due to time constraints and won't be as accurate as this written guide, but it will show you Gems and Tree. I will try to find the time to update it

Overview

This PoE 2 Deadeye Grenade build can do all content in PoE 2, is SSF-viable and beginner friendly. If you're looking for a well-rounded, thoroughly tested league starter build that won't let you down, this is the one.

In 0.2, this build was incredibly successful in both SSF and Trade and only received buffs in 0.3. In SSF, I was able to clear all T0 Pinnacle Bosses and comfortably run Tier 15 Waystones before merging to Trade League, where I was able to complete my Atlas Passives, all T3 Pinnacle Bosses as well as a Difficulty 4 Simulacrum.


This build is as simple as it gets: shoot Grenades, explode monsters and get loot. Incredible single target, excellent clear, zero budget. This is a build I have played in SSF, so it requires no expensive gear to get up and running. Just make sure to be diligent with your gearing, paying attention to your Crossbow and making sure to upgrade your Gems and Gear regularly to maintain high damage and survivability
Strengths and Weaknesses

  • High Movement Speed
  • Excellent Single Target and Good Clear
  • Fun Playstyle for those who enjoy it
  • SSF-Friendly
  • Very tanky for an SC Ranger
  • Very Beginner-Friendly and Easy to Understand
  • Delay between throwing Grenades and Detonating them - some people don't like this playstyle
  • Very important to update Crossbow regularly to maintain high damage
  • Requires quite a few buttons to play optimally
  • Can be hard on the eyes - turn off Global Illumination to reduce flashing

Build Variants

We have 90% Cooldown Recovery Rate for our Grenades and after Ascending to Deadeye, and equipping a Bombard Crossbow, it's time to start blasting out tons of Grenades and dealing massive damage.

Important: We are using Explosive Shot to manually Detonate our Grenades, meaning there is a slight delay between firing and exploding, so play behind your Grenades to not die.

This version of the build will take you all the way from Act 3 to the Endgame.

Equipment

item
1
item
7
item
5
item
2
item
6
item
8
item
3
item
9
item
4
Equipment Priority
+9

Vendor Regex

"ssbow|ent spe|to att|spirit|resist|efle"

Deflection

With the introduction of Deflection in 0.3, we can now get a solid piece of mitigation that was missing before. From Level 33 onwards, you will start finding modifiers on Armours that grant % of Evasion as Deflection chance - try to pick these up! When combined with 10 Stacks of Tailwind, decently high Evasion Rating and Gale Force, you should feel super tanky with a high Deflection chance

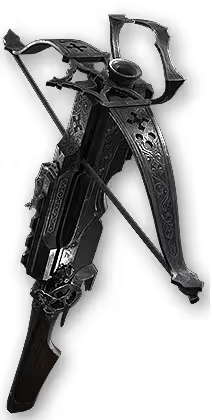
Weapon: BOMBARD Crossbow -> CANNONADE Crossbow

If you find a different base type with much higher damage, don't be scared to use it.

  • % increased Physical Damage (Prefix)
  • # to # Physical Damage, Fire Damage, Lightning Damage and/or Cold Damage (Prefix)
  • % increased Elemental Damage with Attacks
  • +# to Level of All Projectile Skills
  • % increased Attack Speed (Suffix)

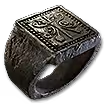
Rings: Iron Ring, Topaz Ring, Ruby Ring

  • # to # Physical Damage, Fire Damage, Lightning Damage and/or Cold Damage (Prefix)
  • Maximum Life (Prefix)
  • Resistances (Suffix)
  • Attributes (Strength, Dexterity, Intelligence - Suffix)

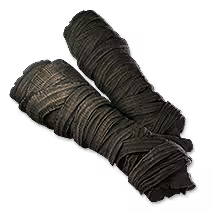
Gloves

  • # to # Physical Damage, Fire Damage, Lightning Damage and/or Cold Damage (Prefix)
  • Maximum Life (Prefix)
  • Resistances (Suffix)
  • Attributes (Strength, Dexterity, Intelligence - Suffix)

Other Gear

Boots - Movement Speed, Life, Resistances

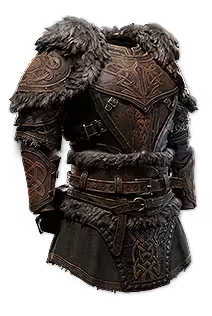
Body Armour, Helmet - Life, Resistances (particularly Lightning Resistance for Act 2, and Fire Resistance for the Mawdun Mine section)

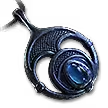
Amulet - Life, Resistances, Spirit, Attributes

Flask Upgrades

  • Level 30: Colossal Life Flask and Colossal Mana Flask
  • Level 40: Gargantuan Life Flask and Gargantuan Mana Flask
  • Level 50: Transcendent Life Flask and Transcendent Mana Flask
  • Level 60: Ultimate Life Flask and Ultimate Mana Flask

Crossbows

Although Bombard Crossbow is an excellent base and grants us an additional Grenade, if you find a different base type with much higher damage, don't be scared to use it.

Skill Gems

Support Gem Requirements:

Str 45

Dex 40

Int 30

Expand all
1

Explosive Grenade

Explosive Grenade
supportelementalarmamentplayertwo
supportimmolateplayer
supportmultishotplayertwo
2

Explosive Shot

Explosive Shot
supportrapidattacksplayerthree
supportstreamlinedroundsplayer
supportnimblereloadplayer
3

Flash Grenade

Flash Grenade
supportstunplayerthree
supportmultishotplayertwo
supportheftplayer
4

Gas Grenade

Gas Grenade
supportelementalarmamentplayerthree
supportmagnifiedareaplayertwo
supportmultishotplayertwo
5

Mortar Cannon

Mortar Cannon
explosivegrenadeplayer
supportfirepenetrationplayertwo
supportelementalarmamentplayerthree
6

Oil Grenade

Oil Grenade
supportpotentexposureplayer
supportencroachinggroundplayer
supportslowpotencyplayer
7

Companion: {0}

Companion: {0}
supportlastgaspplayer
supportmeatshieldplayertwo
supportelementalarmyplayer
8

Wind Dancer

Wind Dancer
supportblindplayertwo
supportknockbackplayer
9

Herald of Ash

Herald of Ash
supportmagnifiedareaplayertwo
Gem Priority
+24

Act 3 Onwards

After reaching Sandswept Marsh in Act 3, make your way to the end of the area and locate the Azak Campfire, to get a guaranteed Lesser Jeweller's Orb from the Chest they are protecting. Use this on your Explosive Grenade and add in Immolate

You will also start gaining access to Bombard Crossbow at Level 33, which should be your primary upgrade priority.

Companion

You can use a Companion from Act 3 after completing the Azak Bog and acquiring a Tier 9 Gem and using it to take Tame Beast. You might be too short on Spirit to use Herald of Ash and Wind Dancer too, but a Haste AURA (not "Hasted") Companion is very worth it to use. This will reserve about 42-45% of your Spirit.

Once you acquire your +40 to Spirit from the Interludes, you might have enough Spirit to add in a Companion along with the other Buff skills. I recommend using a Haste Aura Companion and you can read about how to find one of these in my Companion Guide

Other Skills

Oil Grenade is so incredibly laggy but the Exposure it offers is nice and its performance might be drastically improved in 0.4. If this is still too laggy, you can use Fire Exposure on Gas Grenade instead This also frees up a Gem Socket, in which case you can use Cluster Grenade setup instead, linked with Elemental Armament II, Payload and Multishot II.

Use Streamlined Rounds and Rapid Attacks II on Explosive Shot until you get Nimble Reload, then remove Streamlined Rounds and use Nimble Reload instead

Mortar Cannon feels great and can be used to have an additional Explosive Grenade for bossing. Can also test with Flash Grenade for "auto-stun" and clear, but double Explosive Grenade feels amazing for bossing

Tier 9 Gems

Once you get your first Tier 9 Uncut Skill Gem, you can use it to add Mortar Cannon with an Explosive Grenade setup which will vastly improve your single target damage

Playstyle

Clear

Use Explosive Grenade and shoot ahead of yourself, then shoot an Explosive Shot to Detonate the Grenades

Single Target

Open with Oil Grenade to apply Fire Exposure to the enemy, fire at it with Explosive Shot to ignite it, then dump your Explosive Grenade, and Gas Grenades and follow up with an Explosive Shot to detonate your Explosive Grenades. Also use Flash Grenade to stun the boss.

Long Distance vs Toe-to-Toe

You can play this build in a more ranged way, but close-quarters is preferable.

1. More Ranged: Preferable after playing Abyss. If you go this route, when allocating Projectile Proximity Specialisation, take Far Shot and use Longshot Support with your Explosive Grenade instead of Close Combat. However, you only get the full bonus from Far Shot when Grenades travel at least 7m, which is extremely far, so pay attention to your positioning.

2. Close Quarters: When allocating Projectile Proximity Specialisation, take Point Blank and link your Explosive Grenade with Close Combat instead of Longshot. However, take note that with Close Combat, you'll need to be practically on top of the enemy (1m Range) to gain the full effect of the Gem. You might prefer to swap this for something like Fire Infusion if you don't have too much Lightning and Cold Elemental damage on your gear

Passive Tree

main:
123
123
set 1:
20
20
set 2:
20
20

At this point, you should be around Level 61, and ready to hit the Endgame

Do your Second Trial in Act 3 and allocate Projectile Proximity Specialisation with Far Shot, followed up by Endless Munitions in the early endgame. You can do this when you encounter it in Act 3. Make sure you did your first Ascendancy in Act 2 and allocated Gathering Winds

The Snake Venom Quest

Normal: Mana Regeneration

Additional Information

Crossbow Craft

Here's the link to the Crossbow crafting guides:

HELP!

If you're struggling, make sure you're following the build guide properly. It's perfectly normal to overlook a few small things that all add up to make the build perform far worse than it should. If you're following everything properly, you should be having a smooth experience, but here's a check list in case you're struggling.

Also make sure you've been doing your Permanent Buffs and Quests throughout the Campaign! Link to that guide is here: Campaign Bonuses and Buffs

I Deal No Damage!

Items

  • Weapon: Make sure you're upgrading your Crossbow when a new base becomes available and try to get modifiers on it that increase its damage. Check the Item section for a list of the types of mods we're looking for. If you're level 12 and using the same Makeshift Crossbow you were using at Level 2, you'll be dealing almost no damage
  • Do you have any Runes and Artificer's Orbs that you could use in your weapon?
  • Do you have any Blacksmith's Whetstones you could apply to your weapon?
  • Gloves: You can get extra damage to attacks on Gloves to increase your damage
  • Iron Rings: early on, Iron Rings can be a great boost to your damage. Rings can also roll modifiers that increase damage to Attacks
  • If you're in Act 3, have you done your first Ascendancy? You should do that around Level 22-26

Remember to check Vendors for upgrades once in a while

Gems

  • Have you been leveling up your Gems?
  • Are you using the correct Skill Gems?
  • Are you using the correct Support Gems?
  • Did you collect the Lesser Jeweller's Orb at in the first area of Act 3? It's located by the Orok Campfire
  • Have you been upgrading your Support Gems? New Tiers exist that can increase your damage

Passive Tree

Have you followed the Passive Skill Tree correctly? Make sure you've been doing your Permanent Buff Quests to get the very important additional Skill Points littered throughtout the campaign

I Keep Dying!

  • Energy Shield can be a good source of survivability in the first few zones of Act 1. You can often find Energy Shield gear as drops or from Vendors

  • Maximum Life on gear is important - check to see if you have any
  • Evasion Rating and even Armour can be very useful early on. You can get a fairly high Evasion chance early on by just making sure that your Body Armour is of a fairly high item level
  • LIFE FLASKS! Have you been upgrading them? An improved version becomes available every few levels, so make sure you're keeping yours up to date! If one doesn't drop, check Vendors for Flask upgrades
  • Movement Speed on Boots will help you move through the battlefield more easily
  • Positioniong: there will be a delay between firing your Grenades and them Detonating - try to learn this rhythm and not get yourself into situations where you're surrounded by monsters, waiting for your Grenades to explode

Resistances

It's a great help to get your Fire, Cold and Lightning Resistances as high as possible and up to 75% by the time you reach the endgame. However, this isn't possible early in the campaign. Instead, try to follow this basic guideline

  • Act 1: Cold Resistance is most important, especially for the Geonor boss fight at the end of the Act
  • Act 2: Fire Resistance is very important up until you reach The Halani Gates. After that, Lightning Resistance should be prioritised
  • Act 3: Fire and Chaos Resistance will serve you well
  • Act 4: ???

Of course, try to increase all of your Resistances, but sometimes you'll need to pick one over the other while you gear up

Mana Solutions

Mana costs should be greatly improved in PoE 2 0.3, but if you're still struggling, here's some ideas:

  • Have you been upgrading your Mana Flasks?
  • Roll your Mana Flasks with modifiers that grant 0.20 Charges per Second or increased number of Charges, or Reduced Charges per Use
  • Jewels can roll modifiers that grant #% Mana gained on Kill
  • Do you have too many + to Projectile Levels on your character?
  • Mana Gain on Kill is a decent modifier early on and can be found on many different gear pieces
  • Clarity II or even Clarity I is great to assist Mana Regen
  • Mana Regeneration on gear
  • Anoint Price of Freedom on your Amulet in the endgame
  • Lifetap can be used on Skills if you're really struggling
  • Inspiration Support can be used to reduce the Mana cost of Skills
  • Lavianga's Spirits with Lavianga's Brew Instil on Amulet

Attribute Problems?

  • For the first few levels, you may need to allocate a single point of Strength near the Ranger starting area. You can later unallocate this Point
  • An early Amber Amulet can go a long way if you're lucky enough to find it
  • Check Vendors for gear with Strength, and Intelligence if you need it

General Checklist

  • Are you under-leveled? Make sure you're not trying to go too fast
  • Have you done your Ascendancy Trial when you should have (~Level 20-26 for the first one)
  • Have you followed the Passive Tree properly?
  • Have you been doing your Permanent Buff and Passive Skill Quests?
  • Have you read the guide properly or just skimmed over it, missing crucial information?

How it Works

CHANGELOG

10 Dec 2025: Cleaned up leveling progression to make major swaps more obvious

TLDR: Build is FINE and still incredibly strong

  • No numerical nerfs to Grenades. This is almost ridiculous because of how strongly Grenades have overperformed for the last 3 leagues.
  • I have made some updates to the leveling section with assistance from GuyThatDies' leveling guide
  • Perfect Essence of Battle now grants +5 to All Attack Skills instead of +6
  • Some crafted items will now be harder to make with the removal of Omen of Homogenising Exaltation, but this does NOT apply to the Crossbow craft, meaning it should be fairly easy to make still
  • Wind Ward has been removed, meaning we're losing 30% damage mitigation at full Tailwind Stacks, but some of this defensive power has been moved to Tailwind which we get from Gathering Winds, AND we get to choose a different Ascendancy notable
  • At 10 Stacks, Tailwind now provides 10% Movement Speed, 20% increased Skill Speed (was 30%), 100% increased Evasion Rating (was 150%), but now also grants "prevent 1% of damage from Deflected Hits per Stack". This means we need to place a greater emphasis on Deflection in 0.4
  • Mirage Deadeye is a new Ascendancy passive we can take which grants "While active, firing a Ranged Attack Projectile will create a Mirage that uses socketed Ranged Attacks for a short duration, then vanishes. You cannot create another Mirage for a short time after initially creating one." WIthout using it, it's hard to say how good it will be, but it sounds like it could be strong on paper
  • Constricting Command has been nerfed in that it can no longer count you as Surrounded at all times and you will need at least 1 enemy within 3 metres (4.5m with the Paranoia Notable allocated) of you to gain the benefits from Surrounded and Supports like Defy II and the Passive Tree. This is a fairly significant change and might mean you want to play a slightly more close quarters playstyle with Projectile Proximity Specialisation allocated to Point Blank instead of Far Shot. However, there may be changes with new Uniques and the new mechanic that compensate for this.


Path of Building Code

Video Guide

Table of Contents

Featured Builds

Permafreeze Frost Wolf - LIVE UPDATES
Updated on Feb 5, 2026
[0.4] ED Contagion League Starter (Level 1 to Endgame)
Updated on Feb 5, 2026
Shrine Stacker Melee Chronomancer!
Updated on Feb 5, 2026
Flame Breathing GOD | Smith of Kitava
Updated on Feb 5, 2026
[0.4] 100% Crit Comet Disciple of Varashta
Updated on Feb 5, 2026

Become a Creator

Want to earn rewards by sharing your builds with your community?