Cryo-Shock Telestomp Stormweaver (T18 Maps+)
Build Overview
This Stormweaver build focuses on optimising the Cold Damage and Freeze Capability across the build whilst using curses to aid against more difficult targets.
------------------
NOTE:
Update videos are avalable below:
Endgame Update -> https://youtu.be/kua_s1EYj9Y
T16+ Update -> https://youtu.be/Dv_2HrR8jlQ
Pinnacle Update -> https://youtu.be/QewQGcmIwgc
------------------
Using ![]() Frostbolt as the primary way to Freeze enemies,
Frostbolt as the primary way to Freeze enemies, ![]() Cold Snap can be manually used to consume the freeze until
Cold Snap can be manually used to consume the freeze until ![]() Cast on Freeze becomes available which is used to automatically invoke
Cast on Freeze becomes available which is used to automatically invoke ![]() Cold Snap for big damage in the early game or
Cold Snap for big damage in the early game or ![]() Ball Lightning for huge Shock Utility & Mobility during combat in the endgame.
Ball Lightning for huge Shock Utility & Mobility during combat in the endgame. ![]() Comet is still taken but now as a manual cast when required.
Comet is still taken but now as a manual cast when required.
![]() Hypothermia is used to reduce enemies Cold Resistance whilst
Hypothermia is used to reduce enemies Cold Resistance whilst ![]() Frost Wall is used as an Offensive / Defensive tool depending on the situation.
Frost Wall is used as an Offensive / Defensive tool depending on the situation.
![]() Frost Bomb is taken as a big damage tool when a target isn't moving or is locked in place. This I found to be quite strong in the early game.
Frost Bomb is taken as a big damage tool when a target isn't moving or is locked in place. This I found to be quite strong in the early game.
![]() Lightning Warp is taken to add the ability to Cull enemies, add Shock into the build and give the ability to maneuvre around the battlefield a bit easier.
Lightning Warp is taken to add the ability to Cull enemies, add Shock into the build and give the ability to maneuvre around the battlefield a bit easier.
![]() Grim Feast is taken in the early game as a quick way of generating Energy Shield from killing enemies.
Grim Feast is taken in the early game as a quick way of generating Energy Shield from killing enemies. ![]() Arctic Armour can be used if you feel it fits your build better but
Arctic Armour can be used if you feel it fits your build better but ![]() Grim Feast is the superior option right now before we move away from Energy Shield entirely.
Grim Feast is the superior option right now before we move away from Energy Shield entirely.
![]() Blasphemy in conjunction with
Blasphemy in conjunction with ![]() Enfeeble are added later down the line when you can get to 120+ Spirit on the build and have taken the
Enfeeble are added later down the line when you can get to 120+ Spirit on the build and have taken the ![]() Whispers of Doom Key Passive. It can also be expanded to included
Whispers of Doom Key Passive. It can also be expanded to included ![]() Hypothermia in the super late game when you get 177+ Spirit.
Hypothermia in the super late game when you get 177+ Spirit.
NOTE: ![]() Blasphemy needs to be at 20% quality to reduce the Spirit requirements to 177.
Blasphemy needs to be at 20% quality to reduce the Spirit requirements to 177.
At level 52 ![]() Eye of Winter becomes available which opens up further possibilities for Damage, Cold Exposure and Ailment Application.
Eye of Winter becomes available which opens up further possibilities for Damage, Cold Exposure and Ailment Application.
![]() Sigil of Power is added to Weapon Set 2 to boost our boss damage in the late game boosting with Increased Skill Duration and Area of Effect.
Sigil of Power is added to Weapon Set 2 to boost our boss damage in the late game boosting with Increased Skill Duration and Area of Effect.
I'l be live streaming most evenings (GMT) so this is a good time to come ask me questions directly!
Build Variants
This is designed to get you from the start of a fresh league all the way through to mapping. It's more of a guideline of how to get there rather than an exact blueprint. Enjoy.
Pre-Requisites
Absolutely none, this can be played right from the very start of a league.
Campaign Rewards (Non- Changeable)
There are not many of these in the game, but there are two rewards that can be chosen as part of the campaign that are Permanent and Can Not Be Changed, both in Act 3 & Act 3 (Cruel Mode).
You get the choices as below:
Act 3:
- 25% increased Stun Threshold.
- 30% increased Elemental Ailment Threshold.
- 25% increased Mana Regeneration Rate.
Act 3 - Cruel
- +10% to Chaos Resistance.
- +5 to All Attributes.
- 15% reduced Slowing Potency of Debuffs on you.
-----
I would recommend you go with the following choices as we are going to transition into ![]() Chaos Inoculation much later on in the builds journey which makes you immune to Chaos Damage so we won't need Chaos Resistance at that point:
Chaos Inoculation much later on in the builds journey which makes you immune to Chaos Damage so we won't need Chaos Resistance at that point:
Act 3:
- 25% increased Mana Regeneration Rate.
Act 3 - Cruel
- +5 to All Attributes.
Overview
The above stats are by no means an exact blueprint of what the build requires. They are supposed to act as a guideline for what would be useful to look out for whilst levelling up. The below sections will cover priority whilst including a bullet point list of priorities for easier reading.
Mobility
Movement speed should be your absolute priority #1 when starting out a new character. This will naturally allow you to move and attack better as well as just generally stay away from groups of enemies trying to swarm you and avoid big attacks from bosses. Your lives will be forever better when you have movement speed on your boots.
Offence
Offence can be scaled in many ways but early on your can look for +skills ranks, cast speed and increased damage (spell / element). Try to prioritise getting a decent amount of cast speed early on as this will make any caster build you play feel much better.
I would prioritise trying to get enough of a Mana pool to be able to cast without the worry of running out of Mana all the time.
After this the general passive tree track will scale your damage so you can focus on defences and utility on your gear.
Defence
I'd highly recommend stacking maximum life along with whatever resistances you can get hold of. Armour helps if you're really struggling with physical damage but the misconception that it will fix your defences will lead to you getting one shot by anything non-physical based.
You can reasonably stack energy shield along with maximum life to stay alive so long as you have some amount of resistances. I can't emphasise enough how important resistances are for staying alive so make sure to prioritise this where you can.
Flasks
I would take whatever flasks have the highest heal amount over the shortest time and not worry about these too much else early on.
Charms
If you're lucky enough to get hold of a  Stone Charm or
  Thawing Charm I would put these on as required to help remove the worry of one of those when in hectic fights.
Attribute Priority
- Intelligence
- Dexterity (As Required)
- Strength (As Required)
Stat Priorities
Early Game
- Movement Speed
- Maximum Life
- Maximum Mana
- Cast Speed
- + Level of all Spell Skills
- + Level of all Cold spell Skills
- Elemental Resistances (Fire, Lightning, Cold)
- Mana Regeneration
Early/Mid Game
The above stats still stay as top priority but the following stats can also be fed into the build if you're lucky enough to come by them:
- Chaos Resistance
- Increased Maximum Energy Shield
- Increased Energy Shield
- Spirit (to get to 130+ Maximum Spirit)
- Increased Maximum Mana %
Other useful stats but aren't mandatory:
- Increased Critical Hit Chance
- Increased Critical Damage
Uniques
This build is intended to be possible without any uniques.
If you are lucky enough to drop a  Lifesprig this carried me all the way through until Act 2 (Cruel) -> The equivelant of Act 5. This an incredible starter weapon that gives you everything you need offensively for this build early on.
Another very useful unique that can help tremendously through the first campaign playthrough is the 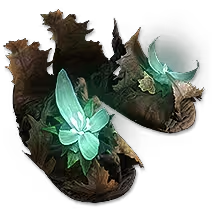 Luminous Pace boots which can drop as early as after the first town. These give you that much needed Movement Speed, some extra Mana through the Intelligence it provides and more importantly it gives 100% Faster Start Of Energy Shield Recharge which is super godly early game for sustaining damage in longer fights, such as boss fights.
The final unique I've encountered that would be incredibly useful here is the 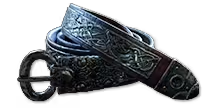 Midnight Braid belt. If you are lucky enough to come by one of these, you can reasonably start to look into stacking mana and going down the route of taking
 ![]() Eldritch Battery with
Eldritch Battery with ![]() Mind Over Matter, the two key passives that converts your HP pool to be taken from mana first whilst scaling your mana by the amount of flat energy shield you have from gear. This isn't recommended early on without a lot of mana stacked because it could make it very hard for you to sustain your mana to be able to cast spells. A lot of mana regeneration will be required for this tech to be viable.
Mind Over Matter, the two key passives that converts your HP pool to be taken from mana first whilst scaling your mana by the amount of flat energy shield you have from gear. This isn't recommended early on without a lot of mana stacked because it could make it very hard for you to sustain your mana to be able to cast spells. A lot of mana regeneration will be required for this tech to be viable.
Jewel Stat Priorities
If you're just starting out then you won't have much available here so use whatever you can get your hands on.
Any of the below stats will be great for the build. I would highly recommend trying to get Gain % Meta Energy where you can but the others are up for grabs.
- Gain % Meta Energy
- Gain % Mana on Kill
- Spell Critical Chance
- Cast Speed
- Cold Damage
- Elemental Damage
- Cold Penetration
Skill Gems
Support Gem Requirements:
Str 5
Dex 30
Int 90
Frostbolt
Frost Bomb
Hypothermia
Frost Wall
Cast on Freeze
Lightning Warp
Eye of Winter
Comet
Grim Feast
Sigil of Power























Skill Gem Overview
A detailed explanation of the skill gems and their various support gems is down below in the How It Works section, so be sure to check that out for a better idea of gem selection and progression.
Note: The attribute requirements are just above the skill gems.
Note: ![]() Sigil of Power comes as an Implicit on a Chiming Staff.
Sigil of Power comes as an Implicit on a Chiming Staff.
Skill Gem Cutting Priority
T1
![]() Spark /
Spark / ![]() Flame Wall /
Flame Wall / ![]() Frost Bomb /
Frost Bomb / ![]() Ice Nova.
Ice Nova.
T3
![]() Frostbolt
Frostbolt
T5
![]() Cold Snap
Cold Snap
T7
![]() Hypothermia
Hypothermia
T9
![]() Frost Wall /
Frost Wall / ![]() Lightning Warp
Lightning Warp
T11
 Ball Lightning /
  Comet
Comet
T13
 Eye of Winter
Support Gem Cutting Priority
These are in roughly the correct order you want to cut them from your Uncut Support Gems.
T1
Scattershot / Unleash / Arcane Tempo / Spell Cascade / Second Wind / Fast Forward / Glaciation / Expanse / Magnified Effect / Fortress / Clarity / Inspiration / Concentrated Effect / Deceleration / Persistence
T2
Spell Echo / Ingenuity / Cold Penetration / Inevitable Critical / Font of Mana / Icicle / Impetus / Soul Drain / Overcharge / Considered Casting / Ritualistic Curse
T3
Wildshards / Cold Exposure / Cursed Ground / Cold Mastery / Strip Away / Supercritical
Other Useful Support Gems
Controlled Destruction / Deep Freeze / Frost Nexus / Biting Frost / Energy Retention / Fork / Heightened Curse / Acceleration
Spirit Gem Cutting Priority
T4
![]() Grim Feast or
Grim Feast or ![]() Arctic Armour
Arctic Armour
T8
![]() Cast on Freeze
Cast on Freeze
Gem Socket Priority
Lesser Jewellers Orbs
-
 Frostbolt
 -
 Frost Bomb
 -
 Frost Wall
 -
 Cast on Freeze
 -
 Hypothermia
 -
 Lightning Warp
 -
 Comet
Comet -
 Eye of Winter
 -
 Grim Feast
Greater Jewellers Orbs
-
 Cast on Freeze
 -
 Comet
Comet -
 Eye of Winter
 -
 Frost Wall
 -
 Hypothermia
 -
 Lightning Warp
 -
 Frostbolt
Gem Quality Priority
If you're lucky enough to come across some Gemcutter Prism consumable items or are able to trade for some, you will want to upgrade the quality of your skill gems in the following order:
 Cast on Freeze
  Frost Wall
  Comet
Comet  Lightning Warp
  Frost Bomb
  Hypothermia
  Eye of Winter
The rest are optional and don't really impact the build in any meaningful way.
Passive Tree
Overview
The start nodes are currently set above to go more offensive so you can focus going more defensively with the gear.
Passive Tree Paths
The Passive Tree line colours represent the following:
- Yellow -> Main Path
- Pink -> Weapon Set 1
- Green -> Weapon Set 2
Levelling Path
Below is a list of what Notables to take in what order. As always this is a guideline so feel free to experiment as you like.
Starter Passives
- Path to
 Pure Energy for some initial Energy Shield defence.
 - Next path to
 Raw Power following the path for Cast Speed.
 - Next path to
 Open Mind for further Mana Regeneration.
 - Cold Spells should be available by this point so now path to
 Path of Winter for extra Cold Damage and Freeze Buildup.
 - Path left and work up towards
 Exploit the Elements for a nice early damage gain.
 - Go back and path into
 Breath of Ice for Cold Penetration helping against Cold Resistance enemies.
 - Lastly take
 Dampening Shield just above
  Pure Energy for even more Energy Shield and some extra Stun Resistance.
Rush To Cold Damage Cluster
- Wait until you have enough gold to respect all the nodes associated with getting to
 Exploit the Elements and
  Breath of Ice.
 - Work directly up towards the dedicated Cold Damage Cluster on the Northern perimeter of the Passive Tree where you want to take the
 Glaciation node to make up for the lost Cold Penetration from before.
 - Take the other 2 Notables in the Cold Damage cluster:
 Endless Blizzard,
  Inescapable Cold.
Begin Mana Stacking + Energy Shield
- Path towards
 Ingenuity and
  Patient Barrier for a nice bump to Mana and Maximum Energy Shield.
 - Work down towards
 Raw Mana for a huge bump to our mana pool.
 - Take
 Arcane Intensity which gives us a way to scale our damage based on our Mana Pool.
 - Take
 Ether Flow which works nicely here and helps our Mana Sustain.
Boost Energy Shield
- Go half way up the trail heading towards the Cold Damage Cluster and go left to take
 Heavy Buffer for another big bump of 40% Maximum Energy Shield at the cost of 10% Maximum Life.
 - Continue left towards
 Dependable Ward for Faster Start Of Energy Shield Recharge (55%) and Faster Recharge Rate of Energy Shield (55%). This will provide some much needed sustain in longer fights.
Go Super Freeze
- Trail down from
 Ingenuity and take
  Thin Ice and
  Heavy Frost for big Freeze buildup & Cold Damage against Frozen enemies.
 - Take
 Harsh Winter for extra Cold Skill Cast Speed.
Mana As Defence
- Work towards
 Adverse Growth in the mid/top left section of the tree from where we pathed off towards
  Heavy Buffer earlier, taking the Damage Is Taken From Mana Before Life nodes on the way. This starts to transfer our Health Pool to our Mana Pool.
 - Finally on the top right perimeter, continue along the right top trail and path into
 Lucidity for even further Mana Defence.
Expand Elemental Damage
- We can now path into
 Stormcharged,
  All Natural and
  Breaking Point for big Elemental Damage, Elemental Penetration, Elemental Cast Speed and some Elemental Resistances.
Final Utility
- Take
 Energise for extra triggered skills utility.
 - Path to
 Touch the Arcane which synergises nicely with our Ascendancy Notables.
Other Useful Notables
The following Notable is useful for gaining Elemental Penetration early on so I'd recommend taking it when at lower levels
![]() Breath of Ice
Breath of Ice
The following Notables would increase the number of projectiles you produce on average as well as slow them down. Slowing down projectively is fantastic for ![]() Frostbolt but not so great for
Frostbolt but not so great for ![]() Eye of Winter where you would want to increase the projectile speed.
Eye of Winter where you would want to increase the projectile speed.
![]() Turn the Clock Back
Turn the Clock Back
![]() Psychic Fragmentation
Psychic Fragmentation
Key Passives
If you find you can stack enough mana with damage taken recouped as mana along with the  Midnight Braid unique, you could look at taking the
 ![]() Mind Over Matter key passive to convert all damage to be taken from mana before life along with the
Mind Over Matter key passive to convert all damage to be taken from mana before life along with the ![]() Eldritch Battery key passive to convert all energy shield on your gear to mana helping stack towards the mana stacking tech.
Eldritch Battery key passive to convert all energy shield on your gear to mana helping stack towards the mana stacking tech.
Ascendancies
For now in the Early Access I recommend going down the Arcane Surge for the extra free Cast Speed & Mana Regeneration. This can possible be changed out later but it's very handy early on.
Recommended:
 Constant Gale
  Force of Will
How it Plays
Cast ![]() Frost Wall as required to block enemies from swarming you or underneath larger targets feet as this causes the wall segements to explode instantly for big damage.
Frost Wall as required to block enemies from swarming you or underneath larger targets feet as this causes the wall segements to explode instantly for big damage.
Cast ![]() Frostbolt or
Frostbolt or ![]() Eye of Winter towards the enemies for near Perma-Freeze activating
Eye of Winter towards the enemies for near Perma-Freeze activating ![]() Cast on Freeze for big damage from the triggered
Cast on Freeze for big damage from the triggered ![]() Cold Snap or high utility output with
Cold Snap or high utility output with ![]() Ball Lightning which the Projectiles can be used to Teleport onto for big damage with
Ball Lightning which the Projectiles can be used to Teleport onto for big damage with ![]() Lightning Warp as well as placing Shocked Ground when this occurs.
Lightning Warp as well as placing Shocked Ground when this occurs.
![]() Frostbolt will be slotted in
Frostbolt will be slotted in ![]() Cast on Freeze in the Ultra End Game so there will be no need to manually cast this at this point.
Cast on Freeze in the Ultra End Game so there will be no need to manually cast this at this point.
if in a safe spot, cast ![]() Comet at will for big Focused Area Damage. It's recommended to block enemies off with
Comet at will for big Focused Area Damage. It's recommended to block enemies off with ![]() Frost Wall before trying to go ahead and spam cast
Frost Wall before trying to go ahead and spam cast ![]() Comet to rain down frosty meteors of goodness on the enemies heads.
Comet to rain down frosty meteors of goodness on the enemies heads.
Cast ![]() Frost Bomb under large groups of enemies or larger targets for huge demolition style AOE damage. This is excellent for clearance and for big damage on bosses when they are stationary or crowd controlled.
Frost Bomb under large groups of enemies or larger targets for huge demolition style AOE damage. This is excellent for clearance and for big damage on bosses when they are stationary or crowd controlled.
Cast ![]() Hypothermia on Cold Resistant enemies whilst you work on building up enough Cold Penetration to bypass these resistances alltogether.
Hypothermia on Cold Resistant enemies whilst you work on building up enough Cold Penetration to bypass these resistances alltogether.
Cast ![]() Lightning Warp on enemies highlighted to be Culled or on
Lightning Warp on enemies highlighted to be Culled or on ![]() Ball Lightning projectiles. This creates Shocked Ground at the Telestomp location causing all enemies within to be Shocked. This can be used as a method to engage or to disengage
Ball Lightning projectiles. This creates Shocked Ground at the Telestomp location causing all enemies within to be Shocked. This can be used as a method to engage or to disengage
Once you hit level 52 and unlock ![]() Eye of Winter I find a good rotation is as follows:
Eye of Winter I find a good rotation is as follows:
- Cast
 Frostbolt to build up some Chilled Ground.
 - Place down
 Frost Wall to block enemies or underneath larger enemies feet to quickly build up Freeze.
 - Once enemies are frozen, place down
 Hypothermia +
  Frost Bomb and cast
  Comet in a safe place.
 - Use
 Ball Lightning projectiles to engage or disengage as needed.
  Eye of Winter is more useful against bosses where it excels are applying huge damage very quickly to large targets.
Once you have ![]() Blasphemy running both
Blasphemy running both ![]() Enfeeble and
Enfeeble and ![]() Hypothermia as well as manual
Hypothermia as well as manual ![]() Ball Lightning equipped, the play style can change to be a much more defensive/aggressive style. I would recommend engaging by blocking off enemies with
Ball Lightning equipped, the play style can change to be a much more defensive/aggressive style. I would recommend engaging by blocking off enemies with ![]() Frost Wall to scan the battlefield for what you're about to engage whilst manually casting
Frost Wall to scan the battlefield for what you're about to engage whilst manually casting ![]() Ball Lightning projectiles through the
Ball Lightning projectiles through the ![]() Frost Wall in preparation to engage with
Frost Wall in preparation to engage with ![]() Lightning Warp . If you deem there not to be any One Shot Mechanics in play from Rare Enemies+ then you should be safe to jump in. This allows you to be a bit more in control.
Lightning Warp . If you deem there not to be any One Shot Mechanics in play from Rare Enemies+ then you should be safe to jump in. This allows you to be a bit more in control.
If you find yourself feeling a bit worried in a fight or you're feeling like you're about to get overrun. I would suggest blocking off as many angles as possible with ![]() Frost Wall and then manually casting
Frost Wall and then manually casting ![]() Ball Lightningaway from you so you can
Ball Lightningaway from you so you can ![]() Lightning Warp out of the current area.
Lightning Warp out of the current area.
I personally tend to fight Harder Single Target Enemies with ![]() Eye of Winter which I'm attempting to make my main single target DPS. If it feels safe to use, you can also choose to cast
Eye of Winter which I'm attempting to make my main single target DPS. If it feels safe to use, you can also choose to cast ![]() Comet down on the area if you are able to block them off with
Comet down on the area if you are able to block them off with ![]() Frost Wall first.
Frost Wall first.
NOTE: I would highly recommend not perma-teleporting with ![]() Lightning Warp in higher risk maps as there are currently some very overtuned one-shot elemental attacks that rare enemies can get in conjunction with bad map modifiers that just means you'l get killed very easily.
Lightning Warp in higher risk maps as there are currently some very overtuned one-shot elemental attacks that rare enemies can get in conjunction with bad map modifiers that just means you'l get killed very easily.
![]() Sigil of Power is added to Weapon Slot 2 in order to give us that extra damage we need for Harder Single Target Enemies. At Level 18 it gives 14% More Spell Damage Per Stage equating to 56% More Spell Damage at Stage 4. The sigil is charged up by spending mana inside the sigil so casting lots of high mana skills constantly will help a lot here (I recommend
Sigil of Power is added to Weapon Slot 2 in order to give us that extra damage we need for Harder Single Target Enemies. At Level 18 it gives 14% More Spell Damage Per Stage equating to 56% More Spell Damage at Stage 4. The sigil is charged up by spending mana inside the sigil so casting lots of high mana skills constantly will help a lot here (I recommend ![]() Eye of Winter).
Eye of Winter).
Aim to place ![]() Sigil of Power somewhere central to where you want to run around so you can start charging it up and give yourself plenty of area to move around whilst benefitting from the extra damage it provides if you have to avoid incoming damage. Reset the placement if it ends before the fight is over, in most cases this won't be the case.
Sigil of Power somewhere central to where you want to run around so you can start charging it up and give yourself plenty of area to move around whilst benefitting from the extra damage it provides if you have to avoid incoming damage. Reset the placement if it ends before the fight is over, in most cases this won't be the case.
NOTE: Make sure to assign all damage skills to Weapon Set 1 only so that when you cast an offensive skill you will automatically swap back to your main weapon and focus. ![]() Sigil of Power is automatically allocated to weapon set 2 as it's a skill that is attached to the staff we equip. You can leave
Sigil of Power is automatically allocated to weapon set 2 as it's a skill that is attached to the staff we equip. You can leave ![]() Blasphemy and
Blasphemy and ![]() Cast on Freeze on both Weapon Set 1 and Weapon Set 2 so these stay active regardless of what set we have equipped at any given time.
Cast on Freeze on both Weapon Set 1 and Weapon Set 2 so these stay active regardless of what set we have equipped at any given time.
How it Works
Starter Skills
On a fresh character you'l want to start with the basic skill gems available such as ![]() Firebolt /
Firebolt / ![]() Spark /
Spark / ![]() Freezing Shards /
Freezing Shards / ![]() Flame Wall until you can get your hands on
Flame Wall until you can get your hands on ![]() Frostbolt which pairs very nicely with
Frostbolt which pairs very nicely with ![]() Cold Snap and
Cold Snap and ![]() Ice Nova is also a very nice addition to the build so be sure to get hold of this when you can as well.
Ice Nova is also a very nice addition to the build so be sure to get hold of this when you can as well.
Skill Gems
![]() Frostbolt is useful when you pair it with Scattershot and Unleash giving a decent amount of early game damage. Later on Unleash will be removed in favour of other gems. Wildshards along with Cold Penetration should be equipped when available adding omni-directional damage and Cold Resistance Penetration to the build. Arcane Tempo is useful for raising your cast speed until this can be solved elsewhere. After you have enough Cast Speed you can swap this for
Frostbolt is useful when you pair it with Scattershot and Unleash giving a decent amount of early game damage. Later on Unleash will be removed in favour of other gems. Wildshards along with Cold Penetration should be equipped when available adding omni-directional damage and Cold Resistance Penetration to the build. Arcane Tempo is useful for raising your cast speed until this can be solved elsewhere. After you have enough Cast Speed you can swap this for ![]() Glaciation to raise the Freeze capability of the build. Deceleration can be used to reduce the projectiles speed, creating a moving wall of projectiles that you can stay behind. This can be furter slowed in the passive tree through the notable
Glaciation to raise the Freeze capability of the build. Deceleration can be used to reduce the projectiles speed, creating a moving wall of projectiles that you can stay behind. This can be furter slowed in the passive tree through the notable ![]() Turn the Clock Back.
Turn the Clock Back.
![]() Frost Bomb was very strong early on for killing groups of enemies and bosses. Spell Cascade and Second Wind can be added to further the damage output which I found to be super helpful.
Frost Bomb was very strong early on for killing groups of enemies and bosses. Spell Cascade and Second Wind can be added to further the damage output which I found to be super helpful.
![]() Frost Wall is extremely useful because it can be used to block swarms of enemies, or you can plant it under the enemies feets for extra damage. It's especially useful against large hit box enemies where it instantly explodes under their feet for pretty significant damage and Freeze Build Up. Combined with Fortress to give the ability to block enemies within it and the utility of Font of Mana for Mana Sustainance, this is a must have in the build. You can take Icicle to reduce the crystals life if you want to use it as a more offensive option. Later on You can replace Fortress for Ingenuity for faster cooldowns.
Frost Wall is extremely useful because it can be used to block swarms of enemies, or you can plant it under the enemies feets for extra damage. It's especially useful against large hit box enemies where it instantly explodes under their feet for pretty significant damage and Freeze Build Up. Combined with Fortress to give the ability to block enemies within it and the utility of Font of Mana for Mana Sustainance, this is a must have in the build. You can take Icicle to reduce the crystals life if you want to use it as a more offensive option. Later on You can replace Fortress for Ingenuity for faster cooldowns.
![]() Hypothermia Is the bread and butter curse in the early game to help deal with Cold Resistance mobs. The one thing to note here is that this can reduce enemies resistances below 0% allowing you to do extra damage. Cold penetration does NOT reduce below 0% in POE2 like it does in POE1 so this curse is useful even if you can penetrate all of an enemies resistances. Most of the support gems here are focused around increasing the area effect of the curse. The main ones are Magnified Effect and Persistence to achieve both a larger area and a longer duration. Later down the line you can get hold of Cursed Ground which turns the curse into a persistant ground effect with no activation delay and Ritualistic Curse for further area increase at no detriment if you have Cursed Ground already slotted. Heightened Curse can be useful in increasing the strength of the curse but I would avoid this if you're having Mana Sustain issues.
Hypothermia Is the bread and butter curse in the early game to help deal with Cold Resistance mobs. The one thing to note here is that this can reduce enemies resistances below 0% allowing you to do extra damage. Cold penetration does NOT reduce below 0% in POE2 like it does in POE1 so this curse is useful even if you can penetrate all of an enemies resistances. Most of the support gems here are focused around increasing the area effect of the curse. The main ones are Magnified Effect and Persistence to achieve both a larger area and a longer duration. Later down the line you can get hold of Cursed Ground which turns the curse into a persistant ground effect with no activation delay and Ritualistic Curse for further area increase at no detriment if you have Cursed Ground already slotted. Heightened Curse can be useful in increasing the strength of the curse but I would avoid this if you're having Mana Sustain issues.
![]() Cast on Freeze adds a layer of automation to the build focused mainly on group clearance. Everytime you freeze an enemy you will gain energy towards activating the skills slotted inside it, and later on you can achieve activating them very frequently with the right setup. I would recommend
Cast on Freeze adds a layer of automation to the build focused mainly on group clearance. Everytime you freeze an enemy you will gain energy towards activating the skills slotted inside it, and later on you can achieve activating them very frequently with the right setup. I would recommend ![]() Cold Snap here to start with as you won't have access to
Cold Snap here to start with as you won't have access to ![]() Ball Lightning at this stage.
Ball Lightning at this stage. ![]() Unleash and Inspiration are taken early to double up the offensive activation whilst mitigating the mana pressure this can put on the build. Later down the line there are support gems that can be used to improve the activation rate such as Impetus and Energy Retention. Once
Unleash and Inspiration are taken early to double up the offensive activation whilst mitigating the mana pressure this can put on the build. Later down the line there are support gems that can be used to improve the activation rate such as Impetus and Energy Retention. Once ![]() Ball Lightning becomes available you will want to replace
Ball Lightning becomes available you will want to replace ![]() Cold Snap as it's jsut extremely useful later on and
Cold Snap as it's jsut extremely useful later on and ![]() Cold Snap seems to flatline damage wise in the end game.
Cold Snap seems to flatline damage wise in the end game. ![]() Ball Lightning allows us to be able to teleport to the projectiles with
Ball Lightning allows us to be able to teleport to the projectiles with ![]() Lightning Warp as well as giving us the ability to apply Shocked Ground through this interaction much more easily. It also allows us to integrate Ailments into the build such as Electrocute which would be very useful in the higher endgame content.
Lightning Warp as well as giving us the ability to apply Shocked Ground through this interaction much more easily. It also allows us to integrate Ailments into the build such as Electrocute which would be very useful in the higher endgame content.
![]() Lightning Warp is a very useful utility skill that may seem out of place but what it allows is for us to integrate Culling into our build, including against bosses. It also gives us the ability to add Shock into our build once an enemy is culled which increases our damage against enemies whilst affected. In conjunction with Considered Casting for Huge Increased Damage, Soul Drain for extra Mana Sustain and Overcharge to increase the Potency of the Shock, this ability has incredibly utility value here. With the addition of
Lightning Warp is a very useful utility skill that may seem out of place but what it allows is for us to integrate Culling into our build, including against bosses. It also gives us the ability to add Shock into our build once an enemy is culled which increases our damage against enemies whilst affected. In conjunction with Considered Casting for Huge Increased Damage, Soul Drain for extra Mana Sustain and Overcharge to increase the Potency of the Shock, this ability has incredibly utility value here. With the addition of ![]() Ball Lightning we are now able to activate
Ball Lightning we are now able to activate ![]() Lightning Warp on demands towards the projeciles, using it as an offensive and a utility option for moving around the battlefield and apply Shocked Ground much more frequently. This ontop of the Culling tech means you can teleport around the map during combat to get in and out of combat situations as you see fit.
Lightning Warp on demands towards the projeciles, using it as an offensive and a utility option for moving around the battlefield and apply Shocked Ground much more frequently. This ontop of the Culling tech means you can teleport around the map during combat to get in and out of combat situations as you see fit.
![]() Eye of Winter becomes available at level 52 and is very strong. Cold Exposure is useful for near permanent cold exposure application on Critical Hits, Elemental Focus is taken more raw damage whilst costing some the ability to apply ailments (we can solve this elsewhere) and Fork is taken to allow the projectiles to split off to other enemies at the cost of 50% Damage after Forking. One thing to note here is we have both Chilled Ground and Shocked Ground in the build, so it can inherit these effects and apply them to all surrounding enemies with ease if you take off Elemental Focus and replace that with something else.
Eye of Winter becomes available at level 52 and is very strong. Cold Exposure is useful for near permanent cold exposure application on Critical Hits, Elemental Focus is taken more raw damage whilst costing some the ability to apply ailments (we can solve this elsewhere) and Fork is taken to allow the projectiles to split off to other enemies at the cost of 50% Damage after Forking. One thing to note here is we have both Chilled Ground and Shocked Ground in the build, so it can inherit these effects and apply them to all surrounding enemies with ease if you take off Elemental Focus and replace that with something else.
![]() Grim Feast is an extremely powerful tool you can pick up as soon as you gain access to Uncut Spirit Gems. This allows you to get Energy Shield pickups from enemies corpses based on chance. This gives us a much needed extra layer of sustain whilst dealing with groups of enemies and with the addition of Clarity it gives us access to 30% Mana Regeneration which is very useful early on. Bludgeon can also be taken to help prevent Perma-stuns by Knocking Back enemies when it activates.
Grim Feast is an extremely powerful tool you can pick up as soon as you gain access to Uncut Spirit Gems. This allows you to get Energy Shield pickups from enemies corpses based on chance. This gives us a much needed extra layer of sustain whilst dealing with groups of enemies and with the addition of Clarity it gives us access to 30% Mana Regeneration which is very useful early on. Bludgeon can also be taken to help prevent Perma-stuns by Knocking Back enemies when it activates.
![]() Arctic Armour is another useful Defensive tool you can opt to use instead of
Arctic Armour is another useful Defensive tool you can opt to use instead of ![]() Grim Feast if you prefer but right now this is the inferior option so this is completely up to you but not recommended. The same Support Gems can be used here.
Grim Feast if you prefer but right now this is the inferior option so this is completely up to you but not recommended. The same Support Gems can be used here.
Which ever you choose to use, they are later replaced due to removing Energy Shield from the build and the addition of ![]() Blasphemy will take precedence once you can get to a minimum of 120+ maximum spirit, but preferably 130+ maximum spirit.
Blasphemy will take precedence once you can get to a minimum of 120+ maximum spirit, but preferably 130+ maximum spirit.
![]() Blasphemy combined with
Blasphemy combined with ![]() Enfeeble is a very powerful combination that allows us to entirely bypass Curse activation restrictions in favour of a Reduced Strength Curse that acts as an aura around us reducing enemies damage against us. This can later be used to have permanent activation tools such as Clarity for Mana Regeneration. This can be used without Clarity so that you only require 120+ Maximum Spirit to use this in conjunction with
Enfeeble is a very powerful combination that allows us to entirely bypass Curse activation restrictions in favour of a Reduced Strength Curse that acts as an aura around us reducing enemies damage against us. This can later be used to have permanent activation tools such as Clarity for Mana Regeneration. This can be used without Clarity so that you only require 120+ Maximum Spirit to use this in conjunction with ![]() Cast on Freeze but the extra Mana Regeneration is highly recommended.
Cast on Freeze but the extra Mana Regeneration is highly recommended.
For ![]() Blasphemy to be able to be taken in the build alongside
Blasphemy to be able to be taken in the build alongside ![]() Hypothermia the Key Passive
Hypothermia the Key Passive ![]() Whispers of Doom is required as this allows us to have 2 Active Curses at once at the cost of Double Activation Delays. The great thing here is that
Whispers of Doom is required as this allows us to have 2 Active Curses at once at the cost of Double Activation Delays. The great thing here is that ![]() Hypothermia later on will use the support gem Cursed Ground to turn it into a persistant ground effect and
Hypothermia later on will use the support gem Cursed Ground to turn it into a persistant ground effect and ![]() Blasphemy will be turned into a constant Aura so both of them bypass Activation Delays entirely, meaning is just a benefit to us with no downside.
Blasphemy will be turned into a constant Aura so both of them bypass Activation Delays entirely, meaning is just a benefit to us with no downside.
Much later down the line we will be able to socket both our curses![]() Enfeeble and
Enfeeble and ![]() Hypothermia into
Hypothermia into ![]() Blasphemy so they both auto bypass the Double Activation Delay from
Blasphemy so they both auto bypass the Double Activation Delay from ![]() Whispers of Doom. This requires 177+ Spirit with Clarity also added to
Whispers of Doom. This requires 177+ Spirit with Clarity also added to ![]() Blasphemy and allows for a much smoother gameplay. This increases your general damage quite a bit because you probably won't be manually casting
Blasphemy and allows for a much smoother gameplay. This increases your general damage quite a bit because you probably won't be manually casting ![]() Hypothermia all the time, only on larger targets. Once enough Area Effect and Area Effect of Curses has been stacked on the build, it can be applied to enemies pretty much screen wide and Increased Effectiveness Of Curses allows us to push our Curses back to full potential or even higher in some cases. This allows for a straight up Damage Reduction Mechanic to any Affected Enemies of which there are very few in the game right now. This also frees up a skill slot for us to add a manual
Hypothermia all the time, only on larger targets. Once enough Area Effect and Area Effect of Curses has been stacked on the build, it can be applied to enemies pretty much screen wide and Increased Effectiveness Of Curses allows us to push our Curses back to full potential or even higher in some cases. This allows for a straight up Damage Reduction Mechanic to any Affected Enemies of which there are very few in the game right now. This also frees up a skill slot for us to add a manual ![]() Ball Lightning into the build which makes the build feel a lot less clunky to play.
Ball Lightning into the build which makes the build feel a lot less clunky to play.
![]() Comet is used now as a Manual Casting Ability rather than an On-Cast Ability. This in Conjunction with Spell Echo, Unleash and Arcane Tempo make it a deadly engagement tool once
Comet is used now as a Manual Casting Ability rather than an On-Cast Ability. This in Conjunction with Spell Echo, Unleash and Arcane Tempo make it a deadly engagement tool once ![]() Frost Wall has been placed down to control enemies advancing upon you as well as being a good burst damage tool when larger enemies are Frozen. Later on Inevitable Critical & Supercritical can be equipped to supercharge the critical power of the comet skill if you choose to stack some Critical Chance and Critical Damage on your character.
Frost Wall has been placed down to control enemies advancing upon you as well as being a good burst damage tool when larger enemies are Frozen. Later on Inevitable Critical & Supercritical can be equipped to supercharge the critical power of the comet skill if you choose to stack some Critical Chance and Critical Damage on your character.
Skill Info
The bread and butter of this build is to Freeze enemies using ![]() Frostbolt /
Frostbolt / ![]() Frost Wall /
Frost Wall / ![]() Arctic Armour /
Arctic Armour / ![]() Eye of Winter as quick as possible to activate
Eye of Winter as quick as possible to activate ![]() Cast on Freeze that will then activate either
Cast on Freeze that will then activate either ![]() Cold Snap to clear enemies or
Cold Snap to clear enemies or ![]() Ball Lightning to enable the Telestomp tech.
Ball Lightning to enable the Telestomp tech.
Mobbing should be pretty straight forward and is definitely where this build excels more than bossing in the early part of the game. ![]() Frostbolt has such a high ability to Freeze with it's Chilled Ground effect that
Frostbolt has such a high ability to Freeze with it's Chilled Ground effect that ![]() Cast on Freeze will activate fairly often. Both
Cast on Freeze will activate fairly often. Both ![]() Cold Snap and
Cold Snap and ![]() Ball Lightning work well here.
Ball Lightning work well here. ![]() Ball Lightning allows us to integrate extra Mobility options since you can teleport onto the projectiles using
Ball Lightning allows us to integrate extra Mobility options since you can teleport onto the projectiles using ![]() Lightning Warp, leaving behind extremely potent Shocked Grounds boosting our damage across the build in favour of doing big hits from
Lightning Warp, leaving behind extremely potent Shocked Grounds boosting our damage across the build in favour of doing big hits from ![]() Comet which now doesn't activate as consistently due to previous changes in patch 0.1.0d.
Comet which now doesn't activate as consistently due to previous changes in patch 0.1.0d.
![]() Frost Bomb is also useful for clearance and bossing if you can keep the enemies in place long enough to benefit from it. This is particularly strong in the early game before you can unlock many of the other skills or support gems so make good use of it. In the late game, we mostly use
Frost Bomb is also useful for clearance and bossing if you can keep the enemies in place long enough to benefit from it. This is particularly strong in the early game before you can unlock many of the other skills or support gems so make good use of it. In the late game, we mostly use ![]() Frost Bomb for it's exceptional application of Cold Exposure which helps drastically improve our damage against harder targets.
Frost Bomb for it's exceptional application of Cold Exposure which helps drastically improve our damage against harder targets.
![]() Comet is still used in the build for its extremely devastating clearance ability as well as decent single target damage. Paired with Spell Echo, Unleash, Concentrated Effect and Inevitable Critical it grants it devastating Focused Target Area Damage.
Comet is still used in the build for its extremely devastating clearance ability as well as decent single target damage. Paired with Spell Echo, Unleash, Concentrated Effect and Inevitable Critical it grants it devastating Focused Target Area Damage.
![]() Eye of Winter can also be used to apply freeze if fired over the Chilled Ground effect that is left behind by
Eye of Winter can also be used to apply freeze if fired over the Chilled Ground effect that is left behind by ![]() Frostbolt as well as being able to apply shock if fired over the Shocked Ground effect that
Frostbolt as well as being able to apply shock if fired over the Shocked Ground effect that ![]() Lightning Warp creates, so bare this in mind for easy ailment application. Paired with Arcane Tempo, Supercritical and Cold Mastery this skill can become a pretty decent Single Target DPS skill. I am exploring boosting this further.
Lightning Warp creates, so bare this in mind for easy ailment application. Paired with Arcane Tempo, Supercritical and Cold Mastery this skill can become a pretty decent Single Target DPS skill. I am exploring boosting this further.
Note: This will only work if Elemental Focus is not used on it, so be weary of this.
Note: ![]() Eye of Winter currently does NOT apply Shock from Shocked Ground which is likely a bug.
Eye of Winter currently does NOT apply Shock from Shocked Ground which is likely a bug.
![]() Hypothermia is best used when the enemies are not moving much or locked in place to maximise its potential. When you Freeze an enemy is a good example of when to use this. This won't be an issue later on when it's socketed into
Hypothermia is best used when the enemies are not moving much or locked in place to maximise its potential. When you Freeze an enemy is a good example of when to use this. This won't be an issue later on when it's socketed into ![]() Blasphemy as it is Auto Cast as an Aura.
Blasphemy as it is Auto Cast as an Aura.
![]() Enfeeble is Auto Cast as an Aura through the use of
Enfeeble is Auto Cast as an Aura through the use of ![]() Blasphemy allowing us to reduce incoming damage quite drastically once enough Area of Effect, Area of Effect of Curses and Effectiveness of Curses has been stacked. It's pretty weak to start with as the Area of Effect of
Blasphemy allowing us to reduce incoming damage quite drastically once enough Area of Effect, Area of Effect of Curses and Effectiveness of Curses has been stacked. It's pretty weak to start with as the Area of Effect of ![]() Enfeeble is just too small to make a real difference and it's Effectiveness is reduced drastically for becoming a Permanent Aura. It becomes very strong later on though once these problems have been solved.
Enfeeble is just too small to make a real difference and it's Effectiveness is reduced drastically for becoming a Permanent Aura. It becomes very strong later on though once these problems have been solved.
![]() Sigil of Power is made available through equipping a Chiming Staff in our Weapon Set 2 equipment slot so it doesn't require a free Skill Slot. It boosts our damage drastically which is very useful against Harder Single Target Enemies especially Boss Fights. The size is increased through Increased Area of Effect passives, Jewels and increasing the quality of the Chiming Staff to 20%, giving a +0.8m size increase. The duration is increasd through the use of Increased Skill Duration passives allowing for durations upwards of 30 seconds+ in conjunction with Persistence support gem.
Sigil of Power is made available through equipping a Chiming Staff in our Weapon Set 2 equipment slot so it doesn't require a free Skill Slot. It boosts our damage drastically which is very useful against Harder Single Target Enemies especially Boss Fights. The size is increased through Increased Area of Effect passives, Jewels and increasing the quality of the Chiming Staff to 20%, giving a +0.8m size increase. The duration is increasd through the use of Increased Skill Duration passives allowing for durations upwards of 30 seconds+ in conjunction with Persistence support gem.
In the End Game the aim is to get the ![]() Sigil of Power to last as long as possible with a size that is useful in combat situations where you have to avoid big attacks, giving options on where you can position yourself and still benefit from this huge damage boost. Clever use of Weapon Set passives allow us to unspec non-essential damage passives from Weapon Set 2 so we can allocate these points into Increased Area Effect and Increased Skill Duration clusters while allocating the damage nodes back to Weapon Set 1 to avoid any damage loss on our damage skills.
Sigil of Power to last as long as possible with a size that is useful in combat situations where you have to avoid big attacks, giving options on where you can position yourself and still benefit from this huge damage boost. Clever use of Weapon Set passives allow us to unspec non-essential damage passives from Weapon Set 2 so we can allocate these points into Increased Area Effect and Increased Skill Duration clusters while allocating the damage nodes back to Weapon Set 1 to avoid any damage loss on our damage skills.
Mana Stacking
This starter build doesn't play entirely into the mana stacking tech as mentioned above as we don't take ![]() Mind Over Matter &
Mind Over Matter & ![]() Eldritch Battery by default.
Eldritch Battery by default.
It does however have Arcane Surge on by default from the ascendancies as well as ![]() Arcane Intensity in the passive tree. What these allow are the ability to scale your cast speed, mana regeneration and damage through stacking mana so it's important to try prioritise this where you can.
Arcane Intensity in the passive tree. What these allow are the ability to scale your cast speed, mana regeneration and damage through stacking mana so it's important to try prioritise this where you can.
The Endgame Variants choose to take both of the above key passives are taken which also scales the defensive capabilities of the build as well. This requires a minimum of 800 - 1000 Maximum Mana for the Early Endgame Variant and recommended 2500+ Maximum Mana for the Mid/Late Endgame Variants.
Changelog
8th December / v0.1
11th December / v0.2
12th December / v0.3
13th December / v0.4
14th December / v0.5
18th December / v0.6
19th Dec. 2024 / v0.7
20th Dec. 2024 / v0.8
22nd Dec. 2024 / v0.9
23rd Dec. 2024 / v0.9.1
24th Dec. 2024 / v1.0
25th Dec. 2024 / v1.1
28th Dec 2024 / v1.2
6th Jan. 2025 / v1.3
7th Jan. 2025 / v1.4
- Added Gem Quality Priority to all Variants.
12th Jan. 2025 / v1.5
- Added Pinnacle Variant (Work In Progress).
- Added
 Sigil of Power to Weapon Set 2.
 - Updated T16+ Passive Tree & Equipment.
15th Jan. 2025 / v1.6
- Added Gem Socket Priority to all Variants.
16th Jan. 2025 / v1.7
- Added
 Sigil of Power to all Variants.
 - Updated all Variants Passive Trees.
5th Feb. 2025 / v1.8
- Updated Pinnacle Equipment.
- Updated Pinnacle Passives.
- Updated Pinnacle Skill Gems.
- Updated Stat Priorities.
- Added Socketables to all Variants.
Video Guide
Table of Contents
Featured Builds
Become a Creator
Want to earn rewards by sharing your builds with your community?


