menu
MobalyticsUse your favourite features in-game with our Desktop App
PoE 2 Build

Despair Archmage Gemling

presentationMercenary
presentationGemling Legionnaire
End Game
0.5.5 FR
Creator
Featured
Updated on Sep 22, 2026
Sep 22, 2026

Build Overview

This is a Low Life Crit Despair Gemling Legionnaire built around Impending Doom, Archmage and Cursed Ground, with one main goal: make mapping as effortless as possible without giving up the ridiculous scaling Gemling can provide.

The actual gameplay is extremely simple. Despair is the only active skill I use. There are no manual buffs, extra debuffs, movement skills or boss rotations to manage. Everything else on the character is either persistent or automated. You simply cast Despair in the general direction of enemies and let Doom Blast do the rest.

Underneath that simple playstyle there are quite a few interactions working together. Cursed Ground + Spell Cascade constantly replaces our active cursed areas, causing Despair to expire and triggering Impending Doom / Doom Blast. We then scale that damage heavily through Archmage, maximum Mana, critical strikes, Despair gem levels and quality, together with additional damage coming from our gear, rings and jewel setup.

We use Atziri's Communion together with Clarity II to move Archmage reservation onto Life and push ourselves onto Low Life, allowing us to benefit from Low Life scaling such as Pain Attunement and Execute III while still keeping more than 1,600 Life available.

Mana sustain is handled through a combination of Mana Remnants, mana regeneration and Virtuous Barrier. Even though we intentionally take Raw Mana and Despair costs around 173 Mana per cast, the build comfortably sustains continuous casting while mapping. Mana Remnants can also overflow our Mana pool, which makes the whole setup feel considerably smoother.

Gemling Legionnaire is where most of the strange stuff starts happening. We use Gem Studded, Essence of Virtue, Advanced Thaumaturgy and Neurological Implants. Red, Green and Blue support gems are deliberately kept at the same count so we can benefit from all three Gem Studded bonuses at once, while filling our skill slots also allows Virtuous Barrier to generate a large number of Motes.

The current setup has 18 Intelligence Motes, 10 Dexterity Motes and 3 Strength Motes. Intelligence Motes are especially valuable because they give us a huge amount of Mana regeneration, while the entire Mote setup adds another layer of passive scaling without adding anything to the actual gameplay rotation.

We also use Thaumaturgic Generator together with Charge Regulation to automatically generate charges. Because the character is heavily Intelligence weighted, we generate mostly Power Charges, with occasional Frenzy Charges, giving us another source of critical strike scaling and speed without pressing another button.

The character currently pushes Despair to level 39 and 40 quality, with additional scaling coming from our wand, focus, amulet, passive tree and jewels. The build also makes heavy use of critical strike scaling, including our Time-Lost Sapphire and other jewel slots, while the rings provide another meaningful source of offensive scaling rather than simply being resistance fillers.

For mapping I use Headhunter, which fits the build extremely well. The character already feels good before any rare-monster buffs are active, but once Headhunter starts stacking buffs the build gets much faster and starts to feel almost like an autobomber.

I've comfortably used this setup for 200% Delirious T16 maps, Citadels, Breach, Abyss and general juiced mapping. Clear is easily the strongest part of the build. Boss damage is perfectly usable, but this isn't designed as an instant Pinnacle-boss deletion character.

The main weakness of my current version is EHP. There is plenty of room to invest further into defence and damage, and considerably more expensive versions of the archetype exist, but the current setup already does everything I wanted from it without sacrificing the lazy one-button playstyle.

Strengths and Weaknesses

  • True one-button gameplay
    Despair is the only active skill you need to press. No manual buffs, no debuff rotation, no movement skill setup and no piano gameplay.
  • Excellent mapper
    Huge Doom Blast coverage, strong AoE and almost auto-aim style clearing make the build extremely comfortable for juiced mapping.
  • Very strong Archmage scaling
    Over 5,000 maximum Mana gives Archmage a large amount of extra Lightning damage, while Mana Remnants and heavy Mana regeneration keep the Mana Despair cost comfortable.
  • High Despair scaling
    The build reaches level 39 Despair and 40 quality, which heavily scales Doom Blast because Impending Doom inherits the level of the supported curse.
  • Excellent Gemling synergy
    Gem Studded, Advanced Thaumaturgy, Neurological Implants and Essence of the Virtue all provide meaningful scaling instead of being isolated bonuses.
  • All three Gem Studded bonuses active
    Red, Green and Blue support gems are deliberately balanced at the same count, allowing the character to benefit from all three bonuses simultaneously.
  • Strong passive automation
    Virtuous Barrier, Motes, Thaumaturgic Generator, Charge Regulation, Blasphemy and Mana Remnants all work in the background without adding extra buttons.
  • Permanent Low Life setup
    Atziri's Communion + Clarity II pushes the character onto Low Life while still leaving over 1,600 Life, allowing us to benefit from Pain Attunement and Execute scaling.
  • Great quality of life
    Temporal Chains through Blasphemy applies around 76% slow, making dangerous packs much easier to control.
  • Plenty of room to scale further
    The current version is not fully min-maxed. Curse radius, defences, jewels, Despair level and several gear slots can still be improved with more currency.
  • Not designed as a boss-delete build
    Boss damage is completely usable, but this build is primarily a mapper. Do not expect instant Pinnacle boss kills.
  • Current version is not especially tanky
    EHP is the biggest weakness of the present setup. It can handle difficult maps, but large hits can still punish you.
  • Low Life adds defensive pressure
    Reserving Life for Archmage gives us extra offensive scaling, but naturally leaves less raw Life available for incoming damage.
  • Several mechanics need to be set up correctly
    Despair quality, gem levels, Gem Studded colour balance, Low Life reservation and Mana sustain all matter. The gameplay is simple, but the character underneath it is not.
  • The build wants a lot of specific stats
    Maximum Mana, gem levels, crit, cast speed, quality and Mana regeneration all compete for gear space.
  • Headhunter performance is naturally inconsistent
    Once buffs start stacking the build can become ridiculous, but that extra power depends on the rare monsters available in the map.
  • Higher-end defensive - offensive upgrades can get expensive
    Turning the character into a substantially tankier version with more damage would require significantly more investment and potentially a different gearing direction.

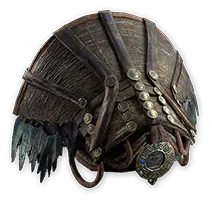
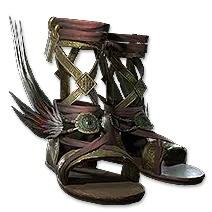
Equipment

item
2
item
4
item
1
item
7
item
6
item
5
item
3
item
8
item
9
item
10
item
item
item
item
item
Jewels
item
item
item
item
item
Equipment Priority
+10
  • Despair Levels
    Prioritize +levels wherever possible. Wand, focus, amulet, Prism of Belief and passive-tree scaling are huge because Doom Blast inherits Despair’s level.
  • Maximum Mana
    Mana directly scales Archmage damage, so high Mana on your gear is one of the most important offensive stats.
  • Critical Strike Scaling
    Spell crit, generic crit and critical damage bonus are all very strong once your Despair levels and Mana are in place.
  • Despair Quality
    Aim for 40 total quality through the gem, amulet, Paragon, body armour rune and Advanced Thaumaturgy.
  • Faster Curse Activation
    Very important for making the build feel smooth. Our setup reaches around 87% faster Curse Activation through the passive tree and jewels, heavily reducing Despair’s activation delay.
  • Rings
    Don’t treat them as resistance fillers. Use rings that add meaningful damage or Mana scaling alongside whatever resistances you need.
  • Cast Speed
    Helps the build feel smoother and increases how quickly we replace Cursed Ground and trigger Doom Blast.
  • Jewels
    Time-Lost Sapphire, Prism of Belief and Split Personality are all important damage pieces. Prioritize crit, Chaos damage, useful radius effects and Despair levels where available.
  • Defences / Resistances
    Once the damage engine is working, use the remaining gear slots to patch Energy Shield, Life, Chaos resistance and general survivability.
  • Headhunter
    Excellent for mapping and adds a lot of damage and speed once buffs start stacking, but the core build still functions without it.

Skill Gems

Support Gem Requirements:

Str 60

Dex 60

Int 60

1

Virtuous Barrier

Level 20

supportarmourdemolisherplayer
2

Spellslinger

Level 18

3

Mana Remnants

Level 18

supportfleetingremnantsplayertwo
supportkhatalsrejuvenationplayer
supportinterludeplayerthree
4

Archmage

Level 18

supportlightningmasteryplayer
supportatziriscommunionplayer
supportclarityplayertwo
5

Voltaic Mark

Level 11

supportcooldownrecoveryplayer
supportefficiencyplayer
supportarmourdemolisherplayer
prolongeddurationsupportplayer
6

Sniper's Mark

Level 9

supportchargeprofusionplayer
supportchargedmarkplayer
supportsecondwindplayer
supportmobilityplayer
7

Bloodhound's Mark

Level 10

supportslowpotencyplayer
supportincreaselimitplayertwo
supportpinplayer
supportbrutalityplayer
supportmarkfordeathplayer
8

Detonate Dead

Level 17

supportcorrosionplayer
supportarmourdemolisherplayer
supportdeadlyignitesplayertwo
supportbrutalityplayer
9

Blasphemy

Level 19

temporalchainsplayer
supportmagnifiedareaplayertwo
supportslowpotencyplayer
supportritualisticcurseplayer
supportarmourdemolisherplayertwo
10

Charge Regulation

Level 20

11

Arctic Armour

Level 19

supportcoldmasteryplayer
supportcooldownrecoveryplayer
supportblindsideplayer
12

Despair

Level 20

supportcursedgroundplayer
supportspellcascadeplayer
vicioushexsupportplayer
supportzenithplayertwo
supportexecuteplayerthree
Gem Priority
+37

Passive Tree

main:
123
123
set 1:
20
20
set 2:
20
20

Quest Rewards

Check which quests you’ve completed on your character
ClearfellBeira of the Rotten Pack
+10% to Cold Resistance
FreythornThe King in the Mists
+30 to Spirit
Ogham ManorCandlemass, the Living Rite
+20 to maximum Life
The Spires of DesharSisters of Garukhan
+10% to Lightning Resistance
Valley of the TitansMedallion
30% increased Charm Effect Duration
+1 Charm Slot
The Azak BogIgnagduk, the Bog Witch
+30 to Spirit
Jiquani's MachinariumBlackjaw, the Remnant
+10% to Fire Resistance
The Venom CryptsVenom Draught
25% increased Mana Regeneration Rate
Abandoned PrisonGoddess of Justice
30% increased Life Recovery from Flasks
Eye of HinekoraNavali's Rest
5% increased Maximum Mana
Halls of the DeadTribal Medicine
Not Specified2 choices
Halls of the DeadNgamahu's Test
+5% to Fire Resistance
Halls of the DeadTasalio's Test
+5% to Cold Resistance
Halls of the DeadTawhoa's Test
+5% to Lightning Resistance
The Khari CrossingMolten Shrine
5% increased Maximum Life
QimahTabana's Pillar
+5% to all Elemental Resistances
Kriar VillageLythara, the Wayward Spear
+40 to Spirit

How it Plays

This is about as simple as it gets.

You move through the map and cast Despair in the general direction of enemies. That’s your only active skill.

Despair creates Cursed Ground through Spell Cascade, which keeps replacing the existing areas and triggering Impending Doom / Doom Blast. Everything else happens automatically in the background.

There are no manual buffs, no extra debuffs and no boss rotation to remember.

While mapping, Mana Remnants keeps your Mana comfortable, Temporal Chains slows enemies heavily, Thaumaturgic Generator + Charge Regulation handle your charges automatically, and Headhunter adds another layer of speed and damage once buffs start stacking.

The build feels almost like an autobomber once it gets going. You cast roughly toward packs, Doom Blast covers a large area, and most of the screen disappears without needing precise targeting.

For bosses, the gameplay stays exactly the same.

Keep casting Despair and let the build do the rest.

How it Works

The build revolves around Despair + Impending Doom + Cursed Ground + Spell Cascade.

Spell Cascade keeps creating new Cursed Ground areas, but we can only have two active at once. As older areas get replaced, the curse ends and Impending Doom triggers Doom Blast.

From there we scale the damage through:

Archmage + maximum Mana for a large amount of extra Lightning damage.

Despair gem levels and quality because Doom Blast inherits the level of the supported curse.

Low Life through Atziri’s Communion + Clarity II, which enables extra damage from Pain Attunement and Execute.

Critical Strike scaling through our passive tree, jewels and gear.

Gemling mechanics such as Gem Studded, Virtuous Barrier, Motes and automatic charge generation.

Mana Remnants and heavy Mana regeneration keep the Mana Despair cost comfortable, while Temporal Chains, Arctic Armour and the rest of the automated setup provide defence and quality of life.

Faster Curse Activation is also important. Despair normally has a noticeable activation delay, so we stack around 87% faster Curse Activation from the tree and jewels. This makes the curse apply much faster and keeps the Doom Blast setup feeling responsive instead of sluggish.

Q&A

  • Why not use Doedre’s Undoing?
    Because this version scales Archmage. Doedre’s toads inherit the added mana cost, while our Doom Blast setup works much better with Cursed Ground.
  • Why does Despair cost Mana if we stack reduced cost?
    We intentionally take Raw Mana for the extra maximum Mana. Mana Remnants, Virtuous Barrier and heavy Mana regeneration make the cost comfortable.
  • Why do you have so many skills socketed if you only press Despair?
    They are there to balance Gem Studded support colours, fill Virtuous Barrier slots and influence Thaumaturgic Generator. They are not part of the active rotation.
  • Why are you using Atziri’s Communion?
    It moves Archmage reservation onto Life. Together with Clarity II it puts us on Low Life, enabling Pain Attunement and Execute scaling while freeing Spirit.
  • How important is Faster Curse Activation?
    Very important. This setup uses about 87% faster Curse Activation from the tree and jewels so Despair applies quickly and the Doom Blast cycle feels responsive.
  • Does the build need Headhunter?
    No. The build works fine before HH buffs. Headhunter just makes mapping much faster and more ridiculous once buffs start stacking. You can always go Mageblood for more consistent damage / defense utilities . Rare belt would work too, but i recommend any of the 2 unique ones
  • Why are we scaling Despair levels if Despair itself isn’t the damage?
    Because Doom Blast inherits the level of the supported curse. More Despair levels directly scale the damage of Impending Doom.
  • Why do we scale both Chaos damage and Lightning damage?
    Doom Blast has Chaos damage as its base, while Archmage adds a large amount of extra Lightning damage based on our maximum Mana. Both damage types matter.
  • Why is Despair only level 39 and not 40?
    Level 40 would be another strong upgrade, but the current setup already reaches 39 without using extremely expensive gear such as a perfect Runeseeker-style setup.
  • Why use a wand + focus instead of Runeseeker?
    It is a much more reasonable way to stack Despair levels while also getting Mana, crit and Cast Speed. The build still performs extremely well without immediately jumping into the most expensive weapon option.
  • Why use Sorceress Split Personality?
    It changes our effective starting position on the passive tree and gives access to a very strong cluster of critical strike nodes that fit this version well.
  • Why not stack as much Curse Radius as possible?
    Because it competes with other useful stats like Mana, crit, Cast Speed and Curse Activation. The current radius already feels good enough for mapping, so I prioritize other upgrades first.
  • Why do we need Cast Speed?
    Cast Speed makes Despair feel smoother and lets us replace Cursed Ground areas faster, which means more frequent Doom Blast triggers.
  • Why do the rings have so much Mana and Cast Speed?
    The rings are real damage pieces for this build. Maximum Mana scales Archmage, while Cast Speed improves how quickly we cycle Cursed Ground and trigger Doom Blast.
  • Why are we using Temporal Chains if Despair is our main curse?
    Temporal Chains is mainly defensive quality of life. Through Blasphemy it slows nearby enemies heavily and makes mapping much safer and more comfortable.
  • Why Arctic Armour?
    It is simply another passive defensive layer that does not require any extra button presses, which fits the whole philosophy of the build.
  • Why don’t we use a movement skill?
    We don’t need one for the build to function. Sprinting and normal movement are enough for the content I’m running, and keeping the setup to one active skill is part of the appeal.
  • Can I remove some of the “unused” skills?
    You can, but you may lose Gem Studded colour balance, Virtuous Barrier Motes or change how Thaumaturgic Generator behaves. Those skills may look useless, but several systems depend on them being socketed.You can always experiment, just make sure you keep count of gems equal number
  • Why do we balance Red, Green and Blue supports exactly?
    Gem Studded checks which support colours are the most numerous. By keeping all three colours tied, we can benefit from all three bonuses at the same time.
  • Why are most of our automatically generated charges Power Charges?
    Thaumaturgic Generator is influenced by the attribute requirements of our socketed skills. Because this setup is heavily Intelligence weighted, Power Charges are generated most often, with Frenzy Charges appearing occasionally.
  • Why use Charge Regulation if we don’t manually generate charges?
    Thaumaturgic Generator handles the charge generation automatically. Charge Regulation then converts those charges into useful crit and speed bonuses without adding another button.
  • Why do we use so many Intelligence Motes?
    Intelligence Motes give a large amount of Mana regeneration, which is especially valuable because we intentionally keep a real Mana cost on Despair.
  • Why not just remove Raw Mana and make Despair free to use (0 mana) ?
    Because Raw Mana gives 10% increased maximum Mana, which directly improves Archmage scaling. The extra Mana cost is easy enough to sustain, so the trade is worth it.
  • Can I use Palm of the Dreamer instead of focus?
    Yes. I played with Palm of the Dreamer as well, and it pushes the build even more toward the autobomber-style feeling. The wand + focus setup is the version shown in this guide.
  • Do I need the exact same Time-Lost Sapphire?
    No. The important part is placing it in a dense part of the tree and getting useful modifiers such as crit and Chaos damage, spell damage, etc from the nodes inside its radius.
  • Do I need exactly the same rare items as the guide?
    No. Prioritize the important stats: Despair levels, maximum Mana, Faster Curse Activation, Cast Speed, crit and enough defences/resistances to keep the character comfortable.

Comments

2
A
aVonts4h ago

Is it possible to start with this build? Or should I only switch to it in the endgame? Are there any guides or tips?

0
E
ExFluent
Author
3h ago

i wouldnt advice to start with this one, because there are alot of key interactions which works only when put together. Switch at the endgame, you can cruise through campaign and early endgame with grenades , twisters, totems, whatever fits your taste

1

Video Guide

Build Planner Export

Export all build variants directly to your game.

Path of Building Code

Table of Contents

Featured Builds

Despair Archmage Gemling
Updated on Sep 22, 2026
Disciple of Varashta CI
Updated on Sep 22, 2026
Infernal cry Gemling - Double setup
Updated on Sep 21, 2026
[0.5.5] Bonestorm Spell Totem Infernalist (GERMAN)
Updated on Sep 21, 2026
[0.5.5] Immortal Witchhunter Frostbolt Infinite Loop
Updated on Sep 21, 2026

Become a Creator

Want to earn rewards by sharing your builds with your community?