Hexblast in order to do any form of damage, requires the target to be cursed, this is where our
  Blasphemy &
  Despair setup comes into play. Getting a lot of AOE, allows us to cast Hexblast and mow down enemies without much effort at all, basically a 1 button build except when it comes to bossing and pinnacle bosses.
For Pinnacle bosses, we use 3 additional skills  Mana Tempest ,
  Essence Drain and
  Ball Lightning .
Let's take them 1 by 1.
Mana Tempest is a skill that drains your mana, but gives you massive damage, use it wisely and don't stay in the vortex too long as it can deplete your mana very fast. Avoid it if you're feeling overwhelmed.
Ball Lightning linked to Withering Touch will be our main source of wither for single target, giving us a boat load of extra damage. Linking it to Deceleration and Persistence just makes sense.
Essence Drain linked to Chaotic Freeze will bassicaly allow you to permanently freeze bosses, and give you even more damage, while adding Hinder gives you more freedom of movement as it slows targets down. Also since our  Summon Infernal Hound always ignites the target, Drain Ailments will make Essence Drain consume the ignite offering more damage in return.
In order to maintain very high stacks of demonflame, we need to lower our HP pool as low as we can, preferably under 200 HP, as after that, we start to get diminishing returns.
How to drop your HP pools? We use 3 main unique items  Ming's Heart
  Ghostwrithe . VERY IMPORTANT: catalyze your Ming's Heart with Flesh Catalyst, and then you can gamble a Vaal orb, and hopefully get some good results, in lowering your HP even more.
For Ghostwrithe remember to give it 2 sockets, quality it up to 20% and vaal it in order to have a change of getting 50%+ on your life conversion to energy shield.
Alongside having a lot of life recovery, preferably over 200 Total Life Recovery Per Second. You can see this in your stat page when pressing C.
How do we stay alive? Simple, we stack A LOT of Energy Shield, on all our pieces of gear, with a lot of life recovery.
This makes gearing rather niche, since not everyone is interested in selling gear that has no life. IT IS VERY VERY VERY IMPORTANT, to NOT HAVE ANY LIFE ON YOUR GEAR. The lower the HP pool, the more demonflame we have.
Gearing priorities are as following:
Helmet: Life Regeneration per Second, Resistances, Energy Shield, Mana
Gloves: Resistances, Energy Shield, Mana, (preferably triple res gloves since they can't roll Life Regeneration)
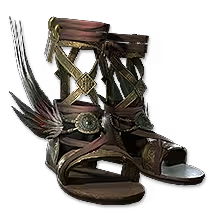
Boots: Life Regeneration per Second, Resistances, Energy Shield, Mana (I don't require movement speed on the boots, since the  Demon Form dash is insanely fast and covers a decent distance)
Belt: Life Regeneration per Second, Resistances, Energy Shield, Mana
Amulet: Life Regeneration per Second, + to all spell skills, Energy Shield, Mana, resistances
Jewels are VERY important for this build. Get as many jewels you can fit into the tree that have either %increased life recovery rate, or AOE, ideally both, but they can be very expensive.
Jewel can also roll resistances if corrupted, so make sure to check those out as well.
 Mask of the Stitched Demon can be used after going