While Iroi's obvious usage is pairing with Shinku in a Shinku Charge team, as a small upgrade over Nanally. Iroi has much wider usage and can slot in many other teams. The Blossom team is especially good and easy to play, and Iroi introduce the first mono Blossom version without Nanally
This team fully commits to the Blossom reaction, adding only Cosmos and Anima characters. Every time a character fills their Esper Meter, a Blossom is guaranteed. With Zero you trigger one Blossom. Hotori replicates it for another. Jiuyuan spawns two buds instead of one from every Blossom, up to a maximum of six buds at once
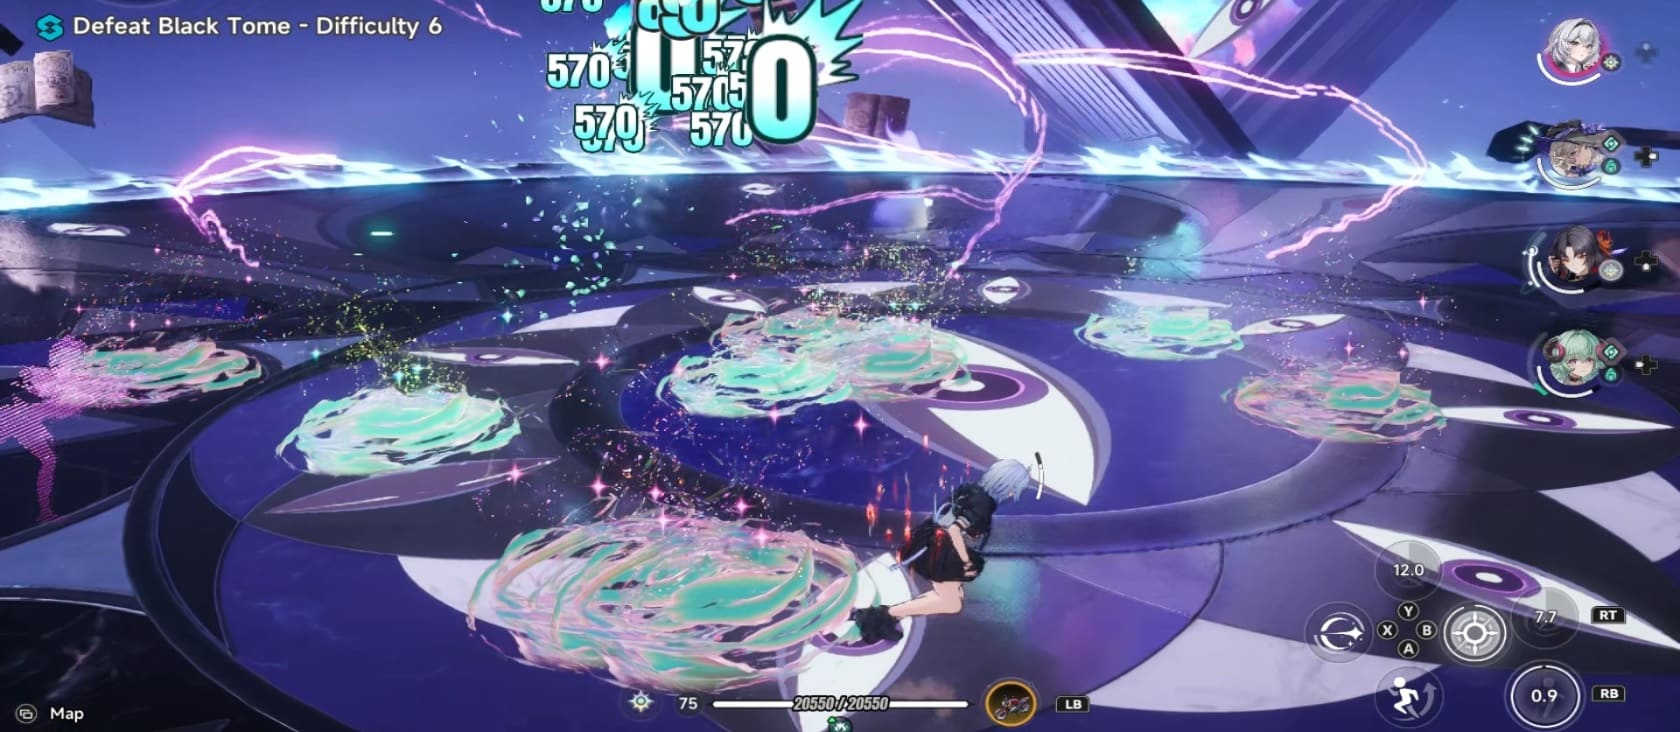
Iroi copies any bud that expires, and this copy doesn't count toward the six-bud cap. This means you can have more than six buds with Iroi, all of which keep firing during Hotori's time stop for massive DPS without the timer even ticking
Team Overview
CharacterIroi
WeaponThe Wrong Gate
CartridgeFireflies and the Forest (S)
CharacterHotori
WeaponMarching Beyond Time
CartridgeLost Radiance (S)
CharacterZero
WeaponThe Rain That Shook the World
CartridgeSpeedy Hedgehog (S)
CharacterJiuyuan
WeaponReality Refuge
CartridgeFireflies and the Forest (S)
The team combines the the best of two elements:
Cosmos: Hotori and Zero
Anima: Iroi and Jiuyuan
For other options, you can slot Nanally in palce of Hotori. You lose the ability to stop time, lose replicated skills, and generally get lower Esper Meter refill, in trade of getting Blossom buds to do hit twice as much (with a small caveat regarding Iroi copied buds not getting the double speed)
You can use Speedy Hedgehog (S) support set on either Iroi or Zero. Then build the other one with a DPS build (Lost Radiance (S) for Zero, or Fireflies and the Forest (S) for Iroi)
Cycle Intensity on Zero is a great stat to buff all Blossom damage. The Rain That Shook the World Arc - if available - is another source of Cycle Intensity for Zero, if not, use Day Off. The rest of the team uses a typical DPS build.
Character Passives Affecting Blossom:
Iroi: Mirror Image
Jiuyuan: Seize the Moment
Hotori: Ghost Orchid Crest
How to Play
Overall Concept
We simply aim to limit all the team reactions to Blossom, and repeat it as many times as possible. With Iroi copying Blossom buds and her own buds not counting towards the cap, this team can accumulate huge number of Blossom buds on the field. All of them will keep shooting through Hotori's time stop.
Jiuyuan doubles the Blossom Buds summoned by Blossom reaction. Iroi doubles them again via copying. Zero make the reaction instant with skill. Hotori replicate the instant reaction of Zero while also replicating Iroi skill and stopping time during Ultimate. All 4 characters contributes DPS. While Iroi buffs Attack and DEF ignore of entire team.
Instant Esper Meter Refill
Zero’s skill Appraise and Engrave grants 100 Cycle Energy upon use. Which fills Zero’s Esper Meter in one go and allows an instant Blossom reaction after swapping to any Anima character.
Replicating Esper Meter Refill
For 5 seconds after using Hotori’s skill, she records one skill use for each character, and after her ultimate, a shadow of characters replicates their skill, including Zero's skill for a another refill of Esper Meter. Swap back to Zero after Hotori's Ultimate ends, then to an Anima character for a second Blossom reaction.
Natural Esper Meter Refill
Other characters refill their Esper Meter through their typical rotation over a longer time, or instantly through a parry. Both Iroi and Jiuyuan will accumulate Esper Meter when they take field time and attack. Eventually, they will also fill their Esper Meter and cause more Blossom reactions.
Copying Blossom Buds and Machinegun Effect
After 3 seconds of a Blossom bud spawning, Iroi creates a copy of the bud. These copies doesn't count towards the 6-cap (from Jiuyuan passive), and doesn't benefit from the double speed in Nanally's passive.
The 3 seconds delay with the fact that Blossom buds shoots every 2 seconds enables the copied buds to shoot 1 second later after the original ones. It creates a constant shooting, alternating between original buds and copied buds in a machinegun effect. Especially when there are like 9 buds on the floor.
Scaling Blossom Damage
Blossom damage scales with the highest Cycle Intensity (CI) stat among the two characters involved in the reaction. By building Zero with the highest CI possible, all Blossoms triggered by switching from or to Zero will deal way more damage.
Each 6 points in CI is 1% Blossom Damage. So an average 300 CI is 50% Blossom damage multiplier, and at absolute max 396 CI for 66% multiplier.
Blossom also scale with Appraisal level (Account level), so the Blossom damage you see at early game will scale up at endgame.
Rotation Guide
At the beginning of combat in Beyond the Rail mode, all characters start with:
Empty Esper Meter
Fully charged Ultimate
That results in stark contrast between the first rotation with full Ultimate, and subsequent rotations, where you have to fully regain Ultimate energy. That’s especially important for Hotori, who controls the rotation pace with her timing. Note that Iroi skill cooldown is 12 seconds, which is different from the 16 seconds cooldown on the rest of the team.
First Rotation
Open with Zero’s Ultimate to kick off the team buffs.
Swap to Hotori and use her skill.
5- seconds countdown starts for recording skills.
10-seconds for Hotori’s Ultimate energy refill.
Use Zero’s skill (fills Esper Meter - records first skill)
Swap to Jiuyuan (her portrait should be glowing) to trigger her support skill (triggers Blossom - records second skill)
Use Jiuyuan Ultimate
Swap to Iroi, and use her skill (records third skill)
Use Iroi normal attacks to build up Imagination stacks.
Use Iroi Ultimate when her Imagination stacks reach threshold.
Switch to Hotori and use her Ultimate (time stops - recorded skills repeat - Zero’s Esper Meter refills)
Use 10x Ultimate-normal attacks, to trigger the Ultimate burst
Hotori’s Ultimate ends. Time resumes
If you are precise, this first rotation takes only 10 seconds on the stage timer thanks to time stop. Hotori’s energy bar is now empty and will need 20 seconds to refill. To use Hotori’s skill, she needs 10 more seconds, taking the duration of the next rotation to +30 seconds, and changing the rotation order.
Second Rotation & beyond
Switch to Zero, then instantly switch to Iroi (portrait's glowing) to trigger Blossom.
Use Iroi Skill
Swap back to Zero to use Ultimate and Skill (refill Esper)
Swap to Jiuyuan to trigger another Blossom
Use Jiuyuan’s skill
Use Jiuyuan's 6x charged attacks if her Ultimate is not ready
Switch to Iroi and use her normal attacks, her Esper should be almost full from previous rotation.
Swap to Zero once her Esper Meter refill to trigger Blossom
When Zero cooldown is almost finished, swap to Hotori
Use Hotori’s skill (5 seconds countdown starts for recording)
Use Iroi skill
Use Zero's Skill (fills Esper Meter)
Switch to Jiuyuan to trigger Blossom
Use Jiuyuan's skill and - if ready - Ultimate
Use Jiuyuan's 6x charged attacks
Use Iroi skill as it will become available before other characters
Use Iroi normal attack and Ultimate when Imagination is full
Switch to Hotori and go through Ultimate > recorded skills repeat > 10x Ultimate-normal > burst
Time stops ends
This concludes the 30-second secondary rotation, and returns you to almost the same point after the first rotation. Repeat for subsequent rotations.
Parries in the Rotation
Parries are invaluable in Blossom team, each parry equals four Blossom buds (two from the reaction with Jiuyuan passive, and two copies from Iroi after 3 seconds)
You can parry with any character you like beside Hotori, her CI is low and her blossom wastes bud count.
For maximum optimization, if a character Esper Meter is nearly full and a parry window opens, quickly switch to a character with near empty Esper Meter. That way you can get two reactions, not just just one.
Additional Notes
Thing You Should Not Do
Don't use Iroi Ultimate while her Imagination bar is empty. This will trigger the healing, but will not deal damage.
Never use Iroi hold skill, this will kill the entire team, and turn them into sheeps.
If an ally falls, it's easier to reset the stage than try dealing with Iroi's revive. Her revive is just temporary for a brief period after using her Ultimate.
Never switch from Anima character with full Esper Meter to Hotori, her CI is low and her Blossom deal lower damage.
During Hotori recording, don't switch from Anima character with full Esper Meter to Zero. This will record Zero's their support skill instead of the redirect skill and you miss a reaction.
Never use Hotori’s skill while Zero’s skill on cooldown, this can also miss a reaction
Don’t use Hotori’s skill twice in a row. The game will not stop you from doing so, but it will waste so much energy and time. If you are unsure, check above her HP bar, you will see the number of recorded skills. If it’s empty, you are yet to use her skill and record allies skills.



 Iroi
Iroi Hotori
 Zero
Zero Jiuyuan
 Nanally
 Mint
Mint Iroi's obvious usage is pairing with
  Shinku in a Shinku Charge team, as a small upgrade over
  Nanally.
  Zero you trigger one Blossom.
  Hotori replicates it for another.
  Jiuyuan spawns two buds instead of one from every Blossom, up to a maximum of six buds at once



 Zankou
 Linko
Linko Lacrimosa
 Sakiri