menu
MobalyticsUse your favourite features in-game with our Desktop App
Genshin Character

Mavuika Build Guide

presentationMavuika
Updated on Jul 15, 2026
Jul 15, 2026

Character Profile

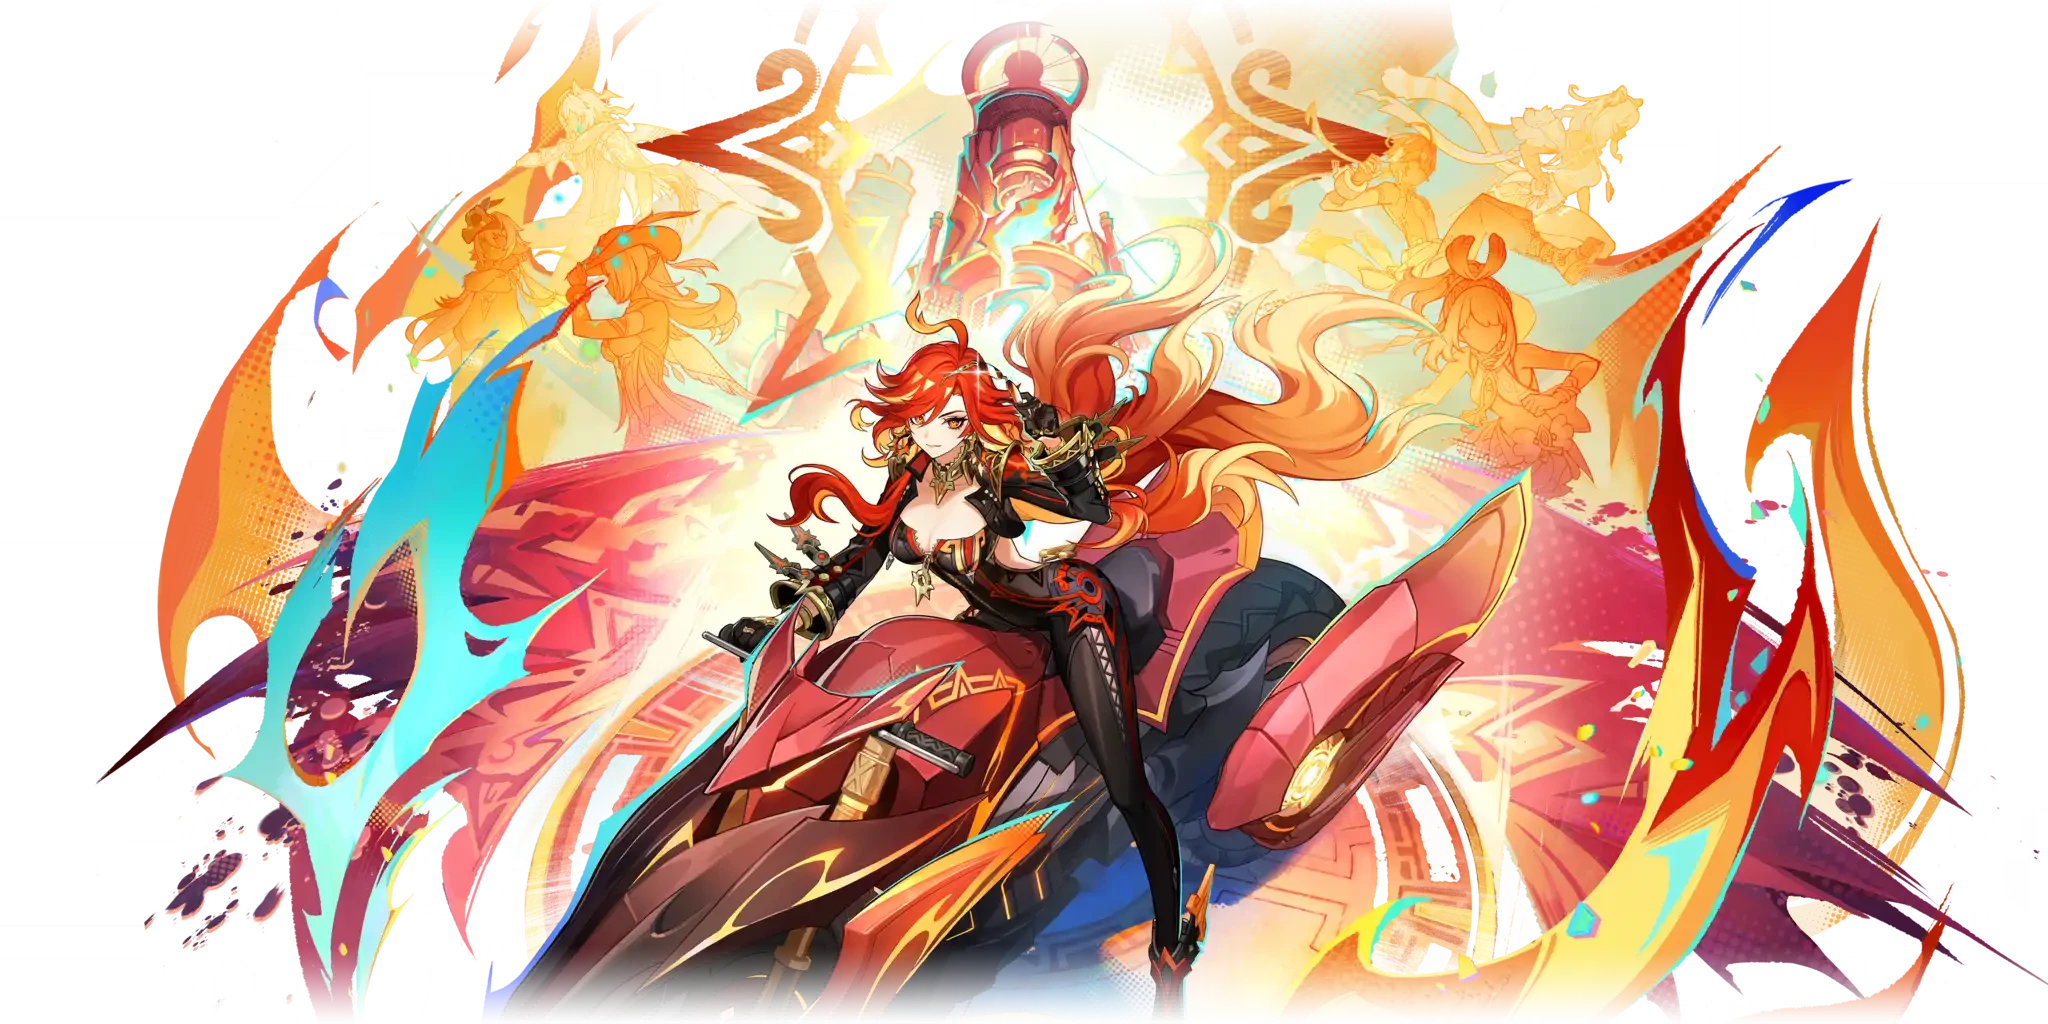
Mavuika, The Pyro Archon, is the best Pyro on-field DPS, one of the best on-field carries in general, and a strong support for other Nightsoul teams. Mavuika proves able to rise to the top of just about every Pyro archetype, although she might require some skillful gameplay to do so. Mavuika does not run on regular Elemental Energy. Instead, Mavuika will generate Fighting Spirit whenever herself or a teammate uses Nightsoul Points. This does slightly limit her options to requiring at least 1 more Natlan unit, but that generally shouldn't pose too much of an issue.

With several and varied viable teams, a slew of supports to choose from and a very high skill ceiling, she’s able to contend with the top dogs for dedicated players. However, if one isn’t willing to learn her advanced mechanics and mechanically challenging combos, it is possible and even likely she will fall behind newly released DPS.

Build Overview

Weapon
BiSA Thousand Blazing Suns
Best 4 starSerpent Spine
Standard 5 starWolf's Gravestone
Best free optionTidal Shadow
Artifact
Artifact SetObsidian Codex
Artifact Stats
SandsATK %
GobletPyro DMG
CircletCrit Rate/DMG
Substats
1Crit Rate/DMG
2ATK %
3Elemental Mastery
4Empty

Energy Recharge Requirements: N/A

Mavuika does not scale on Energy Recharge whatsoever. It is entirely useless on her.

Elemental Mastery Sands is also a very viable alternative for Melt and Vaporize teams. It's a comparable stat to ATK % in the above teams, although not useful in Overload or Mono Pyro teams.

Skill Overview

Talents
Basic AttackFlames Weave Life
SkillThe Named Moment
BurstHour of Burning Skies
MiscEmpty
Passives
Ascension 1Gift of Flaming Flowers
Ascension 4"Kiongozi"
UtilityNight Realm's Gift: Exhaust Mode
ResonanceNight-Shattering Radiance

Best Teams

On-field Mavuika:

Melt

- Citlali - Iansan or Xilonen - Bennett or Nicole

  • Citlali is replaceable by other Cryo units with decent off-field application, such as Escoffier or Rosaria. However, they are significantly worse than Citlali, and tend to make Melt Mavuika worse than non-Melt Mavuika.
  • C6 Iansan is better than C0R0 Xilonen, otherwise they tend to be comparable. Sucrose and Kaedehara Kazuha can also be viable alternatives. C0R0 Nicole is roughly as good as C6 Bennett depending on her investment and the Mavuika combo used.

Considered Mavuika's 'premium' team for most, although not necessarily better than her other strong teams depending on the situation. Citlali's Energy can be difficult in Stygian Onslaught.

Example Rotation:

  1. Mavuika Tap Skill
  2. Bennett Skill Passion Overload
  3. Xilonen Skill Yohual's Scratch + N2
  4. Bennett Burst Fantastic Voyage
  5. Citlali Skill Dawnfrost Darkstar + Burst Edict of Entwined Splendor
  6. Mavuika Burst + Melt combo. Example: Q C3Fd C3Fd CF (will be explained further later in the guide)

Overload:

Mavuika - Chevreuse - Iansan - Ororon

  • Chevreuse is typically one of the best options for any Overload team, particularly at C6. Without C6, Bennett or Nicole can be good as well.
  • Iansan and Ororon provide Mavuika with a ton of Nightsoul. Iansan at higher Constellations is irreplaceable. Ororon without his C6 is very replaceable by Bennett or Nicole.

Example Rotation:

  1. Mavuika Tap Skill
  2. Ororon Skill Night's Sling + Burst Dark Voices Echo (at C6)
  3. Chevreuse (Burst with Noblesse Oblige) + Hold Skill Short-Range Rapid Interdiction Fire
  4. Iansan Skill Thunderbolt Rush (+Attack) + Burst The Three Principles of Power
  5. Mavuika Burst + Overload combo

This team will benefit significantly from learning Mavuika’s advanced Charged Attack Buffer Cancels. Thanks to this team’s very fast animations, it is recommended Mavuika spend some time on her Flamestrider outside of her Burst to fill in rotational downtime and do some extra damage.


Mona / Hexerei Vaporize

Mavuika - Mona - Sucrose or Xilonen - Iansan or Nicole

  • Mona is the only Hydro support to make Vaporize worth using over other team archetypes. Her Hexerei Buffs and access to Celestial Gift make her significantly than all other Hydro options.
  • Sucrose or Nicole are necessary to activate Mona's Hexerei buffs.. Sucrose + Iansan is a stronger combination than Xilonen + Nicole, but either works depending on your investment. Sucrose can provide extra Hydro Application with her Elemental Burst, whereas Xilonen has much longer lasting buffs.

This team is particularly difficult to play at a high level. We will provide 2 Example Rotations: a simpler and less detailed one, and a much stronger advanced one.

Simpler Example Rotation:

Iansan Skill + Burst → Mavuika Hold Skill + N1 → Sucrose Skill + Burst → Mona Skill + Burst + N2 → Mavuika Burst + Vaporize Combo

Advanced Example Rotation:

  1. Mavuika Tap Skill
  2. Iansan Skill + Burst
  3. Mona Burst Stellaris Phantasm + N1 + Skill Mirror Reflection of Doom + N1
  4. Sucrose Skill (Swirl Hydro) + Burst + N1 (Swirl Pyro)
  5. Mavuika Burst + Vaporize combo


Other decent teams

Mono Pyro: Mavuika - Xilonen - Iansan - Bennett or Nicole

Kazuha is also usable here. Similar to Overload, although usually worse if Chevreuse is at C6. If she isn't, or if Xilonen has vertical investment, it can be better. It also doesn't require consistent Electro Application for RES Shred.

Lunar-Charged + Vaporize: Mavuika - Columbina - Ineffa - Xilonen

The Bineffa core lets Mavuika Vaporize her Sunfell Slice as well as most of her Flamestrider hits that can trigger Vaporize. While not the best use for any of these units, it is decent and viable against endgame scenarios like the Knuckle Duckle in Stygian Onslaught.

Off-field Mavuika:

Mualani:

Mualani - Mavuika - Sucrose - Mona

  • Mona without Sucrose here will lose her Hexerei buffs unless another Hexerei unit like Albedo or Durin is used. Xilonen and Citlali are competent replacements.

The Mona + Sucrose core tends to be by far the strongest core here, but can be tricky to play. It is worth learning to play it for Mualani. It also lets Mavuika Vaporize her Sunfell Slice while having all of Mona's buffs up.

Example Rotation:

  1. Mavuika Tap Skill
  2. Mona Skill + Burst + N4
  3. Sucrose Skill
  4. Mavuika Burst + N1
  5. Mualani on-field combo


Varesa

Varesa - Mavuika - Chevreuse - Iansan

  • Mavuika is typically as good as Durin in this slot, particularly if you can do her Buffer Cancel combos. Iansan at C6 makes her much stronger as well, thanks to her increased buff duration.

Example Rotation:

  1. ( Varesa Skill Riding the Night-Rainbow + Plunge first rotation )
  2. Chevreuse Burst (with Noblesse Oblige) + Hold Skill
  3. Mavuika Tap Skill + Burst
  4. Iansan Skill ( + Attack ) + Burst
  5. Varesa on-field combo


Chasca

Chasca - Mavuika - Citlali - Iansan or Nicole or Bennett

Those last 3 are about as good as each other, depending on investment

Chasca has overall stronger teams nowadays, particularly if the focus is on Chasca’s personal DMG – a very significant portion of this team’s damage is getting Mavuika to Melt her Sunfell Slice – but this remains a decent option for certain content.

Kinich Burning:

Kinich - Emilie - Mavuika - Iansan or Nicole

While Durin would be considered a better option here as well nowadays, if Iansan is at a higher Constellation, Mavuika can be competitive. The Hexerei core is generally superior.


Non-Natlan carries:

Ganyu or Wriothesley - Mavuika - Xilonen - Nicole

Navia - Mavuika - Xilonen - Nicole or Bennett

Mavuika should generally be considered a Durin downgrade these and most such teams. She can still be a strong slot with some vertical investment, but will handily lose out to the Hexerei cores at equal investment.

Best Weapons

BiS Option: A Thousand Blazing Suns

Mavuika’s Signature has a very high Base ATK, which can devalue Flat ATK buffs. However, it works great with the large amount of ATK% she tends to receive. This weapon’s passive is good enough that it tends to be one of the better options for any ATK-based Claymore carry, even if they can’t trigger the secondary effect. It is significantly better than other options on Mavuika, typically by about 20-30%.


Best 4 star: Serpent Spine

An excellent option provided you can upkeep its passive – this will generally require a shield, which is easy enough to maintain through Citlali or Nicole. The relatively high Crit Rate secondary stat can make it difficult to build alongside the 40% given by Obsidian Codex. Despite these flaws, it tends to be an excellent option for Mavuika.

Other 5 star stat sticks: Wolf's Gravestone, Beacon of the Reed Sea, Fang of the Mountain King, etc

These are all varying flavors of decent, and will tend to be slightly better than, comparable to, or worse than Serpent Spine depending on the refinement of your Serpent Spine and your artifacts.


Best Free option: Tidal Shadow

The Fontaine Craftable is Mavuika’s best freely accessible option. Virtually every one of Mavuika’s teams will have some form of healing in them, whether it’s through Iansan or Bennett or Chevreuse, so she’ll generally be able to make full use of the passive. As someone who receives as much ATK as her however, this isn’t the strongest.

Mailed Flower: An older Event Weapon that’s usable in Melt teams specifically. She can’t maintain full uptime of the passive generally, but if no stronger option is available, it’ll do the job fine.


Best Artifacts & Stats

BiS option: Obsidian Codex

The dedicated set for Natlan on-field units. Despite Mavuika seemingly not being able to easily fulfill the conditional, she actually gains and consumes a little Nightsoul during her Burst animation and can maintain uptime on the 4pc effect for almost the entirety of her Burst’s Enhanced State duration. Since this shares a domain with Scroll of the Hero of Cinder City, it's highly recommended to farm it if planning to play Mavuika teams. Both sets are also available in the strongbox.


Strong alternative: Scroll of the Hero of Cinder City

Mavuika can be a user of it herself in certain teams, but if there is a different teammate that is able to make use of it that’ll most likely be preferable – most of her teams will have one such teammate, but something like Mualani / Sucrose / Mona won’t. Scroll becomes a quite strong set for her in those cases.

In a pinch: 2p2p combinations (ATK %, Pyro DMG, Elemental Mastery, etc): They can hold the fort down decently on the way to Codex, but make sure to farm or at least use the Strongbox for Codex. It's worth farming for if planning to play carry Mavuika.


Talent Priority

  1. Elemental Burst
  2. Elemental Skill
    >>>>
  3. Normal Attack

Mavuika's Normal Attack does not contain any relevant talent values, even though Mavuika's damage primarily comes from those actions. Her damage is contained in her Skill and Burst, primarily the latter.

Constellations

C1The Night-Lord's Explication
C2The Ashen Price
C3The Burning Sun
C4The Leader's Resolve
C5The Meaning of Truth
C6"Humanity's Name" Unfettered

Overview

Mavuika possesses some of the strongest Constellations in the game. Their value is primarily focused around on-field Mavuika, but off-field also benefits a good amount. On-field Mavuika tends to be either functionally all, or at least a very large majority of team DPS. This makes personal damage increases in her Constellations be approximate to team DPS upgrades.

Constellation Details & Approximate Damage Increase

C1 The Night-Lord's Explication: While not incredible, a very competent first Constellation. It can ease her Natlan requirements a bit, to the point of usually outright not needing a 3rd Nightsoul teammate, and the extra ATK% is nothing to scoff at. About a ~10% personal damage increase.

C2 The Ashen Price: One of the strongest Constellation 2 jumps in the game, about a 30-35% personal damage increase. To date the only Constellation to directly grant a Base ATK increase, which alone makes Mavuika do roughly 15% more damage before accounting for the massive Talent value increases. The 20% DEF Shred only works while Mavuika is off-field, and makes teams she’s a support in do ~15% more damage before accounting for any personal damage increases. Exceptionally powerful; C2 Mavuika is arguably the strongest C2 on-field DPS in the game to date.

C3 The Burning Sun: Very powerful for on-field Mavuika, granting an about 10% personal DPS increase. Less impressive for off-field Mavuika.

C4 The Leader's Resolve: Mostly just fine. Not nearly as good as the rest at its niche, but still decent. Better for off-field Mavuika than on-field.

C5 The Meaning of Truth: Nearly negligible, as very little of her damage at this point will come from her Skill’s Talent values. Most of it comes from her C2 and Elemental Burst.

C6 "Humanity's Name" Unfettered: To date one of the most powerful Constellations in the game, particularly for on-field Mavuika. The numerical increases are very significant. One thing to note is that the additional hits don’t apply any Pyro element even if they do Pyro damage, meaning they can’t react and won’t interfere with the team’s Reactions. This is generally a positive, as any additional Pyro application would make Melting stronger hits very inconsistent and difficult.

How to Play

Overview

Mavuika sports one of the more complex kits in the game. Mavuika is able to be played as either an on-field DPS or an off-field Sub-DPS and Support, and can seamlessly switch between the two at will. She accomplishes through her Elemental Skill, which puts her her Nightsoul's Blessing state and further into either the off-field Ring of Searing Radiance state through a Tap command or the Flamestrider state through a Hold command. While in either state, she can switch between the two through an extra Tap Skill command.

Elemental Skill, Flamestrider & Ring of Searing Radiance

When Mavuika's Elemental Skill is Tapped, Mavuika will deal Pyro damage around her and 5 Pyro particles upon hitting an enemy. She will then go into the Ring of Searing Radiance mode, periodically summoning AoE Pyro attacks in 2 second intervals. This effect will occur regardless of whether she’s on or off the field. While in this mode, she will constantly consume Nightsoul regardless of what other action she takes. The maximum amount of AoE hits she can perform is 6, with the first triggering 2 seconds after cast, resulting in a 14 second duration.


When her Skill is instead inputted as a Hold, Mavuika will mount her Flamestrider. She will deal AoE Pyro Damage in front of her and generate the same 5 Pyro particles on hitting an enemy. While riding the Flamestrider, Mavuika gains an entirely new Normal Attack and Charged Attack moveset alongside a special Dash and Jump.

  • Flamestrider Normal Attacks are a 5-hit combo that won’t be interrupted if Mavuika Dashes out of it. These are generally not as strong as Mavuika's Charged Attack.
  • Holding her Charged Attack will make Mavuika begin drifting in a circular motion, dealing damage to all enemies the Flamestrider hits; also known as a donut. If the player lets go of the Charged Attack button or Mavuika runs out of Nightsoul during a donut, she will perform a Finisher move and deal a large amount of damage. This is what Mavuika wants to perform while on-field.
  • These new moves deal Pyro damage and consume a certain amount of Nightsoul gauge on top of Mavuika’s passive consumption.
  • When Mavuika switches out of the field, she will automatically swap to the Ring of Searing Radiance mode, and will have to manually re-mount the Flamestrider when she switches back in.

Fighting Spirit, importance of Nightsoul teammates

Mavuika’s Elemental Burst does not use traditional Energy; she does not interact with Energy Recharge at all. Instead, Mavuika will track all Nightsoul consumption in her team and convert it into ‘Fighting Spirit’. She has a maximum of 200 Fighting Spirit but is able to use her Burst with as little as 100 Fighting Spirit at the cost of dealing less damage, with the bonus effects provided by her Burst scaling on the amount of Fighting Spirit consumed.

Mavuika herself will typically consume 80-90 Nightsoul per rotation, depending on rotation length, and she will additionally gain 1.5 Fighting Spirit whenever a teammate lands a Normal Attack. It is technically possible to use Mavuika outside of dedicated Nightsoul teams at a weaker potency because of this; however, note that since Mavuika does not want to use her Flamestrider Normal Attacks over her Charged Attack, she is not a strong on-fielder outside of teams with at least one other Natlanese teammate.


Elemental Burst Details

Mavuika’s Elemental Burst cast has an initial hit called the Sunfell Slice, dealing AoE Pyro damage in one of the strongest singular instances of damage in the game, immediately after which Mavuika automatically mounts the Flamestrider. For the next 7 seconds, Mavuika will gain the Crucible of Life and Death effect, significantly boosting the damage of her Flamestrider Normal Attacks and Charged Attack and pausing Nightsoul consumption for herself.

  • The damage of the Sunfell Slice as well as those NAs and CA will be boosted by an amount proportional to the Fighting Spirit she consumed to cast Hour of Burning Skies, so she is highly encouraged to use Nightsoul teammates; any Nightsoul the team consumes after Mavuika reaches 200 Fighting Spirit doesn’t have any effect though.
  • Through her Ascension 4 passive, Mavuika will grant the active character (whether it’s herself or a teammate) DMG Bonus scaling on the amount of Fighting Spirit consumed for the next 20 seconds, with this effect starting at 40% DMG Bonus and decaying by 2% DMG Bonus every second. After the Crucible of Life and Death effect is over or if Mavuika switches out, Mavuika’s Nightsoul consumption will proceed regularly.
  • While this Burst state is active, Mavuika should seek to maximize the amount of attacks she is able to use, which typically means getting as many Charged Attacks and Finisher moves as able to while taking care of triggering as many Elemental Reactions with them as possible if playing in Melt (or Vaporize). Mavuika’s Burst Normal Attacks are quite a bit weaker, and are not recommended.


Flamestrider Charged Attack & Beginner Advanced Mechanics

If you hold down the Charged Attack button and not let go, Mavuika will perform roughly 8 Cyclic hits and a singular Finisher move. This will deal a respectable amount of damage, but with advanced gameplay, Mavuika can do a lot more,

If played in a Citlali Melt team and Mavuika only holds down her Charged Attack, she will only Melt the initial Sunfell. Slice and 2 donuts. There are many ways to get more Melt hits, the easiest of which is performing a Jump after the first 4 donuts, then continuing her Charged Attack.

More advanced Mavuika players will want to perform further Charged Attacks, as well as more Finisher attacks. An example for Melt teams is the combo mentioned in the Teams section, Q C3Fd C3Fd CF. Let's break it down.

  1. Mavuika Skill → (rest of the team) → Citlali Skill + Burst
  2. Mavuika Burst → wait for Cryo to be applied to the enemy again → start Charged Attack with Mavuika and hold it down for 3 Cyclical hits, then let go. This will let Mavuika perform a Finisher which will trigger a Melt reaction. Quickly dash out of it.
  3. Repeat the same sequence as before
  4. hold down Charged Attack and let go after 1 more donut for another Finisher before starting the rotation over again.


Mavuika’s special Dash deals damage and shares Pyro application properties with the rest of Mavuika’s Flamestrider kit. This means that for optimal Melt reactions, these Dashes should hit the enemy.

Additional Info

Buffer Cancels & Advanced Advanced Mechanics

What is a Charged Attack Buffer?

When the game detects a Charged Attack animation for Mavuika’s Flamestrider, it 'buffers' or 'stores' the start-up animation for the Cyclic attack. This storage or buffering will last for a little while.

What is a Buffer Cancel?

A Buffer Cancel has two main components:

  • You have to perform a CA Buffer without going into the full CA animation.
  • You have to perform a Dash shortly after inputting the CA buffer input

When this happens, Mavuika will perform an unexpected sequence – she will perform a Dash first, and then go into the new CA animation that was Buffered. There are many, many ways to abuse this quirk, with the most common being performing this during an already on-going CA animation. When that happens, Mavuika will quickly execute a sequence of Charged Attack, Dash, Charged Attack, all of which will hit enemies in front of her.

The timing on this sequence is lenient but can be done very quickly with enough practice. It will result in two Charged Attack Cyclical hits striking the enemy back to back, with very little time in-between them.

Buffer Cancels are very powerful and let Mavuika perform significantly more hits than she would otherwise be able to, increasing her damage by up to 50% compared to performing the 8 Cyclic hits of a held down Charged Attack. Buffer Cancels are great in Reaction-less teams, as she doesn’t have to worry about maintaining a Cryo or Hydro Elemental Aura on the enemy like in Melt or Vaporize, though there are very strong combos utilizing the mechanic for those teams too.

Advanced Combos utilizing Buffer Cancels

In order to simplify the presentation of more complicated combos, the notation used in this guide will be outlined here:

  • Charged Attack input: C
  • Performing Charged Attack Cyclical hits / donuts: CX, with X being the number of Cyclical hits. C2 is 2 Cyclical hits, C3 is 3 Cyclical hits, etc
  • Letting go of Charged Attack to perform Finisher: F
  • Dash input: d
  • Elemental Burst cast: Q

We will notate the Charged Attack Buffer input sequence with Cd, with the full example sequence outlined above being CCd: Charged Attack input, second Charged Attack input, Dash.

The target combo for Reactionless teams then is:

Q CCdCd C1F CdCd C1F CdCd C1F

In simpler terms:

    1. Use Elemental Burst
    2. perform a Charged Attack into two Buffer Cancels in quick succession, then let Mavuika perform a Cyclic Attack and let go for a Finisher move
    3. perform two Buffer Cancels in quick succession to cancel out of the Finisher animation, perform a Cyclic Attack and let go for a Finisher move
    4. repeat step (c) again


This uses 6 Buffer Cancels to do a total of 10 Cyclical hits, 3 Finishers and 6 Dash hits and represents a massive damage increase compared to less complex combos. It is mechanically very difficult and requires significant practice to perform, but is well worth the reward for dedicated Mavuika players.


An example of a Melt combo that utilizes Buffer Cancels while not being too difficult is as follows:

Q (wait) C3F CdF CdF CdF

This only requires 3 Buffer Cancels and aims to trigger Melt on every Finisher hit for a total of 6 Melts (Q, first Cyclical hit, every Finisher). The Finisher is Mavuika’s strongest hit that isn’t Sunfell Slice and should be prioritized over other hits if possible.

There are various more Combos utilizing these Buffer Cancels. Players are encouraged to play around with Mavuika and find the ones that suit them and their needs.

Release Date

Mavuika was officially released in Genshin Impact on January 1, 2025, during the Version 5.3 update.

Portrait

mavuika


Table of Contents

Featured Characters

Sandrone Build Guide
By Mobalytics Updated on Jul 20, 2026
presentationSandrone
Featured
presentationSandrone
Featured
Columbina Build Guide
By Mobalytics Updated on Jul 20, 2026
presentationColumbina
Featured
presentationColumbina
Featured