menu
MobalyticsUse your favourite features in-game with our Desktop App
Genshin Character

Arlecchino Build Guide

presentationArlecchino
Updated on Jul 12, 2026
Jul 12, 2026

Character Profile

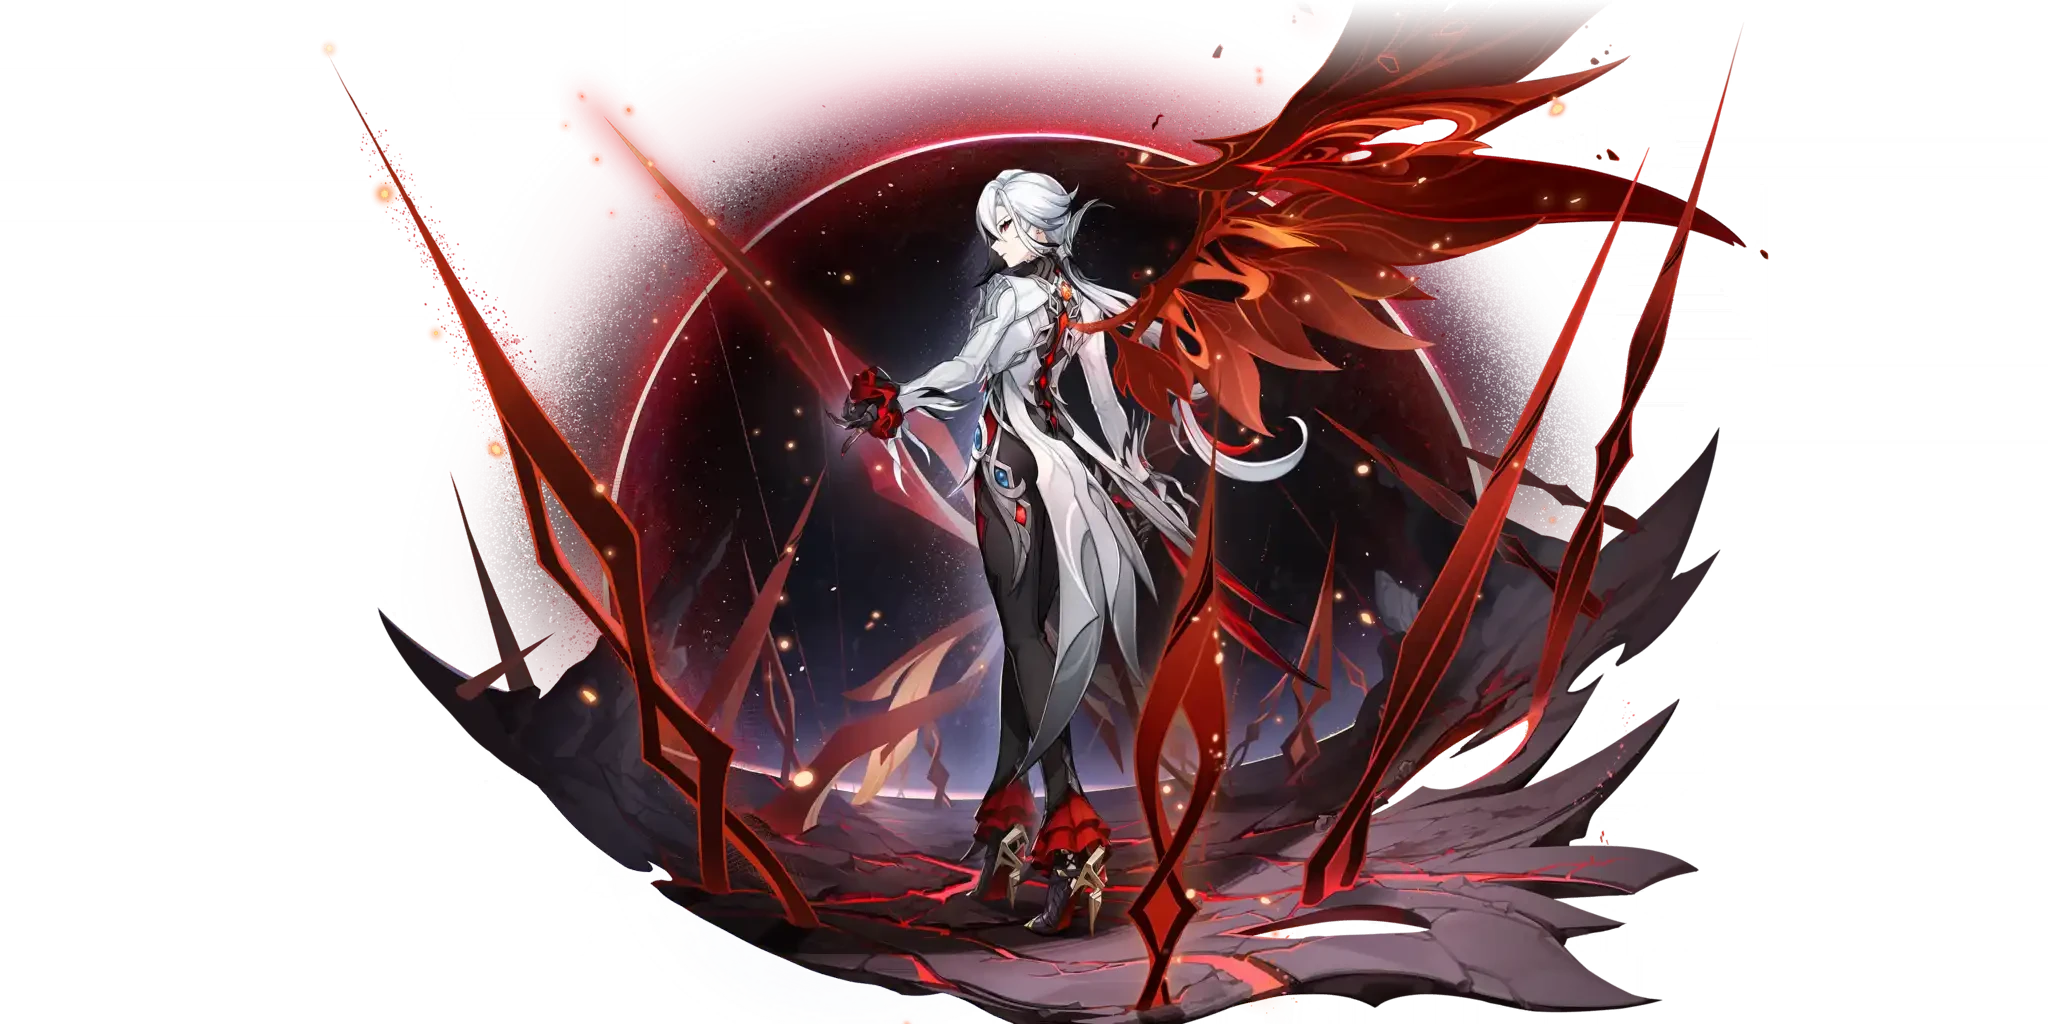
Arlecchino, the Harbinger known as the Knave and Father of the House of the Hearth, is a Pyro on-field DPS. Released at the tail-end of Fontaine,, she remains a very capable carry thanks to her unique interactions with the Bond of Life mechanic. Arlecchino will 'mark' enemies with her Elemental Skill, and then use her Charged Attack to claim those 'marks' and gain Bond of Life, which she can consume to deal significantly increased damage. This unique interaction alongside her Pyro element giving her access to many powerful Elemental Reactions, offer her a high degree of flexibility, plentiful teammates, and the ability to deal with varied content.

However, these strengths also come with a major downside: Arlecchino cannot heal while in combat without using her Elemental Burst, generally considered a significant loss of damage. Its animation is quite long, and it does not deal enough damage to make up for it. This makes dodging enemy attacks or using a Shielder vital to unlocking her full potential. Additionally, being released over two years ago means she has fallen behind newer characters in terms of damage, even if she is able to keep up with the current content thanks to many new support releases that she’s able to make use of.


Build Overview

Energy Recharge Requirements: N/A, Arlecchino does not want to use Burst actively

Weapon
BiSCrimson Moon's Semblance
5 star alternativePrimordial Jade Winged-Spear
Best 4 starDeathmatch
Best free optionWhite Tassel
Artifact
Artifact SetFragment of Harmonic Whimsy
Artifact Stats
SandATK %
GobletPyro DMG
CircletCrit Rate/DMG
Substats
1Crit Rate/DMG
2ATK %
3Elemental Mastery
4Empty

Elemental Mastery Sands is a very viable alternative for Arlecchino in Melt teams. ATK % Goblet can be within range of 1-2 substats of Pyro DMG Goblet.

Skill Overview

Talents
Basic AttackInvitation to a Beheading
SkillAll Is Ash
BurstBalemoon Rising
MiscEmpty
Passives
Ascension 1Agony Alone May Be Repaid
Ascension 4Strength Alone Can Defend
UtilityThe Balemoon Alone May Know
ResonanceEmpty

Best Teams

Arlecchino has many viable team archetypes, although the newest supports will be much stronger within those archetypes.


Overload:

Chevreuse - Fischl - Nicole or Durin or Bennett

Arguably the most versatile team archetype for Arlecchino, especially so with Nicole rounding out Arlecchino’s defensive weaknesses thanks to her powerful shield. C6 Chevreuse and C6 Fischl are both strong here, and the team might suffer for not having them. C6 Iansan can be equally as good as Bennett, but requires specific gameplay to consistently maintain her Nightsoul gauge up. Using Durin shifts the damage more away from Arlecchino and lengthens her usually shorter rotations.

Overall, Nicole is the clear best option, with Durin and Bennett being comparable to each other. If Chevreuse isn't C6, Durin can replace her. If using Nicole, make sure to use 2-3 Normal Attacks on Arlecchino before using Charged Attack to claim Bond of Life, in order to get higher uptime on Nicole's Grace of Theosis.

Example Rotation:

  1. Arlecchino Skill All Is Ash
  2. Nicole Skill Revelation: Uncreated Light (+ Burst Revelation: Ladder of Divine Ascent if necessary to fill out downtime)
  3. Fischl Skill Nightrider or Burst Midnight Phantasmagoria
  4. Chevreuse Hold Skill Short-Range Rapid Interdiction Fire (+ Burst Ring of Bursting Grenades if using Noblesse Oblige)
  5. Arlecchino combo

Melt:

Citlali - Xilonen or Sucrose - Bennett or Nicole

  • Citlali alternatives: Escoffier or Rosaria or Kaeya
    • All of the above and any other alternatives are significantly worse than Citlali. Citlali is highly recommended for Arlecchino Melt.
  • Xilonen or Sucrose alternatives: Kaedehara Kazuha or a second Cryo applicator like Escoffier.

Can be similarly powerful to Overload, but more challenging to use. Citlali can have Energy problems, especially in Stygian Onslaught, and there is significant damage variation in getting optimal Melts.

Example Rotation:

  1. Arlecchino Skill
  2. Bennett Skill Passion Overload + Burst Fantastic Voyage
  3. Xilonen Skill Yohual's Scratch + 2 Normal Attacks
  4. Citlali Skill Dawnfrost Darkstar + Burst Edict of Entwined Splendor
  5. Arlecchino Melt combo

Vaporize:

Mona - Sucrose - Bennett or Nicole

  • Mona: Necessary to make the team competitive. C2 is a significant upgrade, as is C4.
  • Sucrose alternatives: Xilonen (with Nicole)

Strong with the new Celestial Gift set, and can be competitive with Melt with some more advanced play. Other Hydro options are significantly worse even if easier to play, and you should probably opt for a different team instead of playing Vaporize without Mona.

Example Rotation:

  1. Arlecchino Skill
  2. Bennett Skill + Burst
  3. Sucrose Skill
  4. Mona Burst + Skill + N2
  5. Arlecchino Vaporize combo

Lunar-Charged + Vaporize:

Columbina - Ineffa - Xilonen

  • Replacing Columbina or Ineffa will make the team significantly worse, and if doing so, it's likely better to play a different team. Never replace both at once. Aino or Xingqiu or Yelan can replace Columbina, Fischl can replace Ineffa.
  • Xilonen alternatives: Bennett or Nicole, Nicole being particularly decent with Fischl.

Arlecchino can work with the Bineffa core fairly well. She can Vaporize a majority or even all of her hits able to trigger the Reaction without causing issues for Lunar-Charged.

Example Rotation:

  1. Arlecchino Skill
  2. Ineffa Skill Cleaning Mode: Carrier Frequency and / or Burst Supreme Instruction: Cyclonic Exterminator
  3. Columbina Skill Eternal Tides, Burst Moonlit Melancholy if available
  4. Xilonen Skill + N2
  5. Arlecchino Vaporize combo

Other teams:

  • Mono Pyro: Xilonen - Kaedehara Kazuha - Bennett or Nicole

Largely similar to Overload, but with lower damage and more utility if grouping is a relevant factor, such as against the Mandragora or Lunar Dog Bosses.

  • Emilie Burning: Emilie - Durin - Nicole

Less flexible than Overload and Mono Pyro, but the higher hit count thanks to the Burning reaction has potential uses against bosses like the Papila. Emilie and Durin form a very competent Sub-DPS core with Nicole but don’t offer many buffs, so the team’s damage profile shifts away from Arlecchino more than usual.


Best Weapons

Crimson Moon's Semblance: Arlecchino’s Signature Weapon. The unique passive offering extra Bond of Life on hitting a Charged Attack is decently more valuable than most any other stat buff. It also leans into Arlecchino’s frontloaded damage profile even more, a generally desirable trait. Good bit ahead of other options, and up to 30% better than White Tassel.


Primordial Jade Winged-Spear: The Standard Banner 5 star Polearm happens to be one of Arlecchino’s best 5 star alternatives. It sports the same statline as her Signature, making it easy to build for Arlecchino. She tends to stack the passive relatively quickly, making it as good as or better than more or less all limited 5 star options.

Staff of the Scarlet Sands: High Crit Rate can be annoying to build around and the passive doesn’t have very high uptime on Arlecchino, but it’s nonetheless the best 5 star option alongside PJWS, primarily for Melt and Vaporize teams. It makes Elemental Mastery a more valuable stat than ATK % in those teams.


Deathmatch: Arlecchino’s strongest 4 star option in most scenarios. Deathmatch’s low base Attack makes Flat ATK buffs like Bennett’s and Nicole’s very powerful, and the high Crit Rate synergizes well with them while not being too high to build around.

Ballad of the Fjords: The second Battle Pass weapon is similarly strong to Deathmatch in Melt teams specifically, and can even be a little better at high refinements, though not by a whole lot.

White Tassel Found in Exploration Chests scattered around Liyue and Chenyu Vale, making it entirely free. The exceptionally low Base ATK makes the Flat ATK Buffs of Bennett and Nicole even more important than usual, and makes ATK% substats relatively less of an increase. The secondary stat and passive nonetheless make it surprisingly alright.


Best Artifacts & Stats

Fragment of Harmonic Whimsy: Tailor-made for Arlecchino and usable in every of her teams. The stack build-up can nonetheless be a little annoying and conflicting with her very frontloaded damage profile. Crimson Moon's Semblance BoL on CA hit gain will net Arlecchino a second stack alongside the one she gets normally when claiming Bond of Life.


Gladiator's Finale: A viable alternative, provided the build has good sub-stat rolls. Not worth farming for instead of Whimsy in any way, but you are likely to have accumulated a few good pieces by simply playing the game. If you plan on playing Arlecchino, you should get a Whimsy set regardless.


2p2p combinations ( ATK % / Pyro DMG / Elemental Mastery): Quite a bit worse than the above 4pc options, but if you don't happen to have a Glad 4pc set, these will have to do.


Night of the Sky's Unveiling: When used alongside Columbina + Ineffa (or in general having Moonsign: Ascendant Gleam active), this set can even be better than Fragment of Harmonic Whimsy at lower Arlecchino investment.

Talent Priority

Normal Attack Invitation to a Beheading is Arlecchino's only particularly important talent. It contains almost the entirety of her damage. Only level Burst Balemoon Rising if you have C6, and Skill All Is Ash if you want the novelty / can afford to do so. The damage increase is negligible.

Constellations

C1"All Reprisals and Arrears, Mine to Bear..."
C2"All Rewards and Retribution, Mine to Bestow..."
C3"You Shall Become a New Member of Our Family..."
C4"You Shall Love and Protect Each Other Henceforth..."
C5"For Alone, We Are as Good as Dead..."
C6"From This Day On, We Shall Delight in New Life Together."

C1 "All Reprisals and Arrears, Mine to Bear...": Increases Arlecchino’s personal DPS by about 26-28%, which translates to a significant team damage increase in many of her due to her generally being the vast majority of team DPS, making it one of the most powerful early Constellations in the game. In Melt and Vaporize teams, the personal damage increase is the team damage increase. Becoming uninterruptible can also be very desirable, especially in teams without a Shield.

C2 "All Rewards and Retribution, Mine to Bestow...": Will summon a massive extra hit on claiming BoL after a short delay. This hit can trigger Elemental Reactions, making it very strong in Melt and Vaporize but not too strong in teams that don't let it trigger one. It does require some minor rotational changes, but ends up being significantly worth it. Being able to claim Bond instantly can be practical in many scenarios, such as in Overload teams with setups shorter than 5 seconds. The extra DMG reduction can be nice and make Arlecchino basically unkillable. This is especially true with a Shield, as it applies to them. Note that this explosion is an entirely separate damage instance and rotations in Melt or Vaporize might have to change to accommodate it.

C3 "You Shall Become a New Member of Our Family...": Roughly a ~15-16% personal DPS increase, one of the highest for a talent level Constellation. As Arlecchino's damage share in her teams is so high, it's also one of the best team DPS talent level Constellations.

C4 "You Shall Love and Protect Each Other Henceforth...": The Energy refund only matters with C6, where it is helpful in order to not have to build Energy Recharge.

C5 "For Alone, We Are as Good as Dead...": More or less entirely negligible without C6, but alright with it.

C6 "From This Day On, We Shall Delight in New Life Together.": Very powerful, but not quite to the level of a lot of modern Constellation 6s. Her Burst still isn’t worth using outside of Melt (and arguably Vaporize) teams, but it very much becomes so when used in Melt teams. The personal damage gain is hard to quantify, but it can make reaching Boss health thresholds much faster and easier. The Crit Value itself is enough of a buff to be decent, making it a very strong C6 overall.

How to Play

Overview

Arlecchino’s damage is built entirely around the Bond of Life mechanic. BoL normally acts as an absorption layer for incoming healing the character that has taken on Bond receives, but Arlecchino instead uses it as a damage resource. Thanks to her Ascension 4 Passive, Arlecchino cannot be healed while in combat under any circumstances except when using her Elemental Burst. This means that Arlecchino’s Bond will never absorb incoming healing, and will not be reduced on its own.

Instead, when Arlecchino has Bond of Life above 30% of her Max HP, she gains the Masque of Red Death effect: Arlecchino will gain a permanent and non-overrideable Pyro infusion. Additionally, each of her Normal Attacks will consume a set amount of Bond of Life, and deal accordingly incrased damage. She is able to switch out and maintain this infusion freely as long as her Bond remains above 30%. Arlecchino’s primary method of gaining Bond of Life is using her Elemental Skill to apply the “Blood-Debt Directive” debuff to enemies.

Blood-Debt Directive and gaining Bond of Life

Each enemy hit by Arlecchino’s Elemental Skill will be given a Blood-Debt Directive. It will last 30 seconds or until Arlecchino claims it through a Charged Attack or Elemental Burst, with the former method being part of her main gameplay loop. This Skill will generate 5 Pyro Particles on cast.

If Arlecchino immediately claims the Directive, it will grant her 60% Bond of Life. If she instead were to wait at least 5 seconds, the Directive will upgrade and increase the amount of Bond of Life gained to 130%. This is something generally required to use her effectively. Her Constellation 2 removes this requirement. If multiple enemies are hit, each of them will grant Bond; howeer, Arlecchino can only gain up to 145% Bond from a single claim. If an enemy dies while under the Directive but before Arlecchino has claimed it, she will be granted the corresponding Bond regardless.

Elemental Skill Cooldown & Using Bond of Life

Arlecchino's Elemental Skill has a baseline cooldown of 30 seconds, however, Arlecchino is able to reduce it by 0.8 seconds for every Normal Attack that hits an enemy while under her Masque of Red Death effect. Arlecchino's Elemental Skill's effective cooldown then becomes as low as just under 15 seconds, making rotation length heavily dependent on her teammates. Bear in mind that Arlecchino has a 5 second requirement for her Blood-Debt Directive to fully bloom without her C2. Typically, Arlecchino will perform rotations of 16-18s length.

Each of Arlecchino's Normal Attacks Invitation to a Beheading will consume 7.5% of her current Bond of Life. On doing so, Arlecchino's Normal Attack damage will be increased by a corresponding amount, additionally scaling on her Normal Attack level.

Assuming Arlecchino starts with 130% Bond of Life, the maximum attack of infused Attacks she can perform is 19, as after attack #19, her Bond will fall just below 130%. Due to this, you will generally want to perform about 18-19 Normal Attacks per rotation. The most common way of doing so is performing 3 Normal Attacks cancelled by a Dash 6 times, or 6N3d. Doing this, Arlecchino will also apply Pyro on every first hit of each N3d string, for a total of 6 reactable hits. It is possible to get quite a few more with some more advanced gameplay.

The Bond that is left over after Arlecchino finishes attacking will not reset and will instead carry over as long as combat is active, making each of Arlecchino’s rotations subsequently stronger.

Elemental Burst

The other method by which Arlecchino can clear her Bond is using her Elemental Burst. Arlecchino's Elemental Burst has a cooldown of 15 seconds and costs 60 Energy to use.

On cast, Arlecchino will. deal AoE Pyro damage and consume he remaining Bond of Life. She will heal herself for an amount scaling with both the amount of Bond of Life she consumed as well as her Attack. Casting her Burst will also reset Arlecchino’s Elemental Skill cooldown. Ideally, Arlecchino never wants to use her Burst prior to C6 – the animation is quite long and the damage doesn’t make up for it. Doing this requires proper dodging and/or a Shielder in the team, which is something Arlecchino can generally slot in without too much fuss: Nicole is an excellent teammate, as is Citlali.

Additional Info

Normal Attack Strings, Constellation 2 & R1 details

Arlecchino generally has certain Normal Attack animations she prefers. The Normal Attacks in the earlier part of her animation string are typically faster than the later ones, though also a little weaker. Arlecchino's N4 is a double-hit with individual weaker hits, while her N5 and N6 are slow but strong. A good rule of thumb is to stick to either N2 or N3 strings, but there are strong use cases for N5 and N6 in Melt and Vaporize teams.

Arlecchino's Constellation 2 requires Arlecchino to wait a little to begin attacking in Melt teams with Citlali. This is so you're able to Melt Arlecchino's Charged Attack, C2 proc and her Normal Attacks without losing out on any Melts.

With her Signature Weapon, Arlecchino is able to hit an enemy with a Charged Attack while said enemy doesn't have an active Blood-Debt Directive, and still gain 25% Bond of Life. This is called pre-stacking, and can be very useful against bosses with long phases that prevent Arlecchino from doing a lot of damage.

Masque of the Red Death and Advanced Combos

Due to Arlecchino's Masque of the Red Death effect consuming current Bond of Life, the first Normal Attack in a given rotation will tend to deal up to 2.5 times as much damage as the last Normal Attack in the same rotation. This significantly frontloads her damage, meaning that even if certain buffs might fall off at the end of the rotation, it matters less than with many other DPS units. It also makes getting as many hits with Amplifying Reactions as early as possible highly encouraged. This leads to certain advanced combos that Arlecchino can use to deal far more damage in Melt and Vaporize teams than usual. These combos require fast mechanics and tend to utilize advanced techniques like Walk cancels, which are difficult to perform. Vaporize is more forgiving than Melt in this regard. Below are a few examples that you can practice to get an idea of how these combos work:


  • Arlecchino Skill → (supports) → Citlali Skill + Burst → Swap to Arlecchino and use Charged Attack → N2 + Walk cancel → N2 + Walk Cancel → N2 + Walk Cancel → N3
  • After the above, quickly swap to Citlali to perform a Normal Attack and re-apply Cryo to the enemy then swap back to Arlecchino and perform:
  • N2 + Walk Cancel → N2 + Walk Cancel → N5.

There are many variations of these combos. Arlecchino's C2 will generally replace one of the first N2 strings in this variation.


The Mona Vaporize team is particularly synergistic with this combos. Below is a variation of these advanced combos:

  • Arlecchino Skill → Bennett Skill + Burst → Sucrose Skill → Mona Skill + Burst + N1 → Arlecchino CA → N1W → N3d → N3d → N3 → Mona N2 → Arlecchino N3d → N4


Easier to execute and gives Arlecchino 2 more Vaporize than she would get without swapping out and back in. Still quite difficult, but will provide Arlecchino with significantly more damage than the regular 6N3d combo will. There are several variations, but they generally all revolve around cancelling N1/N2/N3 and it’s encouraged to experiment with them.

There is a small downside to the above Combos, specifically if using Nicole with Arlecchino. Switching out will reset Arlecchino's Grace of Theosis to Grace of Kenosis. Nicole still is a great support for these teams, but Bennett will typically pull ahead without Nicole vertical.

Release Date

Arlecchino was officially released as a playable 5-star Pyro character in Genshin Impact on April 24, 2024, during the Version 4.6 update.

Portrait

arlecchino


Table of Contents

Featured Characters

Columbina Build Guide
By Mobalytics Updated on Jul 20, 2026
presentationColumbina
Featured
presentationColumbina
Featured
Sandrone Build Guide
By Mobalytics Updated on Jul 19, 2026
presentationSandrone
Featured
presentationSandrone
Featured