menu
MobalyticsUse your favourite features in-game with our Desktop App
Gamebase Guide

10 Tips and Tricks in Enshrouded 1.0

Updated on Oct 18, 2026
Oct 18, 2026

Overview

Enshrouded has useful features tucked into its menus and controls that are easy to overlook. Learning these shortcuts can save time managing materials, make combat easier to handle and help you keep track of your adventures.

These ten tips cover crafting, storage, combat, exploration and building for both new and returning players.

Thanks to ItalianSpartacus for sharing the tips and explanations used in this guide.

For your first base, essential crafting unlocks and early progression, start with our Enshrouded Beginner Guide.
Enshrouded Builds

Find a build for your playstyle

Pin Recipes Before Gathering

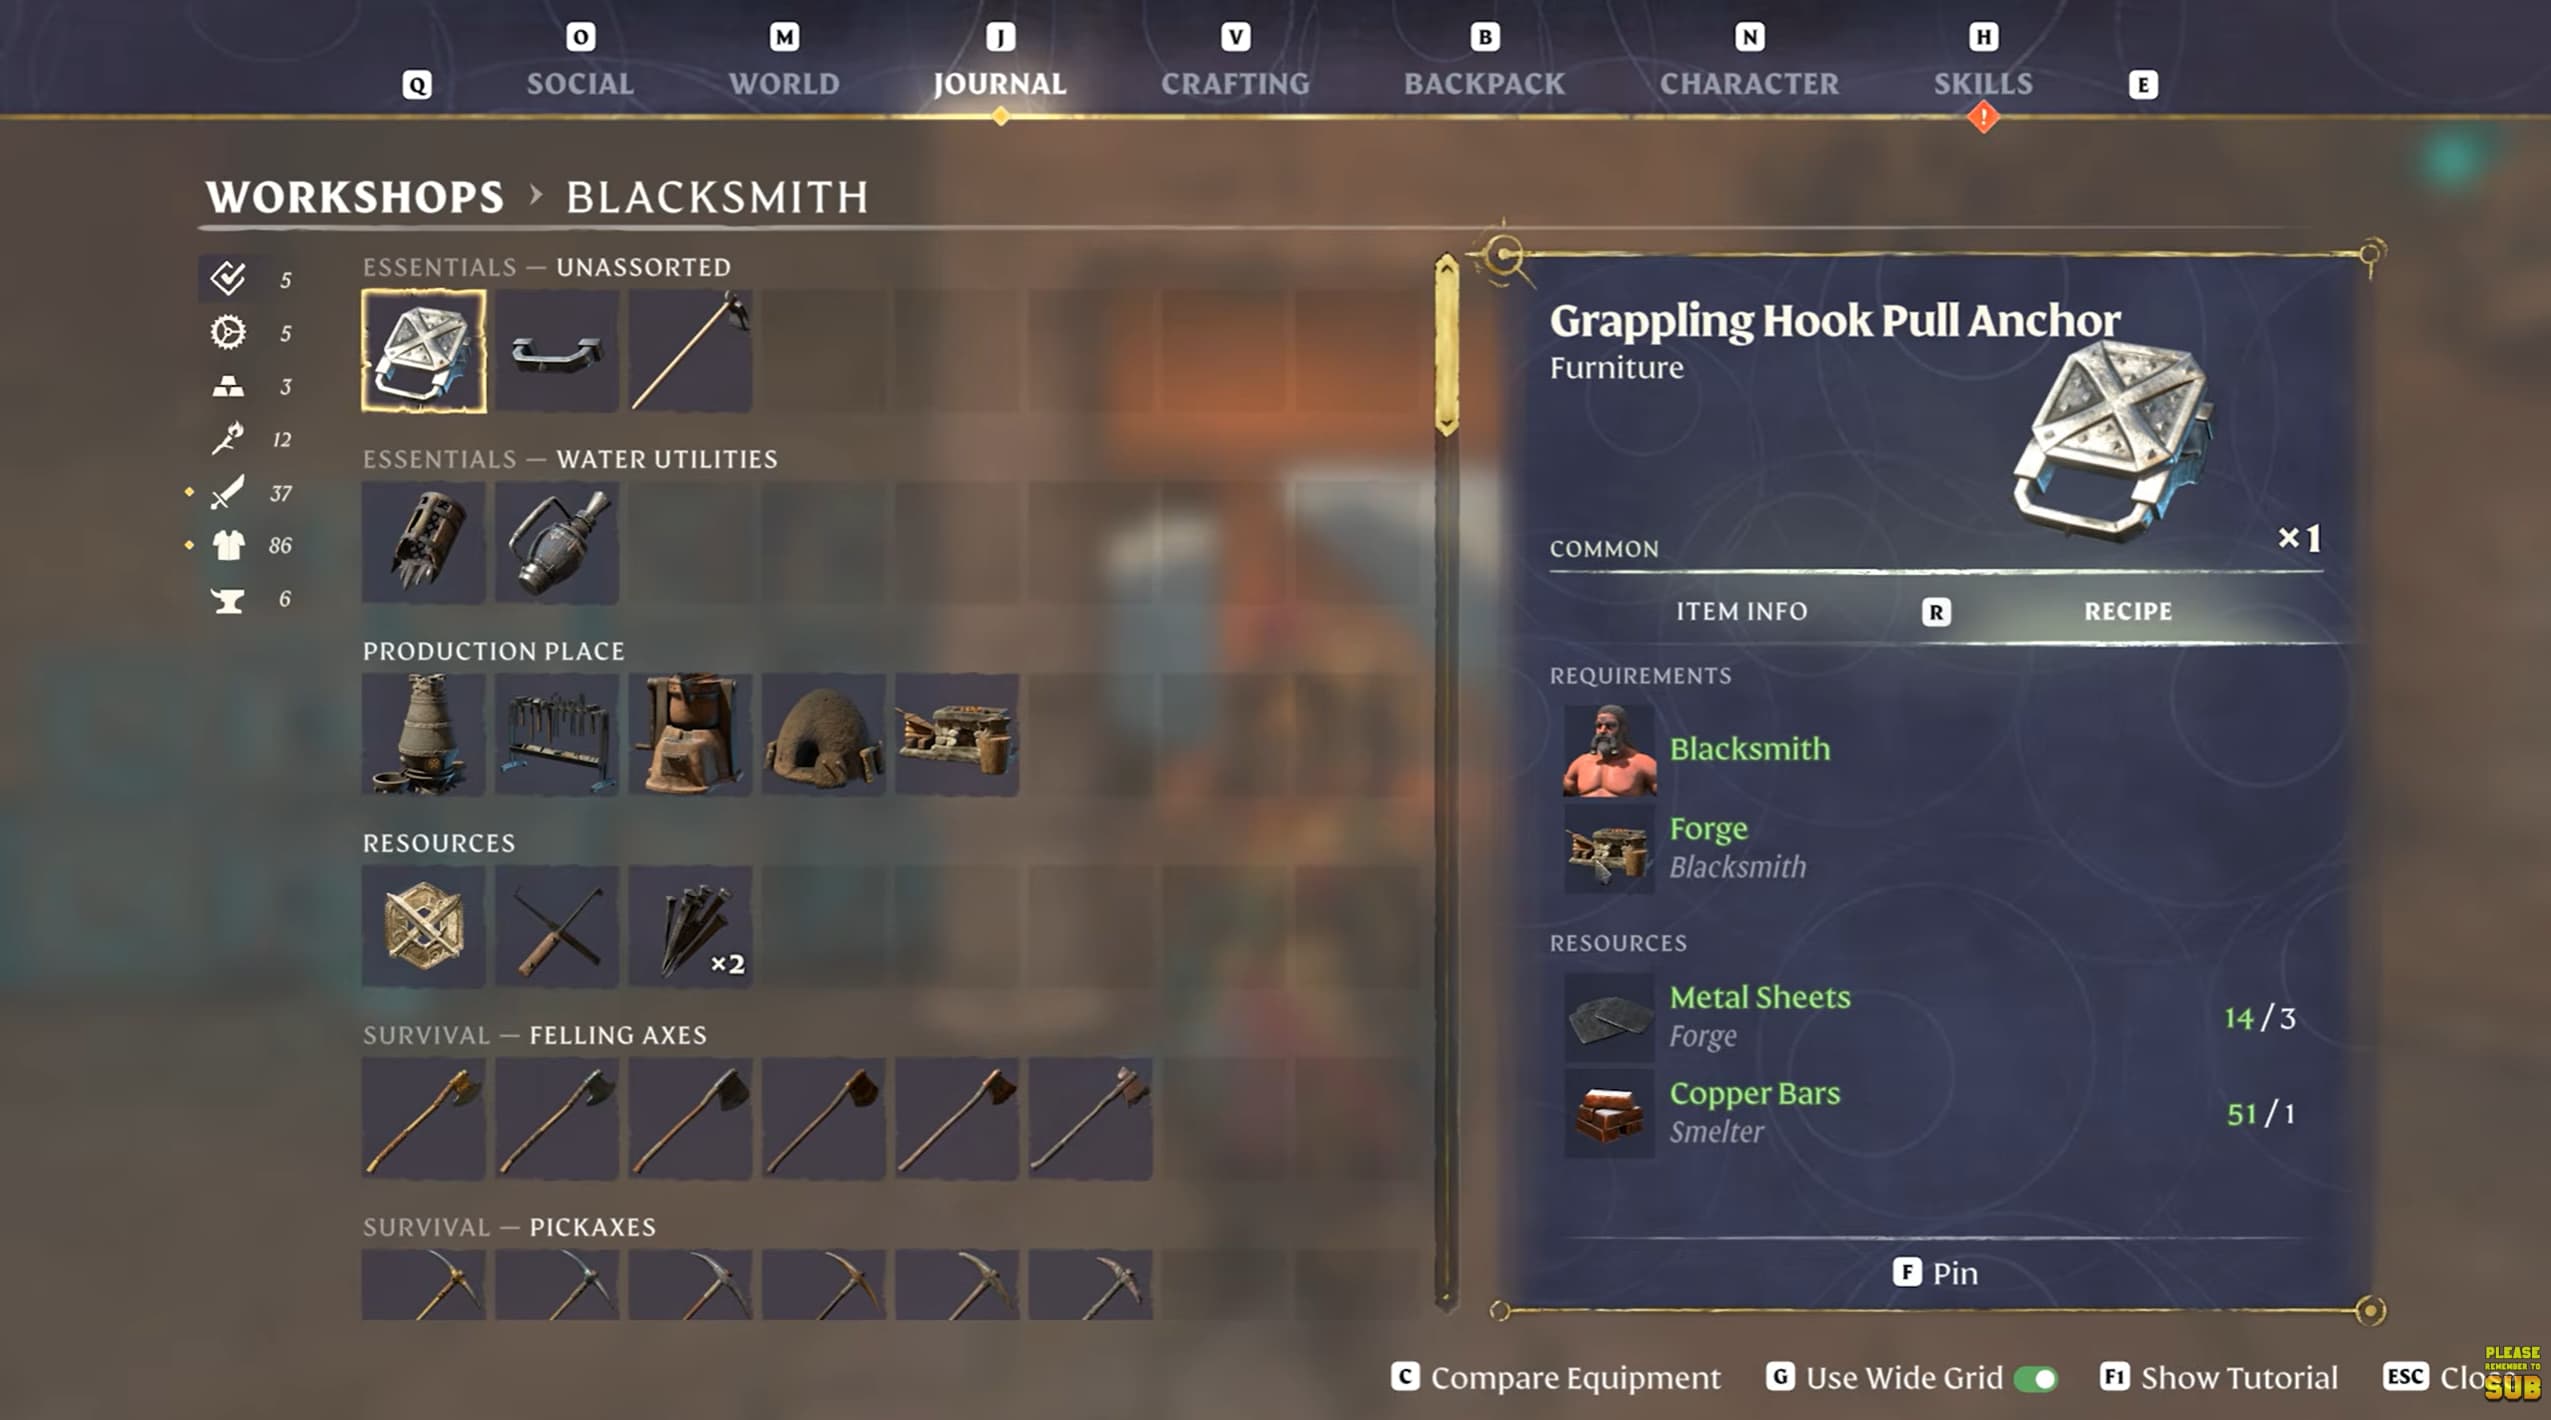
Your Journal is useful for more than tracking quests. Open its Workshops section to browse the recipes associated with your crafting survivors and stations while you are away from base.

Select the item you want to make, check its ingredients and use Pin Recipe to keep the requirements visible while gathering. This saves you returning home just to check which material you forgot.

The Journal also helps you manage other projects. Its Bases section shows information about your settlements, including survivors and ongoing production, while Sets helps you track item collections.

Before starting a resource trip, pin the recipe you are working towards so you know exactly what to bring back.

Customize Your HUD

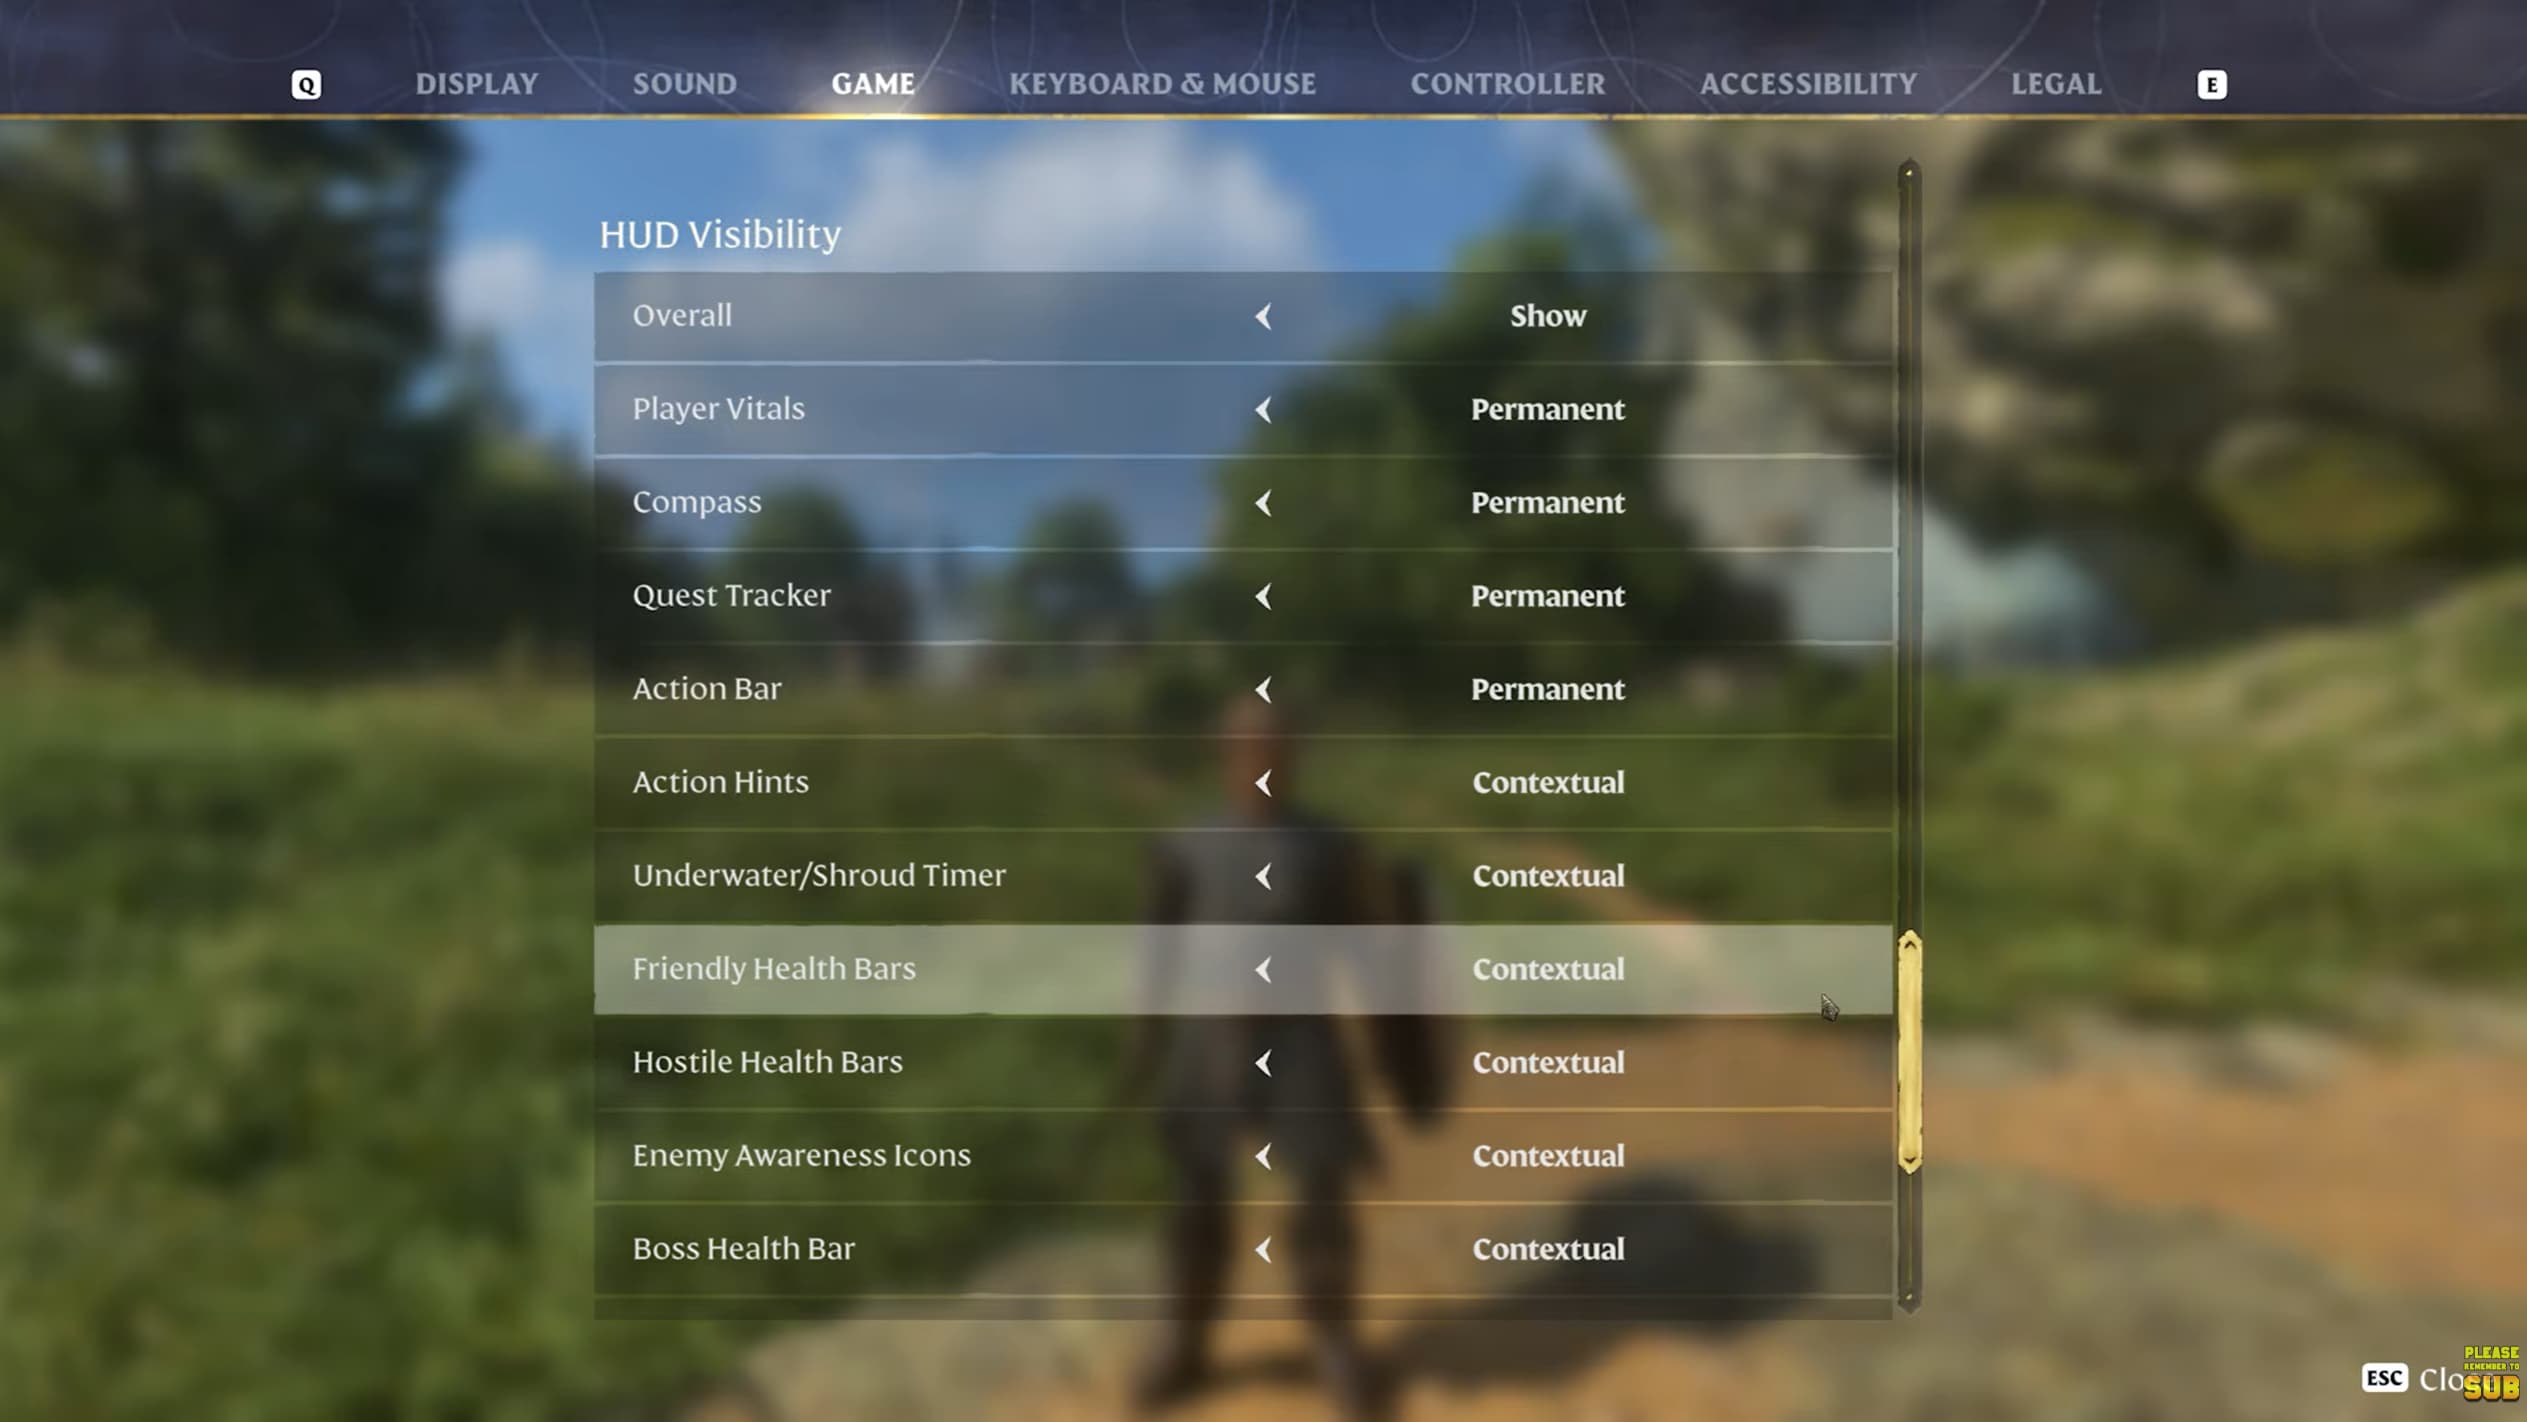
Open Settings, select Game and find HUD Visibility to adjust how much information stays on screen.

Individual elements can remain visible, appear contextually or stay hidden. Contextual elements appear when relevant and fade away when they are no longer needed.

A useful starting point is to make the quest tracker and action bar contextual while keeping your player vitals and compass visible. This reduces clutter while keeping your health and navigation information easy to check.

For example, a contextual action bar appears when you change your selected item, then fades away during exploration. Adjust each element to suit how much information you want on screen.

Collect Nearby Loot

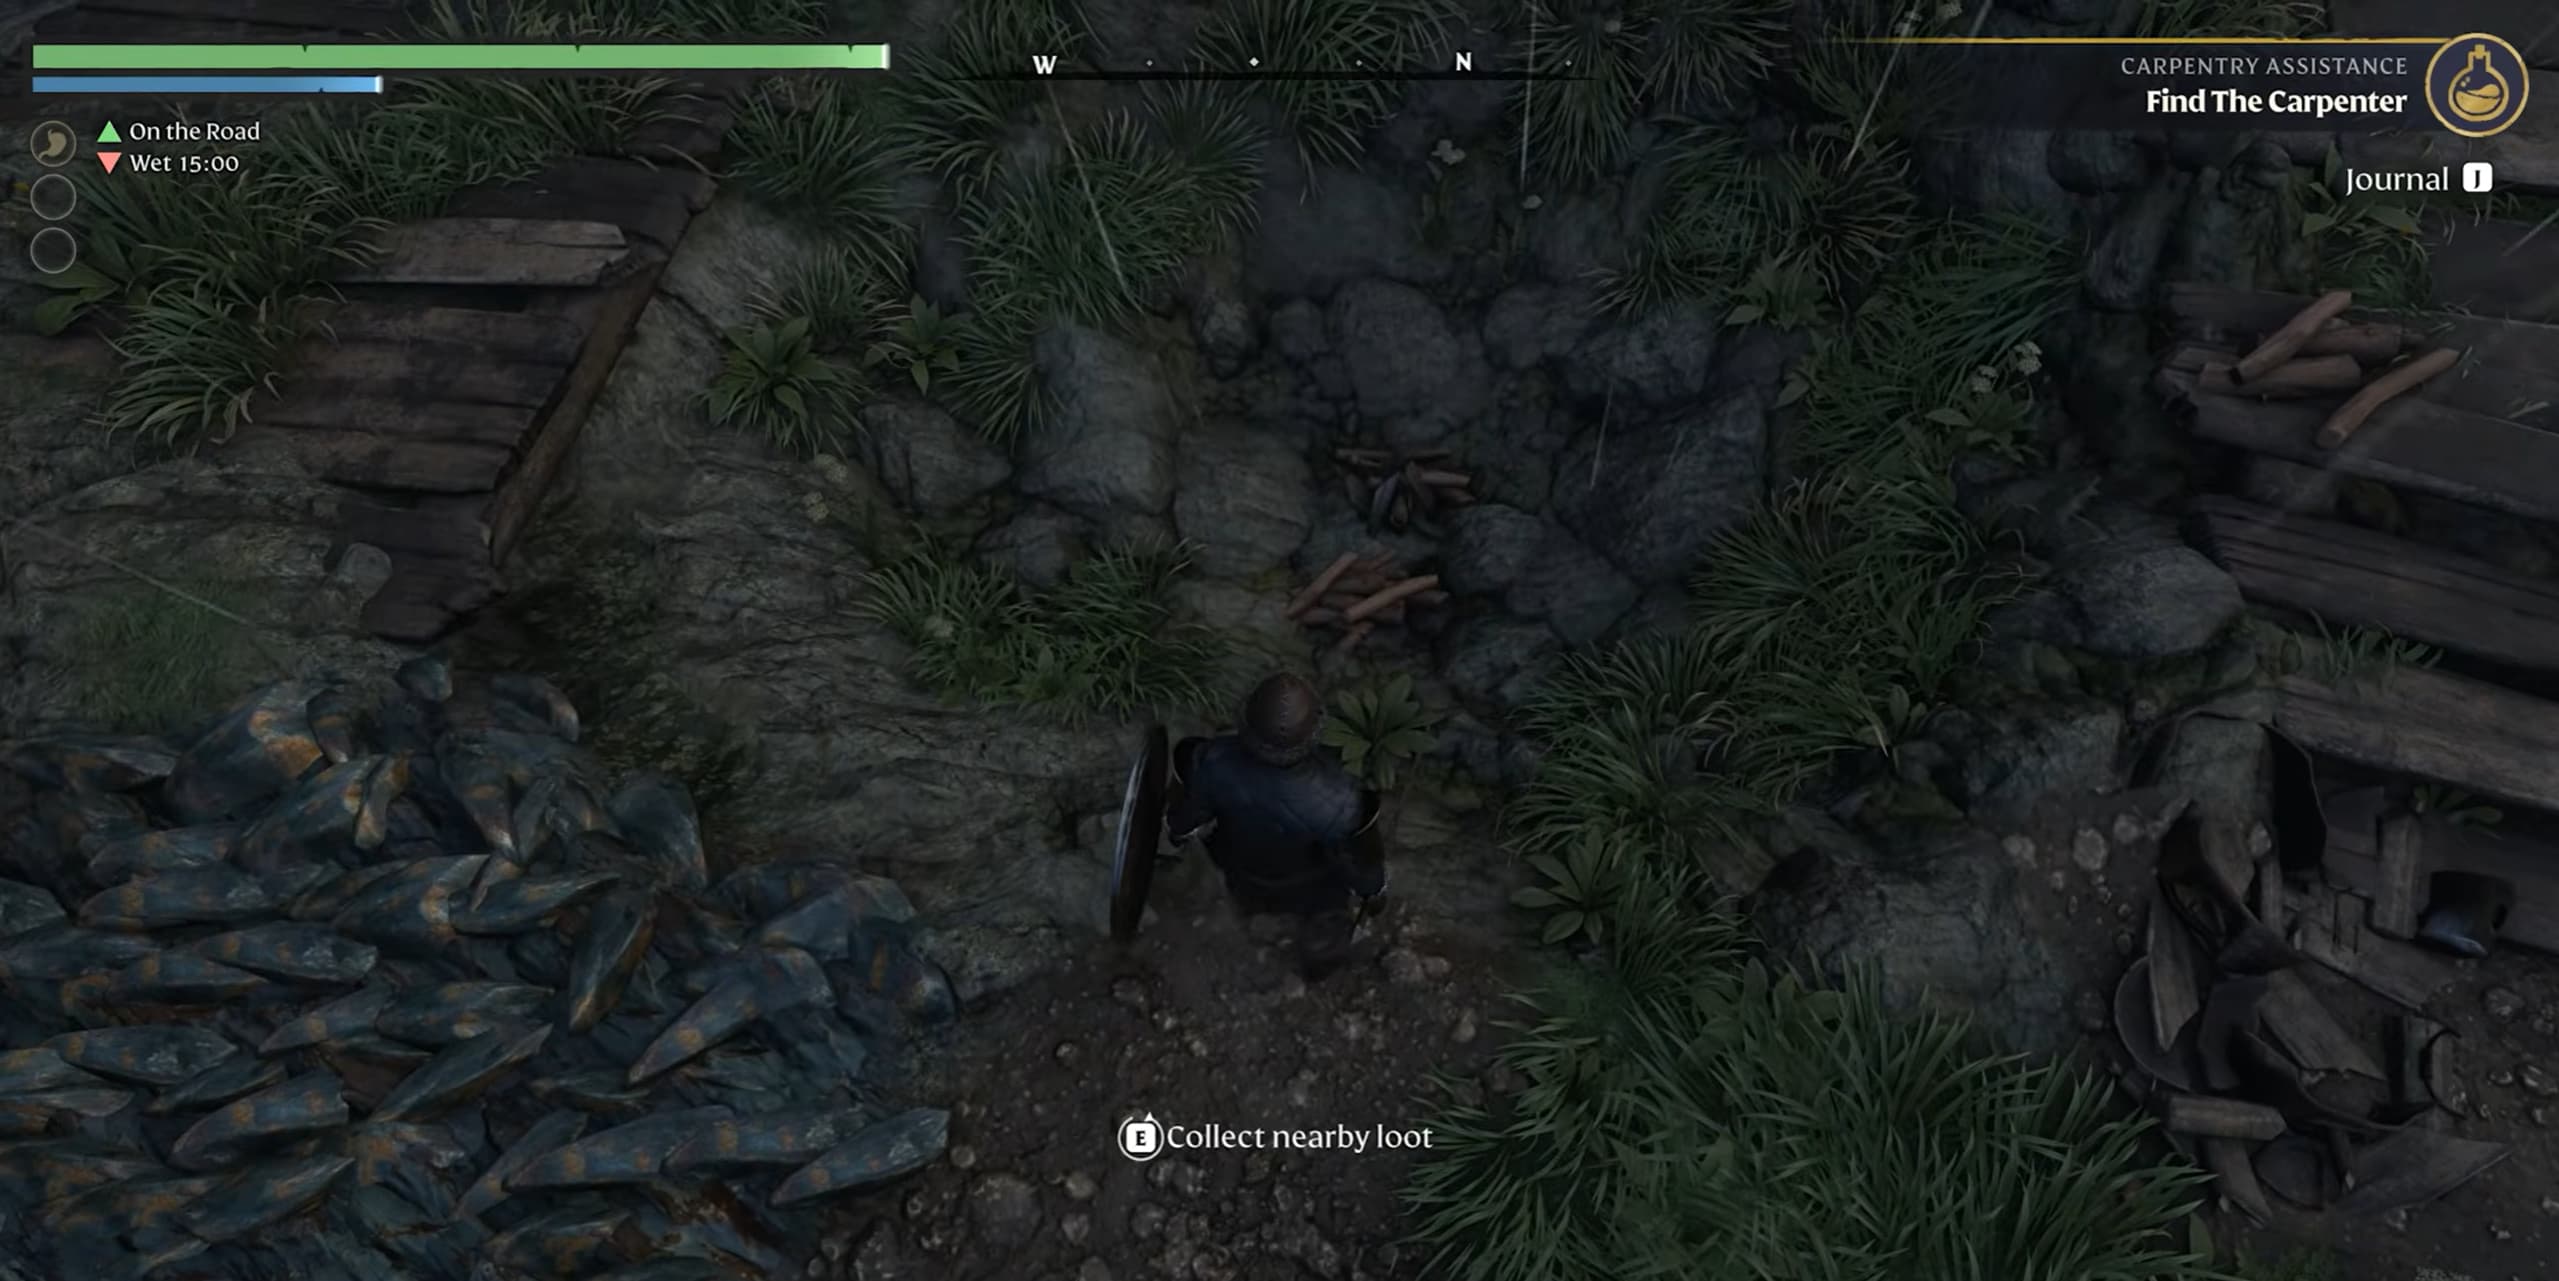
When loose items are scattered on the ground, hold E to collect nearby loot. You can keep holding the button while moving through the items.

This collects eligible scattered loot. Containers, defeated enemies and quest-related items still need to be checked separately.

You can also enable Auto Collect Scattered Loot in the Game settings. This is convenient when gathering common materials, but it can fill your backpack with small stacks you did not intend to pick up.

If inventory space becomes a problem, disable automatic collection and use the held interaction button when you want to gather a group of items.

Check Enemy Resistances

Pay attention to the words appearing alongside your damage numbers. Effective indicates that your attack is exploiting a weakness, while Resisted indicates that the target resists the damage being applied.

If you repeatedly see Resisted, try a weapon or spell that deals a different damage type. Carrying a backup gives you another option against enemies that resist your usual attacks.

Check the damage breakdown on the item itself when choosing an alternative. A different weapon name or appearance does not necessarily mean it deals a different type of damage.

You do not need to memorize every enemy’s weaknesses. Watch the feedback during combat and change your approach when an attack is being resisted.

Preview Equipment Upgrades

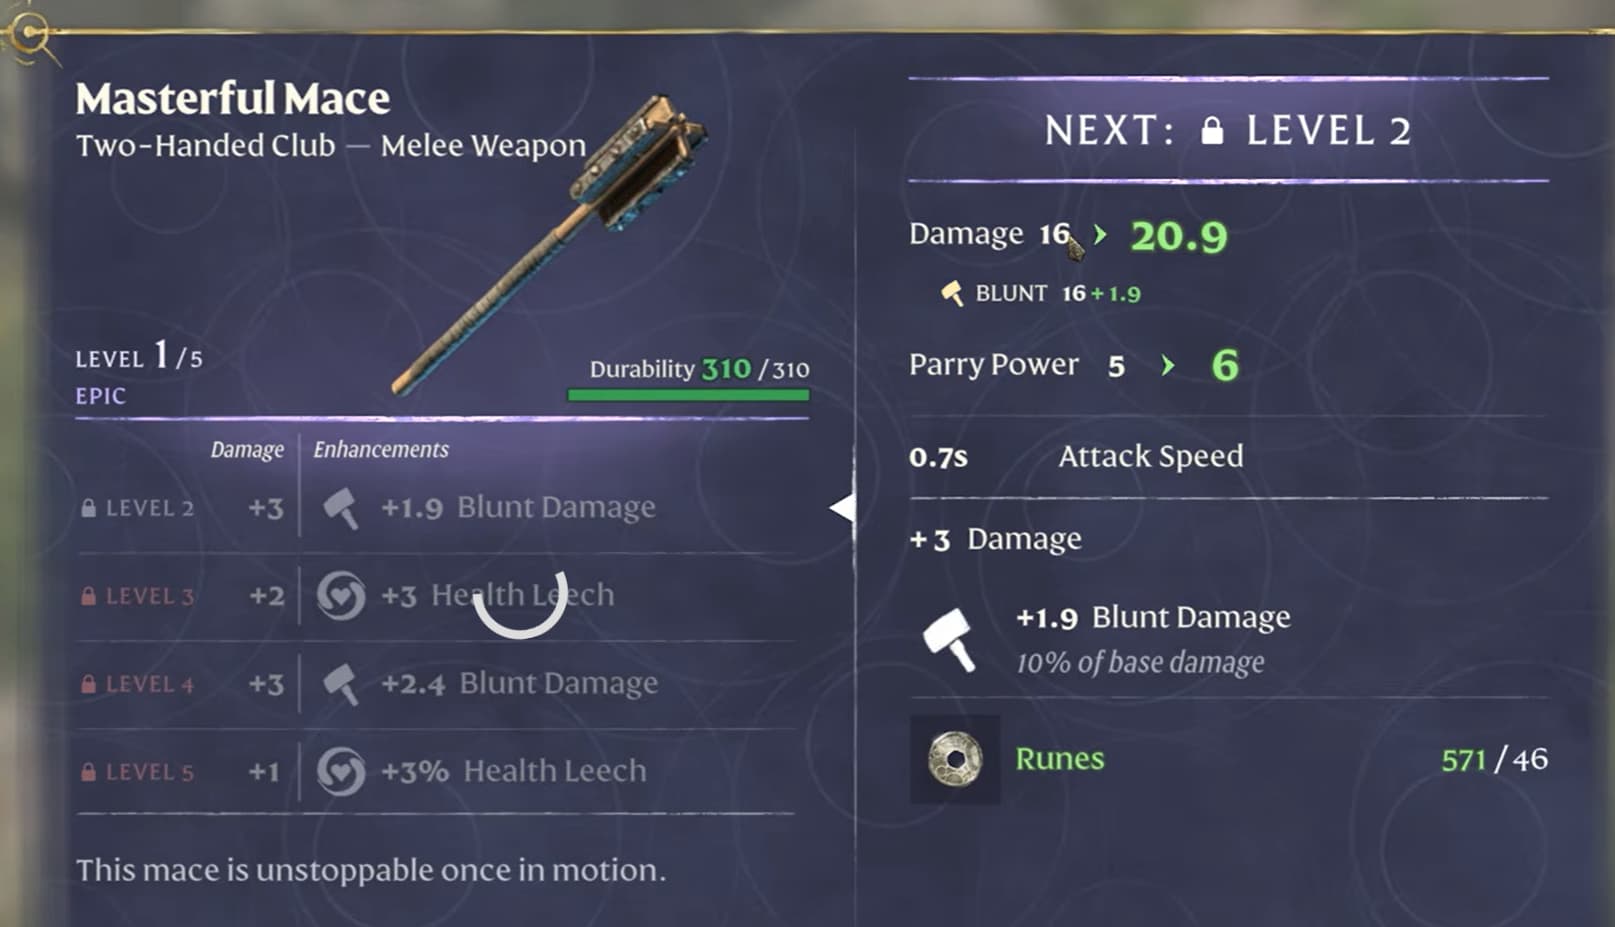
Before spending Runes, open Item Upgrades at the appropriate crafting survivor and inspect the equipment’s available enhancements.

The Blacksmith upgrades warrior equipment, the Hunter upgrades ranger equipment and the Alchemist upgrades mage equipment. If an item is missing from one survivor’s upgrade list, check whether it belongs to another category.

Use the preview controls to inspect later upgrade stages as well as the next one. This lets you see the stats and perks you are working towards before investing in the item.

Check the cost of each stage, too. Some enhancements require Legendary Runes, so your ordinary Rune supply may not cover the full upgrade path.

Salvage unwanted equipment to obtain Runes for future upgrades. Check the displayed salvage value before confirming, and do not assume it will return everything you spent on the item.

Craft Directly from Storage

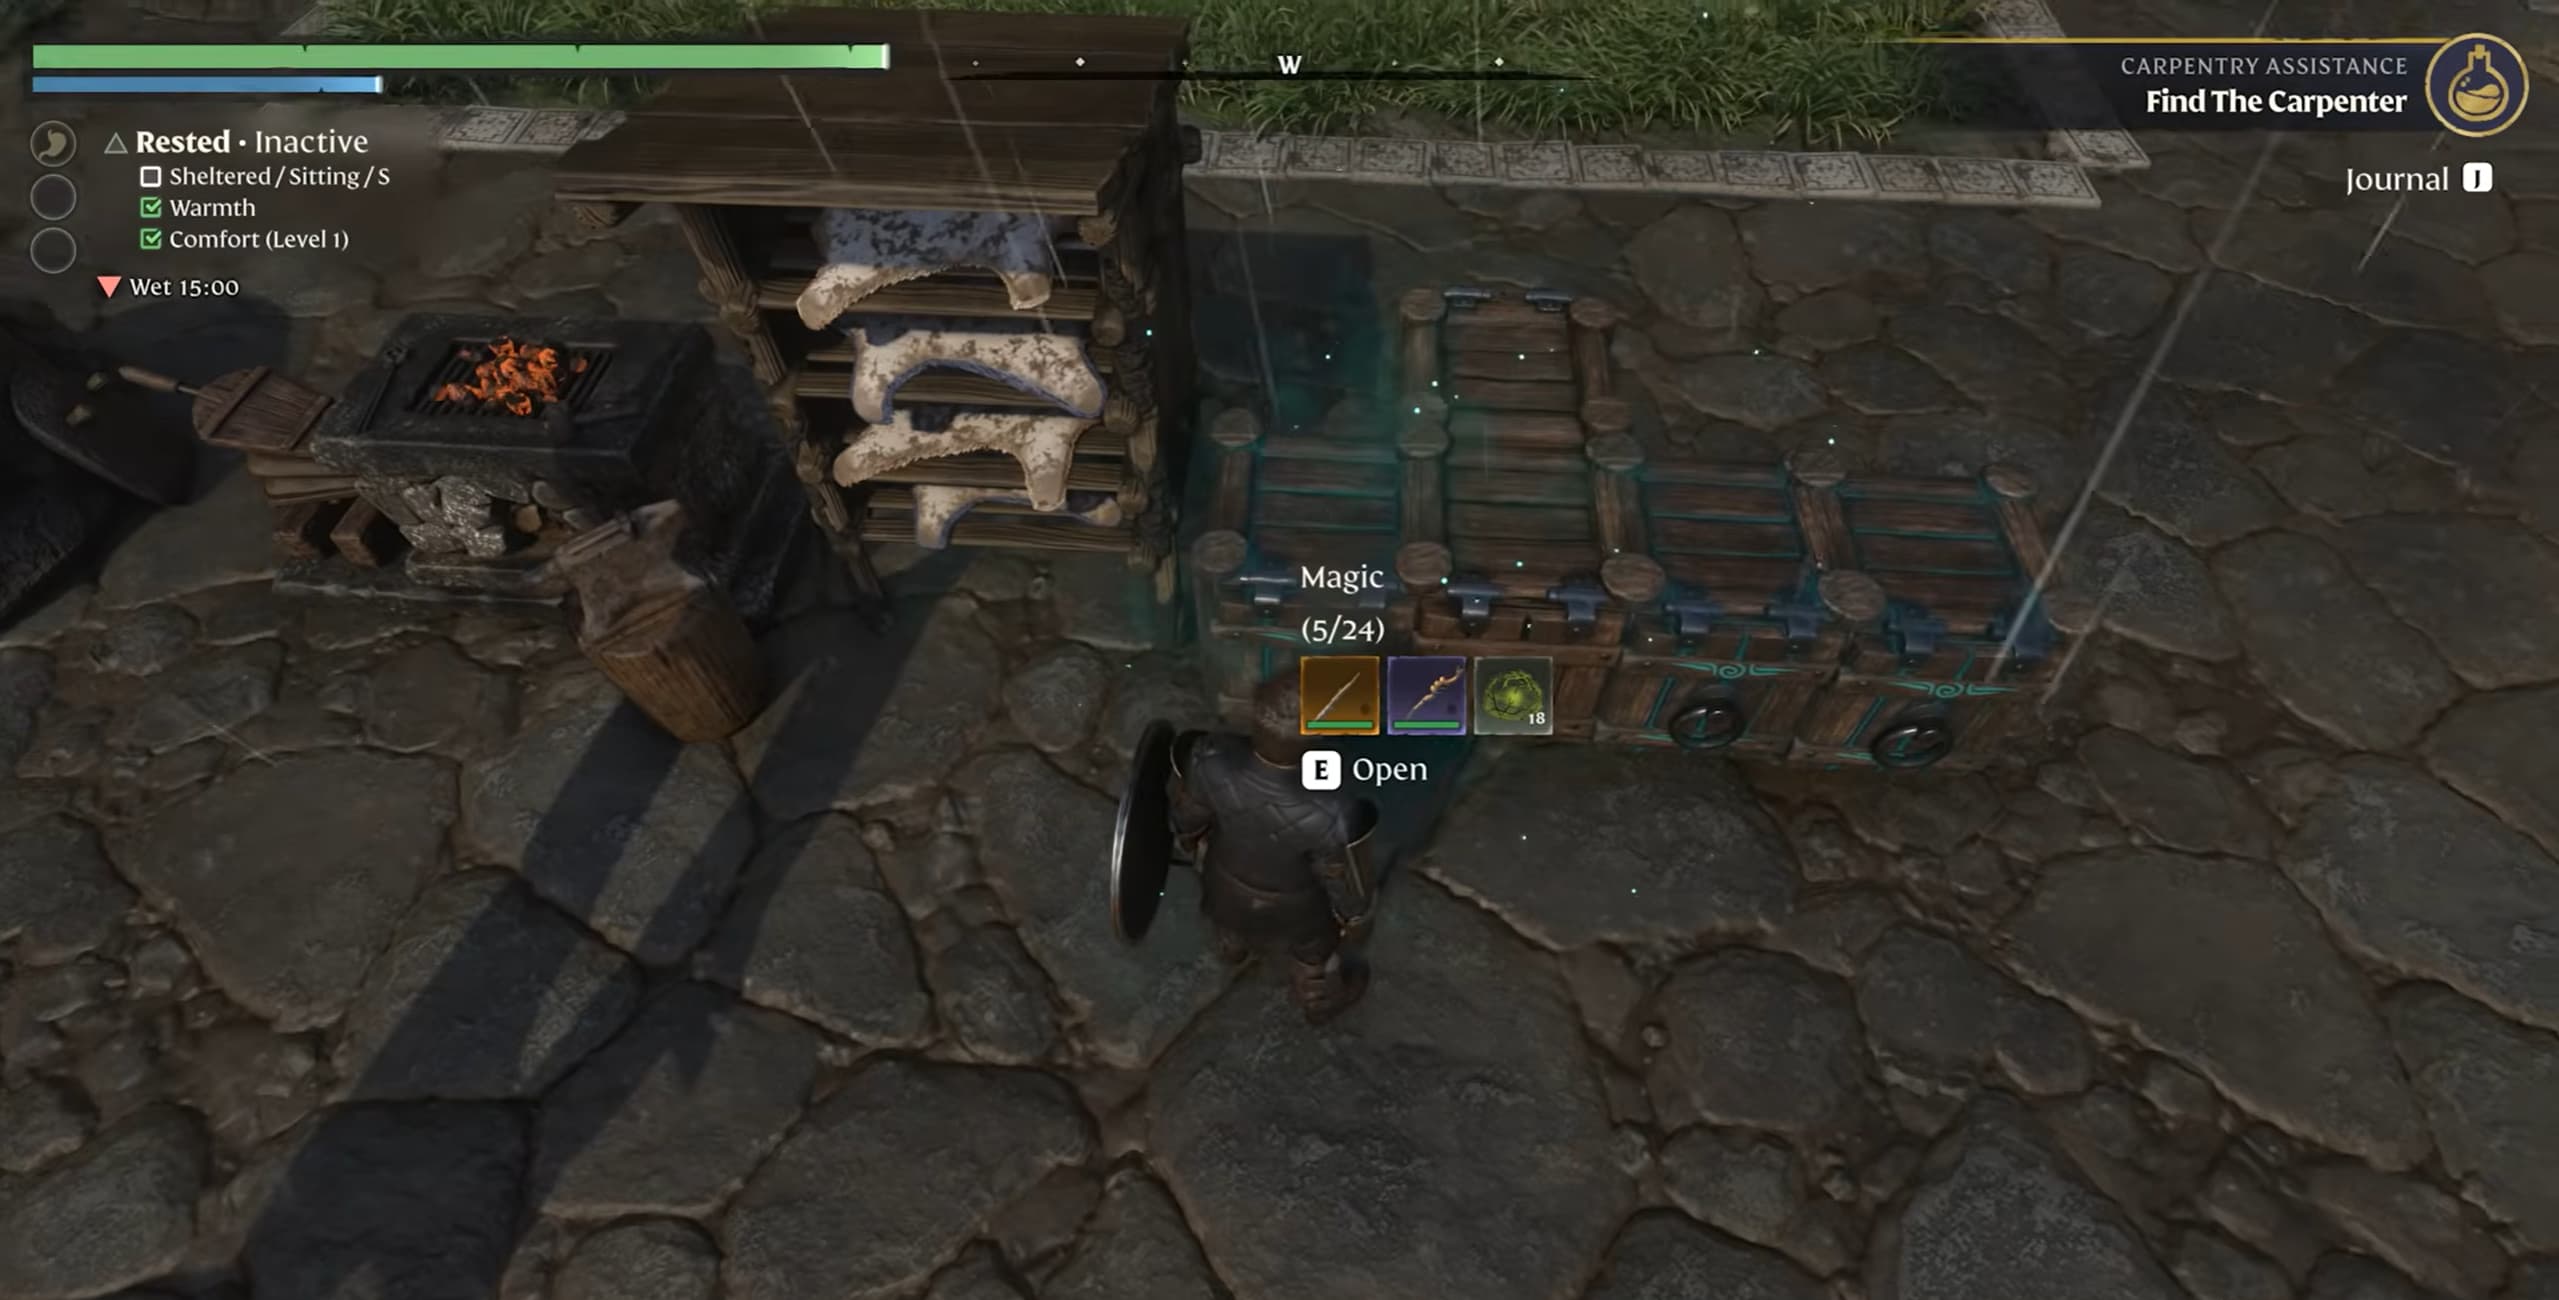
Magical chests let you use stored materials for crafting and building within your base. This reduces the need to move ingredients into your backpack before making something.

Open an eligible chest and select Enchant, supplying the materials shown in its menu. You can convert the chest into magical storage without emptying it first.

Give your chests clear names so you can quickly find equipment, consumables and other items you still want to retrieve manually.

When unloading your backpack, use the different transfer actions:

  • Stack matching items: Deposits items of types already stored in the chest.
  • Transfer everything: Moves as much of your inventory as the chest can hold.
  • Quick-move an item: Transfers an individual stack without dragging it between inventories.

Check the prompts at the bottom of the inventory screen for the relevant controls. Stacking matching items is especially useful when you want to unload resources while keeping the rest of your supplies.

Once unlocked, the Carpenter’s Quick Stack Station lets you deposit matching materials into nearby magical chests from one location.

Use Ranged Shortcuts and Target Lock

Equip a bow or staff in your ranged weapon slot to access it while another weapon is selected. Hold Q to ready it, use your attack button, then release Q to return to your selected weapon.

This is useful when fighting with a sword and shield or daggers but needing a quick ranged attack. Make sure the appropriate arrows or spell are available for the weapon you have equipped.

Press Tab to lock onto an enemy. Target lock helps you keep attacks focused on that opponent, while releasing it lets you aim freely again.

Some skills also require target lock. Strategic Maneuver, for example, lets you dodge around a locked enemy at melee distance, helping you reach its back.

For a setup that combines ranged attacks with close-range positioning, check out our Enshrouded Stealth Archer Build.

Catch Up on Missed Quests

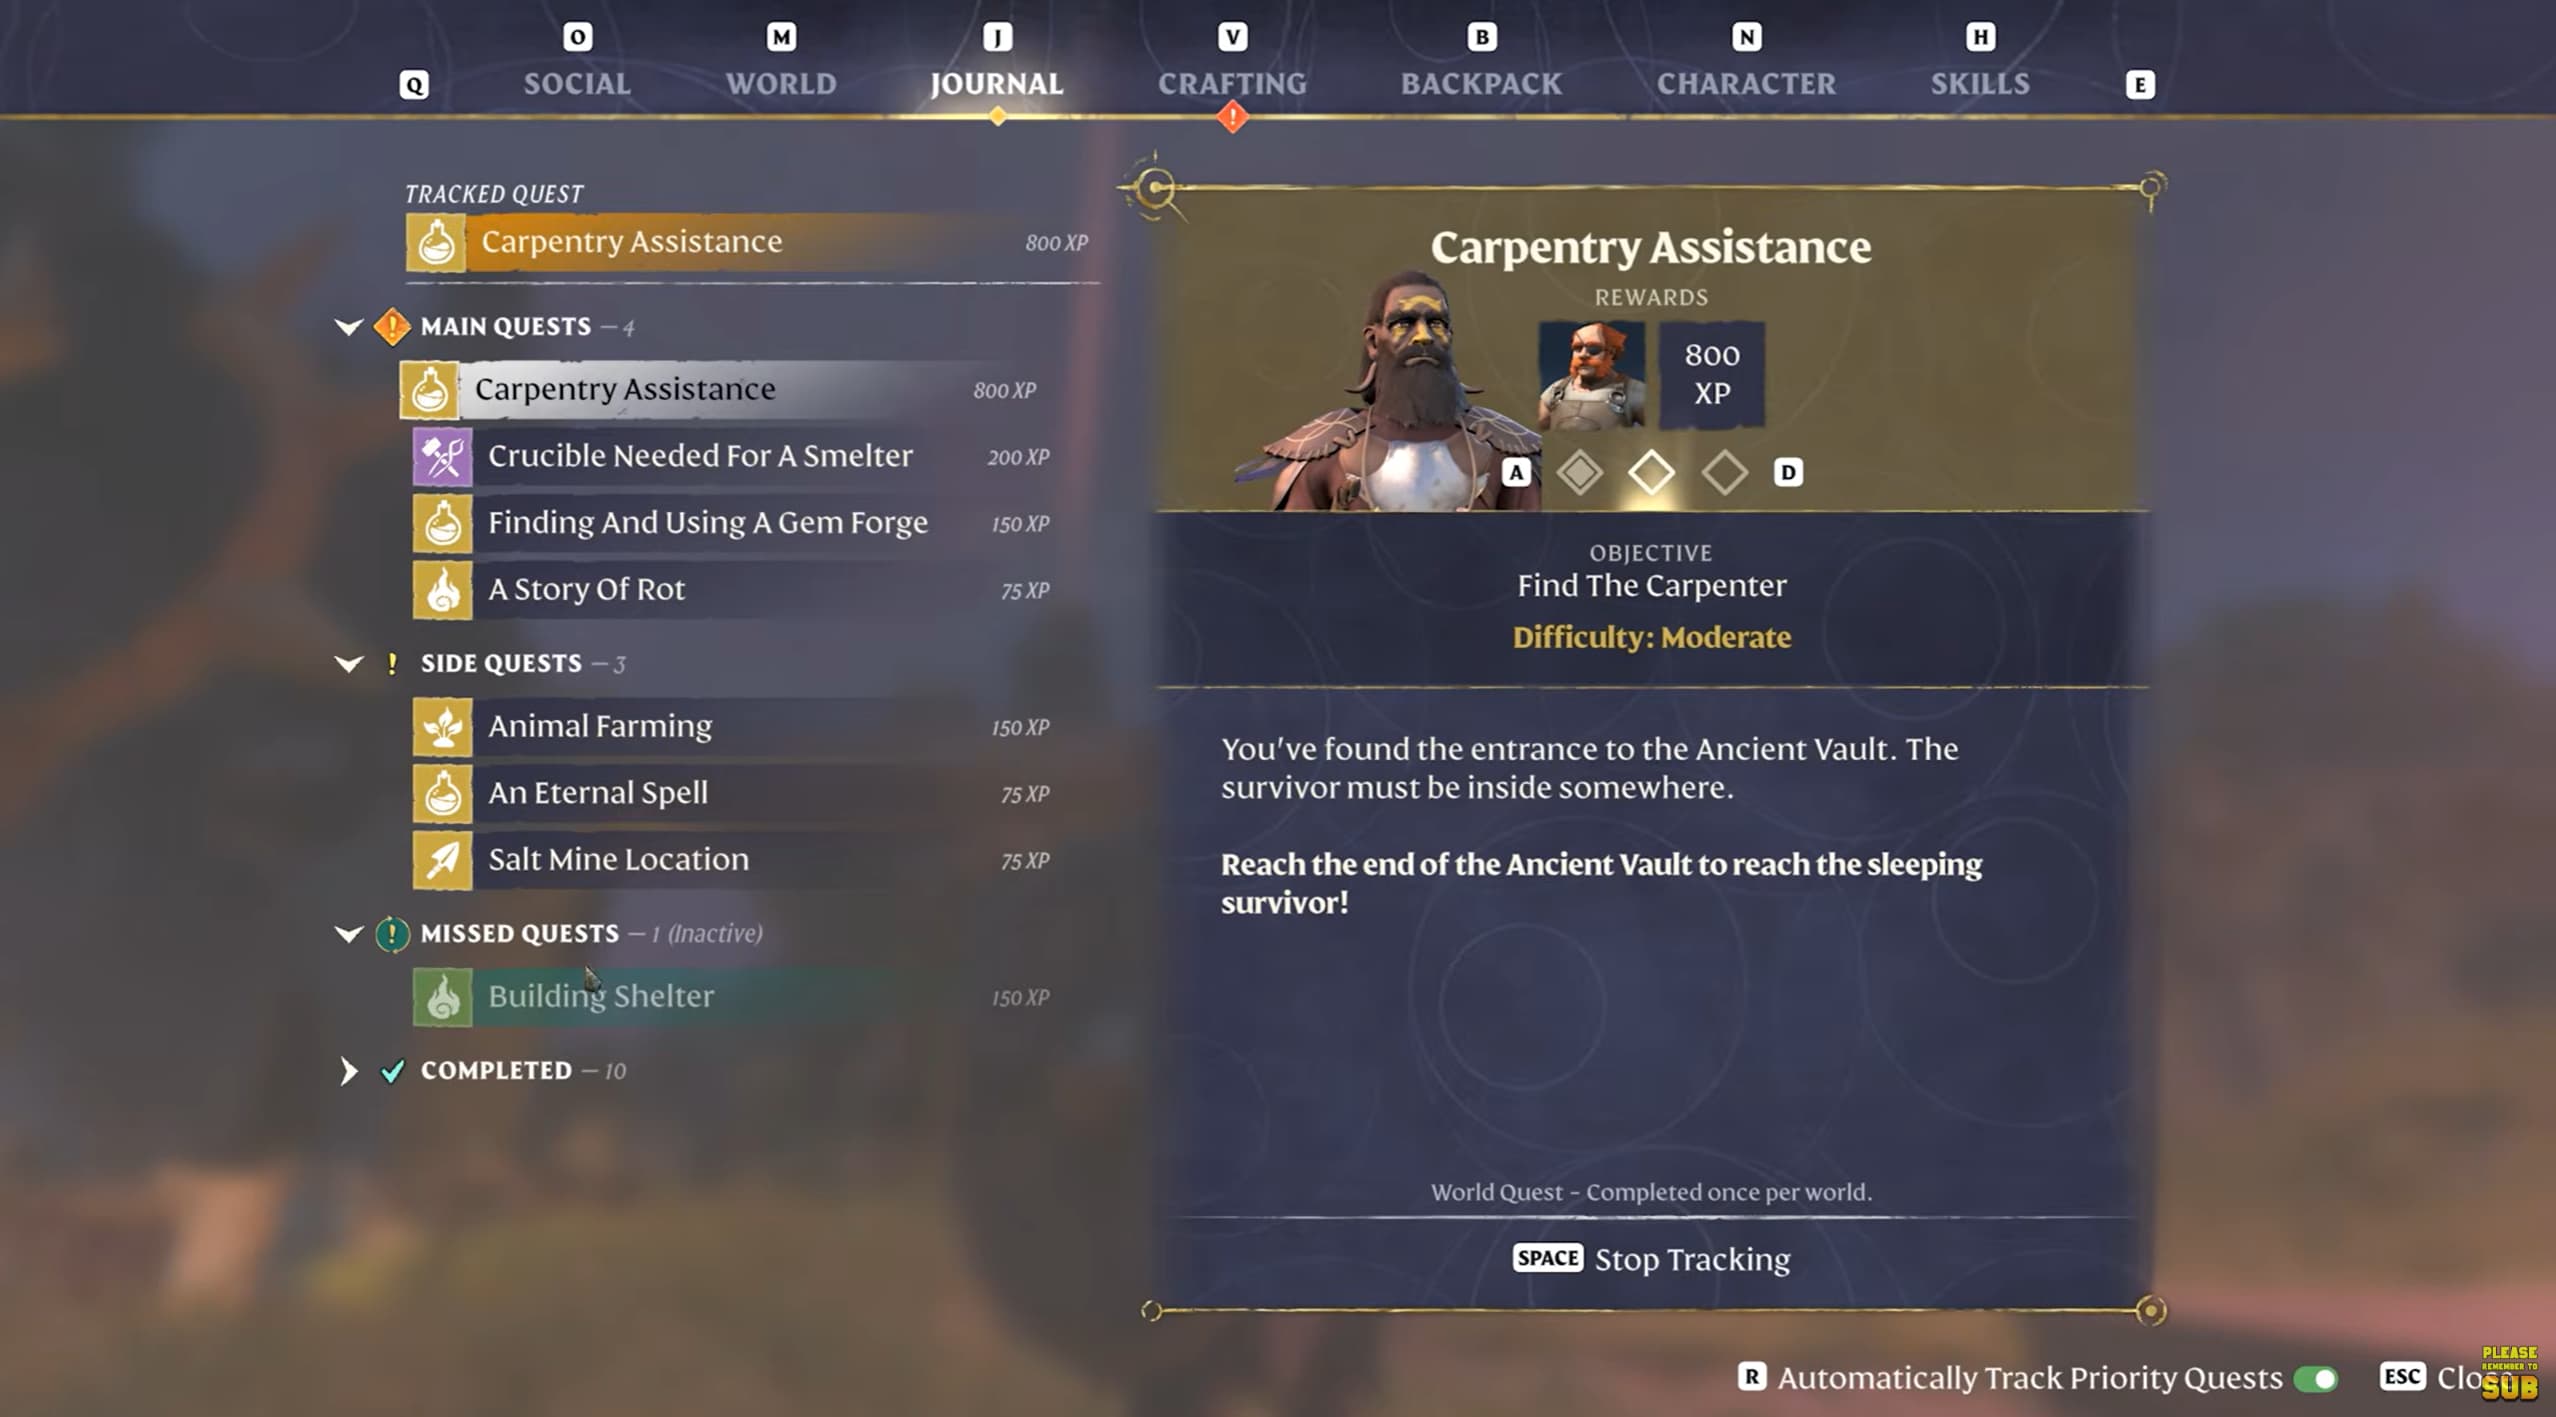
On a shared world, friends can complete world quests while you are away. If you return to find that the group has moved ahead, open the Quests section of your Journal and check Missed Quests.

Select an available missed quest, start tracking it and follow its objectives to complete it for your character. This lets you catch up on the experience and rewards associated with quests you did not participate in.

Your group’s discoveries can make catching up easier. For example, an Ancient Spire unlocked by another player gives you a fast-travel point to use while travelling towards your outstanding objectives.

Check this list when returning after a break, particularly on persistent servers where players explore at different times.

Organize Your Map

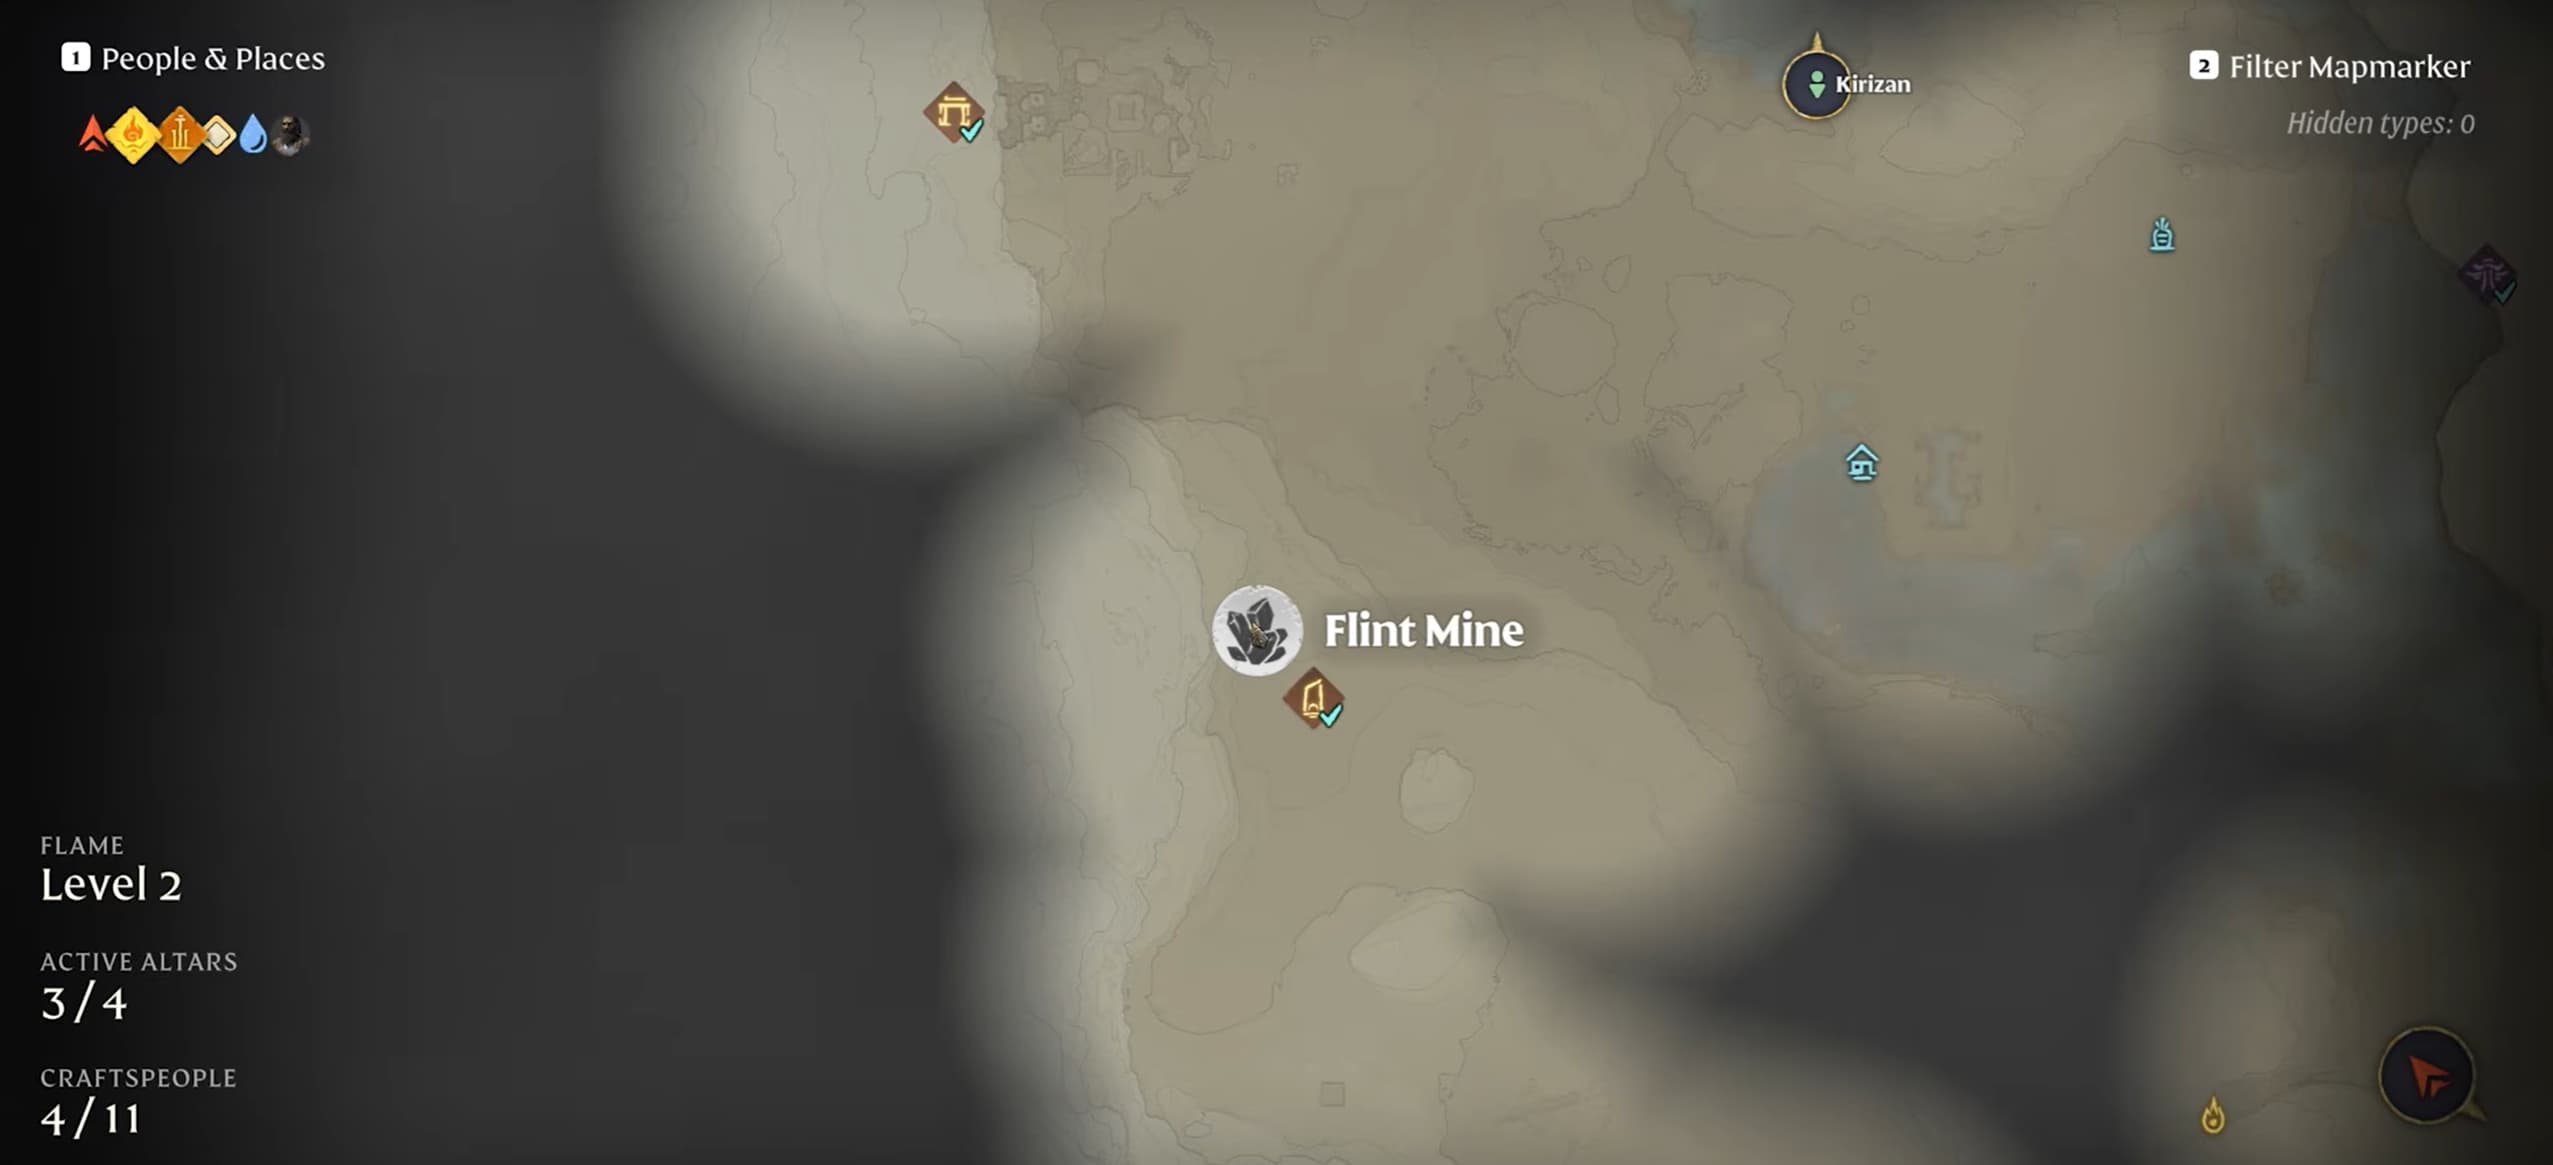
The map’s People and Places list helps you find players, Flame Altars, Ancient Spires, survivors and other destinations without searching through every icon manually.

Use the map filters to hide categories you are not currently interested in. This makes it easier to pick out the locations relevant to your next trip.

Custom markers are useful for resource deposits and places you want to revisit. Give each marker a clear name, such as Flint Mine, and use consistent colors or icons for similar locations.

Custom markers are personal, so other players will not automatically see your annotations. Use a map ping to draw your group’s attention to a location, or set a waypoint for your current destination.

The map also has a shortcut for returning to your last visited Flame Altar. Use it when fast travel is available to save searching for the same base icon each time.

Build in First Person

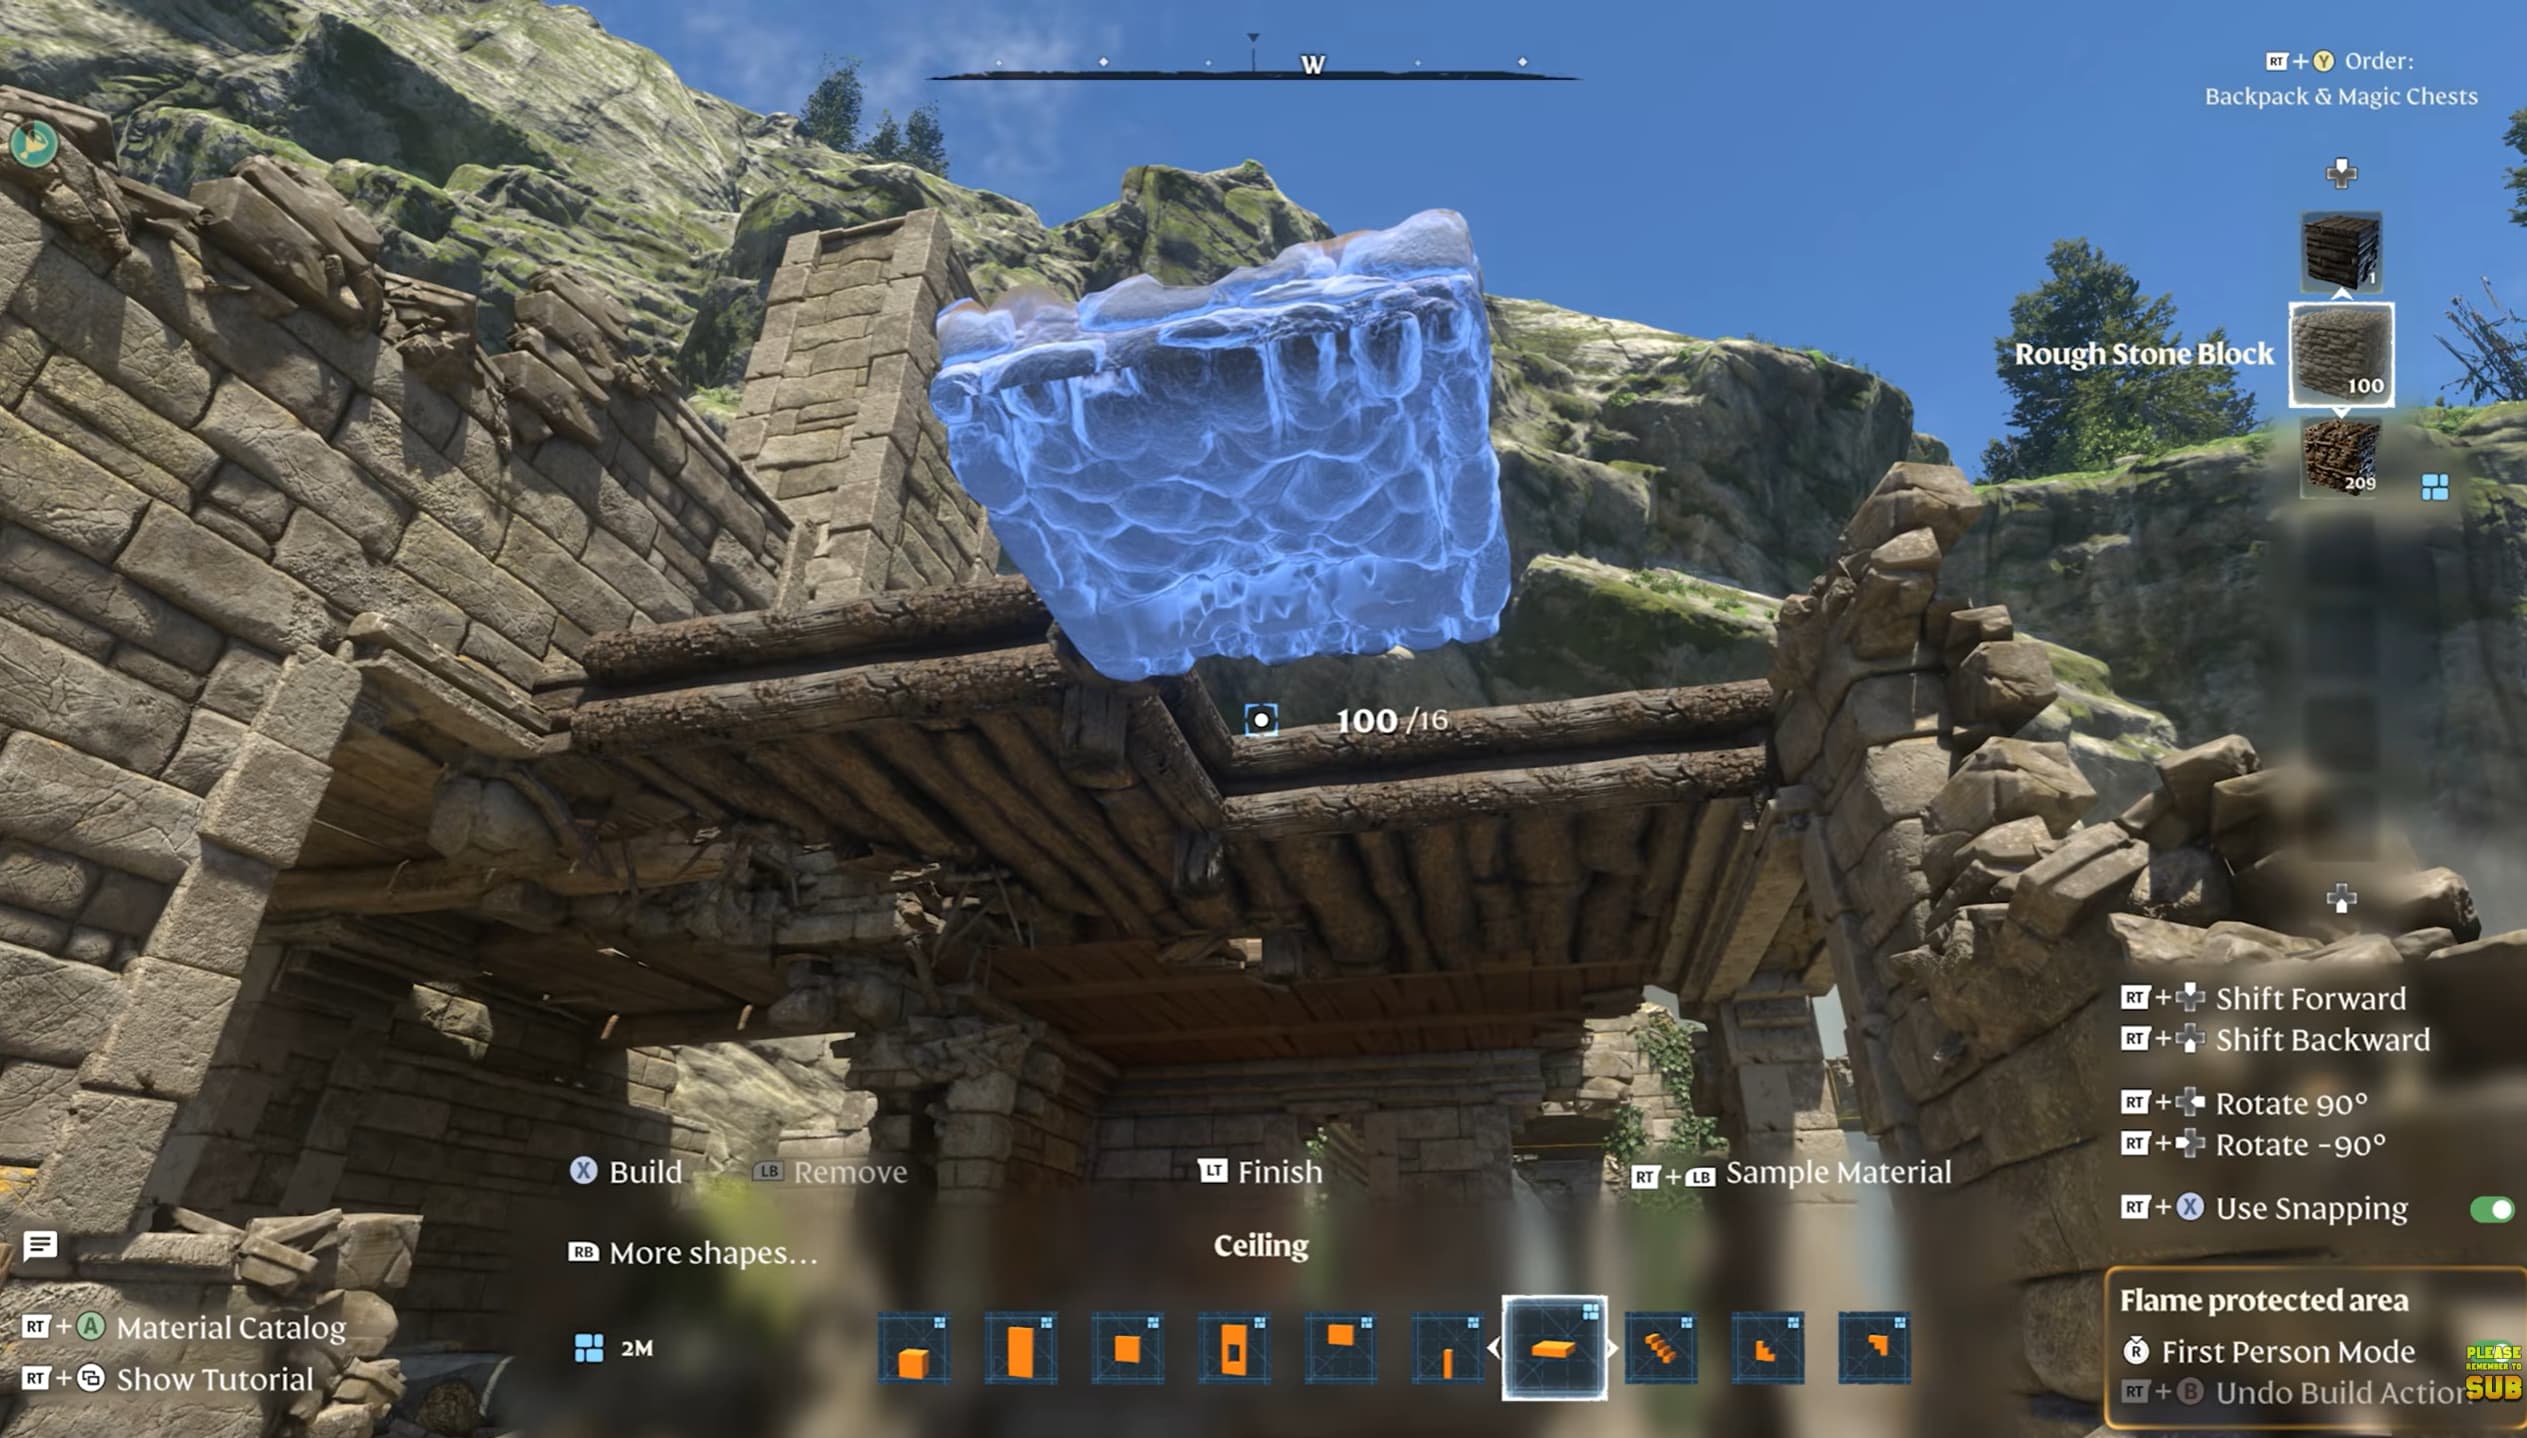
With the Construction Hammer active and build mode open, press Z to enter first-person building.

This gives you a clearer view when working on interiors, lining up details or placing pieces that your character would otherwise obscure. Toggle snapping when you need help aligning a piece with the surrounding structure.

For larger projects, consider the Airborne Architect skill near the center of the skill tree. It lets you move freely through the air in first person while building inside your base, making roofs and other awkward areas easier to reach.

First-person building is available without spending skill points. Airborne Architect adds the ability to fly while building; once unlocked, follow its activation prompt to enter that mode.

Video

Table of Contents

See More

Enshrouded 1.0 Builds
Updated on Oct 18, 2026
10 Tips and Tricks in Enshrouded 1.0
Updated on Oct 18, 2026
Enshrouded 1.0: Best Early Game Weapons
Updated on Oct 18, 2026
Enshrouded 1.0: Beginner Guide
Updated on Oct 18, 2026
Stealth Archer Build - Enshrouded 1.0
Updated on Oct 18, 2026

Like our guides?

Add Mobalytics as a preferred source on Google!