menu
MobalyticsUse your favourite features in-game with our Desktop App
Nightreign Build

Fulghor Expedition Ironeye Build

presentationIroneye
Updated on Jun 13, 2025
Jun 13, 2025

Intro

In this Elden Ring build guide, we’ll cover the best equipment to take on Fulghor as the Ironeye.

Fulghor is a highly mobile boss with powerful charge attacks and sweeping AoE strikes, often followed by delayed holy explosions. 

For a character as fragile as the Ironeye, it’s critical to stack both physical and holy resistances whenever possible.While the fight can be tough, consistently applying status effects will make it significantly more manageable.

Your role is to chip away at their health from safety while your team draws aggro.

This boss is fast and can close large distances extremely quickly when switching targets, so being smart with your dash and not getting stuck in an animation will allow you to evade death and win the fight.

Equipment Loadout

Armaments

For equipment, you’ll want to bring a reliable bow.

A bow with innate status buildup is ideal, but with enough of the right greases, it’s not strictly necessary.

Keep in mind that greases are limited and do not last very long, so applying them at the right time is important.

Here are a few of the best bows you can get to fight this boss.

Primary

Alternatively, Ironeye's Bow can be a good choice if you can equip a relic that imbues it with either frost, rot, bleed, or poison.

Avoid using weapons that deal holy damage as Fulghor is resistant to them.

Talismans

Best-in-slot

  • Green Turtle Talisman
  • Ritual Shield Talisman
  • Arrow's Reach Talisman
  • Ritual Sword Talisman
  • Dragoncrest Shield Talisman
  • Haligdrake Talisman
  • Arrow's Sting Talisman
  • Spear Talisman

Consumables

Best-in-slot

  • Opaline Bubbletear / Greenburst Crystal Tear
  • Uplifting Aromatic / Bloodboil Aromatic
  • Exalted Flesh / Pickled Turtle Neck / Boiled Crab
  • Rot Grease / Poison Grease / Blood Grease / Freezing Grease / Lightning Grease
  • Rot Pot / Poison Pot / Fetid Pot / Freezing Pot / Poisonbone Dart

Dormant Powers, Passives, and Relics

Dormant Powers

Best-in-slot

  • Wending Grace
  • Improved Stamina Recovery
  • Improved Thrusting Counterattack
  • Improved Dodging
  • Lightning upon Dodging
  • Ice Storm Surge Sprint
  • Area of Darkness Conceals Caster While Walking
  • Violent Deluge of Star Rain While Walking
  • More Runes From Defeated Enemies
  • Rune of the Strong

Relics

You will want to complete Ironeye’s Remembrance Quests, as this will allow you to gain some of their best relics, the Edge of Order (yellow) or the Cracked Sealing Wax (yellow), which grant:

Edge of Order:

  • [Ironeye] Boosts thrusting counterattacks after executing Art
  • Starting armament deals holy damage
  • Improved Bow Attack Power

Cracked Sealing Wax:

  • [Ironeye] Extends duration of weak points
  • Critical Hits Earn Runes

Green Relics Best-in-slot

  • Attacks Inflict Scarlet Rot
  • [Ironeye] +1 additional Character Skill use
  • Stamina recovers with each successful attack

Red Relics Best-in-slot

  • Increased rune acquisition for self and allies
  • Attacks Inflict Frost
  • Stonesword Key in possession at start of expedition

Blue Relics Best-in-slot

  • Character Skill Cooldwon Reduction +10%
  • Attacks Inflict Blood Loss
  • [Ironeye] Art Charge Activations Adds Poison Effect

Weapon Passives

Best-in-slot

  • Improved Damage Negation at Full HP (+24%)
  • Improved Attack Power When Two-Handing (10%)
  • Improved Ranged Weapon Attacks (12%)
  • Improved Attack Power at Full HP (+14%)
  • Attacks Inflict Poison (+23)
  • The Ironeye's Grief (+1)
  • Improved Holy Damage Negation (+12%)
  • Less Likely to Be Targeted
Serpent BowBow • Lvl Required 7
Black BowBow • Lvl Required 7
Pulley BowBow • Lvl Required 7
Harp BowLight Bow • Lvl Required 3
Green Turtle TalismanTalismans
Ritual Shield TalismanTalismans
Arrow's Reach TalismanTalismans
Ritual Sword TalismanTalismans
Dragoncrest Shield TalismanTalismans
Haligdrake TalismanTalismans
Arrow's Sting TalismanTalismans
Spear TalismanTalismans
Opaline BubbletearConsumables
Greenburst Crystal TearConsumables
Wending GraceDormant Powers
Improved Stamina RecoveryDormant Powers
Improved Thrusting CounterattackDormant Powers
Improved Damage Negation at Full HP (+24%)Weapon Passive
Improved Attack Power When Two-Handing (10%)Weapon Passive
Improved Ranged Weapon Attacks (12%)Weapon Passive

Game Plan and Pathing

Day 1

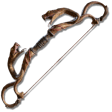
Ironeye doesn’t have a lot of health early, so try to keep your distance and use your dash defensively. Stick with your team and make smart use of your pins. As a ranged fighter, you’re safest in the backline. This gives you time to analyze the map and help coordinate your group’s pathing.

Your priority for Day 1 is to gain as many levels as possible and visit any churches along the way to increase your flask charges. Observe the map with the overview feature and take note of locations with bows as a guaranteed drop. Prioritize frost, rot, bleed, and poison locations as these will do the most damage to Fulghor. If none of these are possible with a bow, simply avoid farming holy camps as these will not be useful.

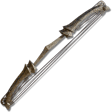
Make your way to those locations, stopping at as many churches as you can manage without wasting too much time and getting caught in the storm. If you’re using relics that alter your default bow, then you will want to raid a cave and find a merchant to upgrade your weapon to Epic as soon as possible.

If the castle in the center spawns Crucible Knights, then this is a great location to farm for a lot of runes, even on day 1, as they are very easy to fight in groups and drop lots of runes.

Day 2

By now, you should have obtained a suitable weapon and the levels to beat most enemies you may come across, so it’s time to target the more difficult locations in Limveld. If there is a shifting earth for your run, you should use the entirety of today to complete it. These are always your best bet for a good run, as they will always have extremely good loot and enough enemies to get to level 15 by the end of it.

Otherwise, if a shifting earth is not available, many field bosses will begin spawning, which can be a good source of rare items and loot. Raiding the castle can also be a good option to efficiently farm runes due to the large quantity of enemies in one location. Now you’ll need to sift through your weapons for the best passives you can get.

After defeating the Night Boss, you can continue to farm locations nearby if you feel you’re underleveled. The zone does little enough damage that you can farm most locations that are nearby without much worry.

Day 3

Take your time here. Level up and purchase any necessary equipment from the merchant and upgrade your weapon of choice. Get rid of any extra upgrade materials or keys in favor of consumables, as you will not be able to use them anymore.

If you have a Revenant on your team and some spare runes, invest in Starlight Shards for them. Their limited FP pool makes extra casts extremely valuable. This can be the difference between a winning and losing fight.


Additional Tips

  • Do your best to keep an adequate distance between you and the boss at all times.
  • If the boss targets you, use marking to dash through him and to the side, the i-frames will stop you from getting damaged and position you outside of the explosion that follows.
  • If a teammate is down, you can lock on to them to make shots easier to hit without needing to use precision aim.

Table of Contents

Explore Other Builds

Scholar General Build Guide
Updated on Dec 5, 2025
Undertaker General Build Guide
Updated on Dec 5, 2025
Gnoster Expedition Ironeye Build
Updated on Nov 13, 2025
Gnoster Expedition Recluse Build
Updated on Jul 10, 2025
Recluse Best Relics for Every Nightlord
Updated on Jul 4, 2025