The Death Trap Rogue Build Guide teaches you about Gear, Skills, Paragon, Playstyle & Seasonal Mechanics in Diablo 4.
Death Trap is a versatile skill that pulls in enemies and deals great damage.
The Death Trap Rogue Build Guide teaches you about Gear, Skills, Paragon, Playstyle & Seasonal Mechanics in Diablo 4.
Death Trap is a versatile skill that pulls in enemies and deals great damage.


When killing bosses we can respect the points from Dash to Caltrops for more damage.


To start playing this build you only need Eyes in the Dark and maybe Scoundrel's Leather. Until those you probably want to play something like Dance of Knives.
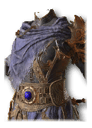
You can acquire Scoundrel's Leather from Andariel and Duriel, Eyes in the Dark is dropped by Varshan/Urivar.
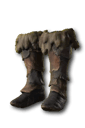
The third most important Unique is Beastfall Boots, as it will greatly increase your damage output because Scoundrel's Leather converts Death Trap into an Ultimate and a Core Skill at the same time. This means it alone fullfils both of Beastfall Boots' requirements.
Beastfall Boots are dropped by Beast in Ice.
Band of Ichorous Rose are nice when starting out, as they make sure you always have trapped targets to generate Exposure procs on.
 0 (0)
0 (0)Weapon Mastery is not taken as it doesn't work with Death Trap.
When monster density is high and your gear is bad you have to spam Poison Trap + Death Trap. Eventually, you can get away with just Death Trap after you place your initial Poison Trap. Sometimes you will need to cast Barrage when your Poison Trap and Death Trap are on cooldown, but it won't happen often.
Against, Bosses you will very likely have to include Barrage in your normal rotation.
This build works by getting the right combination of Cooldown Reduction, Ranks of Death Trap and Energy expenditure, allowing you to endlessly spam Death Trap.
Death Trap Rogue strength comes from Scoundrel's Leather making it a Core Skill and Beastfall Boots allowing you to reset the Cooldown fully after every cast.
The way this works is that Death Trap is considered an Ultimate and a Core Skill at the same time. This allows it to fulfill both Beastfall Boot Requirements. In combination with Preparation, and 150+ Maximum Energy, every Death Trap cast lowers your Death Trap's Cooldown by 10 seconds. When you manage to lower your Death Trap's Cooldown below 10 seconds you will then be able to cast it indefinitely.
In the Midgame Variant we opt for 225+ Maximum Energy and a 15 second Cooldown because it makes you far tankier. The Cooldown breakpoint is much easier to reach as a 10 second Cooldown is only doable with Core Skill Ranks.
You can't really level with this build as you need Scoundrel's Leather and Eyes in the Dark. I would recommend you level with the following DANCE OF KNIVES guide.
The Cooldown of Death Trap is affected by Ranks to Death Trap and our Cooldown Reduction. Because of this Vehement Brawler reduces your Cooldown.
You can use THIS Sheet to calculate your Death Trap Cooldown by making a Copy.
You require a 10 second Death Trap Cooldown.
In order to sustain your energy and get Banished Lord's Talisman to always activate you need to recover all your Energy after every Death Trap cast.
We need Rank 6 Aftermath to sustain our Energy.
Heir of Perdition > Starless Skies.
We use Raheir with Shield Charge as it makes it much easier for you to cap your Armor and also provides Fortify. Provoke provides you with more damage.
Varyana with Earth Breaker is used to Knockdown, which increases the damage you get from Malice.
You will use Disintegrate on Death Trap because it is the lowest Cooldown Spell. It will serve as a catalyst for the following Arcanas:
Lastly, you will use the Nebulous Extract Infusion for some Damage Reduction.
You will use the following Horadric Gems:
We will use ZanXan to Crit and Overpower. For Pit Pushing, you will replace this with ZanQax to essentially double your damage. If you do not have Lucky Hit: Chance to Restore Primary Resource on your Weapons it is not possible to use Qax as you will regularly find yourself with no Energy. The reason why Qax is not used until you Pit Push is because it makes you lose a lot of consistency and more damage is not needed.
PocThul will be used while you have a slot available to place Umbrous Aspect on. In the Endgame variant, which contains more Mythics, you will have none which will lead to you using PocMot.
It's important to run Elixirs and Incenses at all times. Not only because they increase your Experience gain but also because they provide very strong combat boosts.
For Elixirs you will use Elixir of Resourcefulness for Maximum Energy, which will increase your Beastfall Boots Damage Multiplier.
For Incenses you will use Spiral Morning for Dexterity, Song of the Mountain for Armor and Soothing Spices for All Resistances and more Armor.
Because the game's server operates in frames (images), Skills can only be cast in a whole number of frames. This means, for example, that you can't cast a Skill in 10.2 frames. To extend this example further, that means that all Attack Speed values that lead to a cast time of 10.01 to 10.99 frames would mean you end up casting at 11 frames, effectively wasting all Attack Speed gains from 11 frames to 10.01.
In order to avoid wasting Attack Speed, you can calculate the Attack Speed Breakpoints for your skills using THIS SHEET.
You might be wondering how frames translate into actual Cast Speed. Because the server runs at 60 frames per second the way we translate frames into Cast Speed is with the formula: 60 / Frames = Casts per Second.
In this build you want to reach the 10 Frame Breakpoint with Bows in the Starter, Midgame and Endgame variants. This requires 96.7% Attack Speed (51.7% from gear).
In the Pit Pushing variant you will want to use a Crossbow and get 111.8% Attack Speed (66.8% from gear).
Masterworking (MW) enhances an item's stats. Each MW rank boosts all affixes by 5%. Ranks 4,8,12 give a 25% bonus to a random affix (MW Crit).
In this planner, the color blue on an item denotes that the affix got one MW Crit, the color yellow denotes that the item got two MW crits and the color orange denotes that the item got three MW crits.
For future reference the amount of MW Crits on an affix will be denoted by 1MW, 2MW, 3MW.
Greater Affixes (GA) on an item force the affix to roll at the top of it's range of possible values and then applies a 50% increase to its value. GA increases are additive with Masterworking increases.
In this planner, the yellow star to the left of an affix denotes that is a GA.
To put it all in to practice, let's calculate what stat increase a GA Affix on a 12/12 Masterworked item with 2 MW Crits gets:
Ranks 1-3, 5-7, 9-11 all give 5% -> 9 * 5% = 45%
Two MW Crits -> 2 * 25% = 50%
GA = 50%
Total = 45% + 50% + 50% = 145%
Unless a certain amount of a stat is required and no more, like in the case of Attack Speed Breakpoints, Armor and Resistances, GA and MW priority should be easy to follow.
Guides, which follow a Starter -> Midgame -> Endgame progression, are structured such that the difficulty of the MWing outcome and amount of GAs on items also progresses as expected.
For example, a Starter variant will generally have 1GA items with three 1MW affixes. A Midgame variant will generally have 2GA items with a 2MW Affix and a 1MW affix. An Endgame variant will generally have 2GA/3GA items with a 3MW affix.
From this you can derive that the GA on the starter version is the most important, the second GA added is the second most important and the third GA added is the third most important affix.
In the case of Masterworking, 3MW = most important affix, the 1MW in the Midgame variant is the second most important affix and from the Starter variant with three 1 MW affixes you can know which is the third most important affix.
When GA and MW don't align you are most likely in the presence of a stat with a certain threshold you have to meet or a cap and those will be explicitly stated in the guide anyways.
In the case of Uniques GA and MW, progression standards are generally shifted by one as they are easier to MW because they have 4 affixes and also easier to acquire with multiple GAs.
Because Death Trap gets the Non-Basic/Core tag which means it still works.
Because Concealment has a secret 0.5 second Internal Cooldown, which means we don't actually get free 100% Crit on every Death Trap.
Become a Creator
Want to earn rewards by sharing your builds with your community?


