League of Legends
 Teamfight Tactics
 Valorant
 Lost Ark
 Destiny 2
 Diablo 4
 Download APP
 Collapse
Premier Tier List: Best Agent Ranks, 5-Stack Comps, and More
Welcome to our Premier Tier List for VALORANT’s tournament mode!
For a reminder of how Premier works, check out Riot’s video explanation.
In this guide, we’ll be covering the best agents for coordinated 5-stack play with commentary for map picks and team comps.
If you’re looking for rankings for the ladder, check out our general VALORANT tier list instead.
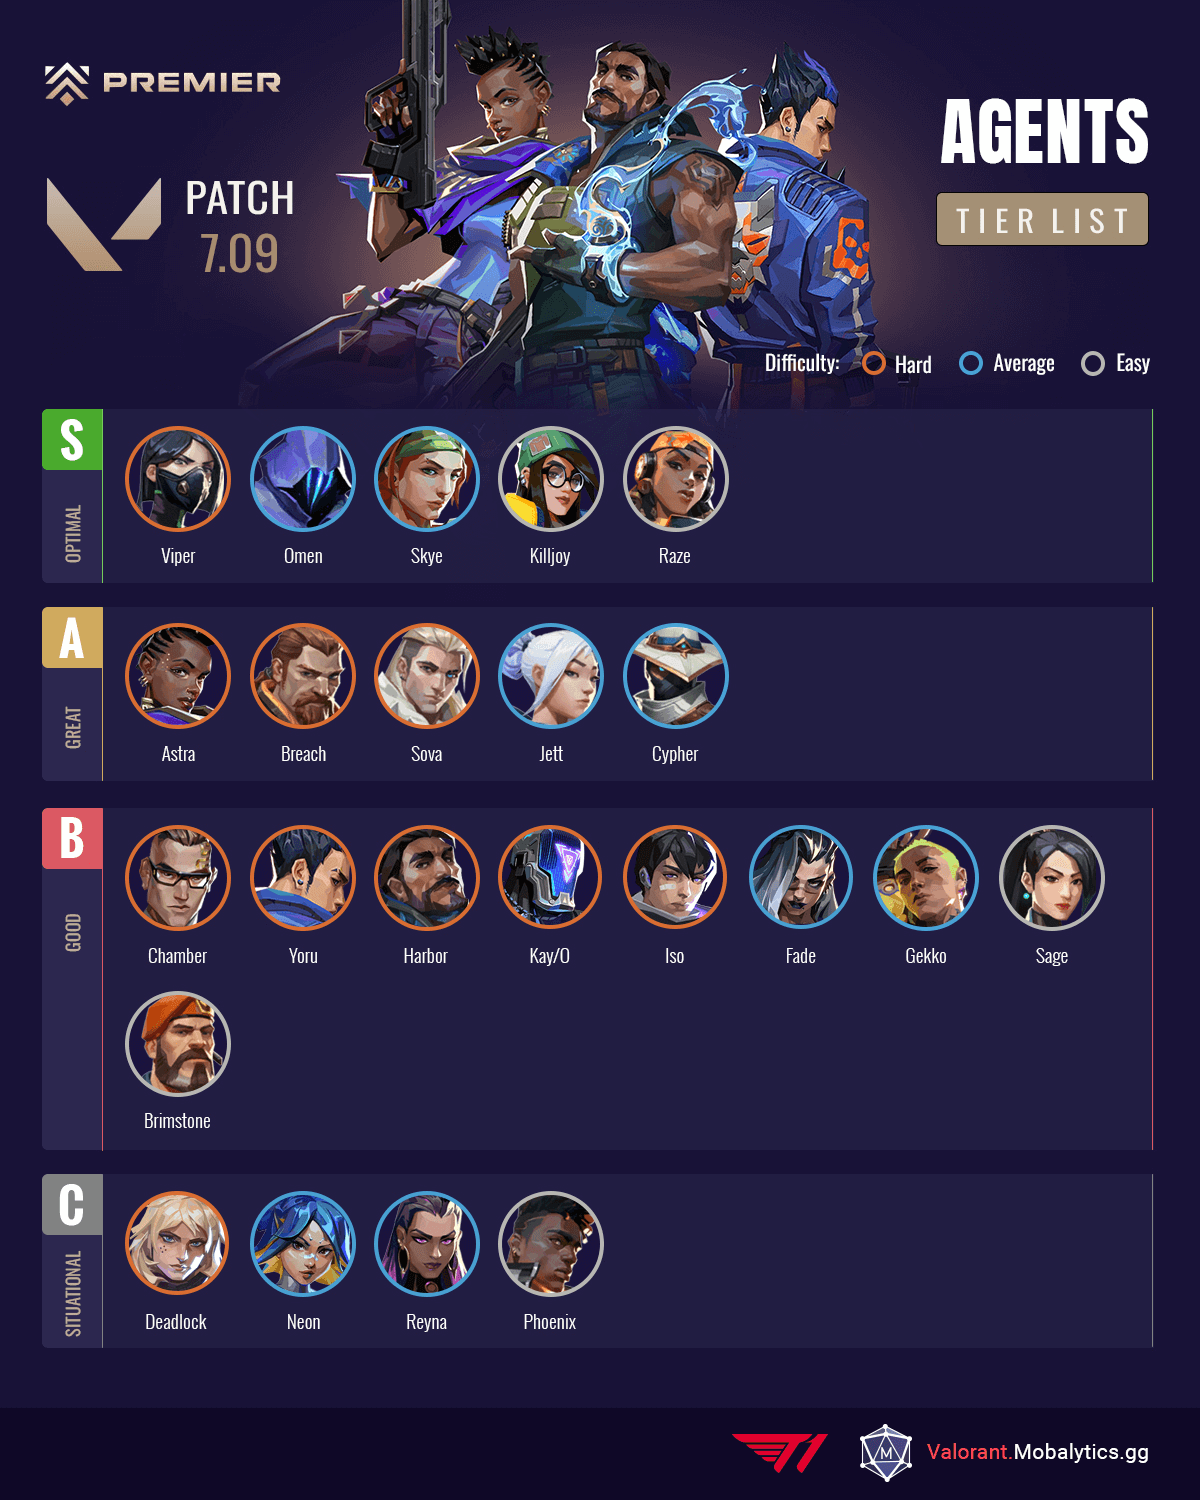
Here are our VALORANT premier tier list rankings:
| Tier | Agents |
| S-tier | Viper, Omen, Skye, Killjoy, Raze |
| A-tier | Astra, Breach, Sova, Jett, Cypher |
| B-tier | Chamber, Yoru, Harbor, Kay/O, Iso, Fade, Gekko, Sage, Brimstone |
| C-tier | Deadlock, Neon, Reyna, Phoenix |
S-Tier Agent Commentary
Viper
Viper doesn’t have the same vision-blocking capabilities as the other controllers, but what she lacks in being a pure controller is made up for by her unrivaled post plant and stalling capabilities.
Her shortcoming of not being able to globally place smokes is covered with the utilization of a second controller which allows Viper to do what she does best which is post plant, utilizing Toxic Screen to cut sites in half, and utilizing both Toxic Screen and Poison Cloud for set up lurk plays and make enemies continually use utility to reclear areas.
On defense, Viper’s rechargeable utility which decays enemies paired with her two Snakebites make Viper arguably the best stalling agent in the game.
Synergies
Viper pairs well with Initiators who can utilize their utility around Viper’s to set up kills for duelists. Skye and KAY/O can flash through Toxic Screen for long duration flashes. Sova and Fade can reveal enemies who are on the other side of Toxic Screen or on the outside of Viper’s Pit to set up very easy kills.
Best Maps
Lotus, Split, and Bind are all maps where Viper can set up Toxic Screen and Poison Cloud for lurks on offense, a Poison Cloud in a choke point, and a Toxic Screen on defense to stall out attackers. Viper is hard to work as a primary controller, but in premier where there is organization to the team comps, she is amazing to have as a secondary controller for strong post plants, lurk setups, and stalling better than any sentinel.
Omen
There are a lot of roles and ways Omen can play.
He can lurk while helping teammates with global smokes, he can play as a support flasher with the extremely strong Paranoia near sight, he can stall on defense with one-way smokes and throwing Paranoia at a choke point in response to enemy utility, he can get out of someone and done angles with Shrouded Step, and even roleplay as budget Jett by making space on offense with From the Shadows or using Shrouded Step into a smoke.
This versatility makes it very easy for Omen to fit into many team compositions and diversify a strat book.
Synergies
Omen pairs well with agents who are able to capitalize on Paranoia. Both Raze and Jett are able to collapse on enemies hit by Paranoia. Sova can shoot a Recon Dart in tandem with Paranoia to make enemies nearsighted so they are unable to shoot out Recon Dart.
Best Maps
Haven, Ascent, and Lotus are great maps for Omen because of his smokes covering the choke points on sites, good lines for Paranoia to get value, and the various heights and one and done locations Omen can play around with Shrouded Step. He is also able to set up one way smokes in A Main on Ascent and Lotus as well as C Lobby on Lotus.
Skye
Skye is a jack of all trades Initiator who is able to get information, flash, and heal teammates. The increased prominence of Viper and Harbor is great for Skye as she has the best flash to send through vision-blocking curtains of Toxic Screen and High Tide.
The flash on its own is a strong tool for both information, setting up teammates at range, and solo plays. Trailblazer is extremely strong due to the precise information it gains and it has a much longer duration than Sova’s Owl Drone. Her kit is tied together by a heal that is better than Sage’s due to its ability to heal all allies at once.
Synergies
Harbor and Viper pair very well with Skye because of Skye’s ability to flash through High Tide and Toxic Screen. Jett is a good agent for Skye to support because Guiding Light can blind enemies deep into the site for Jett to capitalize on who can avoid the flash by being in a Cloudburst.
Best Maps
The duration of Trailblaze and maps in which Sova has difficulty gathering information are good spots for Skye. On Bind, Skye is able to take advantage of Trailbalzer’s duration to get information in multiple lanes with use of the teleporters. Split is another spot where the Trailblazer gets immense value. Lotus is also a good map for Skye due to how common Harbor and Viper are, and Skye’s ability to use her flash through their utility.
Killjoy
Between a strong and well-rounded kit as well as an overall lack of competition in the information-gathering Sentinel role, Killjoy finds herself as a good to a must-have pick on every map. She is able to cover much ground with her information-gathering utility due to having both an Alarmbot and Turret, especially with the latter being able to spot enemies at any distance with line of sight.
Nanoswarms paired with her information gathering and the enemies being vulnerable from Alarmbot, Killjoy can completely halt pushes and delay plants. Her ultimate is also one of the strongest in the game which is great for offense or retaking a site on defense that has a worst-case scenario of being traded for a Brimstone or Sova ultimate.
Synergies
Killjoy is an all-around agent that works well with most, but she can pair very nicely with Astra who can use a Gravity Well based on information from Alarmbot and Turret and make enemies stuck in a Nanoswarm. This also applies to Sova who can pair his ultimate with information from Killjoy’s utility or Lockdown and tag enemies who are in predictable locations on the edge of Lockdown’s radius.
Best Maps
Killjoy is a good pick on essentially every map, but can almost be considered a must-pick on Haven, Ascent, and Lotus. The sites on these maps have tight choke points for Nanoswarms to get value, locations in which Turret can watch two angles at once such as Garage and C Long on Haven as well as B Main and Mid Pizza on Ascent, and spots for Lockdown to be placed to force enemies completely off of sites.
Raze
In the current meta, a duelist needs to be able to create space out of a choke point, and like Jett, Raze is able to make space using her Blast Packs. On top of the ability to make space, Raze is able to gather information and apply pressure using Boom Bot and is able to deny space with Paint Shells.
The threat of damage from Boom Bot and Paint Shells makes Raze great for forcing enemies back on maps with narrow spaces on both offense and defense.
Synergies
Paint Shells synergize well with a few agents. They can be paired with a Seize from Fade to trap enemies inside the explosion. Astra can do a similar combination with Gravity Well. Killjoy and Cypher are also able to give a cue to Raze of when and where to throw a grenade if an enemy activates Alarmbot, Turret, or Trapwire. The enemy will be slowed from the tagging of the Turret or stuck from being in the Trapwire that the grenade will most likely hit the enemy.
Best Maps
Bind and Split are Raze’s best maps due to the tight spaces on the map as well as being able to break through the very tight choke points on the sites. The tight areas force enemies to give up space when pressured by Raze’s explosives. Lotus and Sunset are also great choices for Raze, as she is the best duelist to have due to the values of Blast Packs and tight areas for Paint Shells.
Otherwise Raze is viable on every map other than Breeze. On Haven and Ascent Jett is typically the preferred duelist, but Raze can get good value as well.
A-Tier Agent Commentary
Astra
Astra has global range across the map. She can place any of her utility at any corner of the map no matter where she is, making her a great lurker. On defense she is a solid site anchor, and is able to help allies stuff a push on the other side of the map.
The recharge rates of her abilities and only having 4 stars to place does limit how often she is able to use her utility, but if used when appropriate it is extremely strong.
Synergies
Astra pairs well with agents who can punish enemies in her Gravity Well, and give Astra good information as to when to use her Gravity Well.
Killjoy hits both of these points as information from Alarmbot and Turret can cue Astra when to use Gravity Well, and Nanoswarms can continuously damage enemies inside Gravity Well.
Raze is also a good combination because she Blast Pack to or punish with a grenade enemies who are in a Gravity Well.
Best Maps
Split is a fantastic map for Astra because of the tight choke points of the map and the prominence of Raze. The small chokes allow Astra to stall out pushes.
Lotus is another good Astra map, and she is a good Controller to pair alongside Viper. The long-distance of Lotus allows Astra to be anywhere on the map and help out her team.
Breach
Breach is fantastic at brute forcing his team onto a site. Breach is great for supporting allies, especially those who can get deep into site with movement, and is even fairly effective at using his utility for himself.
Fault Line and Flashpoint are great for disorienting enemies at any range. Aftershock can clear any corner or one-and-done spot to force an enemy out into the open who may be holding a close angle with a shotgun.
Synergies
Breach’s utility is far more useful when he knows where his opponents are. This makes Sova a great pairing with Breach, as once information is gained, Breach can make an enemy’s life a pain with his utility.
Jett is another great pairing as Breach and Jett can pull off a flash and dash and have Jett close the gap on enemies Breach affects with his utility.
Best Maps
Sunset and Haven are Breach’s best maps. These two maps have a lot of long, straight, and narrow lanes where Fault Line can cover their entirety. Breach is a very strong agent for retakes and Haven’s 3 sites lead to retake scenarios very often.
All of the sites of Haven are able to be covered by Breach’s utility making site takes and retakes easy.
Sova
Sova is arguably the best info-gathering agent in the game who brings a lot to the table. Recon Bolt and Owl Drone get very precise information when used properly, and his kit is rounded out by the damage Shock Darts and Hunter’s Fury provide. The changes to Cypher’s will make him more prominent in organized play gives Sova a net boost due to Shock Darts being a good counter to Cypher’s buffed Trapwires.
He isn’t quite in the top tier because of his dependence on a map’s geometry which can obstruct Recon Bolt scans or have few areas where Owl Drone gets good information.
Synergies
Sova pairs very well with Jett who is able to capitalize on Sova’s long distance Recon Bolt. Viper is also a great pairing as Sova can highlight enemies on the other side of Toxic Screen for easy kills.
Best Maps
Maps with open sites that Recon Bolt can cover the entirety of and cramped passages that Owl Drone can clear are where Sova is best. Haven and Ascent fit the mold of what makes a great Sova map for the above reasons and having areas where Odin spam is very strong on defense.
Jett
The best agent with the Operator on defense as well as the best agent for making space on attack, Jett is fantastic on both sides. Tailwind and Cloudburst in tandem give Jett the ability to escape, avoid trades, make space, and stall for teammate support. With proper information gathering from teammates in a more organized setting,
Jett is better able to make informed decisions on when to activate Tailwind as well as make plays off of flashes and reveals when deep into sites under the cover of Cloudburst.
Synergies
All of the initiators: Sova, KAY/O, Skye, Breach, and Fade work well with Jett. Sova and Fade are able to gain information for Jett to know when to activate Tailwind and reveal enemies for her to shoot through Cloudburst. The other initiators are able to set up Jett deep into a site with Flashes as she is able to close the gap quickly and can avoid being teamflashed when in Cloudburst.
Best Maps
Haven, Ascent, and Breeze are the best maps for Jett as she is able to get deep into sites on offense to play off initiator utility as well as playing with the Operator in many forward positions and get away after getting a shot off.
Cypher
The only Sentinel that can hold flanks from anywhere on the map. Cypher has the benefit of being able to use his utility at any distance. His Trapwires can no longer be destroyed very easily which makes Cypher great for retaining flank and improved at stalling multi-person site hits.
Synergies
The thick smokes of Brimstone are able to cover Cypher’s Trapwires well, and make it difficult for enemies who trigger a trap to shoot it out. Viper also has Poison Cloud which is similar in nature and can be paired with a Trapwire to make the anchors difficult to see and destroy. Other Controllers have hollow smokes, and the combination does not work as well.
Best Maps
Split is a fantastic map for Cypher due to the importance of mid and being able to place a trap in Ropes while playing anywhere else on the map. Breeze is another top option for Cypher due to the size of the map where his global range puts him far above the other Sentinels and the map has many kill trip setups that are tough for attackers to handle.
B-Tier Agent Commentary
Chamber
With the extension in Rendezvous and Trademark ranges, Chamber is becoming more viable. Chamber has more coverage and still has his inherent strength in an anti-trade ability which makes him the best Operator agent in the game. Jett is still at the top which boxes Chamber out a bit, but as Raze is becoming more popular in lieu of Jett, Chamber can see more play to fill in the Operator role that is vacant with no Jett.
Synergies
Astra is a good pairing with Chamber as she can utilize Gravity Well to slow opposing players pushing Chamber after he teleports away or to utilize her utility through a choke point based on an alert from Trademark.
Best Maps
Both Bind, Split, and, Sunset are maps which allow Chamber to play in an open area and have his Rendezvous behind overlapping walls in a safe area such as A Site to A Main on Sunset, B Long to Elbow on Bind, and Mid to Ropes on Split. They also offer various spots where Trademark can be without totally hindering Chamber’s Rendezvous location.
Yoru
A difficult agent to get a lot of value from, Yoru is an agent that requires too much investment from teammates’ utility to make very risky plays that are hard for teammates to trade him out.
If mastered and thoroughly planned for, Yoru can make a somewhat viable pocket pick for certain gimmick strategies to catch teams off guard.
Synergies
Fade and Omen are interesting pairings with Yoru because some of their abilities deafen enemies, which allows Yoru to teleport into sites without enemies hearing the audio cue.
Best Maps
Between using the teleporters for trickery and defense being dependent on quick rotations and avoiding over rotations due to the lack of a mid area and teleporters, Bind is a spot where Yoru can have an impact on the game. The size of Breeze allows Yoru to get through the chokepoints into tough to deal locations for defenders.
Harbor
Harbor is well used in double controller compositions with Viper. The sheer amount of utility that Harbor can utilize is overwhelming for the opposing team, especially because of the slow Cascade and High Tide afflict when passing through.
Synergies
Skye is seen very often with Harbor due to Guiding Light being able to be perfectly activated on the other side of Cascade and High Tide to give enemies no time to turn the flash.
Viper is also a great pairing to overwhelm the enemies with vision-blocking utility as well as providing post-plant utility with Snakebite and Poison Cloud after Harbor can secure a plant with the use of Cove.
Best Maps
Bind is a solid map for Harbor as his High Tide can reach all of the small map for support and Reckoning covers the entirety of both sites. Breeze is another great map for Harbor due to the strength of Harbor + Viper on that map.
KAY/O
The only agent who can suppress enemies. KAY/O is a duelist-Initiator hybrid who is able to support teammates and make plays for himself. The ability to throw his flash near or far as well as get information and suppress enemies with ZERO/POINT puts KAY/O over flashing duelists.
Synergies
KAY/O pairs very well with Jett who can get the upper hand on enemies who are suppressed by KAY/O as well as take advantage of a long rage KAY/O flash and avoid it herself while in a Cloudburst.
Best Maps
Ascent is far and away KAY/O’s best map. The small sites allow ZERO/DRIVE to catch Sentinels and suppress them. When rotating to help on defense, the open areas CT allow KAY/O to throw a long-distance flash to assist a teammate in back site on B or flash opponents coming through a main.
Breeze is another great map for KAY/O. He is able to shut down Skye’s Trailblazer, Sova’s Owl Drone, or Viper’s Toxic Screen, making an opposing site execute stall out.
Iso
The newest agent to the cast who is a duelist. Iso suffers from not being able to make space like Raze and Jett. Iso does have some team-oriented utility in Undercut and Contingency which can make him an interesting niche pick on some maps. The ability to suppress enemies with Kill Contract can also open up some rounds as well as secure a 2v1 round.
Synergies
Raze and Sova are great pairings for Iso. Both have damaging utility that Iso can enhance with the debuff from Undercut. Raze is also a nice pairing in making up for Iso’s lack of space-making movement.
Best Maps
Bind and Split have open “flex” agents in their standard compositions and are must-pick Raze maps. These two maps also offer overlapping walls where Iso can throw Undercut through them to assist teammates in different areas of the map.
Fade
Fade’s kit is best for gathering information and punishing enemies for being spotted by her utility with trails leading to their location. Haunt is easier to get into desired spots with its ability to drop on command and sit on top of rooftops, but the relative health and speed of Fade’s utility makes it fairly easy for enemies to shoot it out, so it must be used in tandem with allies’ utility.
If Fade’s utility lands on an enemy their life can become a nightmare because they’ll be marked with a trail and if a Prowler is used it will go much faster and follow the trail to their exact location. On top of this, different pieces of her utility can deafen, nearsight, and/or decay enemies to set them up for easy kills.
Synergies
Allies that can take advantage of enemies who are impacted by Fade’s utility work well with her. Raze is a prime example as she can Blast Pack to an enemy who may be nearsighted or deafened without them knowing or she can kill an enemy stuck in Fade’s Seize with Paint Shells.
Brimstone is a good pairing with Fade as he can get a kill on an enemy stuck in Seize with his Molotov or Orbital Strike. Brimstone’s 3 smokes are also typically used for faster site executes which coincides with Fade quickly dumping all of her utility to punish those on site.
Best Maps
Sunset is a good pick for Fade as the open area and rooftops are great for giving Haunt value. Her Prowlers are fantastic for clearing out the tight halls around A site and in Market. Lotus is another good pick for Fade where her Ult can cover complete sites and her Sieze pairs very well with Raze’s Paint Shells in the limited areas defenders have to play and the tight chokes of B and C sites.
Gekko
Gekko’s kit is based around picking up and reusing his utility as much as possible. He gets great value when he is able to do so, and has a good cycle on offense of using utility, taking the space the utility gained, then picking it up and repeating. His issue is in defense where the utility he uses is much riskier to pick up and is often not worth getting.
This has subjugated Gekko to being best on maps where he is able to throw Dizzy straight up in the air and still get useful information when on defense.
Synergies
With Wingman being able to plant in some tough to get to and risky plant spots, Gekko pairs well with agents who are good in post plant when playing off site.
Killjoy, Viper, and Astra all have post plant stall utility that can make defusing the spike that Wingman planted a difficult task.
Best Maps
Bind is great for Gekko for a few reasons. He is able to throw Dizzy through the roof of Hookah or at B Elbow straight in the air and pick it back up while getting info in Sands or B Long. This map also has a lot of small pockets that Mosh can clear out with its very large radius.
On Lotus, Gekko can get some good value by having Wingman plant in tough to get to areas on B site or on C Site for a post plant to be played in Sands. Dizzy can also be thrown straight up near Waterfall to get info on Sands on defense or on A Site to see enemies pushed A Main and A Root.
Sage
Despite being labeled as a Sentinel, Sage is in an interesting spot where she plays more so as a supportive Duelist. Her Barrier Orb is very diverse and can be used to stall the other team, cut off areas of the map to plant or defuse the spike, or to take fights from unexpected angles.
Sage is unable to gather information like the other Sentinels, which makes her only a good pick on where flank information isn’t as imperative and where Barrier Orb can shine with all of its use cases.
Synergies
Best Maps
Bind is a very good Sage map because this map lacks a mid area, meaning an information gathering Sentinel is not essential. Split is a map where Sage is a good flex play because of her ability to utilize her Barrier Orb in a plethora of ways.
Split has narrow lanes which makes Sage great for walling off an area and further stalling with Slow Orbs. Both Split and Icebox have a lot of boxes and geometry on the map where Sage can wall herself or a teammate up to unexpected locations for advantages in fights.
Brimstone
Brimstone is the only Controller who can use 3 smokes at the same instant, but he struggles in long-duration rounds. This makes him a niche pick on maps that have sites that need extra locations blocked off and for fast executes based on how quickly these smokes can be placed, the fact they do not recharge, and the presence of Stim Beacon which speeds everyone up.
Otherwise Brimstone has a fairly basic kit that doesn’t have much dynamic play to it. The only other use of Brim is zoning and post plant with the use of Incendiary and Orbital Strike.
Synergies
Fade’s Seize can trap enemies inside Orbital Strike or Incendiary. Brimstone’s smokes pairs well with Incendiary to cover up Incendiary making it difficult for enemies to see if they are it.
The Nanoswarms of Killjoy are great for this. Brimstone can smoke off a choke point, and when enemies trigger Killjoy’s utility they won’t be able to the Nanoswarms because of the smoke’s coverage.
Best Maps
Bind has sites that may require 3 smokes to fully block enemy vision. This map also has sites with pockets and corners where Brimstone can punish enemies with Incendiary and Orbital Strikes.
C-Tier Agent Commentary
Deadlock
A sentinel similar to Sage as she is best for stalling pushes in front of her and has limited capacity of passively watching flank, Deadlock is limited to maps which don’t require a flank watching sentinel or she is paired with one as a flex. Deadlock does offer the ability to combo very well with damaging utility and once more of the combinations are explored Deadlock can definitely find a way to be higher on the list.
Synergies
Agents with damaging utility that can punish enemies slowed and stuck in Deadlock’s utility are the best pairings. Brimstone is a prime example as he can ult or molly these enemies. Raze is similar here as Raze can get huge impact with Paint Shells and Showstopper on enemies affected by Deadlock.
Best Maps
Bind is the best Deadlock map as the two agents she pairs very well with are commonplace on the map, but also the map does not require a flank watching sentinel with no mid area and it has tighter lanes that Deadlock’s utility is more likely to hit enemies. Split is another potential option because of the size of the lanes, agents that pair well with Deadlock are good on these maps, and a flank watch isn’t mandatory on this map.
Neon
Neon’s kit pales in comparison to the best space making duelists in Raze and Jett. The strength in Neon lies in her ability for quick rotations using High Gear to quickly stack sites and sprinting back site with the cover of Fast Lane.
Synergies
Neon pairs well with Skye who can flash out of Neon’s Fast Lane as well as Sova and Fade who can reveal enemies on sites for Neon to shoot through the cover of her Fast Lane.
Best Maps
On Lotus Neon can make use of quick rotations with High Gear by getting from A to C on Lotus which is the longest distance between any 2 sites in the game.
Reyna
Reyna is a very selfish agent who is unable to bring much in a team environment. Her only true utility is a near sight flight that can be easily shot out. Her inability to make space and being a selfish, feast or famine character is why Reyna is in this spot.
Synergies
Viper/Harbor and Skye are good to have alongside Reyna to utilize a flash combo through a Toxic Screen or High Tide. If the team throws a Reyna Leer and Skye flash through a toxic Screen or High Tide simultaneously enemies are unable to deal with both.
Best Maps
Bind is a map that can make Reyna work by pairing her with the aforementioned agents. Otherwise Reyna is only a ranked, pub-stomp agent.
Phoenix
Phoenix suffers from being a duelist who is unable to create space outside of his ultimate. Phoenix is also boxed out by Initiators who have stronger, and longer-range flashes.
The only way to get value out of Phoenix is to farm Ultimate Orbs in hopes of him using Run it Back 4 or more times on an offensive half.
Synergies
Astra, Fade, and Sage pair well with Phoenix due to their ability to slow chokepoints and prevent enemies from running away when Phoenix uses Run it Back. These enemies are either forced to fight Phoenix who has nothing to lose or can be caught up to.
Best Maps
Ascent has attacker-sided Ultimate Orbs for Phoenix to farm his 6-charge ultimate. This map promotes Phoenix spamming his ult continuously on offense.
Example Team Comps
Now let’s put it all together. Each team can have minor tweaks to the agents to best suit the players’ comfort with each respective agent.
Nonetheless apply knowledge of agent roles, synergies, and where they perform well to best create a team composition that is cohesive and works well on the map. Here are recommended compositions and alternative for each map
Lotus
- Omen
- Viper
- Skye
- Killjoy
- Raze
Alternatives:
- Fade and Astra for Skye and Omen to offer combos with Raze’s Paint Shells.
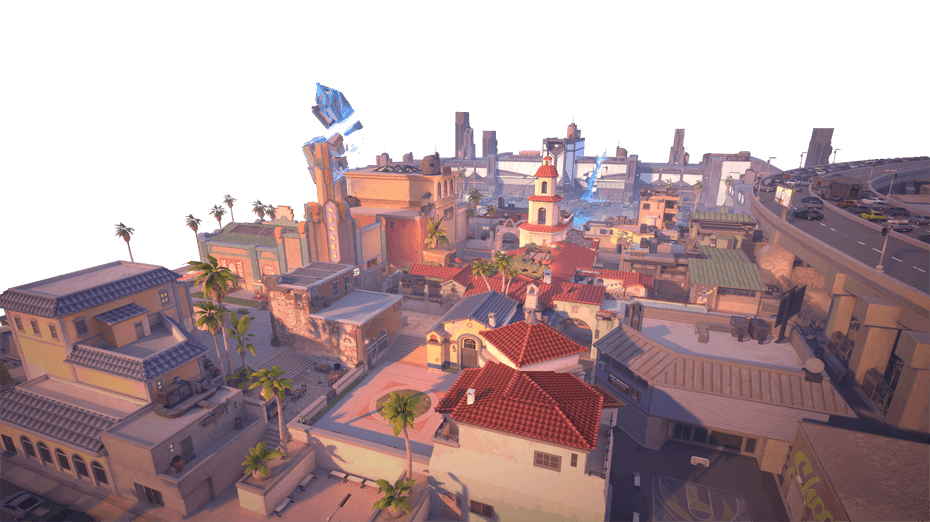
Sunset
- Harbor
- Viper
- Raze
- Chamber
- Skye
Alternatives:
- Cypher for Chamber as a less aggressive Sentinel for better overall information
- Omen for Harbor as a different second controller with a good flash
- Raze, Fade, Breach, Omen, and Cypher is a good single controller composition for Sunset
Bind
- Raze
- Skye
- Viper
- Brimstone
- Chamber
Alternatives:
- Sage for Chamber to easily plant on A Site with Sage’s wall. This 5th spot is rather flexible and can be taken by a lot of different agents.
Haven
- Jett
- Sova
- Breach
- Omen
- Killjoy
Alternatives:
- Astra for Omen in the controller spot based on preference
- Viper and Skye for Sova and Breach to utilize the various walls and strong post plants Viper has on this map
Split
- Team 1
- Jett
- Raze
- Skye
- Viper
- Astra
Alternatives:
- Omen for Astra based on preference
- Chamber for Jett for a slightly less aggressive offense that allows for more stacking on defense
Ascent
- Team 1
- Jett
- Sova
- KAY/O
- Killjoy
- Omen
Alternatives:
- Phoenix for KAY/O to spam ults on offense
Breeze
- Team 1
- Jett
- Sova
- Viper
- Cypher
- KAY/O
Alternatives:
- Omen or Harbor for KAY/O for a secondary controller to be able to work both sides of the map on offense
Format and Methodology
Tier Ratings
Overall, the criteria for S/A/B are as follows:
S-tier
- S-tier agents are a strong pick on almost every map and slot into nearly any team composition.
A-tier
- A-tier agents are very strong on a select few maps or they fit into most team compositions and are a good pick on roughly half of the maps.
B-tier
- B-tier agents are a viable pick based on a specific team composition or are only viable on a few maps and can be replaced by an agent of a similar role in a higher tier with little to no detriment
C-tier
- C-tier agents are weak in the current meta and can be substituted by agents of a similar role in a higher tier. These agents have the potential to succeed in niche scenarios in which the map and team composition are built around their utilization.
Agent Difficulties
These ratings are more suited for newer players (Iron, Bronze, and Silver) and relate to how much time and experience you need to be useful to your team compared to other agents.
Here are examples for each:
Brimstone (Easy)
Brimstone is an ideal agent for beginners with abilities that are very straightforward and easy to understand.
They can all be safely used from behind cover and are useful even when you’re playing from behind.
Cypher (Average)
Cypher’s abilities require you to have additional macro understanding compared to Brimstone.
You need to understand where to place your gadgets, how to balance between switching back and forth to your camera, and how to use your gadgets in combination with each other.
Defending can be more forgiving for a beginner, but on offense, you need to learn how to lurk and where flankers are likely to come from to make your Trapwires useful.
His ultimate is also harder to activate compared to Brimstone.
Sova (Hard)
To be an effective Sova player, you need to spend time in custom games to practice your ability lineups with your arrows.
If you don’t it can be incredibly easy to whiff your Shock Darts and your Recons may land in areas that provide no value.
Because of the amount of time commitment he requires and due to how easy it is to mess up his abilities, he is quite hard for beginners to pick up compared to other agents.
Outro
Best of luck in the rest of the Premier Bets as well as when it comes to the game in its full release. Utilize these synergies and map recommendations to build a team composition, make set plays and strategies which is a unique aspect of Premier with having a set squad to play with.
Thanks for reading! Be sure to check out our other Premier guides.