One of the biggest differences between an Iron player and a Diamond player is the amount of times they die a game.
While both ranks die frequently, there tends to be less deaths by higher ELO players in the mid/late game compared with the lower ranks. This is due to a number of reasons such as understanding timings, positioning and champions win conditions.
In this Mobalytics guide, we are going to discuss how you can stop dying in the mid and late game, and how to stop getting caught out during these crucial moments of the game.
While we cannot prevent every single one of your deaths, reducing the time spent watching a grey screen simulator during the mid game is good for everyone.

The Impact of Dying Less
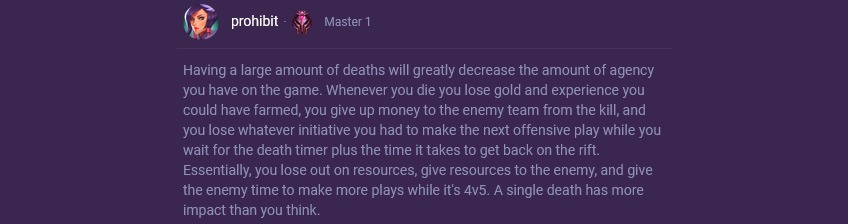
There are a ton of reasons why you should aim to die less during the mid and late game. While some of these reasons are pretty obvious, a single death at the wrong time can have unforeseen consequences that you may be unable to come back from.
Here are some of the benefits of being able to stay alive during these two phases:
A) You'll collect more gold and experience.
While you are dead and off the map, you will not be able to pick up any minions or, kill any monsters. This means that you will miss out on gold as well as experience because you are not in a position where you can farm.
Comparing this to an enemy who is on the map, you will not be able to farm a minion wave or take a jungle camp. This can create a deficit in experience as well as gold and you will not be able to get your items as quickly as the enemy, and you may fall behind in levels.
B) Your team will be able to take towers.
If you are the main damage dealer on your team, your team will not be able to siege any objectives because you are not there to help them.
If they try to take an objective such as a tower, they may lack the damage to take it in one swoop which could leave them overextended and in a position where the enemy may wish to engage on them.

A tower provides a lot of gold that can allow your team to open up the map as well as closeout a game.
But if it remains up, it can be somewhat limiting. This is why you need to stay alive and stick with your team so you are able to siege these objectives together and in a safer manner.
For Supports specifically, your team may be walking into a trap if they try to take a Tower because they will not have any ward coverage which the enemy may use to their advantage by picking off members or trying to team fight.
C) Your team will win more team fights
Just like sieging objectives, your team may not be able to fight without you. This is more of an issue for carry roles, but it is applicable to every role in the game. If the Tank gets caught out and dies, your team will have no front line.
If the AD Carry gets caught out of position, you will lack DPS. If your mid laner dies, you may lack wave clear or poke.
You get the point- lacking any one of these things in a team fight can be the difference between a victory and a loss. So making sure you are able to be in these teamfights is incredibly important.
It is very easy to say that your team should not be fighting while one of their members are dead and this is true.
However, in lower ELO's, players do not tend to take this into consideration and fight anyway. On the other hand, it may not be your teams fault that they are fighting.
Instead, the enemy may capitalize on the situation by looking to engage while they have the numbers advantage.
League of Legends has a snowball effect and if you are to make a simple mistake such as dying in the mid or late game, it can quickly cost you the remainder of the game because the enemy can take advantage of their slight lead.
Step 1: Stick with your team
One way you can stop dying during the mid and late game is by grouping with your team. If you are grouped with them, your chances of dying or being picked off are less as there are not many champions who can get in, kill someone, and then escape freely.
Compared to split pushing or farming a side wave before grouping, when you’re alone- you’re easier to kill. This gives players (in this case the enemy) more incentive to try and take you down. It also leaves you vulnerable to multi-person ganks which are hard to escape from.
You should be grouped most of the time during the mid and late game when you’re not farming. Unless you’re a split pusher or someone with strong dueling potential, you should always try to remain with at least 1 teammate so you do not get taken down.
With that said, you should look to pick up side waves, minion waves, monsters and objectives when possible, take appropriate pathing routes back to your team so you do not get caught out.
If you’re the Support, warding during the mid and late game is important for taking objectives, singing, and a ton of other things. If you know that the enemy is nearby, do not go to ward alone as you may die trying to ward.
If you’re trying to ward the Baron, it may give the enemy the opportunity to take the objective uncontested as they have the numbers advantage. If your team tries to stop them, they will just turn around and fight your team.
Do not ward unless your team is there to help you. If they’re not coming, communicate via pings or use the in game chat to request assistance.
If the enemy has assassins, the number 1 way of countering them is by grouping up. Rengar cannot one-shot you if you’re with your team.
Zed has reduced chances of taking someone down if the enemy is grouped and Kha’zix will struggle assassinated any target that is not isolated.
Step 2: Take appropriate pathing when moving around the map
Moving from one lane to another is something that everybody has to do. Whether you are matching the enemies rotation or moving back towards your team after farming a side lane, your movement around the map has a high impact on your death toll.
Taking the wrong path can have disastrous consequences and you should always take a safer route rather than the fastest if the situation calls for it. But how do you know which route you should take?
The route you take depends on the situation you’re in and what circumstances you’re playing under. For example, if you have the area or river warded- walking through is totally safe because you know that nobody is there to stop you. Whereas walking through the river when you have no vision is much riskier as you do not know who might be trying to take you down.

If you do not know where the enemy is or what side of the map they’re on, they could be literally anywhere: including the path you wish to take.
Always take a defensive route if you do not know where the enemy is as the likelihood of them being deep inside your jungle or on your path will be less.
However, if you’re very behind like being without any tier 1 towers, you shouldn’t walk through your jungle as the enemy has complete freedom and control of it. In this situation, you may have to tread further afield to move safely such as through your base.
Something else that should impact your movement on the map is what champions the enemy team consists of.
If they have assassins, burst Mages or anyone who can take you down quickly- you should always adapt your pathing to reduce their chances of taking you down.
Many champions such as Zed, Ahri, Talon, Jax, Renekton, Shaco, and Rengar all like to have a picnic inside a bush and wait for an enemy to walk past before one-shotting them.
At the end of the day, if you’re not sure where the enemy is or if you’re afraid of being one-shot by an enemy champion, always take a safer route when moving from one lane to another to reduce your chances of dying alone.
Step 3: Have good ward coverage...period.
Warding is incredibly important at all stages of the game, but more so in the later stages as being caught out can cost you a major objective.
While the location of the wards depends heavily on the situation you’re in, it’s always important to have good ward coverage around the map so you do not die.
If you have vision in a range of areas around the map, you will see the enemy wherever they turn.
They cannot go to ward without your team knowing about it and they cannot move around the map without you knowing their location at all times. Not only will this save your own life, but it will also save your teammates lives if you can ping the map whenever an enemy shows up.
Now where do you ward? Warding depends entirely on the situation like we just discussed. In most cases, if a game is even- you want to have wards equal on the map and through the river.
For example, having wards here will allow you to see spot the enemy if they move towards the Baron or Dragon or walk inside your jungle.

We’ve made a rather in-depth warding guide that details every warding location and when you should/ shouldn’t ward. If you can learn to improve your warding and map awareness, your death toll will reduce dramatically.
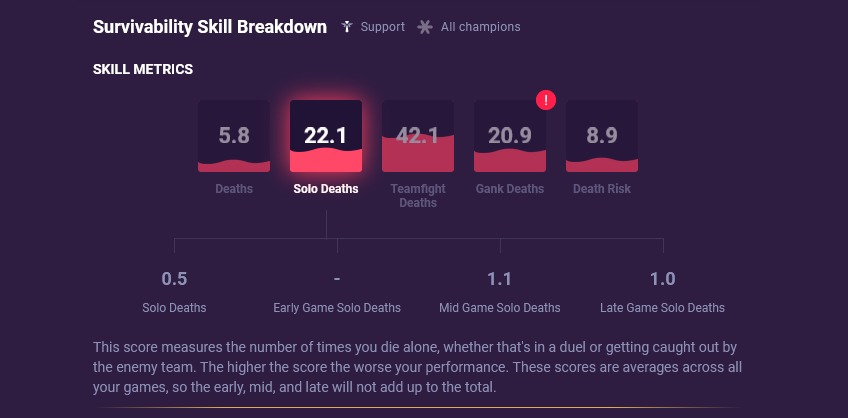
Step 4: Keep track of your Survivability scores
Having a good survivability score in the GPI is crucial because it impacts basically every other GPI score.
If you have a low Survivability, the chances are that your other scores will also perform poorly because you are not on the Rift actively farming, fighting or surviving.
Everything we have talked about in this guide somehow interconnects with the Survivability score. By dying less, your Survivability score will go up. With your Survivability score increasing, the rest of your GPI will improve too.
So if you have low scores throughout the GPI, this is the first thing you should look at improving because it is so impactful. Once you have reduced your deaths in the mid and late game, you should see more victories as well as a significant GPI increase.
While there are a range of other things you can do to stop dying in the mid and late game, ironing out a few key areas such as player movement and having good vision around the map will reduce not only your deaths but your teammates too.