The 3 Best Hunter Builds for PvE
With recent changes to exotic armor, weapons, and more, many builds have gotten better, worse, and stayed the same.
This series aims to give a breakdown of the best builds for each class which should be saved in your loadout slots.
These builds are the best of the best in all end-game content, but may require small tweaks to handle certain champions or modifiers in some activities.
The builds are in no particular order, and each build will have a base form based on the subclass, exotic, and/or weapons used accompanied with various versions of the builds and reasoning as to when and where to use the alternative forms of the build.
Guardians, get ready! The Final Shape has arrived in Destiny 2, introducing an exciting new Prismatic Subclass. Explore our comprehensive Prismatic Hunter builds, Prismatic Warlock builds, and Prismatic Titan builds at our D2 site.
Build 1 – Void Invisibility Spam
The basis of this build is pretty self-explanatory from the title; spam invisibility as much as possible. There are two main exotic armor pieces that can be used with this build, Gyrfalcon’s Hauberk and Omnioculus.
The build is centered around invisibility, and no matter which exotic you use has good survivability as you are able to go invisible on demand if they are played properly. The build also has good utility during damage phases with the use of Tether which is one of the only methods for applying a 30% weaken debuff, and if there are no high health targets Tether can be used to clear large groups of enemies.

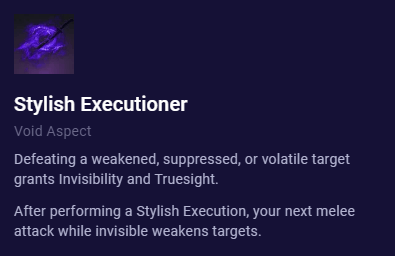
The different exotic armor pieces dictate how invisibility is applied. With Gyrfalcon’s Hauberk the aspect Stylish Executioner must be used to become invisible when defeating a volatile, weakened, or suppressed target, the first of which will almost always be how you chain invisibility due to Gyrfalcon’s giving Volatile Rounds when emerging from invisibility.
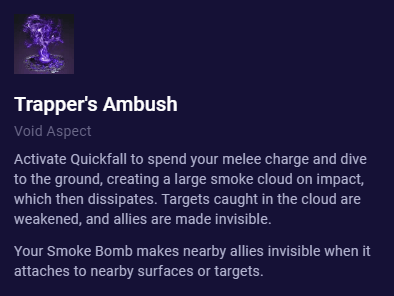
Alongside Stylish Executioner either Vanishing Step or Trapper’s Ambush can be used to initially go invisible. Be sure to use a void weapon such as Graviton Lance, Funnelweb, etc. which can utilize Volatile Rounds to chain invisibility with defeating volatile targets.
When using Omnioculus, invisibility is juggled between the aspects Vanishing Step and Trapper’s Ambush. The main cycle involves using Quickfall or Snare Bomb to become invisible initially and then dodging near an enemy to continue being invisible and get a melee charge back from Gambler’s Dodge.

Typically when using dodge you will be invisible for 7 seconds, but if it is used while invisible from a Quickfall or melee activation, dodge will give 9 seconds of invisibility, so be sure to activate dodge while invisible rather than once it runs out.
The main difference between these two exotics is that Gyrfalcon’s Hauberk is a more offensive version of the build and Omnioculus is a more defensive version of this build. Gyrfalcon is more offensive due to the Volatile Rounds it can apply for extra damage and is best suited for content where enemies are not extremely bulky such as in a standard raid.
This is because the smaller health pool will let you get a kill while Volatile Rounds are still active, letting you go invisible again. If enemies have too much health and take longer to kill, then they may longer be Volatile by the time you score the kill. Omnioculus is better suited for content in which you are at a light level deficit and have teammates as you and allies get damage resistance for improved survivability.
On top of that the exotic armor piece gives back melee energy based on how many allies you make invisible, which lets the cooldown come back even faster.
Build Breakdown:

- If using Gyrfalcon’s Hauberk
- Stylish Executioner and a Void Weapon are mandatory
- Initially activate invisibility with Vanishing Step and Dodge or Trapper’s Ambush and Melee/Quickfall
- From there make targets volatile with void weapons and abilities and become invisible when a volatile, weakened, or suppressed target is defeated or by using a finisher

- If using Omnioculus
- Vanishing Step, Trapper’s Ambush, and Gambler’s Dodge are mandatory
- Use Quickfall or Snare Bomb to become invisible and try to make allies invisible as well to refund more melee energy
- Perpetuate invisibility by dodging near an enemy as it will not only refresh invisibility, but give a melee charge back with Gambler’s Dodge
- Juggle between melee and dodge cooldowns to be invisible indefinitely
Juggle invisibility cooldowns to always have a means of escape if needed - Use Tether for boss damage phases or large clusters of enemies
Build 2 – Radiant Dance Machines Boss Melt
The buff to Radiant Dance Machines has made them a top tier exotic. Typically builds lean more heavily into boss damage or wave clear, but this exotic is good for both.
Radiant Dance Machines allow you to continuously dodge for a 6 second time frame. This timer can get time added to it after a kill up to 11 seconds total. These extra dodges interact with the effects from Marksman’s or Gambler’s Dodge.
In the current meta Rocket Launchers are the top DPS option and their one downside is having a small magazine size and slow reload speeds, continuously activating Marksman’s Dodge allows you to circumvent constantly reloading during a damage phase. This even helps with the neutral game as you can constantly get kills and dodge instead of reloading for infinite uptime of your main ad clearing weapon.
When using these boots and Marksman’s dodge it can be combined with multiple subclasses. Combine this with a good damage phase super and a top tier Rocket Launcher such as Cold Comfort, Apex Predator, or Hothead. The following subclasses and supers are viable combinations as they are an instant cast, giving you maximum uptime to shoot rockets.
- Stasis – Silence and Squall
- Solar – Blade Barrage
- Void – Shadowshot: Deadfall
- Arc – Gathering Storm
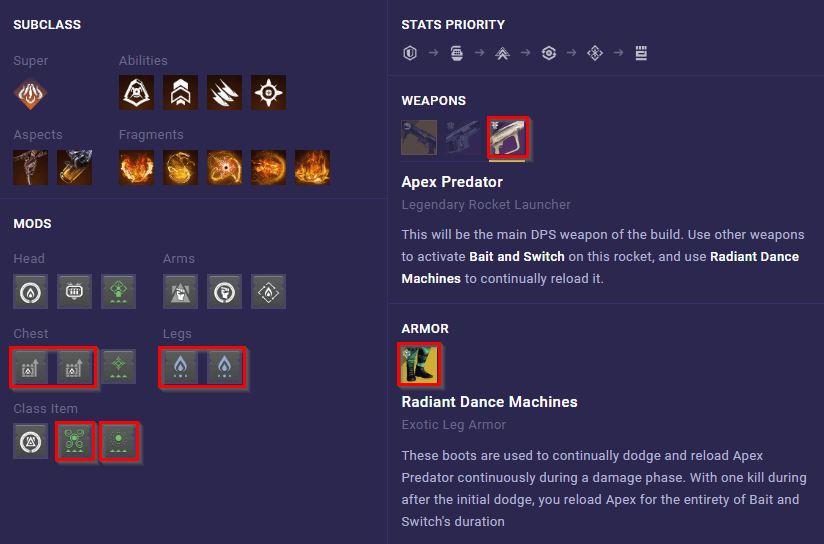
Here is an example of a Solar build using this combination. Here are important pieces of the build to make sure you include:
- Radiant Dance Machines
- Top Tier Rocket Launcher
- Weapon Surge Mods
- Use as many as possible and match the element of the rocket launcher
- Reserves Mods (Matching the Rocket Launcher Element)
- You will go through your ammo fast, this allows you to maximize your total damage
- Powerful Attraction Mod
- This makes your dodge collect Orbs of Power so you can activate the Weapon Surge mods simply by dodging
- Time Dilation Mod
- Maximizes the time your Weapon Surge Mods last in case Orbs of Power are not constantly being generated during a damage phase

With all of these pieces the main boss damage phase is as easy as dodging near an enemy, getting a kill or two as the phase is about to start to get Radiant Dance Machines’ timer up to 11 seconds, then shoot rockets with dodging every time you need to reload.
If the timer is about to run out you can save an enemy or two to quickly kill during the damage phase to extend the timer. The time it takes to do this is worth it for very long damage phases.
This build is great in any content, especially where there is a damage phase as it can dish out arguably the highest DPS of any build in the game.
There doesn’t even have to be a boss for this build to be good as the effects of the boots help out the neutral game with weapon uptime. Here are two example builds that use this exotic and are not focused on maxing out a damage phase:
Build 3 – Arc Melee Spam
The final build utilizes the Arc subclass and the endless bonuses it gets from melee attacks. There are two exotic armor pieces that pair with this build.
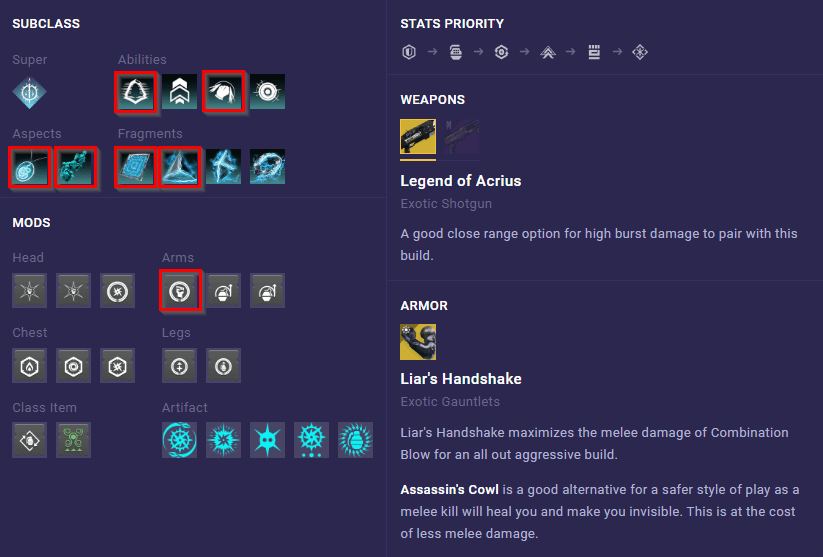
For either exotic the core abilities and gameplay loop will be the same, making either exotic easy to adapt to based on the content being played. The main components of the build are the following:
- Combination Blow
- This melee ability gets increased damage after an enemy kill, and stacks up to 3 times.
- When defeating a target your dodge will fully refund and restore a small amount of health.
- Gambler’s Dodge
- Dodging near an enemy will refund melee energy completely.
- Dodge replenishes melee energy and melee kills replenish dodge energy, letting you cycle the two.
- Lethal Current
- After dodging your next melee will Jolt the target and create an AoE aftershock for extra damage.
- Hitting a Jolted target with a melee will then Blind them, adding to this build’s defenses.
- Flow State
- This second Aspect makes you Amplified when defeating a Jolted target.
- When Amplified you get some nice bonuses, the most notable is extra damage resistance when dodging for extra survivability.
- Spark of Shock is great to use with this build to have another means of Jolting targets with a grenade.
- Spark of Feedback
- This build plays up close which makes it inevitable to get hit by a melee attack.
- This Fragment gives bonus damage to your melee attack when hit by a melee attack.
- Spark of Resistance
- With this being a close range build, survivability is needed. This Fragment gives just that by giving damage resistance from being surrounded by enemies which is almost all the time.
- Heavy Handed
- Gives an Orb of Power on a charged melee kill which is almost every single kill with this build.
- These orbs can be used for ability cooldowns with Innervation, Absolution, etc., or for more survivability with Better Already and/or Recuperation.

The gameplay loop is rather simple and revolves around juggling dodge and melee cooldowns. As mentioned before, a dodge near an enemy will fully recharge your melee ability and getting a melee ability kill will fully recharge dodge. Continuously looping these two to build up stacks of Combination Blow for increased melee damage.
Melee damage is increased from Combination Blow stacks and stacks with Spark of Feedback and other melee damage increasing sources. Other sources that increase melee damage that can be paired with this build are shotguns with the perk One-Two Punch, weaken effects most easily applied via Tractor Cannon, and the exotic Liar’s Handshake which is one of the two exotics best paired with this build.

The two best exotics to pair with this build are Liar’s Handshake and Assassin’s Cowl. Similar to the first build there is a defensive option and an offensive option. Liar’s Handshake will greatly increase melee damage after hitting an enemy with an arc melee or getting hit by a melee.
When the Cross Counter buff is available and you are using a One-Two Punch shotgun, shoot the shotgun shot and then melee when this buff is active as they can stack damage. Although this exotic packs a ridiculous amount of damage output, it still has some survivability to it because a melee hit with Cross Counter active will heal you.
This exotic is usable in essentially all content, but it can struggle where there is a massive light level disadvantage. There is a good bit of healing and damage resistance between this exotic and the build, but it doesn’t matter if you are one-shot by an enemy’s melee. This scenario or other encounters which you may have difficulty in staying alive is where the defensive exotic,
Assassin’s Cowl, is most likely the better option.
This build does so much damage on its own that there isn’t much drawback in using Assassin’s Cowl. The survivability it gives is unmatched as a finisher or melee kill will heal you and make you invisible.

This build plays up close and personal, which can get you in a lot of tough situations. Assassin’s Cowl gives you an out if things go awry. This makes Assassin’s Cowl with this build usable in any content. Liar’s Handshake has the upper hand in boss DPS encounters, but the survivability of Assassin’s Cowl makes it a great choice in any content.
- Liar’s Handshake
- Assassins’ Cowl Build
Outro
If you’re a Hunter main, save some of these builds in your loadouts as these can cover any activity in the game, and will remain strong through future patches. Some honorable mentions are Lucky Pants with the future hand cannon buffs and the infinite suspend Strand build.
Don’t miss our Prismatic Hunter build for The Final Shape!
 Download APP
 Collapse