This is the fastest and easiest way to level an Elementalist for less advanced players. The gameplay is extremely simple and the build can be respecced to another build at the end of the campaign with gold and respec points from quests.
Path of Building Code
Build Overview
Strengths and Weaknesses
- Extremely easy to play
- Fast leveling
- You need to understand how RF works and manage your regen
Build Variants
The First variant covers Act 1 before level 18 and swap to RF and the second variant includes everything after the swap to RF.
You can also check out the PoB for more detailed tree progression: https://pobb.in/YyciyySmuRhv
Equipment


Gearing in Act 1
Make a ranger mule character to get the Momentum Support, extra scrolls of wisdom and extra vendor refresh to look for the following items:
Sockets:
- BBB 3-link (BB 2-link if you can't find one)
- BBR 3-link (BR 2-ling if you can't find one)
- GR 2-link (ideally a RGB item which will hold all your mobility gems)
- 1 red socket
- blue sockets in the rest of your gear
Items:
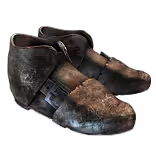
- Movement Speed Boots
- Heavy Belt (needed to equip shield charge)
- Shield (needed to use shield charge)
- Goat's Horn
Use this Regex to search for the item faster:
"-\w-.-|b-b|r-b|b-r|g-r|r-g|Runn|rint|me Sh|Earn|ge to sp|rtz sc|uby ri"
It will highlight the right sockets, movement speed boots, +1 fire and flat fire damage gear, ruby rings and the best sceptre base.
Gearing for RF
To swap to RF you need 2  Ruby Ring (you can craft them by selling an
  Iron Ring and a red gem like
 ![]() Holy Flame Totem which can be bought for 1 scroll of wisdom. Buy a few gems and swap them around to get the best
Holy Flame Totem which can be bought for 1 scroll of wisdom. Buy a few gems and swap them around to get the best  Ruby Ring you can and craft Fire resistance on it from the crafting bench. Get enough Fire Resistance to sustain your RF and after that you can think of getting other resistances.
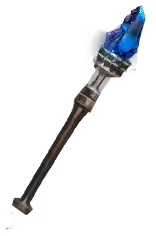
Swap your weapon to a sceptre - ideally  Quartz Sceptre which has the highest implicit bonus to elemental damage. Make sure it has 3 sockets and you can keep it white (normal rarity). In act 3 after Temple of Solaris you will be able to craft Increased Fire Damage on it for 4 alteration orbs.
Passive Tree
Passives Order
- Rush
 Breath of Flames and the Fire Mastery first - you can pick it up at level 18 and swap to RF at that point.
 - Pick up
 Practical Application right after if you need the dexterity for
  Summon Skitterbots
 - Swap the starting nodes like you see on the tree above to free up more passives (RF does not scale with increased spell damage)
- Path to
 Eldritch Battery so that you can reserve all your mana with level 2
  Vitality,
  Summon Skitterbots and
  Purity of Elements
 - Next pick up
 Acrimony with DoT mastery and
  Golem Commander - you should be around level 34 at this point
 - Afterwards simply path to the passives on the left side to pick up your AoE first, followed by Life, Damage and Defensive stats that will help you sustain your
 Righteous Fire with ease.
Bandits
- Beginners: Help Alira for resistances.
- Advanced Players: Help Kraityn for movement speed.
Skills


Act 1 Gem Setup:
- Rolling Magma: Elemental Proliferation, Combustion/Arcane Surge
- Holy Flame Totem: Summon Phantasm, (optional) Combustion
- Flame Wall: Efficacy
- Shield Charge: Momentum
- Frostblink: (optional) Arcane Surge
RF Gem Setup:
- Righteous Fire: Elemental Focus, Efficacy/Burning Damage, Increased Area of Effect
- Scorching Ray: Efficacy, Faster Casting, Infused Channeling
- Holy Flame Totem: Combustion
- Shield Charge: Momentum/Faster Attacks
- Auras: Vitality, Skitterbots, Purity of Elements
- Golems: Flame Golem, Stone Golem, Chaos Golem, Lightning Golem
- Optional: Blood Rage
How it Plays
Rolling Magma Setup
For single target damage drop the ![]() Holy Flame Totem, place
Holy Flame Totem, place ![]() Flame Wall on top of the boss, and cast
Flame Wall on top of the boss, and cast ![]() Rolling Magma slightly in front of the boss to hit it twice.
Rolling Magma slightly in front of the boss to hit it twice.
For clearing you can drop the ![]() Holy Flame Totem as you run by and cast
Holy Flame Totem as you run by and cast ![]() Flame Wall +
Flame Wall + ![]() Rolling Magma into the bigger packs, or just cast
Rolling Magma into the bigger packs, or just cast ![]() Rolling Magma if you have enough damage to kill most of the monsters with one.
Rolling Magma if you have enough damage to kill most of the monsters with one.
RF Setup
For single target damage drop the ![]() Holy Flame Totem on top of yourself to benefit from the consecrated ground and stand close enough to the boss so that he's within the
Holy Flame Totem on top of yourself to benefit from the consecrated ground and stand close enough to the boss so that he's within the ![]() Righteous Fire range. Hold down
Righteous Fire range. Hold down ![]() Scorching Ray until the boss melts.
Scorching Ray until the boss melts.
For clearing just run.
Experience Management:
For the most part you simply ![]() Shield Charge through the entire campaign without stopping after pressing
Shield Charge through the entire campaign without stopping after pressing ![]() Righteous Fire at the beginning of the zone.
Righteous Fire at the beginning of the zone.
- Stay 2-3 levels below the area level for optimal experience gain.
- If you are over-leveled, focus on shield charging through zones and ignoring most monsters.
- If you are under-leveled, kill more blue monster packs to catch up.
How it Works
How to swap to Righteous Fire
![]() Righteous Fire deals more damage to you and your enemies the more Life and Energy Shield you have. Therefore the more Life and Energy Shield you have - the more Fire Resistance and Regeneration you need to sustain it. RF also does not scale with increased spell damage.
Righteous Fire deals more damage to you and your enemies the more Life and Energy Shield you have. Therefore the more Life and Energy Shield you have - the more Fire Resistance and Regeneration you need to sustain it. RF also does not scale with increased spell damage.
To start using RF in the campaign you can simply use a level 3 ![]() Vitality, pick up the Fire Mastery which grants Life Regeneration based on Uncapped Fire Resistance and stack Fire Resistance by using 2
Vitality, pick up the Fire Mastery which grants Life Regeneration based on Uncapped Fire Resistance and stack Fire Resistance by using 2  Ruby Ring with Fire Resistance crafts. This will allow you to use
 ![]() Righteous Fire from level 18. If you find a lot of life and energy shield on your gear and start losing life with
Righteous Fire from level 18. If you find a lot of life and energy shield on your gear and start losing life with ![]() Righteous Fire enabled, make sure to either get more Fire resistance, Life regeneration or lower the amount of Energy Shield you have, by using hybrid bases. You don't need more than 200 energy shield for the purposes of casting your abilities with
Righteous Fire enabled, make sure to either get more Fire resistance, Life regeneration or lower the amount of Energy Shield you have, by using hybrid bases. You don't need more than 200 energy shield for the purposes of casting your abilities with ![]() Eldritch Battery.
Eldritch Battery.
Video Guide
Stats
 Rolling Magma
Table of Contents
Featured Builds
Become a Creator
Want to earn rewards by sharing your builds with your community?


