Weapon:
You're going to want an  Ezomyte Staff,
  Maelstrom Staff, or
  Judgement Staff for the Base 25% Block Chance!
The Best Mods to look for will be -
- % Increased Physical Damage + Phys Accuracy Hybrid
- Adds # to # Physical Damage to Attacks
- % Increased Attack Speed
- +% to Global Critical Strike Multiplier / Chance
- % Chance to Deal Double Damage
Crafting a Warstaff -> High Investment or Budget
Body Armor:
For this variant, we'll be using a Redeemer-Hunter Influenced Body Armor Craft to get a 10% Chance to Gain a Frenzy Charge on Hit and You can Apply an Additional Curse. This will save us 6 points on the Skill Tree AND an anoint on our  Stranglegasp! See my Crafting Guide Here.
The Best Mods to look for will be -
- 10% Chance to Gain a Frenzy Charge on Hit
- You can Apply and Additional Curse
- Attacks have +% to Critical Strike Chance
- % Increased Effect of Non-Curse Aura's (Very Min-Max, will have to use LOTS of Beast Locks)
- T1 Res / Attribute / Block / Physical Damage Reduction
Gloves:
Prioritize Life, Resistances, Attributes, Attack Speed, Accuracy, and Armor for Gloves. Don't bother with Added Damage to Attacks.
Influence your Gloves with Searing Exarch and Eater of Worlds, watch Here if you don't know what that means.
- For Eater of Worlds Influence, go for Increased Chance to Impale
- For Searing Exarch Influence, go for Increased Attack Speed
The Best Mods to look for will be -
- + to Maximum Life
- + or % Increased Armor
- T1 Res / Attribute
- % Increased Damage while Leeching
- % Increased Effect of Non-Curse Aura's (Delve Drop Only, will have to Fracture to craft, very Min-Max)
- % Increased Attack Speed
- + Accuracy (If Needed)
Helmet:
Prioritize Life, Resistances, Attributes, Accuracy, and Armor for Helmet.
Influence your Helmet with Searing Exarch and Eater of Worlds, watch Here if you don't know what that means.
- For Eater of Worlds Influence, go for % of Physical Damage taken as Fire, we get the Mana Reservation Efficiency from the Essence of Loathing when crafting Helmet now (Very Min-Max)
- For Searing Exarch Influence, go for Reduced Mana Cost of Attacks
I went with the new Exceptional Rogue Exile Drop Only Modifier that gives us Increased Damage against Enemies for each Fortification we have. I fractured this mod then re-rolled on the Harvest Bench.
The Best Mods to look for will be -
- + to Maximum Life
- + or % Increased Armor
- T1 Res / Attribute
- Nearby Enemies take 1% Increased Physical Damage per Two Fortification on You (Exceptional Rogue Exile Drop Only, will have to Fracture to craft, very Min-Max)
- % Increased Mana Reservation Efficiency (Essence of Loathing, can always just use Eater Influence Instead, very Min-Max)
- + Accuracy (If Needed)
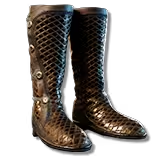
Boots:
Now that we have  Mageblood, we can take advantage of a
  Quicksilver Flask, Onslaught, Elusive, and Tailwind Boots to out speed the Movement Speed Penalty on
  Cyclone of Tumult!
Use Boots with 35% Increased Movement Speed, Chance to gain Onslaught on Kill, and Chance to gain Elusive and Tailwind on Crit Strike. This allows us to achieve anywhere from 200-250% Movement Speed. You can also choose to get Veiled Movement Speed which is a solid option depending on the cost of the Veiled Exalted Orb.
See how to craft them Here
The Best Mods to look for will be -
- % Increased Movement Speed
- + to Maximum Life
- % Chance to Gain Onslaught on Kill
- % Chance to Gain Elusive on Critical Strike
- % You have Tailwind if you have Dealt a Critical Strike Recently
- % Increased Effect of Tailwind on You
- % Increased Attack, Cast, and Movement Speed while You have Onslaught
- T1 Res / Attribute / 4th Influenced Mod
Belt:
We'll be swapping over to Mageblood for Flask Automation which provides a ton of QoL and power increase. Expensive but for all the right reasons. Just make sure its a 4 Flask and try to get good Resistances and Attributes.
Amulet:
Once you have your Attributes and Resistances handled, you'll swap off a Rare Amulet to Stranglegasp. This Amulet can be Anointed 4 times and provides More Offense and Defense than almost every other Amulet for the build (Outside of Mirror tier).
I've anointed with  Enigmatic Defence,
  Serpent Stance and
  Steelwood Stance for Block / DPS then
  Charisma for Mana Reservation Efficiency.
You can Corrupt a Stranglegasp for a Small Chance to turn into a Quad Anointed Rare Amulet (What I have Equipped). If it turns into a Rare Amulet that's bad, feel free to use a Tainted Mythic Orb to try to turn it into a Quad Anointed  Astramentis,
  Carnage Heart,
  Hinekora's Sight (Or Delete it LOL).
What I've mentioned above is VERY Min-Max and should only be done if you have tons of currency to blow, otherwise just keep your normal Quad Anointed Stranglegasp.
Rings:
Use your Ring Slots to fill out whatever needs to you may have. The only Required Affix is Channeling Skills have -3 to Total Mana Cost which can be crafted on from the Crafting Bench.
I've chosen the  Cogwork Ring as this removes 1 Prefix, but gives us 1 Additional Suffix. This allows us to get extra Attributes, Resistances, Crit, and Curse on Hit. The Prefix on Rings outside of Max Life and - Mana Cost are pretty bad so this Ring is perfect for the build!
The Best Mods to look for will be -
- -3 Mana Cost of Channeling Skills
- + to Maximum Life
- + to Global Critical Strike Multiplier
- + to Accuracy
- T1 Res / Attribute
- Curse Enemies with Vulnerability on Hit
Crafting Curse on Hit Ring -> Here
Jewels:
The most important thing for the Jewels at this stage is getting a solid  Lethal Pride (Kaom Strength of Blood) and
  Large Cluster Jewel! There's tons of variations of Lethal Pride (Kaom Strength of Blood) that are good, just use the Find Timeless Jewel Tool provided in my PoB file or come by my stream and ask.
For the Large Cluster Jewel, get one with  Overlord so we can have Fortification. Make sure it Adds no more than 8 Passive Skills and good Notables like
  Martial Prowess, Feed the Fury, Fuel the Fight, Devastator,
  Brutal Infamy, Surefooted Striker, etc....
You'll want a Forbidden Flesh and Forbidden Flame with  More Than Skill. The combo of these 2 Jewels give us Lucky Block for a HUGE EHP increase! These become more expensive as the league goes on so I try to buy early.
Next we'll use a Watcher's Eye  Prismatic Jewel with Buffs when using
  Pride and
  Purity of Elements. I've gone with % Chance to Deal Double Damage, Impales Last 2 Additional Hits, and + Chaos Res. Increased Critical Strike Multiplier, Increased Physical Damage, and Increased Attack Speed are also really good so pick a 2 or 3 combo Jewel that's within your price range.
 The Light of Meaning (Physical Damage) is great for tons of Physical Damage when placed in the correct location. This is typically a couple divine.
Flasks:
- I'll use 1 Quicksilver Flask with 25% Increased Effect and Increased Movement Speed During Effect. Make sure to Craft on with an Enkindling Orb "70% Increased Effect"
- I'll use 1
 Diamond Flask for Critical Hit Chance with Reduced Effect of Curses to make us Immune to all Curses
 - I'll use 1
 Granite Flask for Armor and Additional Elemental Resistances during Effect to help cap our Resistances
 - I'll use 1
 Basalt Flask for More Armor and Increased Armor during Effect to raise our Phys Max Hit
 - I'll use 1
 Oriath's End for tons of clear speed but can optionally be swapped for either
  Progenesis /
  Bottled Faith
 Cyclone /
 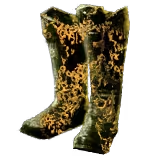 The Stampede /
  General's Cry +
  Autoexertion +
  Double Strike /
  Ground Slam of Earthshakingfor some additional Clear Speed and Damage. The
  Desecrate to create corpses for us to use in scenarios like boss fights. This is a great Single Target and Map Clear increase! Use
  Versatile Combatant to allow Over capped Attack Block to turn into Spell Block. So we'll stack tons of Attack Block by using Nodes like
  Whirling Barrier alongside Tattoo's of the Valako Shieldbearer to reach 65% Attack and Spell Block. Combine this with
  Brutal Fervour from the Slayer Ascendancy will keep our Leech and Leech effects running 24/7 to mitigate small hits as long as we keep spinning. We'll eventually combo this with
  Vaal Pact for instant Leech. We'll also have
  Molten Shell for a very Tanky Spin-2-Win Build!