Equipment Guide
Self crafted gear you can buy off of trade instead of crafting, but it will cost more to do so.
Some of the notes in this section will refer to Corrupting the gear with a vaal orb. This is for the Chaos bloodline which will be mentioned lower in the How it Works section.
Wand and Shield: (ESTIMATED COST: 1D Max)
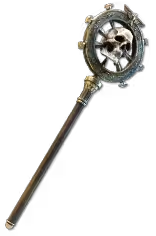
 Tulborn(Foulborn Version with +4 Cold Spell Skills, Not the Double foulborn version)
Make sure to either just Buy a corrupted one, or vaal it yourself.
CORRUPTED IMPLICIT CAN BE WHATEVER, IT DOES NOT MATTER.
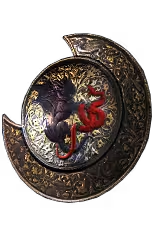 Daresso's Courage
VERY underrated shield. This shield allows for full block cap by just focusing on scaling up spellblock, and since majority of things in endgame maps and pinnacle bosses are spells, you'll always be blocking a spell recently which will proc the shield to give you full attack block too.
It also comes with 30% Spell block on low life, and since this is a low life build thats always active for it.
Make sure to either just Buy a corrupted one, or vaal it yourself.
CORRUPTED IMPLICIT CAN BE WHATEVER, IT DOES NOT MATTER.
Jewelry: (ESTIMATED COST: 2D For the amulet and rings total, and 2D For the Belt)
 Ashes of the Stars
Just a very cheap and efficient amulet to get. The + skill levels is great for almost every single skill the build uses, scaling skill levels gives spells Alot more damage, and the gem quality further heavily scales the effect of the golems.
Make sure to either just Buy a corrupted one, or vaal it yourself. Make sure to Annoint it with  Brink of Death for more regen, and that it has 16 Attributes on the implicit, catalyst it with attribute catalysts to make it 19 all attributes and THEN corrupt it. The build is starved on attributes and cant afford to not have 19 attributes here.
 The Hungry Loop
Please refer to the video regarding how to feed support gems into the hungry loop I show it live there. You can find lvl 19 almost lvled support gems on trade sometimes, if not you will have to level them yourself in your offhand. If you want to do this quick you can join a 5 way and have it all done in one go.
CORRUPT THIS BEFORE YOU PUT ANY SUPPORT GEMS INSIDE IT OR BUY ONE THAT IS ALREADY CORRUPTED. DO NOT FORGET TO CORRUPT IT FIRST. IF YOU CORRUPT IT WHILE IT HAS SUPPORT GEMS IN IT AND IT BRICKS, YOU WILL LOSE ALL THE SUPPORT GEMS AND WILL HAVE TO LEVEL IT ALL AGAIN.
DO NOT BUY FULLY MADE RINGS OFF TRADE. CHANCES ARE YOU WONT EVEN FIND ONE, AND IF YOU DO ITS A FLIPPER OR PRICE FIXER TRYING TO PREY ON SOMEONE THAT DOESNT KNOW HOW HUNGRY LOOPS WORK.
The support gems you want to feed in this are:
 Minion Life Support
 Meat Shield Support
 Elemental Army Support
 Empower Support
The skill gem to use here will be the Animate Guardian. The gear for him is in the pob and I will write it separately at the end of this equipment section.
 Triumvirate Authority (More Damage)
(This ring rolls with many different mods on it, refer to the video on which mods are nice to have as extra based on personal preference)
The Main Mods you want on this ring are:
Socketed Vaal Skills deal 150% more damage
Socketed Vaal Skills have 80% Increased Skill Effect Duration.
The rest is just extra on top. DO NOT OVERPAY FOR ANYTHING. JUST GET THE ABOVE 2 MODS. PLEASE.
IF THIS RING IS NOT AVAILABLE THIS IS WHAT TO DO:
The ring is self farmable from Atziri, but it is a little annoying to do that. I self farmed all 3 rings i showed in the video, so please for gods sake dont go spending 50D on this ring for no reason. If you do not want to self farm it, just keep reading and use the alternative option instead.
You can instead use Another Hungry Loop in place of the triumvirate authority if the rings with those specific 2 mods have all been bought out or price fixed.
The support gems to feed to that hungry loop will be:
 More Duration Support
 Controlled Destruction Support
 Hypothermia Support
 Concentrated Effect Support
Full Disclosure, this will not be As Strong as the triumvirate authority, it will have roughly 15-20% less damage, and less area of effect, but its still okay if triumvirate isnt possible
 Crystal Belt
- You will take a Shaper's Exalted Orb and Slam it on this belt to get a Shaper Influenced Crystal Belt.
- You can then Either: Use Deafening Essences of Woe, or Dense Fossils until you hit High Tier FLAT Energy shield, and %Increased Energy Shield from Equipped Body Armour (shaper) mod on the prefixes.
- The suffixes are not as important, but if you want you can keep spamming the essence or the fossil until you get the prefixes and also get Energy Shield RECOVERY Rate, Not Recharge Rate, on the suffix.
- The final suffix on the belt HAS TO be 15% Increased Flask Effect Duration crafted modifier.
Armour Pieces: (ESTIMATED COST: 10D Max total)
 Rime Gaze
A very cheap unique that gives a massive amount of Cold Dot Multi. Since it is very common and cheap, it is easy to get good corruptions on this. Try to get one of these corruptions. Do not massively overpay for this item, this is only good as a BUDGET option. The higher budget version of the build im working on ditches this helmet instantly.
+2 Socketed Cold Gems
+2 Socketed Duration Gems
+2 Socketed Aoe Gems
This of course should also be Corrupted for the Chaos Bloodline
 Twilight Regalia
Get as much energy shield on this as possible. Aim for a minimum for 1100-1200, but the higher you get the better.
For suffixes the mod priority is:
Life Regen
High Tier Res (swap into Cold Res if other res is already maxed for the mastery that gives dot multi for overcapped cold res)
One open suffix to craft Hybrid chaos res.
Eldritch Implicits:
Flasks gain a charge every second
Chance to block spell damage
TREE RECIPE FOR THE PREFIXES:
%inc chance for body armour
%inc chance for defenses
%inc chance for Cold
%reduced mana
%reduced physical
Random quality (can roll over 20 if lucky)
Roll links +150 times
%inc chance for intelligence requirement
%reduced chance for strength requirement
%reduced chance for dexterity requirement
%chance for Fracture
use any excess points on whatever
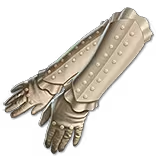
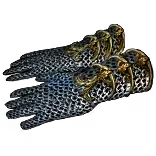 Paladin Gloves
Get as much armour and ES on the prefixes as possible.
Suffix Mod Priority:
Life Regen
High Tier Res (swap into Cold Res if other res is already maxed for the mastery that gives dot multi for overcapped cold res)
One open suffix to craft Hybrid chaos res.
Eldritch Implicits:
Cold Damage over time multi while near a unique enemy
Cold Exposure on Hit
TREE RECIPE FOR PREFIXES:
%inc defense
%inc Chaos
%reduced attack
%reduced mana
%reduced physical
Random quality
%inc chance for gloves
%inc chance for intelligence requirement
%inc chance for strength requirement
%reduced chance for dexterity requirement
%chance for Fracture
use any excess points on whatever
 Paladin Boots
Get as much movement speed and armour and ES as possible.
Suffix Mod Priority Same as The Body armour and the gloves:
Life Regen
High Tier Res (swap into Cold Res if other res is already maxed for the mastery that gives dot multi for overcapped cold res)
One open suffix to craft Hybrid chaos res.
Eldritch Implicits:
Life regen per endurance charge
Dropped scorched ground while near a unique enemy
TREE RECIPE:
%inc defense
%inc fire
%inc Speed
%reduced mana
%reduced physical
Random quality
%inc chance for boots
%inc chance for intelligence requirement
%inc chance for strength requirement
%reduced chance for dexterity requirement
%chance for Fracture
Flasks: (ESTIMATED COST: 1D Max)
 Coruscating Elixir (To prevent Chaos damage from killing you on low life, check the start of the video guide for more info on this)
 Oriath's End This is very cheap right now try to get it with as much chance to explode as possible, the charge recovery does not matter on this.
 Sapphire Flask and
  Topaz Flask You need these to cap your resistances properly too, while also giving max res.
Both these flasks need to have One of these modifiers on the prefix at minimum 33%:
Charge Recovery (Not the one with reduced effect on it)
Increased Duration
Reduced Charges Used
Suffixes are flexible but the best ones are:
Additional Ele Res During Effect
CRAFTED Suffix of Regen Per Second
CLUSTER JEWELS: (ESTIMATED COST 4D)
You need 3  Primordial Bond Cluster Jewels with 8 passives max. Use this Trade Search to buy them
https://pathofexile.com/trade/search/Keepers/mkZ6MpJLc6
If the trade site runs out of them, you can craft them yourself by reforging life on the harvest bench on 8 passive Minion damage large clusters. Make sure that when you do hit primordial bond, it is in the correct spot in your cluster. Easiest way to do that is just equip it and see.
You will also need a Medium Flask Effect Duration Cluster, the desired mod on it is  Fasting you NEED this mod on it.
This is easily self craftable by getting a max 4 passive Flask effect duration medium cluster jewel base, and using the harvest bench to Reforge Speed.
To get the best cluster, the other best in slot mod is  Special Reserve but might get expensive to roll for this since reforge speed uses yellow juice.
TIMELESS JEWEL: (ESTIMATED COST: 1D)
You need a  Brutal Restraint (Balbala The Traitor) timeless jewel. The MANDATORY mod on this is the +20 Dexterity to help fix attribute requirements.
The other best in slot mod is Onslaught on kill to be faster while mapping.
OTHER JEWELS:
Get One of the Desired mods Fractured on a COBALT jewel base.
Reforge Defense on the Harvest Bench until you hit %Energy shield.
keep going until you get a 3rd good mod, or all 4 good mods.
Mod priority is the following, excluding the %ES. %ES Fractures are too costly.
Max res (any element, you can use the harvest bench to change it)
+cold dot multi
+Damage over time multiplier
%minion dmg, cold damage, spell damage holding a shield
%inc damage over time
Attributes
One of these desired mods will be fractured, and then you will just reforge defense until you hit %ES and stop there, or keep going until you get more of those mods.
AG Gear is Further Down