menu
MobalyticsUse your favourite features in-game with our Desktop App
PoE Build

[3.28] VOID Shockwave Cyclone Slayer League Starter to Endgame Guide - Beginner Friendly

Starter
End Game
Creator
3.28 Mirage
presentationDuelist
presentationSlayer
Updated on Mar 4, 2026
Mar 4, 2026

Path of Building Code

Build Overview

Here's my guide for my Cyclone Slayer League Starter to Endgame Build for Patch 3.28 Mirage!

If you have any Questions - Come by my Twitch Here and I'll Help you out!

---------------------------------------------------------------------------------------------------------------------

🚨Work in Progress, be sure to come by the Twitch Stream for the Newest Skill Tree and Gems as I'm changing it to test new things!🚨

---------------------------------------------------------------------------------------------------------------------

GGG Revealed the new Void Shockwave Support which looks to be AMAZING! We'll be using it in the build once we get our hands on it.

In 3.27 Cyclone, Cyclone of Tumult, and Vaal Cyclone all got a 20% MORE Damage Buff which took the already solid build up another notch! It has great Clear Speed thanks to the AOE from , great Defenses thanks to Lucky Attack/Spell Block + Life/Armor Stacking, and Good Bossing Damage to allow you to do nearly everything the game has to offer!

The build is great for League Starting as it performs really well early on with little to no investment! What's even better is that it continues to scale really well into Endgame with some more Investment.

Mapping/Bossing -

Mapping and Bossing will be handled by Cyclone of Tumult which is a bigger and better version of Cyclone. Tumult has larger AoE and a higher DPS ceiling but has the drawback of reducing your Movement Speed drastically. We'll mitigate this Movement issue early on with 
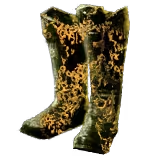
The Stampede / Replica Stampede and eventually transition into Mageblood with Quicksilver Flask + Onslaught + Tailwind + Elusive.

We'll also use General's Cry + Autoexertion + Sunder / Ground Slam of Earthshaking for some additional Clear Speed and Damage. The Autoexertion Tech will Auto-Summon Mirage's which will use Sunder / Ground Slam of Earthshaking automatically when there are corpses nearby. If there isn't any corpses, we'll use Desecrate to create corpses for us to use in scenarios like boss fights. This is a great Single Target and Map Clear increase!

Defenses -

Our Defenses revolve around Life/Armor Stacking, Leeching Life, and Capped Lucky Attack and Spell Block. We'll stack around 4.5-5K Life and 20-30K Armor thanks to our Gear, Flask, Jewels, and Passive Tree Nodes.

We'll use 
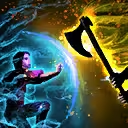
Versatile Combatant to allow Over capped Attack Block to turn into Spell Block. So we'll stack tons of Attack Block by using Nodes like Enigmatic Defence, Steelwood Stance, and Whirling Barrier alongside Tattoo's of the Valako Shieldbearer to reach 65% Attack and Spell Block. Combine this with More Than Skill from the Forbidden Flesh and Forbidden Flame Jewels and you'll have a 87.75% Chance to Block Attack and Spell Damage!

Brutal Fervour from the Slayer Ascendancy will keep our Leech and Leech effects running 24/7 to mitigate small hits as long as we keep spinning. We'll also have Fortify Support for 24/7 Fortification, tons of PDR, Ailment Immunity with Stormshroud, and big hit mitigation with Molten Shell for a very Tanky Spin-2-Win Build!

Useful Links -

Crafting a Warstaff -> Here or Here

Beginner Guide for New Players -> Here or Here or Here

Crafting In General -> Here

How to League Start -> Here

Must Know Vendor Recipes -> Here

Perma Buffs -

Bandits - Kill All Bandits (+1 Passive Skill Tree Points)

Major God - Soul of Arakaali

Minor God - Soul of Ralakesh

Credit to Sanavixx as I based this builds design heavily on what I learned from him. Be sure to check out his Twitch and YouTube as he helped me learn my 1st POE League.

Strengths and Weaknesses

  • 360° Huge AOE Clear
  • Smooth and Easy Bossing
  • Decently Tanky
  • Very Easy League Starter
  • Scales to Ubers
  • Immune to Phys/Ele Reflect
  • Not Giga Fast Movement Speed until Mageblood
  • Need Currency for Uber Scaling

Build Variants

Once you get your hands on a good Physical Warstaff with Critical Hit Chance and are around Level 80-90, you'll be able to swap into the Crit Version of the build which will MASSIVELY Increase our DPS. Be sure to un-spec Resolute Technique or you won't be Critically Hitting!

We'll swap off of Cyclone and transition into Cyclone of Tumult which has a higher DPS and AoE ceiling. You'll need either The Stampede or Replica Stampede before swapping to Cyclone of Tumult to counteract the Movement Speed Loss. We'll also swap Sunder for Ground Slam of Earthshaking which also has a higher DPS and AoE ceiling.

Make sure to take the Accuracy Nodes (Eagle Eye, Art of the Gladiator, Martial Prowess), get Accuracy on some pieces of gear, and get Precision to ensure we have as close to a 100% chance to hit as possible! We'll also pick up Rumi's Concoction so we can help cap our Spell and Attack Block with the Versatile Combatant Keystone.

Aim to get a Large Cluster Jewel with Adds 8 Passive Skills and good Notables like Martial Prowess, Feed the Fury, Fuel the Fight, Devastator, Brutal Infamy, Surefooted Striker, etc.... You can also start to pick up some of our Unique Jewels for cheap such as the Lethal Pride (Kaom Strength of Blood).

Equipment

Judgement Staff
Two-Stone Ring (Cold/Lightning)
Leviathan Gauntlets
Giantslayer Helmet
Royal Plate
Heavy Belt
Onyx Amulet
Amethyst Ring
The Stampede
Eternal Life Flask
Granite Flask
Amethyst Flask
Diamond Flask
Rumi's Concoction
Mid Investment
Lethal Pride
Budget
Budget

Remember to utilize the CRAFTING BENCH to fill one empty Affix slot on an item!

Weapon:

You're going to need a G-R-R-R-R-B 6L for Cyclone and a R-R-R-R-R-R 6L for General's Cry + Autoexertion + Sunder.

You're going to want an Ezomyte Staff, Maelstrom Staff, or Judgement Staff for the Base 25% Block Chance! 22% Bases are fine for early on but want to swap eventually!

Increased Physical Damage, Added Physical Damage, Attack Speed, Accuracy, and Critical Hit Chance are going to be the most important stats to look for. Remember that we use Brutality Support so we deal 0 Elemental Damage! There are a few special crafts that can go on a Warstaff but it's too complicated/intricate to explain here. See the crafting video.

Crafting a Warstaff -> Here or Here

Body Armor:

You're going to need a G-R-R-R-R-B 6L for Cyclone and a R-R-R-R-R-R 6L for General's Cry + Autoexertion + Sunder.

Prioritize Resistances, Attributes, and Armor as these are the most important for this build. If you can afford it, Additional Physical Damage Reduction is another great line to have.

Influence your Body Armor with Searing Exarch and Eater of Worlds, watch Here if you don't know what that means.

  • For Eater of Worlds Influence, go for Melee Hits have a chance to Fortify so we don't have to take Steadfast and the Fortify Mastery Node to save us some skill points.
  • For Searing Exarch Influence, go for Increased Effect of Non-Curse Aura's to make Pride, Flesh and Stone, Precision, and Blood and Sand stronger.

Gloves:

Prioritize Life, Resistances, Attributes, Attack Speed, Accuracy, and Armor for Gloves. Don't bother with Added Damage to Attacks.

Influence your Gloves with Searing Exarch and Eater of Worlds, watch Here if you don't know what that means.

  • For Eater of Worlds Influence, go for Increased Chance to Impale
  • For Searing Exarch Influence, go for Increased Critical Strike Chance

Helmet:

Prioritize Life, Resistances, Attributes, Accuracy, and Armor for Helmet.

Influence your Helmet with Searing Exarch and Eater of Worlds, watch Here if you don't know what that means.

  • For Eater of Worlds Influence, go for Increased Mana Reservation Efficiency. This is needed if you want to run all of our Aura's!!!!
  • For Searing Exarch Influence, go for Reduced Mana Cost of Attacks

Boots:

We'll be using The Stampede as these Boots are the only way to Increase our Movement Speed in Cyclone of Tumult. You can Anoint these Boots and I go with Enigmatic Defence for the Block Chance.

Belt:

The Rustic Sash is still a solid Belt but I will swap to an Stygian Vise for the Abyssal Socket. Prioritize Life, Resistances, Armor, Mana, and Flask Mods.

Amulet:

Carnage Heart is a great Amulet up until this point but your Attributes may become a little tight so it may be time to swap off of it.

Go for an Amulet Base with whatever Attribute/Res needs and Prioritize Resistances, Attributes, Life, Mana, Global Critical Strike Chance, and Level of All Skill Gems.

Anoint with Serpent Stance for the Crit and Block Chance.

Rings:

Use your Ring Slots to fill out whatever needs to you may have. The only Required Affix is Channeling Skills have -3 to Total Mana Cost which can be crafted on from the Crafting Bench.

Prioritize Resistances, Attributes, Life, and Mana. Added Physical Damage to Attacks is not worth it as its such a small amount on Jewelry.

Jewels:

The most important thing for the Jewels at this stage is getting a solid Lethal Pride (Kaom Strength of Blood) and Large Cluster Jewel! There's tons of variations of Lethal Pride (Kaom Strength of Blood) that are good, just use the Find Timeless Jewel Tool provided in my PoB file or come by my stream and ask.

For the Large Cluster Jewel, get one with Adds 8 Passive Skills and good Notables like Martial Prowess, Feed the Fury, Fuel the Fight, Devastator, Brutal Infamy, Surefooted Striker, etc....

If you happen to have decent Rare Jewels or one of the other Unique Jewels used in the build feel free to drop them in!

Flasks:

At this point you shouldn't need a Eternal Mana Flask since our Mana Sustain is so high and only 1 Eternal Life Flask since we have so much Life Leech. We also DO NOT use a Quicksilver Flask since it doesn't affect our Movement Speed since we use The Stampede.

  • I'll use 1 Eternal Life Flask with Immunity to Bleeding and Corrupted Blood. If you get hit with a nasty bleed or corrupted blood then use this flask.
  • I'll use 1 Diamond Flask for Critical Hit Chance with Increased Critical Strike Chance during Effect and Increased Duration. This will help us reach that Critical Hit Chance Cap. Make sure to Craft on with an Instilling Orb "Used when Charges reach full". This will automate the flask when mapping! See Here if you don't know what I'm talking about.
  • I'll use 1 Basalt Flask or Granite Flask for Armor with Increased Duration and Increased Armor during Effect.
  • I'll use 1 Amethyst Flask to help raise my Chaos Resistance for now until I get better gear. For the Affixes, go for Increased Duration and Additional Elemental Resistances during Effect.
  • I'll use 1 Rumi's Concoction to help us Cap our Attack/Spell Block Chance. Make sure to buy one with as High Attack and Spell Block as possible!

Passive Tree

main:
123
123
ascendancy:
8
8
Keystones
Unwavering Stance
Cannot Evade enemy Attacks Cannot be Stunned
Versatile Combatant
-10% to maximum Chance to Block Attack Damage -10% to maximum Chance to Block Spell Damage +2% Chance to Block Spell Damage for each 1% Overcapped Chance to Block Attack Damage
Masteries
Mana Mastery (2)
10% reduced Mana Cost of Skills
12% increased Mana Reservation Efficiency of Skills
Staff Mastery (2)
3% increased maximum Life per Red Socket on equipped Staff
5% increased maximum Mana per Blue Socket on equipped Staff
30% increased Defences while wielding a Staff
Rage Mastery (1)
Nearby Enemies are Intimidated while you have Rage
Leech Mastery (1)
5% of Leech is Instant
Physical Mastery (1)
10% more Maximum Physical Attack Damage
Life Mastery (1)
15% increased maximum Life if there are no Life Modifiers on Equipped Body Armour
Two Hand Mastery (1)
40% increased Damage with Hits against Rare and Unique Enemies
Accuracy Mastery (1)
+500 to Accuracy Rating
-2 to Accuracy Rating per Level

We'll grab Master of the Arena and Bravery first for the Damage, Life, and Armor and then get Art of the Gladiator for the AS/Dex/Movement Speed. Grab Spirit of War and the 10% Reduced Mana Cost Mana Mastery. Go for Martial Experience for DPS and Deal 40% Increased Damage Two-Handed Mastery. Grab Unwavering Stance so we can't be stunned. Grab Kinetic Impacts and take Proficiency or Hard Knocks if needed.

Be sure to get Eagle Eye and the +500 Accuracy Mastery to ensure we have a 100% Chance to Hit. Take Champion of the Cause to ensure we have the necessary Mana Reservation Efficiency. We'll grab Bastion Breaker and the 10% More Max Phys Damage Physical Mastery. Go for Hematophagy for the Leech and the 5% of Leech is Instant Leech Mastery Node.

We'll grab Bloodless and pick the 15% Max Life Mastery. We'll path to Cannibalistic Rite and grab the Mana Mastery for Reservation Efficiency. We'll then get Barbarism, Juggernaut, and Stamina for a big Defensive Increase.

Take Disemboweling for a Crit Chance Increase, Battle Trance and the Rage Mastery to Intimidate enemies for a BIG DPS increase. Get Whirling Barrier and Steelwood Stance for some Block Chance and Devotion for Max Life.

Your 1st Ascendancy Points should be spent on Bane of Legends. Your 2nd Ascendancy Points should be spent on Headsman. Your 3rd Ascendancy Points should be spent on Impact. Your 4th Ascendancy Points should be spent on Brutal Fervour.

We'll soon be moving points around to transition into the higher budget version of the build so start saving those Orb of Regret!

Skills

Fortify Implicit
Royal Plate
Cyclone of Tumult
Melee Physical Damage
Pulverise
Shockwave
Brutality
Infused Channelling
Increased Phys, Crit Chance
Judgement Staff
Autoexertion
General's Cry
Ground Slam of Earthshaking
Melee Physical Damage
Brutality
Pulverise
Accuracy/Life/Res
Giantslayer Helmet
Pride
Blood and Sand
Flesh and Stone
War Banner
Accuracy/Life/Res
Leviathan Gauntlets
Molten Shell
Automation
Accuracy/Life/Res
Leviathan Gauntlets
Assassin's Mark
Mark On Hit
The Stampede
Assassin's Boots
Desecrate
The Stampede
Assassin's Boots
Frostblink
The Stampede
Assassin's Boots
Precision
The Stampede
Assassin's Boots
Blood Rage

For Bossing, you'll need to Cast Desecrate to Spawn Corpses for General's Cry to Summon your Mirage Warriors!

General's Cry will Auto-Summon Mirage's to use Ground Slam of Earthshaking to deal big damage when Autoexertion is Enabled

  • For Cyclone of Tumult
    Shockwave Support is causing Damaging Shockwaves for Extra DPS
    Pulverise Support is for DPS and AOE
    Melee Physical Damage Support is for DPS
    Brutality Support is for Phys DPS and Immunity to Elemental Reflection Map Mods
    Infused Channelling Support is for a Damage and Hit Pool Increase
  • For General's Cry
    Autoexertion is to automate the Warcry
    Ground Slam of Earthshaking replaces Sunder for better clear and same DPS
    Melee Physical Damage Support is for DPS
    Pulverise Support is for DPS and AOE
    Brutality Support is for Phys DPS and Immunity to Elemental Reflection Map Mods
  • Molten Shell with Automation will automate the Damage Reduction from the skill to provide us with a larger Hit Pool
  • Assassin's Mark with Mark On Hit Support will automate the mark to give us Power Charges and More Critical Hit Chance
  • Frostblink will STAY AT LEVEL 1!!!! This is for Movement only
  • Blood Rage is for an Attack Speed Increase and Frenzy Charge Generation
  • Precision is for Accuracy and Critical Strike Chance
  • Pride is for More Physical Damage
  • Blood and Sand and Flesh and Stone in Blood Stance is great for a DPS Increase
  • War Banner for More DPS and AoE
  • Desecrate to Spawn Corpses for Bossing to activate your Mirages from General's Cry. Also keep this at Level 1!

How it Plays

Spin with Cyclone of Tumult to kill things, the corpses will then turn into Mirage Warriors thanks to General's Cry and Autoexertion which will use Ground Slam of Earthshaking Automatically for us. Shockwave Support will Auto-Proc on hit for extra damage and clear speed. Use Blood Rage for Attack Speed and Frenzy Charges. Be sure to keep moving as much as possible and use Frostblink to move while still spinning.

In Boss Fights, use Desecrate to spawn corpses for Autoexertion and General's Cry so we can get extra damage from Ground Slam of Earthshaking. Drop War Banner at the Bosses feet and stick close to it for a HUGE DPS Increase. Use Blood Rage in the Boss Fight to refresh the buff for Increased Attack Speed.

Changelog

3/4/26 - Updated Guide to include new Void Shockwave Support Gem

3/3/26 - Updated Guide to remove War Banner and replace it with Enlighten Support at later stages to save Skill Tree points and an anoint

3/2/26 - Updated Guide to match 3.28 Changes, new video coming soon

11/28/25 - Updated Video link and variants to match new changes

11/19/25 - Updated the 95 Crit and Uber Variants to reflect league changes. Uber Variant is now my Live Gear that I've been using. Added Info to How it Plays Segment and Added More detail to many sections of the guide. Video Update coming by end of week showcasing Uber Boss kills and Level 100 Variant

11/12/25 - Added more Information about Grafts and other skill choices

11/8/25 - Added Grafts to use for build

Video Guide

Stats

Stats are displayed for the "LvL 100 Giga Investment" Variant only
Character
Attributes
300 / 
187 / 
188
Movement Speed
343%
Pantheon Major
Arakaali
Pantheon Minor
Ralakesh
Charges
Endurance Charges
6
Frenzy Charges
4
Power Charges
3
Defensive
Life
4,634
Energy Shield
62
Mana
1,049
Armour
26,500
Evasion Rating
327
Block
87.75%
Resistances
76% / 
75% / 
75% / 
75%
Simulated
Effective Health Pool
541K
Max Hit
23K / 
58K / 
56K / 
56K / 
47K
Skill DPS Estimation
Cyclone of Tumult
96M

Table of Contents

Featured Builds

[3.28] Spark Archmage Heirophant by Big Ducks
Updated on Mar 5, 2026
Lazy's Cold Dot Wintertide Brand Elementalist
Updated on Mar 5, 2026
MasterT's Low Life Ignite Slamentalist
Updated on Mar 5, 2026
[3.28] Woolie's HOLY HAMMER SLAMMER
Updated on Mar 5, 2026
Cold Convert Ice Shot of Penetration Warden
Updated on Mar 5, 2026

Become a Creator

Want to earn rewards by sharing your builds with your community?