menu
MobalyticsUse your favourite features in-game with our Desktop App
PoE 2 Build

The Winter Warbringer Shield Wall Build feat. Vestige of Darkness

presentationWarrior
presentationWarbringer
End Game
0.5 RotA
By Lexd
Updated on Aug 15, 2026
Aug 15, 2026

Build Overview

Lexd's Winter Warbringer Build feat. Vestige of Darkness

Hey guys, I'm back! This is a new take on a Shield Wall Warrior build using the Warbringer ascendancy and Vestige of Darkness, a helmet that let's all of our physical damage contribute to Freeze buildup and Chill magnitude. This is a very fun build as it involves clearing with Herald of Ice chains (if your weapon is good enough), and Freezing high-priority targets very quickly so that they barely pose a threat in the first place. The current version build can run all endgame activities, though with the current import of the build there is still some room to significantly improve the damage and survivability.

We're still using the classic Ahn's Citadel and Kaom's Madness combo as our main way to clear with Shield Wall + Fortifying Cry since it's very hard to beat the AoE granted to us from those lineage support gems, but we're also getting a ton of support from War Banner and a bit from Freezing Mark while clearing as well. War Banner just grants us a bit of everything we could want; Damage, Attack Speed, and Accuracy, while Freezing Mark grants us a reasonably-long "Damage Gained as Cold" buff that is more optional for clearing, but can help if you are a little bit more on the budget side of this build.

Bossing is... hilarious, with this build. Basically you spam Fortifying Cry at the start of the fight to fill up your Rage bar, then Resonating Shield until the boss's armour is fully broken. From there, cast Freezing Mark FIRST, then War Banner SECOND, and start spamming Shield Wall and Fortifying Cry over-and-over. The boss will likely become Frozen on the first or second Shield Wall, and you are free to just wail away until they are dead. Most pinnacles in this game will not be able to do much of anything once they are Frozen, the fight is basically over from there.

Weapon Swapping is quite important to the build (and should be for all builds, tbh), and we're using Weapon Set 1 stuff for Warcry and Banner buffs while Weapon Set 2 is generally used to buff up all things Shield Wall, i.e. damage, skill speed, etc.

We are surprisingly tanky running the meme that is Armour/ES, but ultimately I do think you should try to pivot the build towards Life and Armour stacking when you can afford to; the main benefit from the Armour/ES route is MUCH cheaper pieces, but I think ultimately you'd get more survivability and "Passive Skill Tree efficiency" out of going the Armour + Lifestacking route.

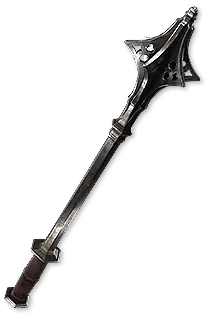
We are also not using Nebuloch for once; it's a very strong mace with arguably the strongest way to crank up damage on a Shield Wall build, but there is some strong anti-synergy with Energy Shield if you rely on "Recharging" it for survivability. Nebuloch's self-damage effect will stop your Energy Shield recharge every time you swap to it, so it is very hard to get your Energy Shield back if you take damage and are still trying to clear.

Strengths and Weaknesses

  • Strong clearing
  • Freezing bosses makes many fights a non-factor
  • Decent survivability for an Armour/ES build
  • Reasonably priced
  • No travel skill (could likely swap out Convalescence with one if you wanted if you go life/armour stacking)
  • Damage can seem low until a little more optimized

Build Variants

Winter Warbringer Shield Wall Warrior: Act 1 Overview

Act 1 is super simple; mostly queuing up groups of mobs for Boneshatters with either smacks or, when you get Brink I as your first support gem, Raise Shield's Shield Bash! I have a short video going over this tech here, but you will guarantee a "Primed for Stun" status on all mobs with even the crappiest shield in Act 1; makes for very consistent clearing once you get the "feel" of this down. Just takes a little getting used to at first as you can only Shield Bash after a mob has hit you.

Aside from that, bossing is very straightforward; dual-wield Maces in Weapon Set 2 when you can, and use the dual-wield Mace Strike for single-target DPS on bosses when possible (you can even set Boneshatter to Weapon Set 2 for harder-hitting ones as well, useful for both bossing and clearing). If you end up heavy-stunning the boss, which you should be able to if you are hitting them enough and mixing in Shield Bashes, you can just spam Mace Strike for loads of DPS, especially when socketed with Rapid Attacks I and Rage I.

That's basically it. The "Icey" and "Cold" parts of this build aren't really a thing until much later so for leveling, just enjoy the physical, bleedy version of a Shield Warrior build.

Equipment

item
1
item
5
item
4
item
7
item
6
item
3
item
8
item
9
item
10
item
item
item
Equipment Priority
+10

Winter Warbringer Shield Wall Warrior: Act 1 Gearing

The shield is not our main damage-dealer yet; you're going to want some strong maces, so focus on getting some good ones. I also think getting some Lightning Damage in some way helps a lot, either as a roll on the weapon itself or socketing one with a Lesser Storm Rune, though if you choose to get one of these as a quest reward you can choose to save it until Act 2 when you unlock the next tier of Maces since Act 1 shouldn't be too hard regardless.

Aside from that, just tankiness where you can. Prioritize Cold Resist and getting that Cold Damage charm in preparation for Geonor and you should be all good.

Skill Gems

Support Gem Requirements:

Str 30

Dex 5

Int 5

1

Raise Shield

Set 1

supportsteadfastplayer
supportbrinkplayer
2

Boneshatter

Level 5

•

Set 2

impactshockwavesupportplayer
supportmagnifiedareaplayer
3

Mace Strike

Set 2

supportrageplayer
supportrapidattacksplayer
4

Resonating Shield

Level 5

•

Set 1

supportrageplayer
supportarmourdemolisherplayer
5

Infernal Cry

Level 3

6

Magma Barrier

Level 4

•

Set 1

7

Shield Charge

Level 3

Gem Priority
+8

Winter Warbringer Shield Wall Warrior: Act 1 Skill Gems & Support Gems

I think the first thing you should do, if you want to use the Raise Shield bash as a stun-primer, is get Brink I socketed into it as quickly as possible. Again, once this happens, you will be able to prime things for easy Boneshatters over and over again without worry, and while blocking. Eventually throw Steadfast I into Raise Shield as well if you feel like your Stun buildup is a little too intense, but that should come after you've appropriately socketed Boneshatter and Mace Strike as listed below.

Boneshatter should be cranked up next with a Impact Shockwave support gem so that it deals a lot more damage and serves as a more reliable clearer and boss-nuker.

After that, Mace Strike should get Rage I and Rapid Attacks I; this will turn it into a strong single-target DPS option early on.

The rest you basically fill out at your leisure, Resonating Shield is particularly useful once you get a level 5 Skill Gem towards the end of the Act. Fully broken armour can only help against bosses, and it will eventually serve as your main way to gain Rage later in Act 2.

Magma Barrier I still think is a decent option; it hits hard and can delete small groups on its own, and also serve as a stun-primer on more resilient targets.

Passive Tree

main:
123
123
set 1:
20
20
set 2:
20
20

Winter Warbringer Shield Wall Warrior: Act 1 Passive Skill Tree

Super basic, but make sure you grab the notables in the order above: Brutal first, Smash second, Blood Rush third, and then path down to Impair as you have points.

Getting those first two notables results in the biggest damage boost for this part of the tree as early as possible, especially since we are heavy stunning things all the time.

Blood Rush makes a noticeable difference with Mace Strike, and you'll really feel a significant DPS increase once you grab this as you'll be swinging faster, gaining Rage faster, building up stun faster, etc.

Impair is a "nice-to-have" if you can make it here before the end of the Act. The nodes leading up to it all increase one-handed weapon damage, which is useful for both weapon sets, and having a 25% increased node to top it off here feels great.

Quest Rewards

Check which quests you’ve completed on your character
Clearfell — Beira of the Rotten Pack
+10% to Cold Resistance
Hunting Grounds — The Crowbell
Grants Two Weapon Set Passive Skill Points
Freythorn — The King in the Mists
+30 to Spirit
Ogham Farmlands — Una's Hut
Grants Two Weapon Set Passive Skill Points
Ogham Manor — Candlemass, the Living Rite
+20 to maximum Life
Keth — Kabala, Constrictor Queen
Grants Two Weapon Set Passive Skill Points
Valley of the Titans — Medallion
30% increased Charm Effect Duration
+1 Charm Slot
Deshar — Final Letter
Grants Two Weapon Set Passive Skill Points
The Spires of Deshar — Sisters of Garukhan
+10% to Lightning Resistance
Jungle Ruins — Mighty Silverfist
Grants Two Weapon Set Passive Skill Points
The Venom Crypts — Venom Draught
25% increased Stun Threshold
Jiquani's Machinarium — Blackjaw, the Remnant
+10% to Fire Resistance
The Azak Bog — Ignagduk, the Bog Witch
+30 to Spirit
The Molten Vault — The Molten Vault
Reforging Bench
Aggorat — Blood Sacrifice
Grants Two Weapon Set Passive Skill Points
Journey's End — Captain Hartlin
Two Weapon Set Passive Skill Points
Skill Gem(Lv 13)
Delirium Drop
Whakapanu Island — Great White One
+30% increased Global Armour, Evasion and Energy Shield
Eye of Hinekora — Navali's Rest
5% increased Maximum Mana
Halls of the Dead — Yama The White
Grants Two Weapon Set Passive Skill Points
Halls of the Dead — Tawhoa's Test
+5% to Lightning Resistance
Abandoned Prison — Goddess of Justice
30% increased Life Recovery from Flasks
Halls of the Dead — Tasalio's Test
+5% to Cold Resistance
Halls of the Dead — Ngamahu's Test
+5% to Fire Resistance
Halls of the Dead — Tribal Medicine
+30% increased Global Armour, Evasion and Energy Shield
Wolvenhold — Oswin, the Dread Warden
Grants Two Weapon Set Passive Skill Points
The Khari Crossing — Akthi and Anundr
Two Weapon Set Passive Skill Points
The Khari Crossing — Molten Shrine
5% increased Maximum Life
Qimah — Tabana's Pillar
3% increased Movement Speed
Kriar Village — Lythara, the Wayward Spear
+40 to Spirit
Howling Caves — The Abominable Yeti
Grants Two Weapon Set Passive Skill Points

Video Guide

Build Planner Export

Export all build variants directly to your game.

Path of Building Code

Table of Contents

Featured Builds

[0.5] Flicker & Falling Thunder Martial Artist
Updated on Aug 14, 2026
Demon Mommy Temu Temporalis Arc Comet (INSANE TECH)
Updated on Aug 14, 2026
Shield Wall Gemling - Level 1 to Endgame Complete Guide
Updated on Aug 13, 2026
Screamheart's Shred Druid Oracle Build 0.5.2 League Starter v3.0
Updated on Aug 13, 2026
Pure Phys Staggering Palm Vaal Pact Martial Artist
Updated on Aug 12, 2026

Become a Creator

Want to earn rewards by sharing your builds with your community?