


 Use your favourite features in-game with our Desktop App
PoE 2 Build
Shield Wall Tanking Smith
 Warrior
 Smith of Kitava
Build Overview
This


For map clear, we combine the


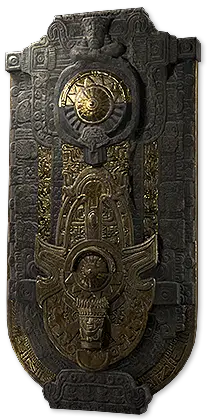
Defensively, this version uses


Our second weapon set also uses

We also use


Strengths and Weaknesses
- • Strong single-target damage.
- • Huge chain explosions with little investment into AoE.
- • Strong physical and elemental defences.
- • Excellent sustain through Life Leech and recovery on kill.
- • Easy resistance scaling through Smith of Kitava.
- Less SSF-friendly, as the build relies on specific unique items and jewels that can be difficult to obtain without trading.
Build Variants
Level 89 Low Budget
Level 91 Lightng coil swap
Level 95 High Budget













Skill Gems
Level 89 Low Budget
Level 91 Lightng coil swap
Level 95 High Budget
Support Gem Requirements:
Str 45
Dex 20
Int 30

1
Fire Spell on Hit
Level 19


2
Raise Shield

3
Herald of Blood
Level 15


4
Herald of Ash
Level 17


5
Ferocious Roar
Level 14


6
Scavenged Plating
Level 17


7
Shield Wall
Level 18


Gem Priority


+21
Passive Tree
Level 89 Low Budget
Level 91 Lightng coil swap
Level 95 High Budget
main:
123
123
set 1:
20
20
set 2:
20
20
Quest Rewards
Check which quests you’ve completed on your character
Clearfell — Beira of the Rotten Pack
+10% to Cold Resistance
Freythorn — The King in the Mists
+30 to Spirit
Ogham Manor — Candlemass, the Living Rite
+20 to maximum Life
Hunting Grounds — The Crowbell
Grants Two Weapon Set Passive Skill Points
Ogham Farmlands — Una's Hut
Grants Two Weapon Set Passive Skill Points
Valley of the Titans — Medallion
30% increased Charm Charges gained
+1 Charm Slot
The Spires of Deshar — Sisters of Garukhan
+10% to Lightning Resistance
Keth — Kabala, Constrictor Queen
Grants Two Weapon Set Passive Skill Points
Deshar — Final Letter
Grants Two Weapon Set Passive Skill Points
The Venom Crypts — Venom Draught
25% increased Stun Threshold
Jiquani's Machinarium — Blackjaw, the Remnant
+10% to Fire Resistance
The Azak Bog — Ignagduk, the Bog Witch
+30 to Spirit
Jungle Ruins — Mighty Silverfist
Grants Two Weapon Set Passive Skill Points
Aggorat — Blood Sacrifice
Grants Two Weapon Set Passive Skill Points
Whakapanu Island — Great White One
+30% increased Global Armour, Evasion and Energy Shield
Eye of Hinekora — Navali's Rest
5% increased Maximum Mana
Halls of the Dead — Tawhoa's Test
+5% to Lightning Resistance
Abandoned Prison — Goddess of Justice
30% increased Mana Recovery from Flasks
Halls of the Dead — Tasalio's Test
+5% to Cold Resistance
Halls of the Dead — Ngamahu's Test
+5% to Fire Resistance
Journey's End — Captain Hartlin
Two Weapon Set Passive Skill Points
Skill Gem(Lv 13)
Delirium Drop
Halls of the Dead — Yama The White
Grants Two Weapon Set Passive Skill Points
The Khari Crossing — Molten Shrine
5% increased Maximum Life
Kriar Village — Lythara, the Wayward Spear
+40 to Spirit
Wolvenhold — Oswin, the Dread Warden
Grants Two Weapon Set Passive Skill Points
The Khari Crossing — Akthi and Anundr
Two Weapon Set Passive Skill Points
Howling Caves — The Abominable Yeti
Grants Two Weapon Set Passive Skill Points
Comments
0Video Guide
Build Planner Export
Export all build variants directly to your game.
Table of Contents
1. Build Overview This Smith of Kitava combines hard-hitting critical strikes, large chain explosions and strong recovery. My current setup has around 40,000 Armour and 85% Fire, Cold and Lightning Resistance, with the aim of feeling comfortable in both maps and boss fights. gets its base damage from the Armour on your shield, which makes a high-Armour shield one of our most important damage upgrades. This also lets us use for its special effect rather than its weapon damage: it consumes an Endurance charge to guarantee a critical hit on the next attack. To supply those charges, we switch into Bear form and use our warcry setup, where spending 15 Rage generates an Endurance Charge, then return to using . Generating charges is therefore part of how we play the build, rather than something we only do before a boss. For map clear, we combine the with , which explodes corpses as we use our melee skills. Our Bleed setup allows to contribute further explosions, while adds burning overkill damage around enemies we kill. Together, these interactions help our damage spread through packs instead of relying on to hit every enemy individually. This is how we get such wide clear without spending many passive points on Area of Effect. Defensively, this version uses to take part of incoming Physical Hit Damage as Lightning Damage, which our high Lightning Resistance helps reduce. It also provides Armour and Evasion, and converts that Evasion into additional Armour. The Smith’s resistance scaling makes Fire Resistance particularly valuable, as it also helps us build our Cold and Lightning Resistance. Our second weapon set also uses , a talisman that grants a stack of Druidic Prowess for every 20 Rage spent, up to three stacks. Each stack provides 10% increased Skill Speed, giving us up to 30% increased Skill Speed. This means spending Rage supports both our Endurance Charge generation and faster Shield Wall placement. We also use for 4% of maximum Mana recovered on kill and for 5% of maximum Life recovered on kill. These provide extra recovery as we clear packs, helping replenish our Life and Mana while mapping. Since they require kills, they do not provide the same recovery against a boss with no additional enemies.2. Strengths and Weaknesses3. Build Variants4. Equipment5. Skill Gems6. Passive Tree7. Quest Rewards8. Comments
Featured Builds




Become a Creator
Want to earn rewards by sharing your builds with your community?