
 Mercenary
 Gemling Legionnaire
A cheap, fast, effective build for early rushing, solo mapping, boss slaying, and ascendency carries.
 Use your favourite features in-game with our Desktop App
PoE 2 Build
GL1TCH3D's Hail Mary Gemling
Build Overview
Strengths and Weaknesses
- Very cheap
- Fast non-Temporalis mapping
- Instant Nuke Any Boss
- Satisfying Screen Explosions
- Glacial Bolt Hurts The Eyes
- Hard to fit rarity given most slots are uniques (outside of defensive setup)
Build Variants
No Money - No Constricting
$ - Constricting Lv1
$$ - Crit
$$$ - Rage
$$$$ - Lineages
$$$$$ - Headhunter
$$$$$ - Defensive
$$$$$$ - MinMax
Getting this setup for under 10 div budget is feasible - just without the  Horror's Flight.
Any 700+ DPS crossbow except the Thartan Cannon since you cannot shoot bolts.
Equipment
No Money - No Constricting
$ - Constricting Lv1
$$ - Crit
$$$ - Rage
$$$$ - Lineages
$$$$$ - Headhunter
$$$$$ - Defensive
$$$$$$ - MinMax
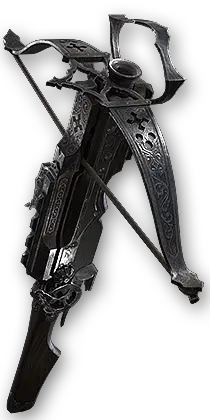

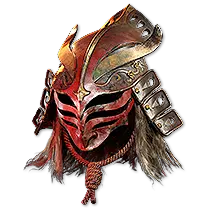
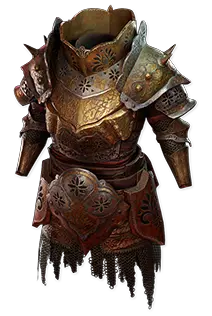

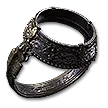
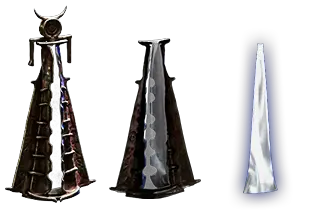


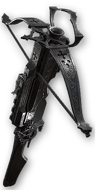 Siege Crossbow is ideal but not required. This base improves the bossing damage from
  Cluster Grenade significantly but comes at the cost of a lower base damage, therefore, less
  Glacial Bolt damage. Normal modifiers apply. Get the highest damage you can afford. Note the
  Warding Rune of Disintegration in the crossbow for armour break pairing with
 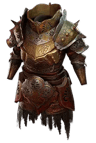 The Brass Dome.
Trade link for Crossbow
Horror's Flight can come with the Raven's Touched modifier (RNG) which allows it to be annointed. DO NOT BUY THEM CORRUPTED. These are incredibly valuable and allows some extra versatility, but otherwise use NORMAL gloves with flat damages. If you manage to get a Raven's Touched version - annoint  Storm's Rebuke.
 Thrillsteel is optional but is a good alternative for speed before you get
  Constricting Command.
Amulet NEEDS spirit on it. Aim for 40+. After that, +quality is the most important. Note that +quality is a desecrate-only suffix modifier. If you have the budget for it, +projectile skills with this.
The Brass Dome is the runeforged version.
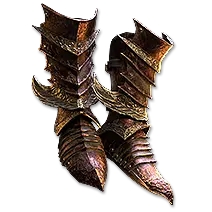
 Decree of Flight is important for the faster dodge roll to really speed up the build. Otherwise, normal boots work as well in the meantime.
Ring is your normal everyday ring. If you can, try and get an  Unset Ring. Otherwise, drop
  Oil Grenade.
 Heart of the Well is ideally a Gain Cold + Gain Lightning - but these go for 15d. Consider buying a single Gain Lightning for around 1d to start as it helps with proccing shock.
Skill Gems
No Money - No Constricting
$ - Constricting Lv1
$$ - Crit
$$$ - Rage
$$$$ - Lineages
$$$$$ - Headhunter
$$$$$ - Defensive
$$$$$$ - MinMax
Support Gem Requirements:
Str 45
Dex 65
Int 60

1
Glacial Bolt
Set 1


2
Verisium Manifestations
Set 1


3
Remnants of Kalguur
Set 1


4
Cast on Dodge
Set 1


5
Rapid Shot
Set 2


6
War Banner
Set 2


7
Berserk
Set 2

8
Eternal Rage
Set 2

9
Oil Grenade


10
Cluster Grenade


Gem Priority


+35
Note that  Eternal Rage CANNOT BE SET TO SET 2 ONLY. This can only be enabled by disabling
  Cast on Dodge. Usually I recommend just using Cast on Dodge all the time outside of pinnacles or boss carries.
Reminder that Glacial Bolt +  Verisium Manifestations +
  Remnants of Kalguur + Cast on Dodge are set to SET 1.
Reminder that  War Banner +
  Berserk + Eternal Rage +
  Rapid Shot are set to SET 2.
You can further set Cluster Grenade to set 2 only if you want to ensure you never misclick and use it from set 1 while bossing. However sometimes I use it while mapping and decided to leave it on both.
All support gems are listed in order of importance. Glacial Bolt and Cluster Grenade are the most important to use perfect jewellers on first.
Use Morrigan's on Cast on Dodge instead of Biting Frost II if you can get one.
Breachlord's Rift does the same thing as Storm's Rebuke. Prioritize the latter. UPDATE: The price of a  Megalomaniac with Storm's Rebuke is around the same price as Breachlord's Rift - don't buy the lineage in this case.
 Spark should be level 1.
Passive Tree
No Money - No Constricting
$ - Constricting Lv1
$$ - Crit
$$$ - Rage
$$$$ - Lineages
$$$$$ - Headhunter
$$$$$ - Defensive
$$$$$$ - MinMax
main:
123
123
set 1:
20
20
set 2:
20
20
Quest Rewards
Check which quests you’ve completed on your character
Clearfell — Beira of the Rotten Pack
+10% to Cold Resistance
Freythorn — The King in the Mists
+30 to Spirit
Ogham Manor — Candlemass, the Living Rite
+20 to maximum Life
The Spires of Deshar — Sisters of Garukhan
+10% to Lightning Resistance
Valley of the Titans — Medallion
30% increased Charm Charges gained
+1 Charm Slot
The Azak Bog — Ignagduk, the Bog Witch
+30 to Spirit
Jiquani's Machinarium — Blackjaw, the Remnant
+10% to Fire Resistance
The Venom Crypts — Venom Draught
Not Specified3 choices
Abandoned Prison — Goddess of Justice
30% increased Mana Recovery from Flasks
Eye of Hinekora — Navali's Rest
5% increased Maximum Mana
Halls of the Dead — Tribal Medicine
Not Specified2 choices
Halls of the Dead — Ngamahu's Test
+5% to Fire Resistance
Halls of the Dead — Tasalio's Test
+5% to Cold Resistance
Halls of the Dead — Tawhoa's Test
+5% to Lightning Resistance
The Khari Crossing — Molten Shrine
5% increased Maximum Life
Qimah — Tabana's Pillar
+5% to all Elemental Resistances
Kriar Village — Lythara, the Wayward Spear
+40 to Spirit
How it Plays
Mapping - Simply continue firing Glacial Bolt to kill stuff.
Note that Glacial Bolt is very capable of clearing map bosses so the below only applies to tanky bosses / pinnacles.
Bossing - Place Oil Grenade before boss spawns. Immediately begin firing Rapid Shot to break armour and build heat. Once armour is broken, drop War Banner then use Cluster Grenade to win.
How it Works
Glacial Bolt drops many frost walls that deal significant AOE damage if you destroy them.
Verisium Manifestations is a temporary minion skill that consumes ward to spawn ranged minions when you hit an enemy with an attack. Therefore, when you Glacial Bolt, the initial hit will spawn these manifestations which in turn will consume the frost walls with Biting Frost II creating huge explosions. This is made better with  Gemling Legionnaire alt qual giving huge AOE and now you're clearing half a screen on a single Glacial Bolt.
Cluster Grenade alt quality lowers detonation time. This paired with nodes on the tree brings the detonation time to 0. Meaning, as soon as you click it, the main explosion and ALL the mini grenades explode immediately. Cluster has great damage which is usually held back by the fact that the mini-grenades spread out over a large area. But now as they all explode instantly, there's no spread.
Add in the armour break with The Molten One's Gift to scale the damage the enemy takes significantly.
Comments
25J
J•8d ago
need 2 crossbow for this build?
0
D
DeadlyMask•24d ago
Hi there,
I am trying to follow your Path of Exile 2 build guide on Mobalytics, but I'm completely stuck on the Verisium Manifestations links.
In your guide screenshot, you have 5 support gems linked directly to it: Biting Frost II, Multishot II, Pierce III, Efficiency II, and Rapid Attacks III.
However, when I try to copy this in-game, the UI completely blocks me. Since Verisium Manifestations is tagged as a Spell, the game won't let me socket Attack/Projectile gems like Multishot, Pierce, or Rapid Attacks into it at all.
How did you manage to put all 5 of these gems directly into the Verisium skill in your setup? Is this a bug in the Mobalytics build planner, or am I missing a specific unique item or mechanic that allows you to bypass the skill tags?
I would really appreciate your help to clear up this confusion!
0
G
GL1TCH3D
Author
•20d agoAre you sure you're using the right gem? This isn't a bug on moba and is a common use with Glacial Cascade builds.
0
P
Pantoffel•24d ago
I dont wanna play twister and this looks nice but i have a lot of questions about this build something feels off i wanna blast it through ROA and get rewards before it ends. Is it possible to link your poeninja? That will answer it all this website is just a mess.
0
P
Pantoffel•24d ago
Here you go if anyone has any questions (twitchglitched) at poeninja
2
J
J•24d ago
how do you get the 160 spirit
2
R
RustyFlower•25d ago
maybe i missed it but u have 2 annoints but i cant tell what there are i figure one is paragon but what is the 2nd?
0
G
GL1TCH3D
Author
•20d agoAll the annoints are in the guide. Main 2 are Paragon and Storm's Rebuke. Eventually you can add Augmented Flesh
0
R
RustyStorm•25d ago
Why Brass dome? Doesn't gem studded provide no bonus damage perk?
0
Y
yoonj7•1 month ago
please fix $$$$$ Headhunter or lower crossbow mods
0
G
GL1TCH3D
Author
•1 month agoI intentionally didn't fill the mods because it's VERY loose. You don't need any specific damage type. Just search by DPS and crit if doing crit+.
I did add notes to that end though.
0
R
RichBlade•1 month ago
Maybe I'm retarded but I'm not understanding weapon set two, do you just use a second crossbow?
0
R
RustyShield•1 month ago
hover over the different weapon sets and if you only have the one crossbow in you can right click the sets at the top and it will lock the one crossbow to both sets so you only need one
3
View 1 reply
B
BoldStorm•1 month ago
I'm in the Headhunter's build but idk how can you get more spirit, i have Eternar rage from the amulet, Verisium, Remnant but i've only 65 spirit and cant activate Cast on Dodge. Trinity and Herald of Ice i don't have activate, my amulet have +50 spirit :(
2
G
GL1TCH3D
Author
•1 month agofrom the Against the Darkness- you can also get spirit on helmet
trinity activates using Atziri's communion which is in the lineage setup
0
Video Guide
Build Planner Export
Export all build variants directly to your game.
Path of Building Code
Table of Contents
Featured Builds




Become a Creator
Want to earn rewards by sharing your builds with your community?