menu
MobalyticsUse your favourite features in-game with our Desktop App

PoE 2 [0.5.5] Immortal Witchhunter Frostbolt Infinite Loop

By Lazy Exile
Updated on Oct 26, 2026
Oct 26, 2026

Build Overview

Hey guys, It's Lazy Exile, and here's a build guide to The Immortal Witchhunter Frostbolt Infinite Loop setup, an autobomber, 0-button builds for mapping, AFK simulacrum, and comfy content clearing. With exceptional defense against hit damage, and huge scaling on damage, this character can comfortably clear contents in the endgame by just walking around.

Disclaimer

Please check out the video for explanation on the techs if you want to see it in action.

Budget Snapshot - https://poe.ninja/poe2/pob/2937a

Expensive Snapshot - https://poe.ninja/poe2/pob/297af

˚₊‧✩*☆˚‧˚ᡣ𐭩︵‿༻☆༺‿︵ᡣ𐭩˚‧˚☆*✩‧₊˚˚₊‧✩*☆˚‧˚ᡣ𐭩︵‿༻☆༺‿

Ascendacy

Witchhunter

Best for Budget when it comes to play a snapshot build due to Weapon Master. We have a flexible tree that focus on Frostbolt damage snapshotted, and a tree spec for defense and cooldown recovery. Beside that, Sorcery Ward is an incredible defensive layers, that pair really well with Evasion, making the character very capable of tanking any thing in the game.

₊‧✩*☆˚‧˚ᡣ𐭩︵‿༻☆༺‿︵ᡣ𐭩˚‧˚☆*✩‧₊˚˚₊‧✩*☆˚‧˚ᡣ𐭩︵‿༻☆༺‿

Strengths and Weaknesses

  • Tanky/Immortal Build
  • Comfy Playstyle with 0-button
  • AFK Simulacrum Farmer
  • Do other stuff while making currency
  • Clear all contents (include Pinnacles)
  • Slow Mapper

Build Variants

The Budget Barebone of the Setup

  • Utilizing cheap gear that is achievable, none of the unique items should be expensive beside From Nothing (maybe, it was at 2C when i recorded the video)
  • No Megalomaniac, Emerald Jewels can be self-crafted.

Minimum Stats Recommendation

  • > 85% increased cooldown recovery
  • > 60% increased projectile speed
  • > 2,000 Life
  • > 1,000 Mana
  • > 8,000 Sorcery Ward
  • > Cap Deflection, 10,000 Evasion

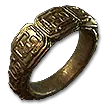
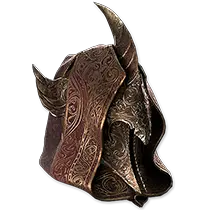
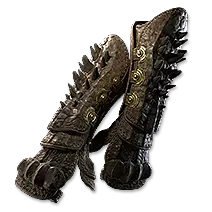
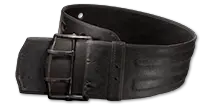
Equipment

item
2
item
5
item
1
item
8
item
7
item
6
item
4
item
9
item
10
item
11
item
item
item
item
item
Jewels
item
item
item
item
item
item
item
Equipment Priority
+11

Jewel Setup

  • From Nothing - Iron Reflexes to grab Gem Enthusiast, General's Bindings, Authority
  • Heart of the Well - I opted for Cooldown Recovery Rate, Damage as Extra Cold
  • Emerald - cooldown recovery rate can be crafted on + projectile speed + evasion/move speed

Alternative Items

  • Sands of Silk - Extra Increased Cooldown Recovery for faster mapping on easier content
  • The Hollow Mask - Easily spawn remnants, and get free recovery with Vigorous Remnants \ Arcane Remnants, pair with Khatal's Rejuvenation for up to 40% increased cooldown recovery

Skill Gems

Support Gem Requirements:

Str 60

Dex 55

Int 60

1

Sorcery Ward

Level 20

cold-mastery
vitality-i
2

Mirror of Refraction

Level 20

cooldown-recovery-ii
uhtreds-omen
3

Shockwave Totem

Level 17

splinter-totem-ii
reinforced-totems-ii
4

Seismic Cry

Level 17

cooldown-recovery-ii
enraged-warcry-ii
stun-ii
raging-cry
5

Infernal Cry

Level 17

cooldown-recovery-ii
efficiency-ii
enraged-warcry-ii
tireless
6

Freezing Mark

Level 17

eternal-mark
charged-mark
cooldown-recovery-ii
prolonged-duration-ii
7

Frostbolt

Level 20

breachlords-amalgam
considered-casting
zenith-ii
deliberation
cold-penetration
8

Blasphemy

Level 18

temporal-chains
slow-potency
magnified-area-ii
ritualistic-curse
heightened-curse
9

Frost Wall

Level 19

ahns-citadel
kaoms-madness
glacier
spell-cascade
cold-mastery
10

Escape Shot

Level 17

rapid-attacks-iii
projectile-acceleration-iii
hit-and-run
cadence
Gem Priority
+37

Skill Usage

  • Freezing Mark is free damage increased (if you want to cast)
  • Frostbolt & Frost Wall to start the infinite loop engine
  • All other skills are there to trigger Gem Enthusiast

Passive Tree

main:
123
123
set 1:
20
20
set 2:
20
20

Quest Rewards

Check which quests you’ve completed on your character
Clearfell — Beira of the Rotten Pack
+10% to Cold Resistance
Hunting Grounds — The Crowbell
Grants Two Weapon Set Passive Skill Points
Freythorn — The King in the Mists
+30 to Spirit
Ogham Farmlands — Una's Hut
Grants Two Weapon Set Passive Skill Points
Ogham Manor — Candlemass, the Living Rite
+20 to maximum Life
Keth — Kabala, Constrictor Queen
Grants Two Weapon Set Passive Skill Points
Valley of the Titans — Medallion
30% increased Charm Charges gained
+1 Charm Slot
Deshar — Final Letter
Grants Two Weapon Set Passive Skill Points
The Spires of Deshar — Sisters of Garukhan
+10% to Lightning Resistance
Jungle Ruins — Mighty Silverfist
Grants Two Weapon Set Passive Skill Points
The Venom Crypts — Venom Draught
30% increased Elemental Ailment Threshold
Jiquani's Machinarium — Blackjaw, the Remnant
+10% to Fire Resistance
The Azak Bog — Ignagduk, the Bog Witch
+30 to Spirit
The Molten Vault — The Molten Vault
Reforging Bench
Aggorat — Blood Sacrifice
Grants Two Weapon Set Passive Skill Points
Journey's End — Captain Hartlin
Two Weapon Set Passive Skill Points
Skill Gem(Lv 13)
Delirium Drop
Whakapanu Island — Great White One
+30% increased Global Armour, Evasion and Energy Shield
Eye of Hinekora — Navali's Rest
5% increased Maximum Mana
Halls of the Dead — Yama The White
Grants Two Weapon Set Passive Skill Points
Halls of the Dead — Tawhoa's Test
+5 to Dexterity
Abandoned Prison — Goddess of Justice
30% increased Life Recovery from Flasks
Halls of the Dead — Tasalio's Test
+5 to Intelligence
Halls of the Dead — Ngamahu's Test
+5 to Strength
Halls of the Dead — Tribal Medicine
+30% increased Global Armour, Evasion and Energy Shield
Wolvenhold — Oswin, the Dread Warden
Grants Two Weapon Set Passive Skill Points
The Khari Crossing — Akthi and Anundr
Two Weapon Set Passive Skill Points
The Khari Crossing — Molten Shrine
5% increased Maximum Life
Qimah — Tabana's Pillar
12% increased Cooldown Recovery Rate
Kriar Village — Lythara, the Wayward Spear
+40 to Spirit
Howling Caves — The Abominable Yeti
Grants Two Weapon Set Passive Skill Points

How it Plays

Skill Binding

  • Bind Frostbolt to Weapon Set I
  • Bind Frost Wall to Weapon Set II
  • Bind Freezing Mark to Weapon Set II (if you plan on using)

Starting the Loop

  1. Start in your Weapon Set II (Mirror of Refraction should be passively spawning)
  2. Cast Frostbolt at the Mirror of Refraction, then cast Frost Wall right after
  3. Now your Frostbolt should be looping, make sure to never swap to Weapon Set I or Mirror of Refraction will stop spawning and your loop will stop

Changelog

09/16 - Expensive Setup Updated

09/14 - Budget Setup Created

Comments

46

Build Planner Export

Export this build variant directly to your game.

Path of Building Code

Video Guide

Table of Contents

Featured Builds

[0.5.5] Plants Oracle League Starter (Level 1 to Endgame)
Updated on Nov 19, 2026
[0.5.5] Grenades Gemling League Starter (Level 1 to Endgame)
Updated on Nov 19, 2026
[0.5.5] Plants Abyssal Lich League Starter (Level 1 to Endgame)
Updated on Nov 19, 2026
[0.5.5] ED Contagion Lich League Starter (Level 1 to Endgame)
Updated on Nov 19, 2026
[0.5.5] Scorps Plants COC Endgame Guide
Updated on Nov 17, 2026

Become a Creator

Want to earn rewards by sharing your builds with your community?