The build revolves around two important mechanics: generating enough Cast on Dodge energy and reducing Ember Fusillade's hover duration to 0.01 seconds.
1. Double Cast on Dodge
We're using two separate Cast on Dodge setups:
- One comes from our amulet.
- The second is a regular Spirit gem.
Both automatically trigger Ember Fusillade as we dodge roll.
Cast on Dodge generates energy based on the distance travelled while dodge rolling. Once enough energy is generated, it automatically triggers the socketed spell.
This is why we're stacking so much movement speed and dodge roll distance.
Decree of Flight provides faster dodge rolls, while Mageblood with two Quicksilver Flasks gives us additional movement speed. We're also getting extra dodge roll distance from our runes and gem quality.
The faster and farther we can roll, the more frequently we can generate energy and trigger our spells.
2. Instant Ember Fusillade
Normally, Ember Fusillade creates projectiles that hover for a short duration before firing at enemies.
We want to reduce that hover duration to 0.01 seconds, allowing our projectiles to fire almost instantly.
We're achieving this through several interactions:
- Gemling Legionnaire: Additional gem quality effects from our ascendancy.
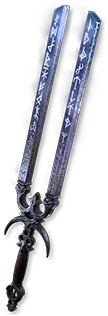
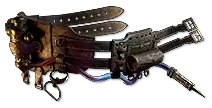
- Palm of the Dreamer: Reduced Skill Effect Duration.
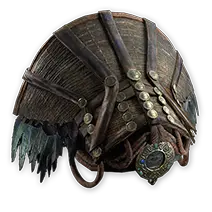
- Loreweave: Additional quality to our skills.
- Fox Idol: Another +5% skill quality.
If you can't reach 0.01 seconds with your current equipment, you can temporarily allocate additional Reduced Skill Effect Duration passives on the tree.
This is one of the most important things to get right when putting the build together.
3. Damage, Projectiles and Explosions
Our damage comes from automatically triggered Ember Fusillade projectiles.
We're using Blackflame Covenant to convert our Fire damage into Chaos damage, allowing us to scale Chaos damage and benefit from Wither.
Several items improve our clear:
- Palm of the Dreamer: Provides those satisfying explosions when clearing packs.
- Runeseeker's Call: Additional projectiles and powerful spell scaling.
- Snakepit: Additional projectile chaining.
- Loreweave: Another source of projectile chaining.
- Withering Presence: Applies Wither to nearby enemies, increasing the Chaos damage they take.
We're also stacking Critical Hit Chance and Critical Damage Bonus. With our current setup, we're reaching 100% Critical Hit Chance and over 1,100% Critical Damage Bonus.
4. Low Life and Defenses
We're intentionally playing on Low Life by using Blasphemy with Atziri's Communion, reserving Life instead of Spirit.
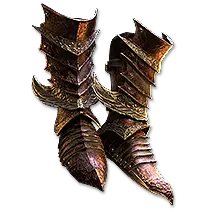
This enables several useful bonuses, including additional damage from Pain Attunement, Execute support, and extra movement speed from our boots.
For survivability, we're combining:
- High Energy Shield and armour.
- Ghost Dance for Energy Shield recovery.
- Arctic Armour for additional armour.
- Temporal Chains and Despair through automated Blasphemy.
- Mana Remnants for additional mana sustain.
- Bearer's Anguish for Ignite protection.
Ignite is particularly dangerous for this setup, so I'd strongly recommend having protection against it.
Final Priorities
When putting everything together, focus on these two things before chasing expensive damage upgrades:
- Reach 0.01-second Ember Fusillade hover duration.
- Get enough dodge roll distance, movement speed, and energy generation for consistent Cast on Dodge triggers.
Once those are working properly, you can start optimizing projectiles, Critical Damage Bonus, Energy Shield, and other luxury upgrades.


 Mercenary
 Gemling Legionnaire
 Cast on Dodge. We're using two Cast on Dodge setups to automatically trigger
 Ember Fusillade, while
 Palm of the Dreamer takes care of those satisfying pack explosions. No complicated rotations or constantly pressing different skills. Just roll around and watch everything disappear.
 Decree of Flight , plenty of movement speed, and Gemling's powerful gem quality scaling, we turn something as simple as dodge rolling into a complete damage engine.