PoE 2 Guide
PoE 2: How to use Build Files (In-Game Build Planner)
Beginner
Overview
How it works
Step 1: Find a Build Guide and Download your Build File
Take a look at our extensive catalogue of Build Guides here and find one you'd like to follow. Once you're set, you can download the Build File by navigating to the Build Planner Export section in the guide.
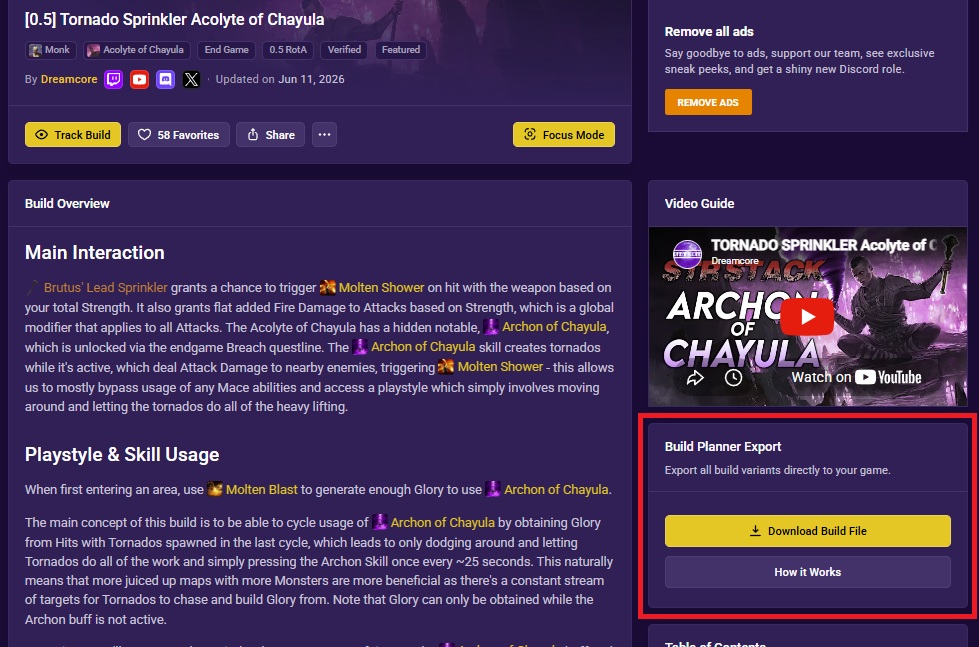
Click Download Build File in the Build Planner Export section
Step 2: Placing the Build File in the correct folder
Navigate to the Build Planner folder in your Path of Exile 2 directory. This is usually located in:
Documents\My Games\Path of Exile 2\BuildPlanner\
Place the downloaded Build File(s) into the Build Planner folder.
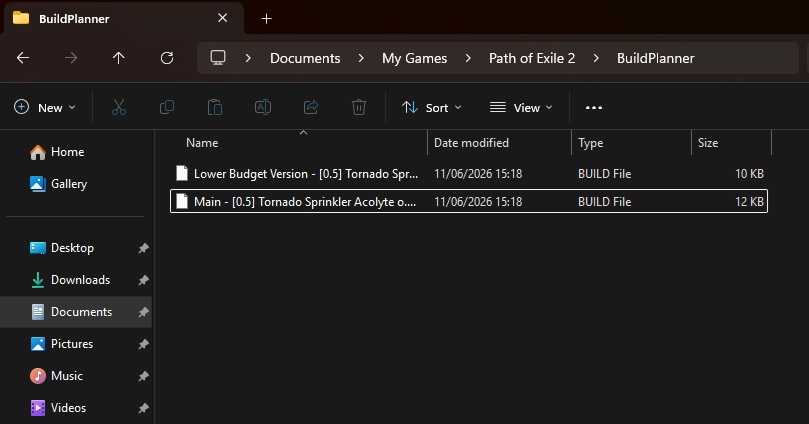
Build Files placed in the correct folder
Step 3: Boot Path of Exile 2 and navigate to the Build Planner menu
Open the Passive Skill Tree screen and locate the Build Planner button at the top-left of the screen.
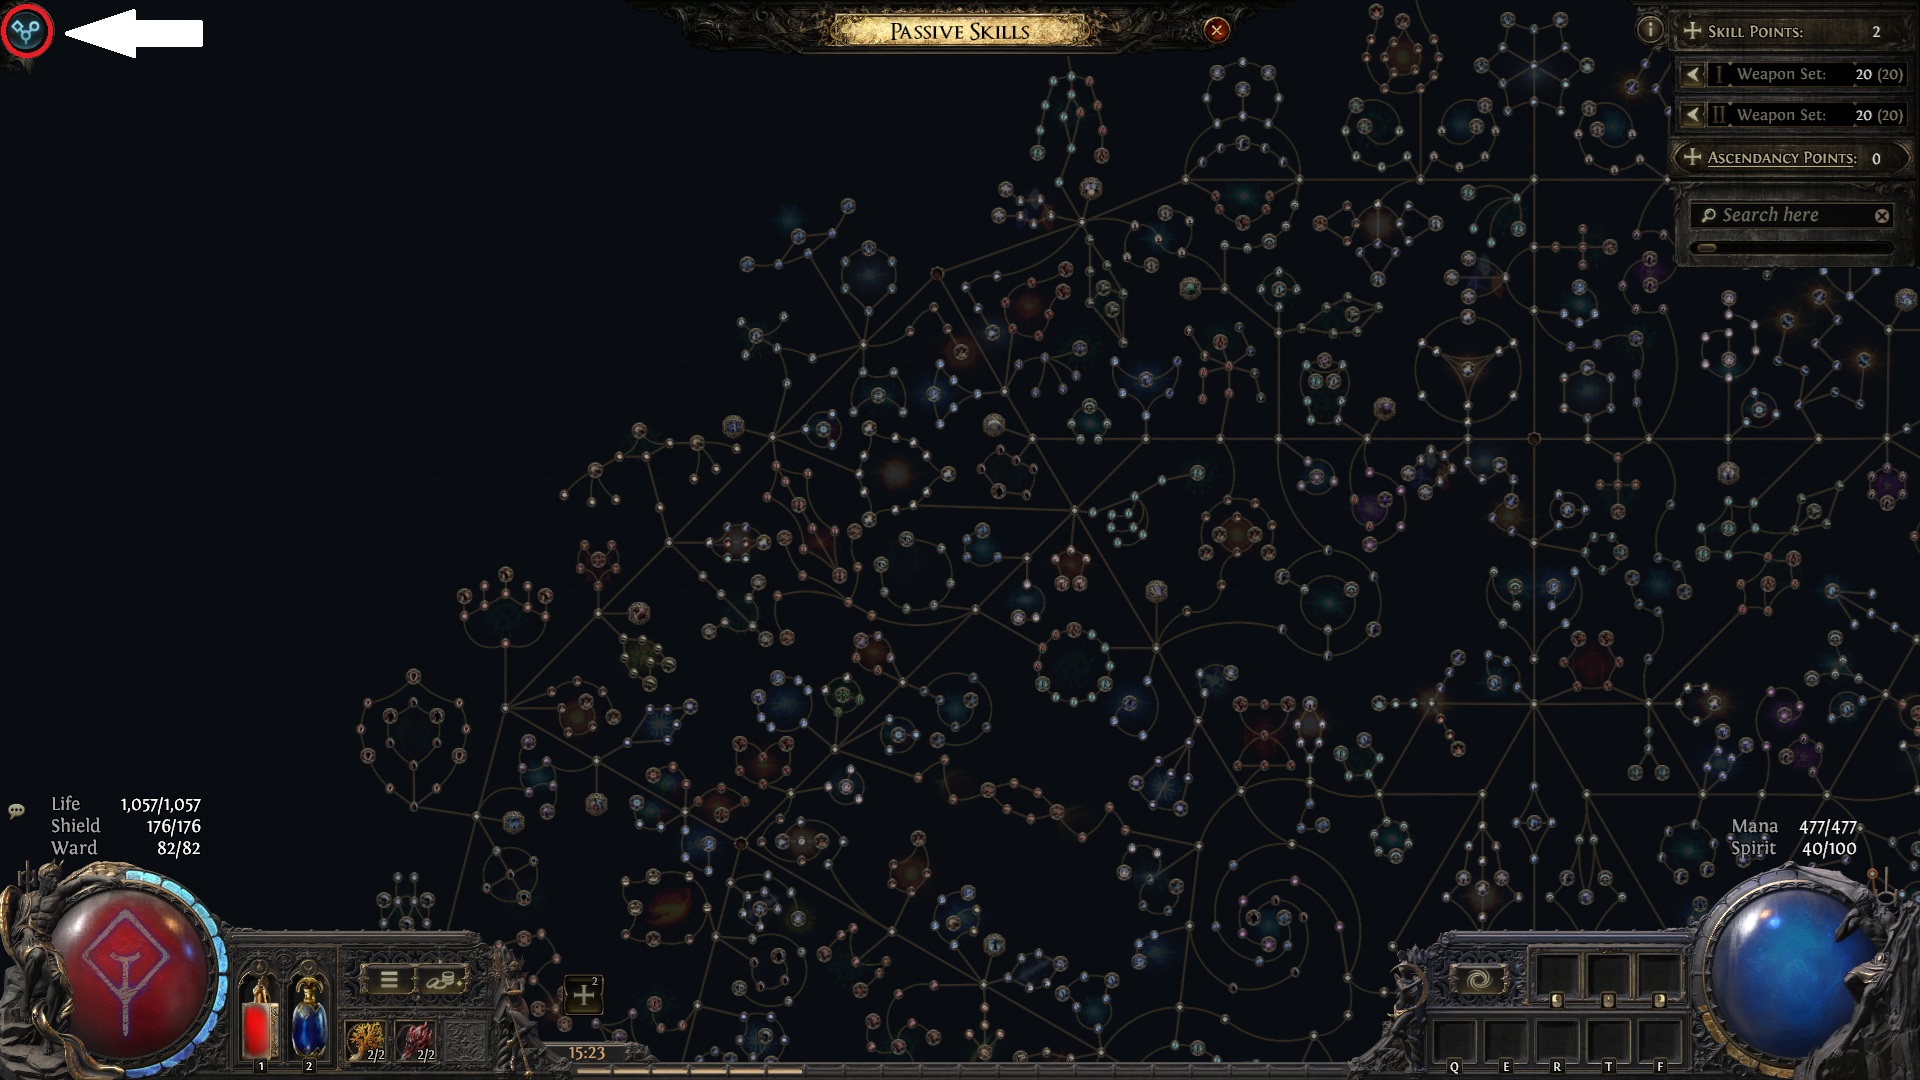
Clicking this button will open a selection of all available Build Planner guides
Step 4: Choose the desired Build File
From the drop-down list, choose the Build Planner guide that you wish to follow. Note that some Build Guides contain multiple Build Files for different steps of progression, or different budgets, so be sure to select the correct one!
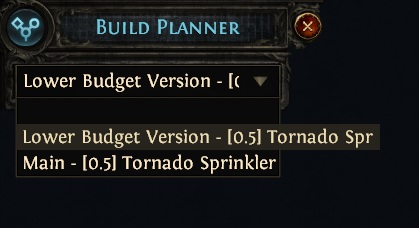
Select the Build File you want to follow
Step 5: Following the Build Planner
Build Planners have several ways to communicate important information to players, but not all of these methods are used in every guide. You will typically have a Passive Skill Tree and Ascendancy guideline that's highlighted in a subtle blue colour to show you where you should be allocating your points.
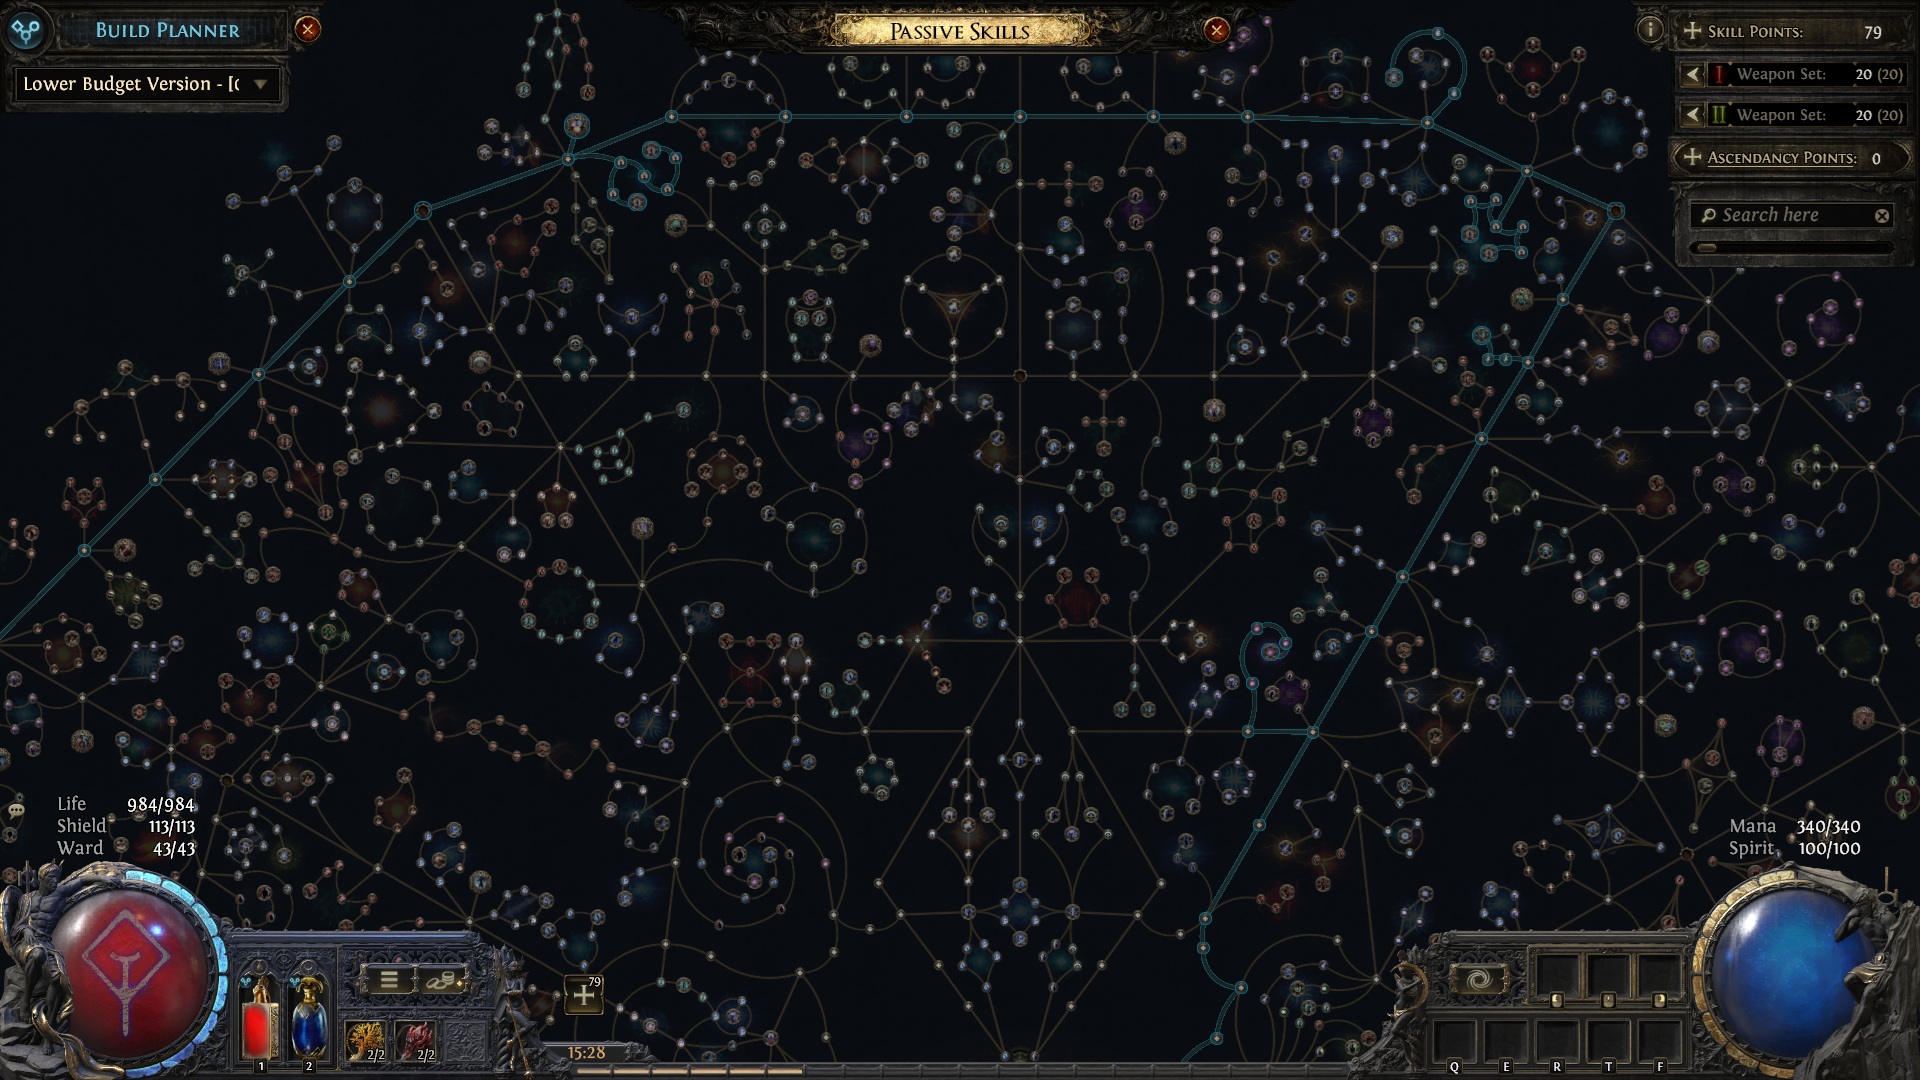
The outline of the Passive Skill Tree guide
Gear pieces may also contain additional detail, including displaying ideal gear modifiers for each slot and potentially some additional notes below to explain any other important details. To view this information, simply hover over the small icon in the top left of each gear piece window.
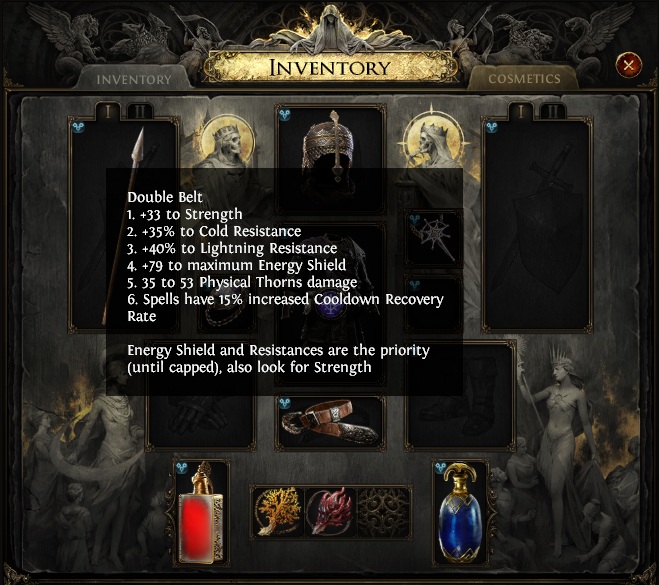
Hovering the equipment icon displaying ideal modifiers and other notes