LIVE UPDATE: CRITICAL HIT INTERACTION IS NOT WORKING - SEE VIDEO
IMPORTANT NOTE: This build makes use of new Ascendancy Skills and/or mechanics that aren't fully understood. The expected interactions aren't yet known to function, so follow at your own risk.
WORK IN PROGRESS, CHECK BACK FOR UPDATES
Build focused on hitting  Hollow Focus Technique bells using
  Boneshatter to create 3 overlapping Shockwave hits in a large area.
Concept
Boneshatter creates a Shockwave when causing a Heavy Stun after hitting a target that's Primed for Stun. The bells created by Hollow Focus Technique are always Primed for Stun, and hits against them are always Critical Hits.  Hollow Resonance Technique attaches a bell to your back which creates a Shockwave around you when another Skill deals a Critical Hit.
Using Boneshatter to hit a Hollow Focus bell will cause three Shockwaves, one from each bell and one from Boneshatter itself. Since the Boneshatter usage targeted the Hollow Focus bell, the hit which created the Shockwave is a guaranteed Critical Hit, which in turn creates a Critical Shockwave to deal extra Damage to all nearby targets. See video for more information!
Hollow Focus Bell Placement
One of the issues that may arise is the placement of Hollow Focus Technique bells since they are randomly placed at an interval within a 3 metre radius around you. This may be less of an issue for general map clearing, but we will still have a typical Boneshatter rotation available for the cases where the bell spawns in a disadvantageous position, such as behind us as we approach a pack. In these scenarios we can use  Rolling Slam or
  Leap Slam into Boneshatter to clear.
For bossing this could pose more of an issue. As of right now, the 4th Ascension option is  Runic Meridians, but if single target poses more of a problem than I expect it will, then
  Hollow Form Technique may be a good choice, as we'll be able to generate Power Charges from Critical Hits on the bells (combined with a
  Way of the Stonefist modifier), providing a much more reliable single target option.
Levelling
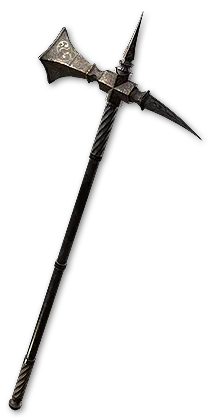
I will level using a Mace almost right away. Pathing on the tree may require a few Strength attribute nodes to be able to equip Maces.
Brink I is now a Level 1 Support Gem so we can grab it right away, along with a buffed Attack-time Rolling Slam to combo into Boneshatter.  Mace Strike will do most of the heavy lifting early on for single target Damage.
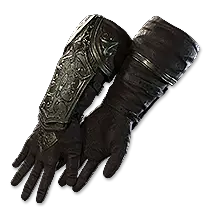
Focus on upgrading your Two-Handed Mace as regularly as possible. Prioritize Physical Damage prefix modifiers, Attack Speed and Skill Levels, but any added Damage modifier will be useful early on. The same goes for Gloves and Rings with added Damage.
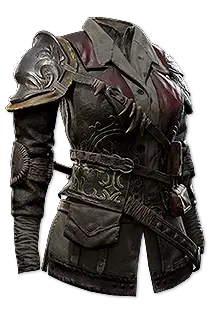
Defences
Since we'll be using a Two-Handed Mace, the plan is to utilise mostly pure Evasion gear along with a splash into Energy Shield scaling via Way of the Stonefist Gloves and a pure Energy Shield Helmet with  Subterfuge Mask. I will also be experimenting with the new Deflection formula to see how it feels.
Attributes
Since this build will need to use all 3 Attributes to equip a Mace alongside Evasion and Energy Shield gear, we may have some affix pressure to deal with. Early on make sure you're focusing on Evasion gear so you can take Strength and Dexterity on the pathing nodes. Make sure to regularly check vendors for good gear with any Attribute rolls you can use.