menu
MobalyticsUse your favourite features in-game with our Desktop App
PoE 2 Build

0.5.5 Cold Bow Explode Witchhunter League Starter Guide by Asmodeus

Updated on Sep 1, 2026
Sep 1, 2026

Build Overview

This is a league starter guide for Cold Bow Explode Witchhunter. The guide comes with a detailed build file, full progression from campaign to level 90+ and a video guide - including a full campaign playthrough with commentary.

Playstyle

The playstyle consists of attacking with Ice Shot as your main clearing and freezing skill, and finishing off frozen targets, such as bosses, with Snipe, which is capable of dealing millions of damage in a single hit. For tougher targets, the build utilizes Tornado Shot to multiply the Ice Shot hits and massive debuffs from Freezing Mark, Frost Bomb and Elemental Weakness boosted by secondary Weapon Set Passives.

You either attack with Ice Shot and the Herald of Ice combined with Zealous Inquisition explodes the packs; or you debuff the target, freeze it with Ice Shot and kill it with Snipe.

Ascendancy Choice

Witchhunter has a big advantage over many other ascendancies on a league start, due to easy access to Explosions from Zealous Inquisition. This allows for fast and easy clearing of the Abyss and Breach mechanics - both of which spawn Demon type monsters, against which the Witchhunter has double the chance to trigger the big AoE explosions. It also happens to be that Abyss and Breach are some of the best and most important mechanics to farm early on, before you can invest a lot of currency into your character, giving you a head start at the beginning of the league.

The additional weapon set passives from Weapon Master allow us to invest in Curse Magnitude for Elemental Weakness, Exposure Effect for Frost Bomb and Shock Magnitude for Stormcaller Arrow or Charged Mark. This provides big damage multipliers against the tough bosses early on, before you can acquire things like Rakiata's Flow, making it a good fit for a league starter.

Build File [IMPORTANT!]

Do NOT use the automatic build file download on this page. Instead subscribe to or download the build file from the Path of Exile 2 website here: https://pathofexile2.com/build/l07rf1

Strengths and Weaknesses

  • SSF viable and works on any budget
  • Explode from Zealous Inquisition trivializes early Abyss and Breach
  • Good clearing coverage due to projectiles + explosions playstyle
  • Good single target thanks to many Weapon Set Passives invested in debuffs
  • Requires aiming your skills and Perfect Timing with Snipe
  • Complicated passive tree which requires using many Weapon Set Passives

Build Variants

Equipment

item
1
item
4
item
8
item
9
item
7
item
4
item
2
item
3
item
10
item
6
item
item
item
Equipment Priority
+10

Campaign Gear Modifiers Priority

Click on "Show All/Show All Notes" above to see a detailed modifier priority for each item slot.

Overview

In act 1 and 2, you are going to be using mostly Lightning Damage skills, but you want to also Freeze. That's why you should prioritize Cold Damage modifiers and Lesser Glacial Runes in your weapon.

In act 3 and 4 you are going to be using mostly Cold Damage skills, but you also want to Shock. That's why you should prioritize Lightning Damage modifiers and Storm Runes in your weapon.

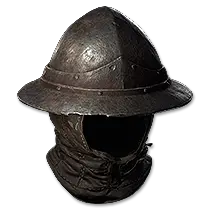
Early on, it is important to get additional Intelligence or Dexterity on your gear (I recommend the Helmet slot). As soon as you can, you should also get an amulet with extra attributes (the ones you will be needing the most are Dexterity and Intelligence).

Charms

Take the Sapphire Charm as your quest reward in act 1 and replace it for Antidote Charm which you can get as a quest reward in act 3. Other than that a Thawing Charm and Stone Charm are the two main charms you want to use, to avoid losing control of your character.

Flasks

Always upgrade your flasks while leveling, as soon as you can. They are very important and you need to pay a lot of attention to them.

REGEX

When checking vendors, you can use the REGEX below to highlight items with useful modifiers for this build.

"!Mace|Talisman|Staff|Spear|Cross|Plate|Cuira|Robe|Vest|Mantl|Raise|Parry" "bow|o str|o int|o dex|move|dds|ll proj"

Skill Gems

Support Gem Requirements:

Str 30

Dex 10

Int 30

1

Lightning Arrow

Set 1

supportelementalarmamentplayer
supportrapidattacksplayer
2

Lightning Rod

Set 1

supportelementalarmamentplayer
supportconcentratedareaplayer
3

Escape Shot

Set 1

supporticebiteplayer
supportelementalarmamentplayer
4

Frost Bomb

Set 2

5

Freezing Salvo

Set 1

supporthourglassplayer
supportelementalarmamentplayer
6

Herald of Thunder

supportelementalarmamentplayer
supportmagnifiedareaplayer
7

Fragments Of The Past

Set 1

supporthourglassplayer
supportmultishotplayer
8

Snipe

Set 1

supportelementalarmamentplayer
supportconcentratedareaplayer
9

Ice-Tipped Arrows

10

Barrage

Gem Priority
+14

Campaign Skill Gems

The most important part to remember about leveling your skill gems are the level limits of Frost Bomb and Elemental Weakness. You need to periodically check the maximum level of enemies that they can affect and upgrade them every 2 or 3 tiers, to keep up with the area level you are in. Other than that, prioritize your main damage skills and skills which help you freeze enemies (such as Freezing Salvo or Escape Shot because they gain damage as well as Freeze Buildup.

Skill gem priority in act 1:

2 - LA

3 - Salvo

3 - Rod

3 - Escape

4 - LA

4 - Snipe (Before Geonor, swap Snipe in place of Lightning Rod, taking over its support gems)

5 - Ice-Tipped Arrows

5 - Barrage

In The Manor Ramparts take Fragments Of The Past as a reward from the league mechanic. Use it in act 1 and 2 against bosses for extra cold damage / freeze. After adding more gems in Act 2, you can either use Fragments Of The Past or Ice-Tipped Arrows and drop the other one.

Skill gem priority Act 2

6 - Lowest

7 - Freezing Mark

7 - Elemental Weakness

8 - Lowest (prioritize freezing skills)

Tame Beast

In act 3 - you should capture a rare Boar. You can reset at the checkpoint next to the Troubled Camp in Infested Barrens to repeatedly respawn nearby rare beasts until you find one with good modifiers. Haste or Haste Aura are ideal because you want the beast to stay close to you (for that reason avoid Shroud Walker). Otherwise get anything beneficial, but I recommend avoiding modifiers that spawn environmental effects such as detonate dead, volatile plants or fire explosions, because they will constantly spawn dangerous looking environmental hazards that are indistinguishable from those spawned by enemies, making it easy to get confused and miss the real danger.

In the interludes you can capture a flying beast by similarly resetting at checkpoint next to the Travelling Merchant in The Khari Crossing. These will likely not roll a Haste modifier, as they are already very fast, so I recommend Periodic Invulnerability Aura or any other beneficial modifier you like.

Support Gems

I recommend grabbing a lot of support gems for this build, because it uses a lot of skills and can benefit from a large number of supports to gain additional power. You will only be able to use all of these support gems if you use gear with some attributes on it. The gear sections highlights this (for example Int/Dex on a helmet)

Guaranteed support gem locations in act 1:

  1. Devourer's Den (League Mechanic)
  2. Devourer Quest Turn in
  3. Areagne
  4. Druid in Grim Tangle
  5. Tomb of the Consort Chest Ambush
  6. Hunting Grounds Dryadic Ritual
  7. Freythorn (League Mechanic)
  8. The Executioner
  9. Manor Ramparts Gallows

You can also randomly encounter support gems as a reward from the league mechanic in other zones.

Support Gem Engraving Priority in the Campaign:

Follow the support gem priority listed below, or adjust it based on your most frequently used skills. Once you engrave all of the priority supports, you can spend the rest on upgrading Elemental Armament I to Elemental Armament II. I recommend keeping at least one spare Uncut Support Gem for transitions and additions of new skills, such as Ice Shot at level 31.

Support Gem Order Tier 1:

Lightning Arrow

  • Elemental Armament I
  • Rapid Attacks I

Escape Shot

  • Ice Bite

Lightning Rod

  • Concentrated Area
  • Elemental Armament I

Freezing Salvo

  • Hourglass
  • Elemental Armament I

Fragments of the Past

  • Multishot
  • Hourglass

Escape Shot

  • Elemental Armament

Herald of Thunder

  • Magnified Area
  • Elemental Armament I

Snipe

  • Window of Opportunity

Elemental Weakness

  • Efficiency
  • Heightened Curse

Freezing Mark

  • Mark of Siphoning

Support Gem Order Tier 2:

Frost Bomb

  • Potent Exposure

Freezing Mark

  • Lifetap

Freezing Salvo

  • Freeze

Support Gem Order Tier 3:

Ice Shot

  • Ice Bite II

Freezing Salvo

  • Deliberation

Snipe (optional if you struggle with perfect timing)

  • Elemental Focus

Herald of Ice

  • Elemental Focus

Escape Shot

  • Ice Bite II

Elemental Weakness

  • Magnified Area II

Support Gem Order Tier 4:

Ice Shot

  • Rapid Attacks II

Support Gem Order Tier 5:

  • Charged Mark

Lesser Jeweller's Orb Priority:

  1. Snipe
  2. Ice Shot
  3. Freezing Salvo
  4. Elemental Weakness
  5. Herald Of Ice
  6. Companion
  7. Escape Shot

Gemcutter's Prism Priority:

  1. Freezing Mark
  2. Frost Bomb
  3. Elemental Weakness

Passive Tree

main:
123
123
set 1:
20
20
set 2:
20
20

Weapon Set Passives

This build takes advantage of the Weapon Set Passives extensively. Make sure your bow and quiver are assigned to both sets by right clicking the lock icon above them, and set all of your attacks to Weapon Set 1, and Freezing Mark, Frost Bomb as well as Elemental Weakness to Weapon Set 2.

To simplify - Weapon Set 1 = attacks and damage; Weapon Set 2 = debuffs

If at any point you don't have enough Weapon Set Passives to allocate all of the nodes, you can temporarily use generic points to allocate the Weapon Set 1 passives and skip the Weapon Set 2 passives, but after doing your second trial around level 38-40 you will take Weapon Master and have practically unlimited Weapon Set passives, at which point you should start following the suggested weapon set passives exactly.

Passives Progression

Follow the recommended order of notables above in the "Notable Priority" section. If you want to better understand the order, read all of the notables, especially Inspiring Ally.

Aim to reach level 15 right before Count Geonor fight, so that you can allocate Overwhelm.

Your travel nodes will mostly need to be Dexterity for gear and Skill Gem requirements, and Intelligence for Skill Gem and Support Gem requirements. You will also need some Strength, but one roll on a belt and Colossal Weapon should get you most of the way there. Your Weapon Set 2 travel nodes should be always Intelligence.

Quest Rewards

Check which quests you’ve completed on your character
Clearfell — Beira of the Rotten Pack
+10% to Cold Resistance
Hunting Grounds — The Crowbell
Grants Two Weapon Set Passive Skill Points
Freythorn — The King in the Mists
+30 to Spirit
Ogham Farmlands — Una's Hut
Grants Two Weapon Set Passive Skill Points
Ogham Manor — Candlemass, the Living Rite
+20 to maximum Life
Keth — Kabala, Constrictor Queen
Grants Two Weapon Set Passive Skill Points
Valley of the Titans — Medallion
30% increased Charm Charges gained
+1 Charm Slot
Deshar — Final Letter
Grants Two Weapon Set Passive Skill Points
The Spires of Deshar — Sisters of Garukhan
+10% to Lightning Resistance
Jungle Ruins — Mighty Silverfist
Grants Two Weapon Set Passive Skill Points
The Venom Crypts — Venom Draught
25% increased Stun Threshold
Jiquani's Machinarium — Blackjaw, the Remnant
+10% to Fire Resistance
The Azak Bog — Ignagduk, the Bog Witch
+30 to Spirit
The Molten Vault — The Molten Vault
Reforging Bench
Aggorat — Blood Sacrifice
Grants Two Weapon Set Passive Skill Points
Journey's End — Captain Hartlin
Two Weapon Set Passive Skill Points
Skill Gem(Lv 13)
Delirium Drop
Whakapanu Island — Great White One
+30% increased Global Armour, Evasion and Energy Shield
Eye of Hinekora — Navali's Rest
5% increased Maximum Mana
Halls of the Dead — Yama The White
Grants Two Weapon Set Passive Skill Points
Halls of the Dead — Tawhoa's Test
+5% to Lightning Resistance
Abandoned Prison — Goddess of Justice
30% increased Life Recovery from Flasks
Halls of the Dead — Tasalio's Test
+5% to Cold Resistance
Halls of the Dead — Ngamahu's Test
+5% to Fire Resistance
Halls of the Dead — Tribal Medicine
+30% increased Global Armour, Evasion and Energy Shield
Wolvenhold — Oswin, the Dread Warden
Grants Two Weapon Set Passive Skill Points
The Khari Crossing — Akthi and Anundr
Two Weapon Set Passive Skill Points
The Khari Crossing — Molten Shrine
5% increased Maximum Life
Qimah — Tabana's Pillar
3% increased Movement Speed
Kriar Village — Lythara, the Wayward Spear
+40 to Spirit
Howling Caves — The Abominable Yeti
Grants Two Weapon Set Passive Skill Points

How it Plays

Combos and rotations

Campaign level 1-14

Clearing

Use Escape Shot to jump over monsters and continue moving in one direction (aim backwards). This will trigger Ice Bite I. Finish the monsters off with Lightning Arrow when necessary.

Single Target

Pre-stack Lightning Rod x 4. Debuff the target with Frost Bomb. Attack with Lightning Arrow up to 8 times. Use Freezing Salvo once the target is Shocked.

Campaign level 15-30

Clearing

Same as before - use Escape Shot to jump over monsters and continue moving in one direction (aim backwards). This will trigger Ice Bite I. Finish the monsters off with Lightning Arrow when necessary.

Single Target

Use Ice-Tipped Arrows, pre-place Fragments Of The Past, debuff the target with Frost Bomb, use Freezing Salvo and Lightning Arrow or Escape Shot to freeze the target.

Once the target is frozen - use Barrage and Snipe.

Campaign level 31-60

Clearing

Use Escape Shot to jump over monsters and continue moving in one direction (aim backwards). Finish the monsters off with Ice Shot or just clear with Ice Shot.

Single Target

Debuff the target with Freezing Mark, Frost Bomb and Elemental Weakness. Freeze the target with Freezing Salvo and Ice Shot.

Once the target is frozen - use Snipe.

Endgame level 60+

Clearing

Use Ice Shot. If you want more damage, drop Tornado Shot on the pack first, then follow up with Ice Shot.

Single Target

Debuff the target with Freezing Mark, Frost Bomb and Elemental Weakness (and optionally Stormcaller Arrow). Drop Tornado Shot on the target and freeze it with Ice Shot

Once the target is frozen - use Snipe.

Comments

0

Video Guide

Build Planner Export

Export all build variants directly to your game.

Table of Contents

Featured Builds

[0.5] GEMLING SPARK - Endgame BLASTER @animeprincess
Updated on Sep 3, 2026
[0.5] Comprehensive CoC Frostbolt/Spark Comet Recoup Infernalist - by Ignatius
Updated on Sep 3, 2026
[0.5] COC COMET - Stormweaver @animeprincess
Updated on Sep 3, 2026
[0.5.5] SSF Sand & Fire Djinn Varashta - Campaign & Endgame Build Guide
Updated on Sep 3, 2026
[0.5.5] Scorps Ultimate Plants Leveling Build
Updated on Sep 3, 2026

Become a Creator

Want to earn rewards by sharing your builds with your community?