THE. FROG. BUILD. This build needs no introduction... but I'll give one anyways! Fast blasting  Poisonburst Arrow
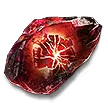
 ![]() Oracle. We stack a decent amount of Area of Effect and Utilize a Rage +
Oracle. We stack a decent amount of Area of Effect and Utilize a Rage + 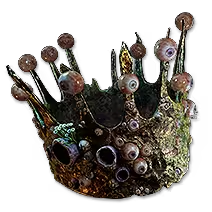 Crown of Eyes +
  Mystical Rage interaction to essentially multiply our damage. The character uses the tried and true
  Boneshatter +
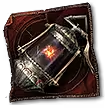
  Trenchtimbre setup for our [Weapon Set I] for all of our movement. The
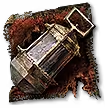
 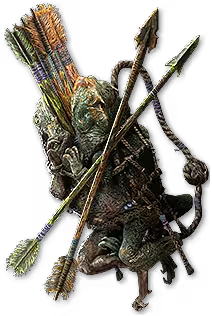 Murkshaft Quiver is the centerpiece of the Build and we spawn Frogs on Kill. These Frogs detonate with a very large Area of Effect and fuel our
  Charge Regulation +
  Resonance + Armour Break III engine.
Build Overview
Strengths and Weaknesses
- Tanky
- Great Clear
- One Button for Everything (+ Boneshatter)
- Inexpensive
- Oracle
- Weird Gearing Process
- Crafting Maybe Required


Skill Gems
Support Gem Requirements:
Str 65
Dex 50
Int 65
Expand all

1
Bursting Fen Toad
Level 19
2
Poisonburst Arrow
Level 21
3
Charge Regulation
Level 18

4
Berserk
Level 21

5
Herald of Plague
Level 19

6
Eternal Rage
Level 21

7
Cast on Critical
Level 17

8
Barrage
Level 16
9
Boneshatter
Level 1

10
Wind Dancer
Level 18
Gem Priority


+37
Lineage Support Gem Purchase Priority is Rigwald's Ferocity for Attack Speed (Movement Speed) on Boneshatter (make sure this is a Level 1 Skill), Uul-Netol's Embrace, Garukhan's Resolve, Tacati's Ire for Poisonburst Arrow. You can use 3 Dialla's Desire if you first equip a  Solus Ipse socket the gems, then remove the helmet. 2 of the Dialla's Desire will be greyed out but they still function. This tech also works with Uhtred's Augury, Uhtred's Exodus, and Uhtred's Omen if you have them.
Boneshatter (this is used in [Weapon Set I] at LEVEL 1, if you have Mana issues this is not at LEVEL 1! Rigwald's Ferocity coupled with Rage III, Rapid Attacks III, Weapon Set I points in tree,  Dance with Death, and a Trenchtimbre make for a VERY fast moving character!)
Poisonburst Arrow (this is used in [Weapon Set II] and is our clear and single target, it greatly benefits from Rage so make sure you are Rage capped as often as possible)
Bursting Fen Toad (kill monster frog go boom, refer to the gear section to better understand why we use this)
Herald of Plague (this is used in [Weapon Set II] and spreads poison to any monster that somehow survives your upfront damage)
Berserk (this is used in [Weapon Set II] and scales your Rage! This has an inherent synergy with Mystical Rage and Crown of Eyes and SUPER buffs your Poisonburst Arrow)
Cast on Critical (this is used in [Weapon Set II] and  Profane Ritual automation feeds into our Charge Regulation engine. Charge Profusion II will also generate charges other than the Endurance we get from the Profane Ritual + Resonance combo!)
Barrage (this is used in [Weapon Set I] for the memes)
Wind Dancer (this is used in BOTH [Weapon Sets] and will generate charges with Armour Break III, it also sometimes will give you some space if a monster happens to stun you)
Charge Regulation (this is used in BOTH [Weapon Sets] and gives you a 1.2x multiplier to your Defenses, the occasional 1.3x multiplier to your Critical Hit Chance, and a nice increase to your Skill Speed which is later multiplied by Dance with Death)
Passive Tree
main:
123
123
set 1:
20
20
set 2:
20
20
 Heart of the Well is honestly very flexible, I took increased Energy Shield from Equipped Body Armour, Gain Damage as Extra Chaos, and some Recover 2% Maximum Mana on Kill.
 Megalomaniac should either have
  Commanding Rage or Battle Trance. Whichever you cannot get should be anointed on your
  Solar Amulet. You cannot justify the use of a Megalomaniac for the Jewel Slot if it doesn't also have another useful mod. We opted for an extra increased Chaos Damage node.
 Heroic Tragedy needs the Vorana tag and the seed is either great or terrible. You can go into standard, buy any random one, and slam it with divine in the same jewel socket to see what notables it would change. You can write down all the good seeds that overlap with your Black Scythe Covenant Radius and then buy them within the Fate of the Vaal League.
 Controlled Metamorphosis needs a medium radius to spec
  Escalating Toxins and Building Toxins from the slot we have it in. This slot saves you a lot of points! These are cheap and you can look for a nice double corrupt.
 Prism of Belief +3 Level of Poisonburst Arrow Skills
 Flesh Crucible takes Dance with Death and either Less Maximum Life because we have
  Chaos Inoculation or Less Movement Speed because we move with Boneshatter.
 Time-Lost Emerald takes Increased Effect of Notables in Radius, Increased Critical Damage Bonus for Attack Damage, Increased Damaging Magnitude, and Increased Damaging Magnitude from Critical Hits. We always deal Critical Hits with
  Forced Outcome.
The entire character is centric around  Entwined Realities, Rage + Mystical Rage + Crown of Eyes, and Boneshatter movement! We take as many keystones as possible so we can in turn take as many notables possible for as few points as possible. The reason
 ![]() Oracle is so good is because we can create a really efficient tree and don't have to spend so much currency on gear for power.
Oracle is so good is because we can create a really efficient tree and don't have to spend so much currency on gear for power.  The Unseen Path enables notables that aren't normally accessible, including one that gives us a ridiculous amount of Maximum Rage.
How it Plays
Path of Building Code
Video Guide
Table of Contents
Featured Builds


Become a Creator
Want to earn rewards by sharing your builds with your community?