menu
MobalyticsUse your favourite features in-game with our Desktop App
PoE 2 Build

[0.5] Scorps Hollow Form Endgame Monk

presentationMonk
presentationMartial Artist
End Game
0.5 RotA
Creator
Featured
Updated on Aug 6, 2026
Aug 6, 2026

Build Overview

Hollow Form Martial Artist Build Guide with Multiple Variants.

⭐ Click Favorite above to save this guide for all updates & changes. ⭐
If you have any questions, join me live on Twitch and ask away!

Click here for all other Monk Build Guides.

───────────────────────────────────────────────────────────────────────────────────

This build can be transitioned to at level 41 when you unlock Whirling Assault. You will want to put this ability into Hollow Form which is an ability we get from our Martial Artist ascendancy.

All other abilities such as Pounce Devour Hollow Focus and others are all Utility based abilities to enhance the main protagonist which is Hollow Form, making this a 1-Button Build.

───────────────────────────────────────────────────────────────────────────────────

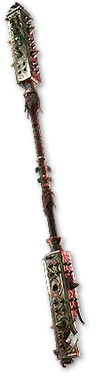
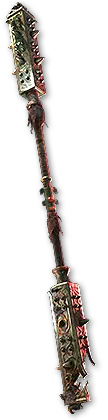
In the endgame we prefer going for a good Quarterstaff weapon which will give us an insane boost of damage. Something like Nazir's Judgement early on or Duality later on before transitioning to a good Rare Quarterstaff.
For anyone interested in Hollow Palm Technique, here's some info:

Hollow Palm Technique Explanation:

Hollow Palm Technique scales in 3 ways:

  • Skill Level: The higher your skill level is the better HPT scales. Therefore the higher you are the better
  • Evasion on Gear: The more EV we have the more Attack Speed we get with HPT.
  • Energy Shield on Gear: The more ES we have the more Crit we get with HPT.

HPT is simply a node on our tree, its not a Build on it's own. Whether you go for it or not, depends on whether you have the right gear to support it. Finding a really good Quarterstaff will often times out-dps Hollow Palm Technique.

Good Quarterstaff Mods:

  • Flat Damage (Phys,Light,Cold,Fire)
  • Increased Damage (Phys, Ele)
  • +Level of Skills (Melee, Attack)
  • Crit Hit
  • Crit Dmg Bonus
  • Attack Speed

───────────────────────────────────────────────────────────────────────────────────
Equipment

item
10
item
3
item
1
item
6
item
5
item
4
item
10
item
7
item
8
item
9
item
item
item
item
item
Jewels
item
item
Equipment Priority
+10

GLOVES:

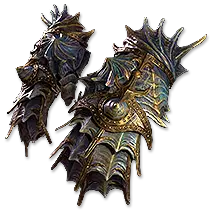
Lochtonial Caress is a must have especially early on. This enables and gets our build online due to Way of the Stonefist node from our Martial Artist ascendancy.

When equipped Lochtonial Caress will provide us with a chance to get Endurance, Frenzy and Power Charges through our allies, which are the clones we summon from Hollow Form. You want the % chance to be as close to 10% as possible.

───────────────────────────────────────────────────────────────────────────────────

WEAPON:

Nazir's Judgement is an incredibly good Quarterstaff to start with. We transition to Whirling Assault at level 41 and the Nazir's Judgement can be equipped at level 40 with 2x Greater Iron Rune for the extra Phys.

You will then want to add a Farrul's Rune of the Hunt which will help us deal more damage to bosses and rares, HOWEVER, this will increase the QS Level Requirement to lvl 50.

Once you're deep into mapping, around Tier 12, you can start looking at good alternatives such as Duality or a Rare Quarterstaff.

Good Quarterstaff Mods:

  • Flat Damage (Phys,Light,Cold,Fire)
  • Increased Damage (Phys, Ele)
  • +Level of Skills (Melee, Attack)
  • Crit Hit
  • Crit Dmg Bonus
  • Attack Speed

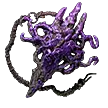
You need a TALISMAN on Weapon Set 2.

───────────────────────────────────────────────────────────────────────────────────

GEAR:

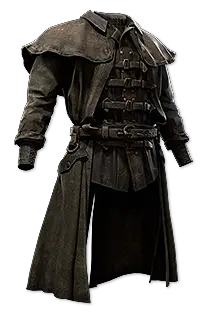
Body Armour, Helmet & Boots should all be focusing on Evasion and Energy Shield. Some bases can be hybrid, some can be pure EV or pure ES. Based on that, we decide whether we will focus more on Energy Shield Recharge with Convalescence OR Deflection Rating with Wind Dancer

───────────────────────────────────────────────────────────────────────────────────
RINGS & AMULET:

On the rings we want as many Flat Damage Mods as possible, while also either capping Resistances, stacking Rarity or getting some Attributes.

On the Amulet we want to get +Level of Skills/Melee Skills, Flat & Increased ES/EV, Resistances and/or Spirit.

SPIRIT: This could be important depending on what path you wanna take. We can get max spirit on Amulet + Body Armour which will allow us to run multiple different Auras such as, Blasphemy Wind Dancer, Ghost Dance, Charge Regulation, Convalescence.

Skill Gems

Support Gem Requirements:

Str 25

Dex 70

Int 55

1

Hollow Form

Level 18

whirlingassaultplayer
supportmobilityplayer
supportblindsideplayer
supportmagnifiedareaplayertwo
2

Hollow Focus

Level 18

supportmagnifiedareaplayertwo
supportcullingstrikeplayertwo
supportblindplayertwo
supportcooldownrecoveryplayertwo
3

Frost Wall

Level 14

supportrapidcastingplayertwo
supportspellcascadeplayer
supportglacierplayer
4

Devour

Level 12

supportchargeprofusionplayertwo
supportthrillofthekillplayer
prolongeddurationsupportplayer
5

Rend

Level 18

supportperpetualchargeplayer
supportrapidattacksplayertwo
prolongeddurationsupportplayertwo
supportrageplayerthree
6

Blasphemy

Level 14

temporalchainsplayer
supportslowpotencyplayer
supportmagnifiedareaplayer
supportfocusedcurseplayer
supportritualisticcurseplayer
7

Pounce

Level 12

supportrapidattacksplayer
supportmarkfordeathplayer
8

Wind Dancer

Level 15

supportmaimplayer
supportblindplayer
9

Ghost Dance

Level 12

supportcooldownrecoveryplayertwo
10

Convalescence

Level 13

prolongeddurationsupportplayertwo
supportsecondwindplayerthree
supportcooldownrecoveryplayer
11

Charge Regulation

Level 14

supportclarityplayer
Gem Priority
+32

ABILITY TLDR

Hollow Form is our main skill as we add Whirling Assault into it. We will spam this 1-button for all content, which will create clones that will perform the skill we added into it.

  • Mobility is used so we can speed up in maps with our clear.
  • Magnified Area II is used to increase the radius of our Clones. In the future we want Vorana's Siege
  • Blindside is used to increase our damage since we use Blind II on Hollow Focus
  • 5th Support gem could be Efficiency II or Rakiata's Flow depending on your budget.

Hollow Focus is our main utility based auto-ability. This will spawn bells around us that our clones will destroy, applying all utility-based support gems we have in it.

Frost Wall is a nice (not mandatory) touch to the build for bossing. We create the Frost Walls around the boss for our clones to destroy further damaging the boss.

Devour can be used on corpses AND our Bells, to manually gain Charges if needed. We then use Rend to consume a Power Charge in exchange for a Damage Increase Buff. You need a TALISMAN on Weapon Set 2.

Pounce is mainly used for 2 reasons. Mobility and Bossing. We always jump on the boss pre-fight to apply the Marks we have on the ability. You need a TALISMAN on Weapon Set 2.

Blasphemy has Temporal Chains in it which will slow all enemies making it easier for us to survive tense moments. However this could also be paired with Repulsion for an extra aoe Explosion.

Charge Regulation is used for multiple different buffs that increase our damage and speed based off our Charges.

Wind Dancer, Ghost Dance, Convalescence are all defensive layers.

───────────────────────────────────────────────────────────────────────────────────

SUPPORT GEM TLDR

───────────────────────────────────────────────────────────────────────────────────

AURA MANAGEMENT + SPIRIT REQUIREMENT

Based on your Endgame Progress, you can decide to skip some of these auras and focus on other benefits. For example:

  • if you have an issue with defense, then you should prioritize the 3 Defensive Auras over Charge Regulation.
  • If you have mana issues, you could go for Mana Remnants
  • If you focus more on ES than EV, then prioritize Ghost Dance and Convalescence.
  • Do the same for Wind Dancer if you prioritize EV.
  • If you want to slow the enemies down but also increase your clear speed then you can combine Temporal Chains + Repulsion in your Blasphemy

Passive Tree

main:
123
123
set 1:
20
20
set 2:
20
20

WEAPON SETS:

On Weapon set 1 we have our Quarterstaff, which is our main weapon.

On Weapon set 2 we have a Talisman, so we can use abilities like Devour, Rend & Pounce.

We use the passive tree nodes to separate Wep Set 1(RED) and Wep Set 2(GREEN) so we can benefit further on our Devour + Rend combo as we want to extend the Buff we get by getting a few Skill Effect Duration Nodes on the tree for Wep Set 2(Green)

MANA MANAGEMENT:

If you have mana issues you could go for Efficiency II on your Hollow Form OR find a Mana on Kill Sapphire. If you still have issues with mana, you can specc into Efficient Casting

Quest Rewards

Check which quests you’ve completed on your character
ClearfellBeira of the Rotten Pack
+10% to Cold Resistance
Hunting GroundsThe Crowbell
Grants Two Weapon Set Passive Skill Points
FreythornThe King in the Mists
+30 to Spirit
Ogham FarmlandsUna's Hut
Grants Two Weapon Set Passive Skill Points
Ogham ManorCandlemass, the Living Rite
+20 to maximum Life
KethKabala, Constrictor Queen
Grants Two Weapon Set Passive Skill Points
Valley of the TitansMedallion
30% increased Charm Charges gained
+1 Charm Slot
DesharFinal Letter
Grants Two Weapon Set Passive Skill Points
The Spires of DesharSisters of Garukhan
+10% to Lightning Resistance
Jungle RuinsMighty Silverfist
Grants Two Weapon Set Passive Skill Points
The Venom CryptsVenom Draught
25% increased Stun Threshold
Jiquani's MachinariumBlackjaw, the Remnant
+10% to Fire Resistance
The Azak BogIgnagduk, the Bog Witch
+30 to Spirit
The Molten VaultThe Molten Vault
Reforging Bench
AggoratBlood Sacrifice
Grants Two Weapon Set Passive Skill Points
Journey's EndCaptain Hartlin
Two Weapon Set Passive Skill Points
Skill Gem(Lv 13)
Delirium Drop
Whakapanu IslandGreat White One
+30% increased Global Armour, Evasion and Energy Shield
Eye of HinekoraNavali's Rest
5% increased Maximum Mana
Halls of the DeadYama The White
Grants Two Weapon Set Passive Skill Points
Halls of the DeadTawhoa's Test
+5% to Lightning Resistance
Abandoned PrisonGoddess of Justice
30% increased Mana Recovery from Flasks
Halls of the DeadTasalio's Test
+5% to Cold Resistance
Halls of the DeadNgamahu's Test
+5% to Fire Resistance
Halls of the DeadTribal Medicine
30% increased Armour, Evasion and Energy Shield
WolvenholdOswin, the Dread Warden
Grants Two Weapon Set Passive Skill Points
The Khari CrossingAkthi and Anundr
Two Weapon Set Passive Skill Points
The Khari CrossingMolten Shrine
5% increased Maximum Life
QimahTabana's Pillar
15% increased Armour, Evasion and Energy Shield
Kriar VillageLythara, the Wayward Spear
+40 to Spirit
Howling CavesThe Abominable Yeti
Grants Two Weapon Set Passive Skill Points

Changelog

6th of August:

Creation of Guide

Build Planner Export

Export all build variants directly to your game.

Path of Building Code

Table of Contents

Featured Builds

[0.5] Scorps Hollow Form Endgame Monk
Updated on Aug 6, 2026
[0.5] SSF Pin2Win Grenades Tactician - Campaign & Endgame Build Guide
Updated on Aug 6, 2026
Ultra Speed Snipe
Updated on Aug 6, 2026
0.5 Death Pulse Gemling Legionnaire
Updated on Aug 6, 2026
[0.5] SPARK STORMWEAVER Leaguestarter
Updated on Aug 6, 2026

Become a Creator

Want to earn rewards by sharing your builds with your community?