menu
MobalyticsUse your favourite features in-game with our Desktop App
PoE 2 Build

SPIN TO WIN - Whirling Assault Invoker Monk

0.4 TLotD
End Game
presentationMonk
presentationInvoker
Creator
Updated on May 20, 2026
May 20, 2026

Build Overview

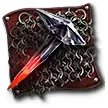
This build utilizes Whirling Assault to clear all content and bosses. Depending on the Build Variant you want to follow you can use either Tempest Bell to enhance your Boss damage, Falling Thunder for bossing and mapping or even Flicker Strike.

We use Cast on Critical with Profane Ritual to automatically produce Power Charges to then empower our Charged Staff and/or use Falling Thunder or Flicker Strike. We also use Mantra of Destruction with Ailith's Chimes to automatically produce even more charges for the same purpose.
The Mantra of Destruction charge generation helps with bosses as Profane Ritual only targets corpses. But since Ailith's Chimes has a limit you can also pair it with Delayed Gratification to build up more combo for more charges.

This builds damage scales with all kinds of Flat Dmg modes, +Levels of Melee skills, Attack Damage, Critical hit, Critical Dmg bonus and Elemental Damage nodes. It will also help the clear to go for nodes such as Frantic Reach and Dizzying Sweep which will significantly expand the Whirling Assault area of effect.

Our defenses will come from Resistances, Energy Shield and Evasion.
Therefore we want to make sure we get nodes like Spectral Ward which means that our Body Armour could either be pure Evasion or hybrid EV/ES.
We also want to get Subterfuge Mask, which means that our Helmet should be full Energy Shield. This nodes could either be taken by pathing to it or adding it on your Amulet as Anointment.
And of course we want to focus on as much ES as we can with Patient Barrier and Melding if needed.

This build variant can be played with multiple ascendancies such a TITAN, however we are focusing on the Invoker Monk.
Sunder my Enemies... helps us with ignoring enemy Resistances. We can ignore this if we have a Rakiata's Flow placed on Whirling Assault
Lead me through Grace... helps us get a ton of Spirit through our Body Armour.
The Soul Springs Eternal helps us minimize the spirit needed on COC and increase its Energy.
I am the Thunder... for more Lightning damage and shock
I am the Blizzard... for more Cold damage and freeze (if you dont go for Sunder my Enemies...)

Strengths and Weaknesses

  • Smooth & Great AOE
  • Fun to play
  • Good Single Target DMG
  • Good Build Variety
  • Constant Buff Refresh
  • Gear Dependant

Build Variants

Equipment

item
1
item
4
item
3
item
2
item
6
item
5
item
1
item
7
item
8
item
9
item
item
item
item
item
Equipment Priority
+9

Quarterstaff Stat Priority:
1) %Physical Damage + Flat Physical Damage
2) + Melee Levels
3) Critical hit Chance
4) Flat Elemental Damage
5) Attack Speed

Body Armour Stat Priority:
1) FULL EVASION Base or HYBRID EV/ES Base (because of Spectral Ward)
2) Resistances
3) ES Recharge OR EV Deflection

Helmet Stat Priority:
1) Full ES Base (because of Subterfuge Mask)
2) Resistances
3) Critical hit Chance
4) ES Recharge

Gloves Stat Priority:
1) ES / ESEV / EV Base (Not as important but ES is preferred)
2) Flat Phys and/or Flat Elemental
3) + Melee Levels
4) Crit
5) Resistances

Boots Stat Priority:
1) Movement Speed
2) ES / ESEV / EV Base (Not as important but ES is preferred)
3) Resistances
4) ES Recharge

Belt Stat Priority:
1) +2 Charms
2) Resistances
3) Mana

Rings Stat Priority:
1) Minimum 2 Flat Dmg mods (Physical/Lightning/Fire/Cold)
2) % Increase Lightning/Cold/Fire
3) Attributes
4) Resistances

Amulet Stat Priority:
1) + Melee Levels
2) % Increase Max ES
3) Crit
4) % Global Defense
5) Attributes
6) Resistances
7) Other beneficial stats ( % Increase Max EV / Flat ES / Flat EV )
Best Anointments -> 1) Subterfuge Mask 2) Patient Barrier 3) Overwhelming Strike 4) Stormcharged

Skill Gems

Support Gem Requirements:

Str 65

Dex 45

Int 60

1

Whirling Assault

supportmagnifiedareaplayertwo
supportelementalarmamentplayertwo
supportmeleephysicaldamageplayer
supportrageplayerthree
supportefficiencyplayertwo
2

Charged Staff

supportelementalarmamentplayertwo
supportpinpointcriticalplayer
prolongeddurationsupportplayertwo
supportfreezeplayer
3

Falling Thunder

fistofwarsupportplayertwo
supportpinpointcriticalplayer
supportnovaprojectilesplayer
supportricochetplayertwo
supportelementalarmamentplayertwo
4

Mantra of Destruction

prolongeddurationsupportplayertwo
supportmobilityplayer
supportchargeprofusionplayertwo
supportailithlineageplayer
5

Tempest Bell

supportarmourbreakplayerthree
supportdelayedgratificationplayer
6

Cast on Critical

profaneritualplayer
supportchargeprofusionplayertwo
supportboundlessenergyplayertwo
supportenergyretentionplayer
7

Herald of Ice

supportmagnifiedareaplayer
supporturukssmeltingplayer
supportarmourexplosionplayer
supportcoldmasteryplayer
8

Herald of Thunder

supportmagnifiedareaplayertwo
supportfreezeplayer
supportpinpointcriticalplayer
supportembitterplayer
9

Convalescence

supportsecondwindplayer
supportcooldownrecoveryplayer
prolongeddurationsupportplayertwo
Gem Priority
+35

Important Gems to know:

Pinpoint Critical on Charged Staff helps us crit more while mapping, therefore we get more charges.

Nova Projectiles I and Ricochet II on Falling Thunder helps us clear the entire area when used. Make sure you use this ability when you have FULL charges.

Ailith's Chimes on Mantra of Destruction helps us generate Charges when bossing by using the ability.

Profane Ritual on Cast on Critical helps us Automate charges when mapping from the corpses.

Uruk's Smelting on Herald of Ice helps us deal more damage on bosses

Passive Tree

main:
123
123
set 1:
20
20
set 2:
20
20

Its important to balance damage with nodes like Killer Instinct Concussive Attack Whirling Assault, aswell as getting our crit as high as possible with things like True Strike Critical Exploit and Heartbreaking, while also building our defense with Patient Barrier Melding Spectral Ward and ofcourse Subterfuge Mask.
Subterfuge Mask is either going to be anointed on the Amulet or taken by pathing towards it.

Since everything about this build revolves around charges we want to get the two main clusters of The Power Within and Overflowing Power.

This build variant can be played with multiple ascendancies such a TITAN, however we are focusing on the Invoker Monk.
Sunder my Enemies... helps us with ignoring enemy Resistances.
Lead me through Grace... helps us get a ton of Spirit through our Body Armour.
The Soul Springs Eternal helps us minimize the spirit needed on COC and increase its Energy.
Meditate helps us double our maximum Energy Shield.

BEST JEWELLS:
Sapphire is the better jewel for us. We look for Increase MAX ES / CRIT HIT / CRIT DMG BONUS/ ES RECHARGE / ELE DMG.

Quest Rewards

Check which quests you’ve completed on your character
Clearfell — Beira of the Rotten Pack
Not Specified1 choice
Hunting Grounds — The Crowbell
Not Specified1 choice
Freythorn — The King in the Mists
Not Specified1 choice
Ogham Farmlands — Una's Hut
Not Specified1 choice
Ogham Manor — Candlemass, the Living Rite
Not Specified1 choice
Keth — Kabala, Constrictor Queen
Not Specified1 choice
Valley of the Titans — Medallion
Not Specified2 choices
Deshar — Final Letter
Not Specified1 choice
The Spires of Deshar — Sisters of Garukhan
Not Specified1 choice
Jungle Ruins — Mighty Silverfist
Not Specified1 choice
The Venom Crypts — Venom Draught
Not Specified3 choices
Jiquani's Machinarium — Blackjaw, the Remnant
Not Specified1 choice
The Azak Bog — Ignagduk, the Bog Witch
Not Specified1 choice
The Molten Vault — The Molten Vault
Not Specified1 choice
Aggorat — Blood Sacrifice
Not Specified1 choice
Journey's End — Captain Hartlin
Not Specified1 choice
Eye of Hinekora — Navali's Rest
Not Specified1 choice
Halls of the Dead — Yama The White
Not Specified1 choice
Halls of the Dead — Tawhoa's Test
Not Specified2 choices
Abandoned Prison — Goddess of Justice
Not Specified2 choices
Halls of the Dead — Tasalio's Test
Not Specified2 choices
Halls of the Dead — Ngamahu's Test
Not Specified2 choices
Wolvenhold — Oswin, the Dread Warden
Not Specified1 choice
The Khari Crossing — Akthi and Anundr
Not Specified1 choice
The Khari Crossing — Molten Shrine
Not Specified1 choice
Qimah — Tabana's Pillar
Not Specified7 choices
Kriar Village — Lythara, the Wayward Spear
Not Specified1 choice
Howling Caves — The Abominable Yeti
Not Specified1 choice

How it Plays

ENTERING A NEW MAP:
Start with 2-3 Whirling Assault -> Use Mantra of Destruction -> use Charged Staff -> Spam Whirling Assault -> Use Mantra of Destruction -> use Charged Staff -> Spam Whirling Assault -> Rinse and Repeat.
Important Note: IF you have a full stack of Mantra of Destruction and you have your Charged Staff full, then you can also add Falling Thunder or Flicker Strike when you have FULL charges.

BOSS FIGHT:
Whirling Assault -> Mantra of Destruction -> Charged Staff and kill the boss just by spinning.
Or use the same rotation to build combo and charges for Falling Thunder and/or Flicker Strike.

Build Planner Export

Export this build variant directly to your game.

Table of Contents

Featured Builds

0.5 Martial Artist League Starter
Updated on Jun 4, 2026
Thy's Detailed SSF Minion Infernalist Guide for 0.5
Updated on Jun 4, 2026
[0.5] Comprehensive CoC Frostbolt/Spark Comet Recoup Infernalist - by Ignatius
Updated on Jun 4, 2026
[0.5] Bigdaddy ⚡Arc/Spark CoC Stormweaver - Endgame Build Guide
Updated on Jun 4, 2026
[0.5 Bigdaddy ⚡SPARK Leveling - Full Guide - League Starter to Endgame
Updated on Jun 4, 2026

Become a Creator

Want to earn rewards by sharing your builds with your community?