menu
MobalyticsUse your favourite features in-game with our Desktop App
PoE 2 Build

[0.4] Lexd's Spear & Shield Wall Bleed Warrior

0.4 TLotD
End Game
presentationWarrior
presentationWarbringer
Creator
By Lexd
Updated on Mar 27, 2026
Mar 27, 2026

Build Overview

The Spear & Shield Wall Bleed Warrior Build

So, alongside swords, I am very excited to see Axes added into Path of Exile 2, and since several of the files in the game seem to point towards a Bleed specialization of some kind, I wanted to familiarize myself by running a Bleed build. Some examples of some potential Bleed-focused Axe skills below:

  • [DNT-UNUSED] Axe Chop
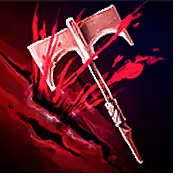
  • [DNT-UNUSED] Axe Whirling Slash

How the Spear & Shield Wall Bleed Build Plays

Overall, this build is very strong for clearing (better than my previous builds) since we are using the ever-popular Herald of Blood, Bursting Plague, Poison III combo alongside Rake to chain Bleeds, Poisons, and physical damage explosions (explanation of how this works in the video). This makes it excellent for mapping, Xesht runs, Rituals, and anything that involves clearing dense packs of monsters.

We're also using Leech and 
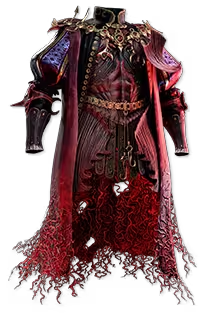
Couture of Crimson for a lot of survivability; this will allow you to increase your HP to 50% over your current maximum via overleech, which can make us so, so tanky. Truth be told, I could stack more life on this character to get more out of this; I'm currently fairly damage-focused.

This also has very strong Pinnacle slaying capability thanks to the Shield Wall and Fortifying Cry combo obviously, since we're also running a high armour shield. However, it's not the hit damage that is so impressive with this combo on this particular build; it's the bleed damage. You can deal 12 million+ damage with one shield wall if this is set up properly, without even the craziest gear, and when we're dealing so much bleed damage on pinnacles it makes Blood Hunt very potent and bursting them down.

The only weakness here is Simulacrums; unfortunately, the clear-chaining we rely on can only work on monsters that leave corpses behind, and Simulacrum mobs simply don't. So full transparency here, I don't think you should run this build for Simulacrums, though it is VERY strong for all other activities.

Strengths and Weaknesses

  • Very strong clearing
  • Very strong bossing
  • Very tanky
  • Quite mobile thanks to Rake zooms
  • It's still not as mobile as some of the top-meta builds
  • Simulacrums are off-the-table with this build

Build Variants

Lexd's Spear & Shield Wall Bleed Build: Endgame Variant

Though I did end up leveling with a variant of this build, I did not include extensive details or recordings in the video as I did so unfortunately, you will have to wait for that update in the future.

For now, this is the endgame version I've been running to tackle all the T3+ endgame content. Honestly it all feels like a breeze, and though there are some select items that are very pricey, I do think this can work as a league starter as all you really need is a high armour shield and a decent spear to get going. The Couture of Crimson and Nebuloch are both relatively cheap uniques as well, as long as you aren't shooting for some wild "Exceptional" versions of these.

Equipment

item
2
item
5
item
4
item
8
item
7
item
5
item
1
item
9
item
10
item
11
item
item
item
item
item
item
item
item
item
Equipment Priority
+11

Lexd's Spear & Shield Wall Bleed Build: Equipment Priority

It should be obvious, but really you just want a good shield to start, followed quickly by hopefully a decent spear. The one I am using I crafted following a guide by ExiledRatLord (video found here), but if earlier on I honestly think any Spear with some decent damage rolls on it will suffice, though definitely prioritize % increased phys damage and +melee skills if possible.

Couture of Crimson should be considered once you are able to handle your Spirit costs for your Spirit Gems without relying on your chestpiece, and Nebuloch should follow sometime after, once you have a good bit of crit damage bonus on the passive skill tree + where you can find it on your gear.

Other than that, business as usual. Grab whatever elemental resists you need where you need em, +melee skills on gloves if possible, though make absolutely sure you get double-sockets on these and throw in a Wolf Idol and Courtesan Mannan's Rune of Cruelty for a bunch of Bleed magnitude. You'll likely have to get a +Spirit amulet at some point, so be aware of costs there, as well as the fairly pricey annointment, Blood Tearing.

Skill Gems

Support Gem Requirements:

Str 150

Dex 60

Int 25

Expand all
1

Rake

Rake
supportmeleephysicaldamageplayer
supportdeepcutsplayertwo
supportbrutalityplayerthree
supportancestralcallplayertwo
supportclosecombatplayertwo
2

Resonating Shield

Resonating Shield
supportbleedplayerthree
supporturukssmeltingplayer
supportpoisonplayerthree
supportrageplayerthree
supportarmourbreakplayerthree
3

Herald of Blood

Level 19

Herald of Blood
supportbleedplayerthree
supportburstingplagueplayer
supportpoisonplayerthree
supportescalatingpoisonplayer
supportmagnifiedareaplayertwo
4

Shield Wall

Shield Wall
supportbleedplayerthree
supportheftplayer
supportbrutalityplayerthree
supportmeleephysicaldamageplayer
supportincreasedcriticaldamageplayer
5

Fortifying Cry

Fortifying Cry
supportexploitweaknessplayer
supportbleedplayerthree
supportmeleephysicaldamageplayer
supportbrutalityplayerthree
supportincreasedcriticaldamageplayer
6

Blood Hunt

Level 21

Blood Hunt
supportrapidattacksplayertwo
supportbrutalityplayerthree
supportheftplayer
supportmeleephysicaldamageplayer
supportphysicalmasteryplayer
7

Spear Stab

Spear Stab
supportbleedplayerfour
supportrapidattacksplayertwo
supportexploitweaknessplayer
supportrageplayerthree
supportclosecombatplayertwo
8

Spear Throw

Spear Throw
supportbleedplayerthree
supportrapidattacksplayertwo
supportpoisonplayerthree
supportburstingplagueplayer
supportbrutalityplayerthree
9

Raise Shield

Raise Shield
10

Herald of Plague

Level 11

Herald of Plague
11

Magma Barrier

Level 18

Magma Barrier
supportchargeprofusionplayertwo
supportaddedfiredamageplayer
supportigniteplayerthree
supportwildfireplayer
supportelementalarmamentplayertwo
12

Scavenged Plating

Level 18

Scavenged Plating
prolongeddurationsupportplayertwo
supportvitalityplayertwo
Gem Priority
+47

Skill Gem Priority for Lexd's Spear & Shield Wall Bleed Build

Skill gems are overall pretty straightforward, but there's actually quite a bit that can be up for preference, sometimes at the cost of damage... and sometimes for more damage, at the cost of more challenging setup. Explanations below.

Starting out, Rake is our main way to clear, very straightforward. Try to target mobs towards the back of groups as you want to make sure you are getting the dash-portion of this skill to occur, which grants you a bunch of extra bonus damage. IMPORTANT NOTE: You actually want to deal as much Bleeding damage as you can to targets, quickly, not hit damage since Herald of Blood's damage is based off of the Bleeding damage a target takes before dying. This is why we run Deep Cuts II, though you can juggle some other Support Gems here if you feel like you aren't hitting things hard enough, e.g. Heft or Momentum.

Resonating Shield I use for one or two taps after each Rake, because this is socketed in a way to spread Poison which in turn helps with our chaining effects. I don't channel Resonating Shield as much as most of my other builds here since we have so much Passive Block and Leech to bolster up our survivability. This is also socketed with Uruk's Smelting to help stack that permanent damage debuff on bosses by simultaneously fully-breaking armour with this skill and consuming it via Fortifying Cry and Exploit Weakness. Last note, this is one of our main ways to generate Endurance Charges via Armour Break III, which is easy to generate while clearing, but tougher on Pinnacles (though not impossible, since we can loop full-armour breaks so easily).

Shield Wall is set to Weapon Set II and only ever used in boss fights really. Sometimes I'll use it against juiced Abyss rares. I've also experimented socketing this with Exploit Weakness instead of Fortifying Cry (which we'll go over next) to some strong success; however, this means you have to be extra-careful of Shield Wall placement. If you place one down on top of a boss, it consumes the Fully-Armour Broken debuff immediately before detonation, since that "creation" portion of Shield Wall can technically damage things and is considered an attack (just a much lower-damage one).

Fortifying Cry is used to detonate our Shield Walls, though there are some options with this one. As mentioned earlier, it is currently socketed with Exploit Weakness to help loop full-armour breaks on bosses with Resonating Shield, but you can also just socket this skill with Armour Break III as well to help break MORE armour while spamming Resonating Shield on bosses, and Spear Stab is socketed with Exploit Weakness so that you can just remove it over-and-over with the default attack instead, until the boss has the full 20% extra physical stacked up from Uruk's Smelting.

Blood Hunt is amazing for finishing off bosses that have suffered a ton of Bleeding damage; use it accordingly. Just be aware that it will consume all Bleeding effects currently active on the target, so you want to make absolutely sure this will finish off the boss before using it.

Magma Barrier is probably our most assured way to get Endurance Charges; this is mostly here for Pinnacle bossing. As long as you aren't trying to block red attacks all the time, you'll be able to consistently get some Endurance Charges off of this, and that should be your green light to try and use Shield Wall ASAP.

Passive Tree

main:
123
123
set 1:
20
20
set 2:
20
20

Lexd's Spear & Shield Wall Bleed Build: Passive Skill Tree

Overall we're traveling to the Bleed Magnitude nodes that are "in our neighborhood" so to speak, grabbing notables such as Bloodletting, Bleeding Out, and Lasting Trauma, being sure to grab any small passives that also support Bleed Magnitude along the way to each of these.

Aside from that, some Passive Block where possible to increase our tankiness, e.g. Defender's Resolve and the Time-Lost Ruby I am using; full disclosure, I could probably shift some more points into passive block and feel tankier. As I mention in the video, I do think Towering Shield is a cheap & potent option for hitting block cap while clearing.

Leech nodes where possible, I do think Goring is quite useful despite the max life cost, as well as the points leading up to Voracious. I do think you could also potentially make Vaal Pact and the branch leading up to Savoured Blood work with enough Leech support on your gear as well.

Ignore Pain is very important since we do gain Rage quite often on this build, and it solves MOST of our stun threshold problems; we still want a little bit on our gear or elsewhere on the tree for it to feel perfect.

Bunch of crit damage bonus nodes, all geared to Weapon Set II, our Nebuloch set, and this is all for the purpose of Pinnacle slaying.

Atlas Tree

Video Guide

Table of Contents

Featured Builds

[0.4] Lexd's Spear & Shield Wall Bleed Warrior
Updated on Mar 27, 2026
Comprehensive Spark Stormweaver Guide - League Start to End Game - by Ignatius
Updated on Mar 25, 2026
[0.4] Plants Oracle League Starter (Level 1 to Endgame)
Updated on Mar 24, 2026
[0.4] ED Contagion Lich League Starter (Level 1 to Endgame)
Updated on Mar 24, 2026
Shrine Stacker Melee Chronomancer!
Updated on Mar 24, 2026

Become a Creator

Want to earn rewards by sharing your builds with your community?