menu
MobalyticsUse your favourite features in-game with our Desktop App
PoE 2 Build

[0.5 UPDATED] Chaos ED + Contagion LICH Build - Full Guide - League Starter to Endgame

presentationWitch
presentationLich
Verified
Starter
Speed Leveling
End Game
0.5 RotA
Updated on May 28, 2026
May 28, 2026

Build Overview

This is a Build Guide for Essence Drain + Contagion Chaos LICH - from Leveling league starter to Endgame.

This build guide covers all the progression from league starter leveling setup to a proper endgame build. Click build variants down below to see how to progress.

You can also use this guide to level up any caster Build or Ascendancy.

❗IMPROVED for 0.5 Step by Step League Starter video - https://youtu.be/qbrEeLZzuqI

Endgame Gameplay + Endgame Mechanics Explanation - youtu.be/r6ouLO-Y0sk

If you have questions, ask me on Twitch and I will help - twitch.tv/ronarray

▬▬▬▬▬▬▬▬▬▬▬▬▬▬▬▬▬▬▬▬

In 0.5 we can use a few new skills to improve the combo even further and get better early boss damage.

Chaos ED + Contagion build is still the best way to level most of the Caster builds and can be incredibly versatile and easy to use.

It especially shines together with Witch Class and Lich Ascendancy, but you can use this guide for any caster based build for the smooth campaign experience.

▬▬▬▬▬▬▬▬▬▬▬▬▬▬▬▬▬▬▬▬

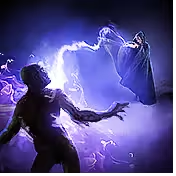
Essence Drain and Contagion are some of the most beginner-friendly builds that also provide very satisfying pack clear due to the DoT spreading provided by Contagion.

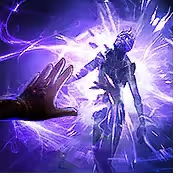
The single target is Improved with Entangle and Bonestorm to deal with bosses even faster.

Later on you can swap the rotation to Sigil of Power, Despair, then put down your Dark Effigy totems and DoT the boss with Essence Drain and Contagion.

The best part is you can run around while the bosses are losing health and the uptime of your damage is very high.

▬▬▬▬▬▬▬▬▬▬▬▬▬▬▬▬▬▬▬▬

▸ Campaign Rewards:

Venom: Stun Threshold,

Tattoos: Resistances

Pillars: Resistances, Movement Speed or Global Defense

▸Vendor Regex (copy to Vendor search);

"10% i.+mov|ell.*ge$|\d ch.+da|^\+.*l sp.*ls$"

Strengths and Weaknesses

  • Ed + Con is Great while Leveling
  • Great Clear
  • Very Tanky
  • Easy to scale
  • Bonestorm is good for Bosses
  • Need to use a few skills in a row

Build Variants

This section if focused on the endgame. Use Build variants to the right to see early leveling progression.

Equipment

item
10
item
7
item
1
item
4
item
6
item
2
item
11
item
9
item
8
item
5
item
item
item
item
item
item
Equipment Priority
+11

▸ Wand and Focus

  • + Levels of Chaos/Spell Skills
  • Spell Damage + Chaos Damage is 2nd
  • On the Focus try to get high Energy Shield.
  • Cast Speed gives QoL.

Use Chiming Staff with +4-6 Levels of Spells as a weapon swap

▸ Body and Helmet

  • We are using Atziri's Disdain, try to get a corrupted version with higher % of the damage that bypasses energy shield for better survivability.
  • Body armor is the main source of energy shield, so get it as high as possible, +Spirit helps fit all the Auras.

▸ Boots

  • Here you just need to get Movement Speed and if possible some Life and Resistances.

▸ Gloves

Doedre's Tenure for damage OR defensive rare with ES + Resistances.

▸ Jewelry

  • Amulet can provide +Levels of Spell/Chaos → Cast Speed / Spell Damage → Energy Shield.
  • For rings aim to get Chaos damage, cast speed and defensive stats (res + HP).
  • Snakepit can also be great to provide the chain for clear.

▸ Jewels

  • Search for Spell Damage / Chaos damage + Energy shield.


Skill Gems

Support Gem Requirements:

Str 20

Dex 35

Int 80

1

Contagion

supportmagnifiedareaplayertwo
supportunleashplayer
supportarcanesurgeplayer
supportrapidcastingplayertwo
2

Essence Drain

supportderangeplayer
supportswiftafflictionplayertwo
supportconsideredcastingplayer
supportintenseagonyplayer
supportchainplayertwo
3

Convalescence

supportcooldownrecoveryplayer
prolongeddurationsupportplayertwo
supportclarityplayer
4

Dark Effigy

supportdeliberationplayer
supportincreaselimitplayertwo
supportrapidcastingplayerthree
supportpoisonplayertwo
supportcontrolleddestructionplayer
5

Blasphemy

temporalchainsplayer
supportritualisticcurseplayer
supportslowpotencyplayer
6

Despair

supportcursedgroundplayer
supportcurseeffectplayer
supportdecayinghexplayer
supportefficiencyplayertwo
7

Withering Presence

supportchaosmasteryplayer
prolongeddurationsupportplayertwo
8

Sigil of Power

supportmagnifiedareaplayertwo
prolongeddurationsupportplayertwo
Gem Priority
+26

▸ Rotation

ContagionEssence DrainDespair if you need it → Dark Effigy

Dark Effigy helps a lot with single target damage too so make sure you are using it often enough.

KEEP 2 TOTEMS UP ON BOSSES (Overabundance provides second totem)

Use Sigil of Power from Chiming Staff in your second weapon set together with longer curses for single target damage improvement.

▸ Bossing

  • Two Dark Effigy totems should ALWAYS be active
  • For Essence Drain swap Chain II to Deliberation
  • Always have Despair with the Cursed Ground + Sigil of Power active, these provide a lot of damage.

The rotation is usually Sigil of Power → x2 Dark EffigyDespair → ED + Contagion → Repeat when things expire

▸ How to solve Mana Issues:

Use a mana flask with Removes 15% of Mana from Life. You will have very good Mana regen with it.

OR Use a very low level Contagion so it's Mana cost will be negligible. It will heavily help with Mana sustain when clearing but will slightly lower your damage.

▸ Survivability

We can use Convalescence to regenerate ES and receive some more damage from it as well. Second Wind helps greatly with cd on it.

Passive Tree

main:
123
123
set 1:
20
20
set 2:
20
20

Use 2 sets to CURSE Manually. Whispers of Doom Node is Mandatory to use 2 Curses at the same time.

Curse setup is explained in this video - https://youtu.be/r6ouLO-Y0sk

▸ Damage

At the start we are just focusing on basic damage nodes, such as Entropy, Potent Incantation, Spiral into Mania and Spiral into Insanity.

After that, take all chaos related nodes in the first weapon set, prioritizing Dark Entries. Wither Away is your second goal to maximize the effect Wither debuff from Withering Presence.

▸Survivability

Getting our ES recharge delay down to 1 second and recharge rate up to a 1000 or higher helps a lot.

So aim for Essence Infusion + Quick Response. If it is still not enough look into Dependable Ward or even Refocus


▸Possible Setup change to improve the curses:

If you are feeling like slowing down enemies with your Temporal Chains even more, swapping a few points from Damage or survivability nodes to Zone of Control and Master of Hexes can be a decent idea.

Just make sure that those passives are allocated in both weapon sets.

▸ Ascendency Order:

1. Soulless Form - should give MORE mana regeneration than you have without it.

2. Eternal Life to improve the tankiness and utilize Atziri's Disdain and Heavy Buffer better.

3. Eldritch Empowerment - for a natural damage boost.

4. Crystalline Phylactery should be used when you get a good Jewel with lots of ES and Spell dmg. If you don't have it, feel free to swap to Rupture the Soul to have a significantly improved map clear.

Quest Rewards

Check which quests you’ve completed on your character
ClearfellBeira of the Rotten Pack
Not Specified1 choice
Hunting GroundsThe Crowbell
Not Specified1 choice
FreythornThe King in the Mists
Not Specified1 choice
Ogham FarmlandsUna's Hut
Not Specified1 choice
Ogham ManorCandlemass, the Living Rite
Not Specified1 choice
KethKabala, Constrictor Queen
Not Specified1 choice
Valley of the TitansMedallion
Not Specified2 choices
DesharFinal Letter
Not Specified1 choice
The Spires of DesharSisters of Garukhan
Not Specified1 choice
Jungle RuinsMighty Silverfist
Not Specified1 choice
The Venom CryptsVenom Draught
Not Specified3 choices
Jiquani's MachinariumBlackjaw, the Remnant
Not Specified1 choice
The Azak BogIgnagduk, the Bog Witch
Not Specified1 choice
The Molten VaultThe Molten Vault
Not Specified1 choice
AggoratBlood Sacrifice
Not Specified1 choice
Journey's EndCaptain Hartlin
Not Specified1 choice
Eye of HinekoraNavali's Rest
Not Specified1 choice
Halls of the DeadYama The White
Not Specified1 choice
Halls of the DeadTawhoa's Test
Not Specified2 choices
Abandoned PrisonGoddess of Justice
Not Specified2 choices
Halls of the DeadTasalio's Test
Not Specified2 choices
Halls of the DeadNgamahu's Test
Not Specified2 choices
WolvenholdOswin, the Dread Warden
Not Specified1 choice
The Khari CrossingAkthi and Anundr
Not Specified1 choice
The Khari CrossingMolten Shrine
Not Specified1 choice
QimahTabana's Pillar
Not Specified7 choices
Kriar VillageLythara, the Wayward Spear
Not Specified1 choice
Howling CavesThe Abominable Yeti
Not Specified1 choice

How it Plays

The build gameplay is pretty simple, cast Contagion and follow up with ED for AOE clear.

For bossing, do the same stuff but start with Sigil of Power + Dark Effigy to maximize the damage.

Video Guide

Build Planner Export

Export this build variant directly to your game.

Table of Contents

Featured Builds

[0.5] PhazePlays MINION CULL WARPER: The Fastest Minion Mapper in PoE2 — 400% Culling Threshold
Updated on Jun 18, 2026
[0.5] SPARK STORMWEAVER Leaguestarter
Updated on Jun 18, 2026
0.5 ICE STRIKE SHATTERING EXPLOSIONS
Updated on Jun 18, 2026
[0.5] 100% Crit/Recoup Chronomancer
Updated on Jun 18, 2026
[0.5] Slow Cap Support Chronomancer
Updated on Jun 18, 2026

Become a Creator

Want to earn rewards by sharing your builds with your community?