menu
MobalyticsUse your favourite features in-game with our Desktop App
PoE 2 Build

[0.4] DEMON Infernalist - League Starter to Endgame Witch

Verified
Starter
Speed Leveling
End Game
presentationWitch
presentationInfernalist
0.4 TLotD
Updated on Jan 8, 2026
Jan 8, 2026

Build Overview

This is guide for my League Starter Build - Demon Form Infernalist for 0.4

This guide will help you pick the gear and gems and will help you out while progressing. It will also explain how the mechanics work and how to teleport through maps while being a Cool Demon.

==========================================================

After 0.4 Changes RECOUP Became more viable than Tecrod regeneration, the single target damage was reduced, but the clear is still alright, although the skill can feel a bit clunky still.

Also because of the changed behaviour, Lightning Warp is now MUCH MORE clunky to play because it's harder to target balls. Before you invest into it, try to play a little with basic Ball Lightning and Lightning Warp.

==========================================================

In this guide we are League Starting Unearth + Contagion and playing with Essence Drain + Contagion through the campaign / early maps.

After that we will be swapping to a combo of Lightning Warp and Ball Lightning to teleport through maps and explode everything!


If you have questions - hit me on Twitch (https://www.twitch.tv/ronarray), I will help!

Strengths and Weaknesses

  • Demon form looks cool
  • Fast Movement
  • You leap around
  • Good clear
  • Can feel clunky
  • Jumping into monsters

Build Variants

Finally we can start teleporting and blasting maps with Ball Lightning and Lightning Conduit!

Equipment

item
1
item
6
item
4
item
2
item
5
item
7
item
1
item
9
item
8
item
3
item
item
item
item
Jewels
item
item
item
Equipment Priority
+9

▸Offense

Your biggest source of damage is weapon, so focus on getting a good weapon first. You can use Staff or Wand + Focus.

Weapon Stat Priority:

  1. + Level to Skills (+6 is the maximum)
  2. % Increase Lightning / Spell Damage
  3. Damage as Extra Lightning damage / Critical Hit Chance
  4. Cast Speed / Mana Regen are nice bonuses on top

Apart from that make sure to get Level to Spell Skills on Amulet.

▸Defense

The mandatory stat that should be on almost all the items is Life Regeneration. It helps us sustain Demon Form. You need to aim for 150-180 Life Regeneration per Second.

Other than that aim for Maximum Life and Maximum Energy Shield on items.

Since Maximum Life is also getting us Spirit and extra ES from our Ascendancy, aim for 2k+ Total Maximum Life to fit all the Auras and don't forget about +Spirit on Body Armour.

Life per Enemy Killed on any of Ring / Gloves is a nice buff that will help you sustain Demon Form while clearing if you haven't reached the required Life Regen Threshold.

❗❗❗ Chaos Resistance is very Important, since Chaos deals more damage to ES. Get it as high as you can.

▸Utility

Prioritize getting Maximum Mana and Increased Mana Regeneration to properly sustain your casts and get bonuses from Zenith II.

Getting extra ~50 Spirit is mandatory to fit all the Auras, get it either on the Amulet or Body Armour.

Cast Speed is for utility and to feel more comfortable with the casts.

▸Bleed

Bleed is passing through our Energy Shield, so you should be wary of it. The main way to avoid it is the Staunching Charm, but still try to avoid modifiers in maps or Trials that make monsters auto-apply Bleed (e.g. Monsters Bleed on hit).

▸Gloves

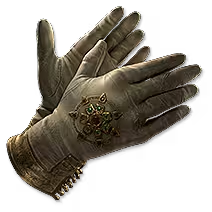
We use Leopold's Applause because we over-penetrate resistances as a result of using curse with good magnitude and penetration bonuses. With a proper setup these gloves can give you up to 50% MORE damage.

Buy CORRUPTED gloves with 2 rune sockets. You can put there resistance runes if you're not capped OR Fenumus' Rune of Spinning for extra cast speed.


Skill Gems

Support Gem Requirements:

Str 30

Dex 45

Int 55

1

Demon Form

supportsecondwindplayertwo
supportcooldownrecoveryplayertwo
2

Sigil of Power

supportmagnifiedareaplayertwo
prolongeddurationsupportplayertwo
3

Blasphemy

elementalweaknessplayer
supportritualisticcurseplayer
supportmagnifiedareaplayertwo
supportvitalityplayer
4

Cast on Critical

lightningconduitplayer
supportelementalfocusplayer
supportconcentratedareaplayer
supportzenithplayertwo
supportcooldownrecoveryplayertwo
5

Ball Lightning

supportpinpointcriticalplayer
supportmultishotplayertwo
supportprojectileaccelerationplayerthree
supportrapidcastingplayertwo
6

Convalescence

supportvitalityplayertwo
supportcooldownrecoveryplayertwo
prolongeddurationsupportplayertwo
7

Lightning Warp

supportunleashplayer
supportconsideredcastingplayer
supportefficiencyplayertwo
supportzenithplayertwo
supportdeliberationplayer
8

Orb of Storms

supportlightningexposureplayer
supportincreaselimitplayertwo
prolongeddurationsupportplayertwo
Gem Priority
+28

Order of Gem Supports is in the order of importance.

Your main damage dealer in packs is Lightning Warp, for bosses it's Cast on Critical with Lightning Conduit.

How to Play the Build?

Your Lightning Warp teleports on Ball Lightning and into enemies that can be culled, which leads to sweet blinking chains when clearing.

First you enter the map and activate Demon Form. 10 Stacks stack very fast so you don't have to wait.

The skill rotation starts with casting Ball LightningLightning Warp on the balls that you create.

▸ On Bosses / Tough Enemies

1. Place Sigil of Power

2. Place x2 Orb of Storms

3. Cast Ball Lightning + Lightning Warp Combo

▸ If you don't have enough Spirit

Disable Blasphemy, focus on getting more Maximum Life and ~50 Spirit on body/Amulet.

▸ Demon Form

You should be permanently in Demon Form as long as you have enough regeneration / life sustain. Second Wind II is there ONLY to counteract bugs.

Passive Tree

main:
123
123
set 1:
20
20
set 2:
20
20

Generally, we're focusing on getting lots of Lightning Damage with nodes like Breath of Lightning, Pure Power and Electric Amplification.

Apart from it, we are also getting Crit Chance to stack Cast on Critical faster and get a bit of damage on top.

Archon of the Storm provides a very significant buff when the Archon is active, but makes us only deal Lightning Damage. Because of that, try to avoid getting other damage types on items.

In terms of Defenses, we focus on maximizing Energy Shield Recharge and Faster Start of Energy Shield Recharge to sustain ES. Combined with Convalescence it provides a very stable way of recharging our ES pool.

Ascendancy Order:

  1. Altered Flesh
  2. Demonic Possession
  3. Beidat's Hand
  4. Beidat's Will


Quest Rewards

Check which quests you’ve completed on your character
ClearfellBeira of the Rotten Pack
Not Specified1 choice
Hunting GroundsThe Crowbell
Not Specified1 choice
FreythornThe King in the Mists
Not Specified1 choice
Ogham FarmlandsUna's Hut
Not Specified1 choice
Ogham ManorCandlemass, the Living Rite
Not Specified1 choice
KethKabala, Constrictor Queen
Not Specified1 choice
Valley of the TitansMedallion
Not Specified2 choices
DesharFinal Letter
Not Specified1 choice
The Spires of DesharSisters of Garukhan
Not Specified1 choice
Jungle RuinsMighty Silverfist
Not Specified1 choice
The Venom CryptsVenom Draught
Not Specified3 choices
Jiquani's MachinariumBlackjaw, the Remnant
Not Specified1 choice
The Azak BogIgnagduk, the Bog Witch
Not Specified1 choice
The Molten VaultThe Molten Vault
Not Specified1 choice
AggoratBlood Sacrifice
Not Specified1 choice
Journey's EndCaptain Hartlin
Not Specified1 choice
Eye of HinekoraNavali's Rest
Not Specified1 choice
Halls of the DeadYama The White
Not Specified1 choice
Halls of the DeadTawhoa's Test
Not Specified2 choices
Abandoned PrisonGoddess of Justice
Not Specified2 choices
Halls of the DeadTasalio's Test
Not Specified2 choices
Halls of the DeadNgamahu's Test
Not Specified2 choices
WolvenholdOswin, the Dread Warden
Not Specified1 choice
The Khari CrossingAkthi and Anundr
Not Specified1 choice
The Khari CrossingMolten Shrine
Not Specified1 choice
QimahTabana's Pillar
Not Specified7 choices
Kriar VillageLythara, the Wayward Spear
Not Specified1 choice
Howling CavesThe Abominable Yeti
Not Specified1 choice

How it Plays

Map Modifiers

Overall, there are no modifiers that brick the build, however Reduced Life Recovery Rate doesn't really feel that great. Try to avoid it on maps as it can make maps slower to optimally farm.

Some Abyss monsters can turn off your recoup, and you will drop dead fast without recovery. Be very mindful when fighting Abyss.

How it Works

Bugs

If game acts strange (e.g. you're very slow but no debuffs on you in Trial of Chaos, etc) ALWAYS try to exit and reenter Demon Form.

Video Guide

Build Planner Export

Export this build variant directly to your game.

Table of Contents

Featured Builds

[0.5] Strength Stacker - Molten Blast
Updated on Jul 21, 2026
[0.5] SPARK STORMWEAVER Leaguestarter
Updated on Jul 21, 2026
[0.5] COC COMET - Stormweaver @animeprincess
Updated on Jul 21, 2026
[0.5] GEMLING SPARK - Endgame BLASTER @animeprincess
Updated on Jul 21, 2026
[0.5] Ulf's Hammer Engine
Updated on Jul 20, 2026

Become a Creator

Want to earn rewards by sharing your builds with your community?