This section will go over general gearing advice along with tips to make your leveling experience easier. I recommend taking a read through this while leveling.
NOTE - Unique recommendations & Trade Links are at the bottom if you are leveling this as a second build. Otherwise the info here will be written as if you just started.
Vendor Regex for +x Level Weapons & MS Boots: "\d+% i.+mov|^\+.*ills$|s: (wa|st|fo)"
Loot Filter
Profile Link
Filterblade Link
This build will come with a Loot Filter. You can use this while leveling and once you get to Maps it will work as a general Endgame Loot Filter. This is the Filter I will use all season that will constantly have the Endgame portion updated to reflect the current economy. You can also use the Endgame part in any other builds you want to play in the future.
Note - There will be a version of the filter available named "Static" which will be a snapshot of the Filter as it was on Day 1. This Filter will NOT be updated and is here to serve as an option if you started late. I will very quickly remove a lot of junk from the Endgame portion in the first few days that is a waste of your time to pick up. This Static one will leave it all on which might be useful to get you going with currency as a late start. I do not recommend using this if you are starting on launch.
There are two links, one to my Profile which will allow you to Follow the filter. This will then download it automatically and import it directly into the game. Every time I make an update, yours will also be updated so you never have to think about it.
The Filterblade link will be there if you wish to make a copy of it to change things.
While leveling certain items will be colored to highlight different things. The color coding will work as follows:
Green - Energy Shield Rares worth Identifying for upgrades.
Red - Items with Quality or Sockets to be scrapped.
Pink - White Weapon bases worth picking up to Transmute and Augment.
Act 1 & Weapons
Act 1 should be very comfortable with  Bone Cage and
  Bonestorm destroying everything. Even then, there is quite a bit you can do to make it less painful.
If you are not leveling with a  Lifesprig then you will want to regularly stop at the Town Vendor and look for any new Staffs or Wands they might offer.
This will be a Spell build meaning we want to use a Wand & Focus or a Staff for all of your leveling. % Spell Damage and % Spell Physical Damage are both very strong stats to look out for along with +x to Spell Skills.
Your Weapon and Focus should always have +x Spell Skills on them as it is by far the single strongest stat. If it does not have any and your previous Weapon does, it is likely not an upgrade.
The 0.4 League mechanic is very rewarding, due to this +1 and +2 Weapons are super cheap if you are unlucky. You can easily get a good one for 2-3 Exalted Orbs.
There are no Staff Bases that can roll % Spell Phys and it will only be available on  Bone Wand bases. Due to this, you should only Gamble for Wands if you need to find an upgrade.
Along with those stats, you should try to look for as much % Damage as Extra or Cast Speed as possible. These are strong multipliers and if you have a Weapon with +x Spell Skills and Spell Damage, it is worth it to use an Exalted Orb on it.
I recommend to put  Iron Runes in your Wand or Staff at all times but if you are short on them
  Lesser Storm Rune,
  Lesser Desert Rune, or
  Lesser Glacial Rune are all good alternatives. The tooltips on Moba dont show this but
  Lesser Iron Rune gives you Spell Damage while the other ones give you Damage as Extra.
You should also pick up every Wand and Staff off the ground that you can find and you should Transmute & Augment them in hopes of finding +x to Spell Skills, % Spell Damage or % Spell Physical Damage.
You will get quite a lot of Orbs of Transmutation & Augmentation throughout Act 1 and you should try to use them all as you get them. Your priority order will be:
- Weapon
- Boots
- Gloves/Rings/Amulets
- Everything else
If you happen to find a +2 to Spell Skills Weapon, you should hold onto it and craft it with Regal and Exalted Orbs as soon as you can. It will likely last you a long time.
Gear Stats
Outside of your Wand & Focus/Staff the rest of your gear will not contribute to your damage output at all except for your Amulet. You can find +x Spell Skills on Amulets and if you do, you will likely use it for most of your leveling.
Your only goal is to get as much Life as possible everywhere along with any Resistances you are missing.
You will need quite a bit of Intelligence to keep up with your Gems but once you have enough you can simply pick up Dexterity or Strength nodes as needed to equip your gear. You should try to use Evasion or Armour bases if possible and to stay away from Energy Shield as you won't have any sustain for it. All three are fine and if you happen to find an ES item with high Life or Resistances, you should still use it.
Starting in Act 2 and beyond keeping up with Dex requirements won't be reasonable anymore. Given we need to pick up both Strength and Intelligence for  Entangle, you should have no issue using most Armour and Energy Shield bases.
Try to find a pair of Boots with Movement Speed if possible as it will make everything a lot faster. Outside of that, just slap on as much Life & Resistances as you can.
Use your  Storm Runes,
  Desert Runes &
  Glacial Runes as needed to keep up with Resistances and otherwise use
  Body Runes for more Life.
Act 2
Make sure to save all Exalted Orbs for the Act 2 End Boss.
In Act 2, your main battle will be with your Weapon. Try to pick up white and blue Weapons off the ground and Transmute & Augment them just like in Act 1.
At this point you should start to Disenchant Rare Items you don't need into Regal Shards to make sure you have 1-3 Regal Orbs ready to go for the Act 2 Boss.
Preparing for the Act 2 Boss
The Act 2 Boss will be the major wall you have to get through. This Boss is awful and will be a miserable fight. Keep checking the Vendor every level for new Weapons as a part of the stock will update every time in hopes of finding something useful.
+2 Skills with anything else on it should be more than enough but other combinations such as % Spell Damage or % Physical Spell Damage along with 1-2 Damage as Extra stats would also work.
You can also go to Risu in the Act 2 town and Gamble your gold until you find one with % Spell/Physical Spell on it.
From there, you should Aug & Regal it and see if it ends up rolling either +2 Skills or one of the Extra Damage stats. If it does, you should then Exalted Orb Slam it hoping for better Prefixes. Lastly, put two Lesser Iron Runes in it. With this you should be able to kill the Boss with relative ease.
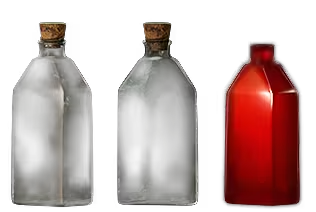
Lastly, make sure you upgrade to a  Colossal Life Flask &
  Colossal Mana Flask for the fight to make it a little bit more reasonable.
Act 3 & Beyond
In Act 3 you will get a free Lesser Jeweller's Orb as mentioned in the Leveling Guide below.
Keep picking up Weapons as before and as long as you are looking for new upgrades while keeping your Resistances in check, you should have no issues.
If you can make it to Act 4 and unlock the Currency Exchange to buy Lesser/Greater Jeweller's Orbs you are in the clear all the way to Maps.
Leveling Uniques
If you happen to get a few Exalted/Chaos Orbs along your journey or are leveling this as a second character with money, in this section we will discuss what Leveling Uniques you might consider using to make everything easier.
If you are just starting and have 1-2 Exalted Orbs to your name, your best bet is to buy Greater Jeweller's Orbs to 5-Link Entangle over buying any Uniques. Extra Support Gems will be a much bigger upgrade. The Skill Gems section will have all of the Supports you would want to use in order of priority for this.
Weapons
Effigy Trade Link
For the first few levels the only Weapon we really have isLifesprig. These will be very expensive as you need to find one with a low level requirement which... only drop at low levels. Due to this they are uncommon and thus expensive.
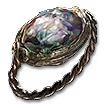
You can also pair this or any other Wand with an  Effigy of Cruelty for extra dps. You should not stick to Effigy of Cruelty for very long as almost any Focus with +1 to Spell Skills on it would beat it.
Helmet
Goldrim Trade Link
There is only one good Helmet to use which is  Goldrim. With this you should feel very very tanky through the whole Campaign.
Body Armour
Belly Trade Link
At Level 33 you will want to swap over to 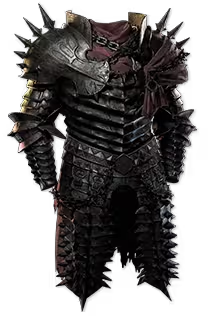 Belly of the Beast which will just provide you with a lot of Life. This might not be worth swapping to if your Body Armour is already solid or has a lot of Resistances on it.
Gloves
Doedre's Tenure Trade Link
 Doedre's Tenure are an incredible DPS Boost and will on their own carry you through the campaign. Try to find a pair with a low Reduced Cast Speed roll if you can afford it.
Belt
Midnight Trade Link
Level 50+ Belt
Most Belts suck and do basically nothing so we will just use 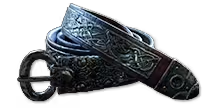 Midnight Braid to mostly take care of your Mana problems while also providing some Resistances.
At Level 50+ you will struggle due to low Life, pick up a Rare Belt with high Life on them from the second link.
 Cast on Critical and gearing in early Maps.
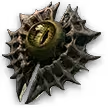 Undying Hate and
  Rathpith Globe.
 Pounce.
 Thrashing Vines to generate many plants that will murder everything for you!
 Wildsurge Incantation,
  Thunderstorm to WATER your plants. This will Overgrow them which will quickly destroy Bosses!
 Orb of Storms and then later on through
  Archmage or Life Stacking and we are going to use the latter as it is simply too strong in the Earlygame.
 Sunder the Flesh stacking Crit becomes very simple and a good idea given
  Gore Spike rewards us for getting Crit. You can pair this up with
  Life Remnants allows you to Overflow your HP by 50%, all of this gets even stronger! In 0.3 Atalui's Bloodletting was added into the game that gives you another reason to stack more Life and though it was nerfed in 0.4, it is still the strongest option.
 Blood Magic great!
 Sanguimancy. We can then take
  Vitality Siphon and given we are stacking Crit, we can easily generate massive Leech Instances that will always keep you healthy. That on it's own would be enough in most cases but we can go A LOT further than that. While Leech might feel clunky, later on
  Fast Metabolism takes that issue away giving you a constant supply of regen ready to go as soon as you take damage.
 Grasping Wounds we now can basically ignore 25% of all damage dealt to us as
  Defiance of Destiny which was buffed in 0.4 to be even stronger. With all of this put together, you will have to be 1-Shot to really have a chance to die!