The build works by stacking several systems that multiply each other: Totem count, Arc chains, quality, mana, Low Life, cast speed and critical scaling.
Six Arc Totems
Our main damage comes from Arc socketed into Spell Totem.
The important breakpoint is reaching six active totems. Ancestral Bond is a core part of reaching that number, while Efficient Inscriptions and our Spirit investment reduce the reservation enough to actually sustain all six.
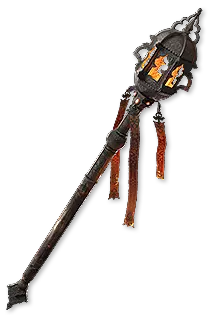
In the current setup, each totem reserves 54 Spirit. With our 213 Spirit sceptre and additional Spirit from gear, all six fit alongside the rest of the setup.
Once all six are active, we have six separate totems continuously casting Arc for us.
Why Arc Quality Is So Strong
This is one of the most important interactions in the build.
Arc's additional quality scaling gives more damage for each remaining chain. On the current setup this reaches 6% more damage per remaining chain.
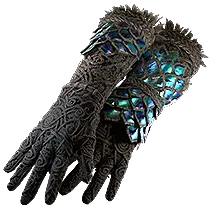
Then we add Dominus' Grasp, which makes Arc chain 100% more times.
So Dominus' Grasp isn't here only to make Arc clear better. More available chains also means Arc can have more remaining chains, which directly feeds its quality-based damage multiplier.
This is why skill quality is so valuable on this build.
Spell Totem Quality
Quality also scales the other half of the main setup.
Spell Totem's additional quality effect provides Cast Speed per summoned Totem. Since we're running six totems, increasing its quality gives us a large amount of additional cast speed when everything is active.
Gemling's Advanced Thaumaturgy increases the effect of skill quality, which means we're simultaneously improving:
Arc quality → more damage from remaining chains
and
Spell Totem quality → more cast speed from our summoned totems
That's one of the main reasons Gemling is so strong for this setup.
Mana Is Both Damage and Defence
The second half of the build revolves around mana.
We stack a huge amount of maximum Mana, reaching around 6,672 Mana on the showcased character.
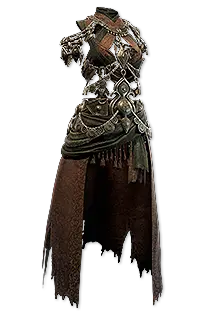
Eldritch Battery allows the Energy Shield on our equipment to contribute toward our mana pool, which is why high-ES gear is valuable even though this isn't an Energy Shield build in the traditional sense.
That mana then gets used twice.
Archmage turns our huge mana investment into additional Lightning damage.
At the same time, [Mind Over Matter] makes mana our primary defensive resource by taking incoming damage from Mana before Life.
So increasing our mana doesn't force us to choose between offence and defence. The same investment improves both.
Mana Recovery & Overflow
Having a giant mana pool isn't enough if we can't recover it.
The build has roughly 1,000 Mana Regeneration per second while moving, with several sources of regeneration throughout the character.
We also use Mana Remnants, which can restore mana and allow us to overflow above our normal maximum.
That overflow is particularly useful with Mind Over Matter, because the extra mana effectively gives us an additional buffer against incoming damage.
Permanent Low Life
The build intentionally stays on Low Life.
Archmage is supported by Atziri's Communion, moving its reservation to Life instead of Spirit. We then use the additional reservation in that setup to push ourselves into Low Life permanently.
And we're not doing this just for one passive.
Being on Low Life activates several bonuses at once:
Pain Attunement gives more Critical Damage Bonus.
Final Barrage gives increased Cast Speed, which also benefits our totems.
Execute III gives our main damage setup more Hit damage while we are Low Life.
Our Crossroads Gaze rune also gives additional Movement Speed while Low Life.
So Low Life is effectively another engine running underneath the entire character.
Automatic Power Charges & Critical Scaling
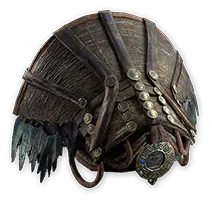
We use Raven Touch on our helmet to allocate Thaumaturgic Generator, giving us automatic Power Charge generation.
Those Power Charges then interact with Charge Regulation, increasing our Critical Hit Chance without requiring another skill or rotation.
Combined with the Critical Hit Chance and Critical Damage investment on the passive tree and jewels, the showcased character sits at roughly 37% Critical Hit Chance and 900% Critical Damage Bonus unbuffed, with Critical Hit Chance usually reaching around 50% while mapping.
Motes & Mana Regeneration
Several skills that look completely useless at first glance are actually there for a reason.
Skills such as Profane Ritual, Spark, Detonate and Contagion are Intelligence skills used to increase our available Motes through Gemling's setup.
The important benefit for us is Mana Regeneration.
We don't care much about the Life regeneration side of the mechanic. We stack these Intelligence skills because the additional Motes contribute to the mana recovery that keeps our Mind Over Matter pool healthy.
You do not need to actively cast these skills.
The Whole Engine
Put everything together and the build becomes:
6 Totems
→ six Arc casters
Arc Quality + Dominus' Grasp
→ huge remaining-chain damage scaling
Spell Totem Quality
→ large Cast Speed scaling from having six totems
Maximum Mana + Archmage
→ more Lightning damage
Maximum Mana + Mind Over Matter
→ larger defensive pool
Mana Regeneration + Mana Remnants + Motes
→ keeps that defensive pool filled
Permanent Low Life
→ Pain Attunement + Final Barrage + Execute III + Movement Speed
Automatic Power Charges + Charge Regulation
→ additional Critical Hit Chance
The end result is why the build can have very simple gameplay while still having a surprisingly complicated engine underneath it. We basically assemble the machine once, then gameplay is just dropping six totems and walking away. ⚡



 Mercenary
 Gemling Legionnaire
 Spell Totem, they automatically cast
  Arc, and we keep moving while the totems clear everything around us. There is no complicated skill rotation or constant button spam, making normal mapping essentially a one-button playstyle.
 Gemling Legionnaire. Gemling's additional quality scaling is especially powerful here because it improves both parts of our main setup. Arc gains more damage based on its remaining chains, while Spell Totem gains additional cast speed for each summoned totem. We then use Dominus' Grasp to massively increase Arc's available chains, pushing that interaction even further.
 Archmage converts that investment into additional Lightning damage,
  Mind Over Matter makes mana our primary defensive pool, and
  Eldritch Battery converts Energy Shield from our equipment into additional maximum mana.
 Pain Attunement,
  Final Barrage and Execute III, giving us additional critical damage, cast speed and damage.