menu
MobalyticsUse your favourite features in-game with our Desktop App
PoE 2 Build

Cast on Dodge Gemling Makes Everything Explode With ONE Button | PoE2

By ExFluent
Updated on Nov 3, 2026
Nov 3, 2026

Build Overview

The Cast on Dodge Gemling Legionnaire is one of the fastest and laziest mapping builds I've played in Path of Exile 2. It combines ridiculous movement speed, fully automated damage, and satisfying chaos explosions into one incredibly simple playstyle.

The entire build revolves around dodge rolling with Cast on Dodge. We're using two Cast on Dodge setups to automatically trigger Ember Fusillade, while Palm of the Dreamer takes care of those satisfying pack explosions. No complicated rotations or constantly pressing different skills. Just roll around and watch everything disappear.

This is a high-investment endgame mapper, built for speed, efficient farming, and comfortable gameplay. With Decree of Flight , plenty of movement speed, and Gemling's powerful gem quality scaling, we turn something as simple as dodge rolling into a complete damage engine.

The build is still a work in progress! I'm currently experimenting with a few additional mechanics and optimizations, which is why you'll notice around 30+ unreserved Spirit in my setup. This is intentional, and I'll update this later

The original concept was popularized by Jungroan, and I've put this version together around my own preferences and playstyle.

Maximum speed, minimum effort. Your spacebar might need a replacement before your other keys even get dusty.

Strengths and Weaknesses

  • Insanely Fast Mapping: Ridiculous dodge roll speed lets us fly through maps, clearing packs almost instantly.
  • One-Button Gameplay: Movement and damage are handled through dodge rolling. No complicated rotations or manual spell casting.
  • Excellent Clear Speed: Automated Ember Fusillade, projectile chaining, and Palm of the Dreamer explosions make clearing dense packs incredibly satisfying.
  • Flexible Min-Maxing: Plenty of room to improve damage, critical strike scaling, and survivability depending on your preferences.
  • Expensive to Put Together: This is definitely not a budget or league-start build. Some of the important items can cost quite alot
  • Specific Mechanical Requirements: Reaching the 0.01-second Ember Fusillade duration and generating enough Cast on Dodge energy are essential for smooth gameplay.
  • Ignite Can Be Deadly: Even with Bearer's Anguish, Ignite remains one of our biggest threats, especially in dangerous encounters.
  • Poor in Narrow or Maze-Like Maps: Tight corridors, small rooms, and awkward layouts prevent us from taking full advantage of our dodge roll distance and speed, making both movement and damage triggering less efficient.

Build Variants

Endgame Mapping (Current Setup)

This is the version I'm currently playing and showcasing in the video. It's focused on maximum mapping speed, automated damage, and comfortable endgame farming.

The build is already quite expensive, but there's still plenty of room for min-maxing.

Optional Adjustments

  • More Survivability: You can prioritize Energy Shield or Global Defences over Spell Damage on your amulet if you prefer a tankier setup.
  • More Damage: If you're already critical strike capped, prioritize additional Spell Damage, projectiles, and Critical Damage Bonus.
  • Ember Fusillade Duration: If you can't reach the 0.01-second hover duration through your equipment and gem quality, you can temporarily allocate additional reduced Skill Effect Duration passives.
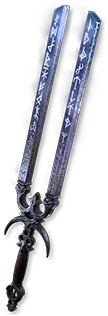
  • Luxury Upgrades: I'm currently using a 5-socket Runeseeker's Call, which already performs extremely well. A 6-socket version provides further optimization but isn't necessary for my current setup.

Equipment

item
2
item
4
item
1
item
7
item
6
item
5
item
3
item
8
item
9
item
10
item
item
item
item
item
Jewels
item
item
item
item
item
item
item
Equipment Priority
+10

Skill Gems

Support Gem Requirements:

Str 35

Dex 15

Int 60

1

Virtuous Barrier

Level 20

supportarmourdemolisherplayer
2

The Stars Answer

Level 19

3

Impurity

Level 19

supportclarityplayertwo
supportcannibalismplayer
supportmysticismplayer
supportvitalityplayertwo
4

Cast on Dodge

Level 20

emberfusilladeplayer
supportexecuteplayerthree
supportwildshardsplayertwo
supportboundlessenergyplayertwo
supportprojectileaccelerationplayerthree
5

Blasphemy

Level 19

temporalchainsplayer
supportmagnifiedareaplayertwo
despairplayer
supportritualisticcurseplayer
supportatziriscommunionplayer
6

Charge Regulation

Level 20

7

Withering Presence

Level 18

8

Ghost Dance

Level 18

9

Lingering Illusion

Level 18

10

Arctic Armour

Level 19

11

Siphon Elements

Level 20

supportinterludeplayer
supportfleetingremnantsplayertwo
supportfiremasteryplayer
12

Mana Remnants

Level 18

supportfleetingremnantsplayertwo
supportkhatalsrejuvenationplayer
supportinterludeplayer
13

Cast on Dodge

Level 20

emberfusilladeplayer
supportexecuteplayerthree
supportpietysmercyplayer
supportboundlessenergyplayertwo
supportprojectileaccelerationplayerthree
Gem Priority
+22

Passive Tree

main:
123
123
set 1:
20
20
set 2:
20
20

Quest Rewards

Check which quests you’ve completed on your character
Clearfell — Beira of the Rotten Pack
+10% to Cold Resistance
Freythorn — The King in the Mists
+30 to Spirit
Ogham Manor — Candlemass, the Living Rite
+20 to maximum Life
The Spires of Deshar — Sisters of Garukhan
+10% to Lightning Resistance
Valley of the Titans — Medallion
30% increased Charm Effect Duration
+1 Charm Slot
The Azak Bog — Ignagduk, the Bog Witch
+30 to Spirit
Jiquani's Machinarium — Blackjaw, the Remnant
+10% to Fire Resistance
The Venom Crypts — Venom Draught
25% increased Mana Regeneration Rate
Abandoned Prison — Goddess of Justice
30% increased Life Recovery from Flasks
Eye of Hinekora — Navali's Rest
5% increased Maximum Mana
Halls of the Dead — Tribal Medicine
Not Specified2 choices
Halls of the Dead — Ngamahu's Test
+5% to Fire Resistance
Halls of the Dead — Tasalio's Test
+5% to Cold Resistance
Halls of the Dead — Tawhoa's Test
+5% to Lightning Resistance
The Khari Crossing — Molten Shrine
5% increased Maximum Life
Qimah — Tabana's Pillar
+5% to all Elemental Resistances
Kriar Village — Lythara, the Wayward Spear
+40 to Spirit

How it Plays

The gameplay couldn't be much simpler. Just keep dodge rolling! 😄

Your dodge rolls handle both movement and damage. As you travel through the map, Cast on Dodge automatically triggers Ember Fusillade, while Palm of the Dreamer provides those satisfying chaos explosions that help clear entire packs.

Mapping

  • Keep Moving: Dodge roll from pack to pack, letting your automated spells do all the work.
  • Open Maps Are Your Best Friend: Wide, open layouts allow you to take full advantage of your movement speed and dodge roll distance.
  • Keep Rolling Against Tough Enemies: Continue moving around tougher rares and bosses to generate energy and trigger more Ember Fusillade projectiles.
  • Avoid Awkward Layouts: Tight corridors, small rooms, and maze-like maps can interrupt your movement and make the build feel considerably less effective.

Things to Watch Out For

Ignite is one of our biggest threats, so make sure your protection against it is properly set up.

Also, remember that this build relies heavily on movement. Getting stuck against walls or obstacles can significantly reduce how smoothly your damage triggers.

And that's pretty much it. No complicated skill rotations, no constantly pressing different buttons.

Just roll, explode everything, and move on to the next pack.

How it Works

The build revolves around two important mechanics: generating enough Cast on Dodge energy and reducing Ember Fusillade's hover duration to 0.01 seconds.

1. Double Cast on Dodge

We're using two separate Cast on Dodge setups:

  • One comes from our amulet.
  • The second is a regular Spirit gem.

Both automatically trigger Ember Fusillade as we dodge roll.

Cast on Dodge generates energy based on the distance travelled while dodge rolling. Once enough energy is generated, it automatically triggers the socketed spell.

This is why we're stacking so much movement speed and dodge roll distance.

Decree of Flight provides faster dodge rolls, while Mageblood with two Quicksilver Flasks gives us additional movement speed. We're also getting extra dodge roll distance from our runes and gem quality.

The faster and farther we can roll, the more frequently we can generate energy and trigger our spells.

2. Instant Ember Fusillade

Normally, Ember Fusillade creates projectiles that hover for a short duration before firing at enemies.

We want to reduce that hover duration to 0.01 seconds, allowing our projectiles to fire almost instantly.

We're achieving this through several interactions:

  • Gemling Legionnaire: Additional gem quality effects from our ascendancy.
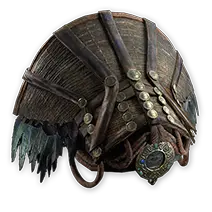
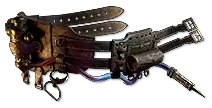
  • Palm of the Dreamer: Reduced Skill Effect Duration.
  • Loreweave: Additional quality to our skills.
  • Fox Idol: Another +5% skill quality.

If you can't reach 0.01 seconds with your current equipment, you can temporarily allocate additional Reduced Skill Effect Duration passives on the tree.

This is one of the most important things to get right when putting the build together.

3. Damage, Projectiles and Explosions

Our damage comes from automatically triggered Ember Fusillade projectiles.

We're using Blackflame Covenant to convert our Fire damage into Chaos damage, allowing us to scale Chaos damage and benefit from Wither.

Several items improve our clear:

  • Palm of the Dreamer: Provides those satisfying explosions when clearing packs.
  • Runeseeker's Call: Additional projectiles and powerful spell scaling.
  • Snakepit: Additional projectile chaining.
  • Loreweave: Another source of projectile chaining.
  • Withering Presence: Applies Wither to nearby enemies, increasing the Chaos damage they take.

We're also stacking Critical Hit Chance and Critical Damage Bonus. With our current setup, we're reaching 100% Critical Hit Chance and over 1,100% Critical Damage Bonus.

4. Low Life and Defenses

We're intentionally playing on Low Life by using Blasphemy with Atziri's Communion, reserving Life instead of Spirit.

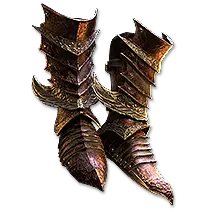
This enables several useful bonuses, including additional damage from Pain Attunement, Execute support, and extra movement speed from our boots.

For survivability, we're combining:

  • High Energy Shield and armour.
  • Ghost Dance for Energy Shield recovery.
  • Arctic Armour for additional armour.
  • Temporal Chains and Despair through automated Blasphemy.
  • Mana Remnants for additional mana sustain.
  • Bearer's Anguish for Ignite protection.

Ignite is particularly dangerous for this setup, so I'd strongly recommend having protection against it.

Final Priorities

When putting everything together, focus on these two things before chasing expensive damage upgrades:

  1. Reach 0.01-second Ember Fusillade hover duration.
  2. Get enough dodge roll distance, movement speed, and energy generation for consistent Cast on Dodge triggers.

Once those are working properly, you can start optimizing projectiles, Critical Damage Bonus, Energy Shield, and other luxury upgrades.

Changelog

Q: Why do I have around 30 unreserved Spirit?

I'm still experimenting with a few additional mechanics and optimizations. The build already performs extremely well, so there's no need to spend every last point of Spirit just for the sake of it. I'll update the guide if I find something worth adding.

Q: Do I really need a 6-socket Runeseeker's Call?

No! I'm currently using a 5-socket version, and it's working perfectly fine even in difficult endgame content. A 6-socket version offers additional optimization, but don't feel like you need to spend a fortune on it immediately.

Q: Why isn't my Ember Fusillade firing instantly?

Check your Ember Fusillade hover duration. You want to reach 0.01 seconds.

If you're not there yet, check your gem quality, Palm of the Dreamer's reduced Skill Effect Duration modifier, and other quality bonuses. You can also temporarily invest in reduced Skill Effect Duration passives.

Q: Why aren't my Cast on Dodge setups triggering frequently enough?

Make sure you're generating enough energy through dodge rolling. Movement speed, dodge roll distance, and energy generation are extremely important.

Also, avoid constantly rolling into walls or obstacles. This build works considerably better when you have enough space to move.

Q: Is Mageblood mandatory?

It's a major part of my current setup, especially with two Quicksilver Flasks providing additional movement speed.

I haven't properly tested a cheaper belt alternative, so I don't want to recommend something that might significantly change how the build feels.

Q: Is this build suitable for league starting?

Definitely not in its current form. This is a high-investment endgame character that relies on several specific items and interactions.

If you're struggling with currency, I've linked the farming strategy I used to afford my equipment in the video description.

Q: Which maps should I avoid?

I generally avoid narrow corridors, small rooms, and complicated maze-like layouts.

Open maps allow us to take full advantage of our movement speed and dodge roll distance, making both clearing and damage triggering much smoother.

Q: Why am I still dying to Ignite?

Ignite is one of the most dangerous threats for this character. I'm using Bearer's Anguish for protection, but you should still be careful with dangerous encounters and make sure your defensive setup is functioning correctly.

Q: Is the build completely optimized?

Not yet! I'm still experimenting with additional mechanics, some unused Spirit, and better jewels.

There is definitely room for improvement, but I'm already very happy with the current performance. I'll update this guide whenever I find something that makes a meaningful difference.

Comments

0

Video Guide

Build Planner Export

Export all build variants directly to your game.

Path of Building Code