menu
MobalyticsUse your favourite features in-game with our Desktop App

PoE 2Β [0.5.5] Giga Bonk Martial Artist - Falling Thunder Monk - League Starter to Endgame

presentationMonk
presentationMartial Artist
End Game
Starter
0.5.5 FR
Beginner
Verified
By FGKorbyn21
Updated on Oct 30, 2026
Oct 30, 2026

Build Overview

Here's my guide for my Giga Bonk League Starter and Endgame Build for Patch 0.5.5! This is a Work in Progress so expect rapid changes early on! I've included Leveling Variants and Budget Variants, just scroll through the Variants!

---------------------------------------------------------------------------------------------------------------------

🚨Work in Progress, be sure to come by the Twitch Stream for the Newest Skill Tree and Gems as I'm changing it to test new things!🚨

---------------------------------------------------------------------------------------------------------------------

🚨I've included a League Starter Leveling Guide, Early Mapping Guide, and Endgame Guide to cover your run on Monk from Start to Finish. Click the appropriate Tab for Gear and the Passive Tree🚨

---------------------------------------------------------------------------------------------------------------------

New Power Charge Tech Here

In the Endgame, we'll use Shattering Palm + Living Lightning II + Culmination II + Ailith's Chimes to generate TONS of Power Charges on Hit! We'll hit a target with Shattering Palm, this will trigger Living Lightning II minions which will expend built Combo when h itting targets thanks to the Martial Master node. This combo is then consumed by Ailith's Chimes for Power Charges. Simply enter map, press Shattering Palm a couple times and you have Charges!

We'll use these Power Charges with Falling Thunder + Nova Projectiles II for 360Β° Clear! This will be our main Bossing and Mapping Skill. Bonk with Falling Thunder, then recharge your Charges with 1 press of Shattering Palm on enemies, then bonk again!

The new Way of the Stonefist Ascendancy Node will allow our Gloves to be transformed into new and stronger versions of themselves! This will provide things like Explode Corpses for Damage, Onslaught on Hit, +% to Crit Chance, and More!

We'll also use Martial Adept + Martial Master to build up Combo from ALL our hits and twice as fast. For every 1 Combo we consume, we reduce our Energy Shield Recharge Rate by 0.2 seconds, so 10 combo consumed = -2 seconds before ES Recharge starts. We spam Combo skill so CONSTANT ES recharge!

Our Defenses were Buffed in 0.5 with Deflection and Evasion getting some MASSIVE improvements. We'll be around 6K Energy Shield, 77% Evasion, and 95% Deflect on top of Chaos Immunity with Chaos Inoculation and Instant ES recovery with Shavronne's Satchel + Ultimate Life Flask with Instant Recovery. We'll also have a Companion with Spirit Vessel from the Forgotten Warden Body Armor. This Companion will eat 10% of Damage taken and 15% of Deflected Hit Damage for a massive Damage Reduction!

Filter's I use (Shoutout Mr9Lives) - Here

Act 1 Regex - "i.+mov|^ad.*ph.*da|^\d.*ph.*da|^\+.*ills$|lacquered|studded|co.+res"

Act 2 Regex - "li.+res|^\+.*ills$|i.+mov|nymph's|o-wisp's|sylph's|\d [cfl].+da"

Act 3 Regex - "i.+mov|resi|^\+.*ills$|\d [cfl].+da|nymph's|sylph's|cherub's"

Act 4 Regex - "i.+mov|resi|^\+.*ills$|\d [cfl].+da|^\d.*ph.*da|^ad.*ph.*da|nymph's|sylph's|cherub's"

Strengths and Weaknesses

  • Nuke Bosses
  • Insane Clear Speed
  • Curse and Crit Immune
  • Super Tanky (Deflection OP)
  • Very Fast
  • Tougher League Start
  • Riskier Playstyle (Skill Diff, just lock in)
  • Kinda Squishy until CI

Build Variants

Please Read, Monk is not a braindead 1 Button Build for the most part. Lack of reading will make this a painful experience.....

Falling Thunder will start to "Fall Off" around this time since it'll require better Power Charge sustain and AoE to feel smooth for mapping and bossing. This time around I've decided to use Hollow Form with Whirling Assault until we get our hands on Ailith's Chimes.

Ailith's Chimes is the BIGGEST power spike we can get for the build, so until we get it we'll abuse Beyblade Monk to carry us into Maps. Without it, Falling Thunder will feel really clunky which upset some people at the 0.5 start. Hopefully Ailith's Chimes will be cheaper much sooner this league, until then we'll use Hollow Form.

Lochtonial Caress should be your #1 chase item to buy / drop! This will be a massive power spike that will automate Power Charge generation for us. Save your currency for this and get it ASAP! Lochtonial Caress are INSANE with Way of the Stonefist as they allow our Hollow Form Clones to grant us all 3 Charge Types. This means we can infiniely sustain our Power Charges to summon additional Clones.

Use Pounce for Movement Speed in Wolf Form and to jump gaps that you typically can't. Purely used for Movement, can drop if you don't want another button.

Take Herald of Thunder as your first Spirit Buff to help your clear speed. Then pick up either Wind Dancer (More Defense) or Mana Remnants if you have Mana problems.

Around Act 4, Hollow Palm Technique will start to fall off if you don't get + Level of Melee Gloves or Amulet. You'll want to start looking for a % Increased Physical Damage / + Physical Damage Quarterstaff.

Equipment

item
2
item
4
item
6
item
3
item
8
item
5
item
2
item
1
item
9
item
7
item
item
item
item
item
Equipment Priority
+9

Quarterstaff:

Around Act 4, Hollow Palm Technique will start to fall off if you don't get + Level of Melee Gloves or Amulet. You'll want to start looking for a % Increased Physical Damage / + Physical Damage Quarterstaff.

Any Added Damage to Attacks, + Level of Melee, and Attack Speed are also nice. Damage type priority: Physical -> Lightning -> Cold -> Fire

Body Armor:

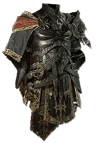
Take any Armor with Maximum Life and + / % EV/ES first, then start worrying about Resistances and Attributes. % of Evasion as Deflection is really solid early on for a potential 40% Damage Reduction. This will be the largest source of EV/ES so make sure to have a solid Body Armor.

Gloves:

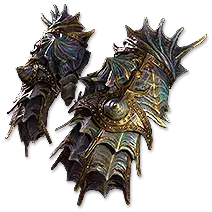
Lochtonial Caress are INSANE with Way of the Stonefist as they allow our Hollow Form Clones to grant us all 3 Charge Types. This means we can infiniely sustain our Power Charges to summon additional Clones.

I would save any currency that you can get in the campaign and buy these ASAP! Even try using Orbs of Chance on Temperred Mitts if you get any. Otherwise any pair of +1 Melee Gloves will be good enough until you can get these.

If you get Lochtonial Caress, re-spec Hollow Focus to Way of the Stonefist until you get your 3rd Ascendancy Trial! This will allow you to have infinite Power Charges early on and is stronger than the bells if you have this unique!

Helmet:

We'll be going hybrid EV/ES with Maximum Life. Make sure to get any needed Resistances and Attributes.

Boots:

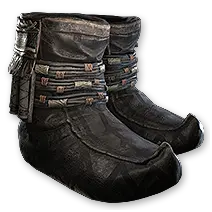
Take any Boots with 20-25% Movement Speed as this will allow you to move through zones quicker and just make your QoL better.

Try to get Maximum Life alongside some Resistances and Attributes. % of Evasion as Deflection is really solid early on for a potential 40% Damage Reduction. This on top of the Way of the Mountain Damage Reduction should be solid.

Amulet:

I like getting Attributes here as managing our Strength, Dex, and Int early on can be a little tough. Any other stats are nice but I do like Maximum Life, Resistances, and + Level of Melee Skills since we'll be going Hollow Palm Technique and this massively scales our DPS.

Rings:

Take any Rings with Added Damage to Attacks, this will be one of our biggest DPS sources so any early on will make your Melee League Start experience a bit easier.

Any extra Maximum Life, Resistances, Attributes, etc... are going to be helpful early on. I'd say focus on Flat Damage the most though.

Belt:

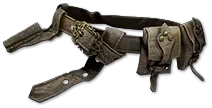
Take any Belt you can get that has solid Maximum Life, Resistances, and Attributes. Things like Life Flask Recovery Rate are very slept on and turn your Flask into near instant heals so look out for that if you can!

Flasks:

Overall Flask don't get a ton of attention, but early on they're very important and can make your Melee League Start SOOOO much easier.

If you have Extra Orbs of Transmutation or Augmentation, try to slam your Life Flask for something like Increased Amount Recovered, % of Recovery Applied Instantly, or Increased Recovery Rate. This will make those early fights feel a little less stressful.

Charms:

Your preference, but I prefer a Stone Charm, Staunching Charm, Thawing Charm, Dousing Charm, or Silver Charm are great.

Skill Gems

Support Gem Requirements:

Str 55

Dex 55

Int 45

1

Hollow Form

Level 13

whirlingassaultplayer
supportarmourbreakplayerthree
supportmagnifiedareaplayertwo
supportmeleephysicaldamageplayer
2

Storm Wave

Level 13

supportshockplayer
supportelementalarmamentplayertwo
supportbranchingfissuresplayertwo
supportrapidattacksplayertwo
3

Siphoning Strike

Level 13

supportchargeprofusionplayertwo
supportrapidattacksplayertwo
supportrageplayerthree
supportefficiencyplayertwo
4

Devour

Level 13

supportchargeprofusionplayertwo
supportthrillofthekillplayertwo
supportblazingcriticalplayer
prolongeddurationsupportplayertwo
5

Hollow Focus

Level 13

supportcooldownrecoveryplayertwo
supportconcentratedareaplayer
supportblindplayertwo
supportarmourbreakplayerthree
6

Herald of Thunder

Level 13

supportmagnifiedareaplayertwo
supportelementalarmamentplayertwo
supportelementalfocusplayer
7

Wind Dancer

Level 13

supportmagnifiedareaplayertwo
supportmaimplayer
supportblindplayer
8

Rend

Level 13

prolongeddurationsupportplayertwo
supportperpetualchargeplayer
supportrapidattacksplayertwo
9

Pounce

supportmarkofsiphoningplayertwo
supportmarkfordeathplayertwo
supportcooldownrecoveryplayertwo
10

Charge Regulation

Level 13

Gem Priority
+32

Mapping:

We'll use Hollow Form with Whirling Assault to summon clones that will attack for us. If we consume Power Charges, it'll summon additional clones. We can get these Power Charges from either using Devour on corpses or using Siphoning Strike on Shocked Targets.

Channel Hollow Form when you have Power Charges to easily clear everything, use Devour and Siphoning Strike to acquire more charges when needed. I like to keep Storm Wave just in case, really nice for shocking bosses to start the Power Charge loop.

If you have Lochtonial Caress with Way of the Stonefist, you can just channel your Hollow Form and you'll get all 3 Charge Types for free and can ignore having to setup. Just remember to refresh your Rend buff when bossing.

Bossing:

Get Power Charges from our Hollow Focus Technique Bells by using Devour on them or Siphoning Strike after Shocking the boss with Storm Wave. Once you have Power Charges, use Pounce on the Boss to Mark them and then Channel Hollow Form.

Refill on Power Charges in between the clones, feel free to use Rend for 50% Damage Gained as Lighting as well. This will make using Siphoning Strike for Power Charges more consistent as well.

If you have Lochtonial Caress with Way of the Stonefist, you can just channel your Hollow Form and you'll get all 3 Charge Types for free and can ignore having to setup. Just remember to refresh your Rend buff when bossing.

Gem Level Up Priority -

1. Whirling Assault

2. Storm Wave

3. Siphoning Strike

4. Anything else

Passive Tree

main:
123
123
set 1:
20
20
set 2:
20
20

Don't forget to un-spec Hollow Palm Technique once you swap to a Quarterstaff!

We'll swap Essence of the Storm for Crashing Wave as we'll start orienting our setup towards Crit as we get closer to Endgame. We'll grab Heartstopping and Struck Through for additional Crit Chance increases. We'll then take Enhanced Reflexes for an Evasion and Deflection Increase.

Your 1st Ascendancy Points can be spent on Hollow Focus Technique. Your 2nd Ascendancy Points should be spent on Hollow Form as we'll be swapping to this at Level 41. If you're still using this setup by your 3rd Ascendancy Points then take either Hollow Focus Technique or Way of the Stonefist depending on what you had prior.

If you get Lochtonial Caress, re-spec Hollow Focus to Way of the Stonefist until you get your 3rd Ascendancy Trial! This will allow you to have infinite Power Charges early on and is stronger than the bells if you have this unique!

Quest Rewards

Check which quests you’ve completed on your character
Clearfell β€” Beira of the Rotten Pack
+10% to Cold Resistance
Hunting Grounds β€” The Crowbell
Grants Two Weapon Set Passive Skill Points
Freythorn β€” The King in the Mists
+30 to Spirit
Ogham Farmlands β€” Una's Hut
Grants Two Weapon Set Passive Skill Points
Ogham Manor β€” Candlemass, the Living Rite
+20 to maximum Life
Keth β€” Kabala, Constrictor Queen
Grants Two Weapon Set Passive Skill Points
Valley of the Titans β€” Medallion
30% increased Charm Effect Duration
+1 Charm Slot
Deshar β€” Final Letter
Grants Two Weapon Set Passive Skill Points
The Spires of Deshar β€” Sisters of Garukhan
+10% to Lightning Resistance
Jungle Ruins β€” Mighty Silverfist
Grants Two Weapon Set Passive Skill Points
The Venom Crypts β€” Venom Draught
25% increased Stun Threshold
Jiquani's Machinarium β€” Blackjaw, the Remnant
+10% to Fire Resistance
The Azak Bog β€” Ignagduk, the Bog Witch
+30 to Spirit
The Molten Vault β€” The Molten Vault
Reforging Bench
Aggorat β€” Blood Sacrifice
Grants Two Weapon Set Passive Skill Points
Journey's End β€” Captain Hartlin
Two Weapon Set Passive Skill Points
Skill Gem(Lv 13)
Delirium Drop
Whakapanu Island β€” Great White One
+15% of Armour also applies to Elemental Damage
Gain Deflection Rating equal to 12% of Evasion Rating
+12% faster start of Energy Shield Recharge
Eye of Hinekora β€” Navali's Rest
5% increased Maximum Mana
Halls of the Dead β€” Yama The White
Grants Two Weapon Set Passive Skill Points
Halls of the Dead β€” Tawhoa's Test
+5% to Lightning Resistance
Abandoned Prison β€” Goddess of Justice
30% increased Mana Recovery from Flasks
Halls of the Dead β€” Tasalio's Test
+5% to Cold Resistance
Halls of the Dead β€” Ngamahu's Test
+5% to Fire Resistance
Halls of the Dead β€” Tribal Medicine
+15% of Armour also applies to Elemental Damage
Gain Deflection Rating equal to 12% of Evasion Rating
+12% faster start of Energy Shield Recharge
Wolvenhold β€” Oswin, the Dread Warden
Grants Two Weapon Set Passive Skill Points
The Khari Crossing β€” Akthi and Anundr
Two Weapon Set Passive Skill Points
The Khari Crossing β€” Molten Shrine
5% increased Maximum Life
Qimah β€” Tabana's Pillar
15% increased Armour, Evasion and Energy Shield
Kriar Village β€” Lythara, the Wayward Spear
+40 to Spirit
Howling Caves β€” The Abominable Yeti
Grants Two Weapon Set Passive Skill Points

How it Plays

See YT Videos!

How it Works

FAQ

How to Scale my Crit Chance and how much is enough?

Your Base Critical Hit Chance is the most important thing to improve. The Sinister Quarterstaff has a Base Crit Chance of 12%, which is the highest of any Quarterstaff Base. This Base + the mod " +% to Crit Chance) can provide up to a 17% Base Critical Hit Chance.
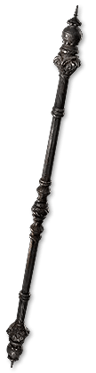
The Way of the Stonefist converts the Critical Damage Bonus mod to "+% to Crit Chance) as well, meaning we can get an additional 3% to Base Critical Hit Chance. Otherwise things like the Time-Lost Sapphire with Crit Chance, other Jewels, Passive Tree Nodes, etc.... will be your other sources of Crit. You can also utilize the Diamond Flask on Mageblood or Pinpoint Critical in place of Blindside if absoluetly necessary.

The Blindside support will provide 15% More Critical Hit Chance against blinded enemies, which is why we run Blind II in Herald of Ice and Charged Staff. This will ensure most targets we hit will be blinded and give us the bonus. However, this 15% More does not show up in our Tooltip since its Conditional. Same applies for our Daze Effects like Stupefy and Dizzying Hits. The minumum Crit Chance on tooltip in hideout with 0 buffs we should want to achieve is around 65%. Our buffs mentioned above and Charge Regulation will get us to 100% against a Blinded and Dazed Target.

Why Herald of Ice and when to swap to it?

Herald of Ice has a higher damage ceiling and better AoE than Herald of Thunder, but is harder to get to work since you have to be Freezing the targets to proc it. This is why early on, we use Herald of Thunder until you can get enough sources of Cold Damage and Freeze Buildup.

You can get these sources of Cold Damage and Freeze Buildup from your Quarterstaff with Added Cold Damage + Increased Elemental Damage with Attacks, Added Cold on Rings, Gain % Cold Damage from Heart of the Well, and Freeze Buildup on Passive Tree if needed (Thin Ice, Heavy Frost, One with the River). Breath of Aldur is also an option but it is socket bound meaning you can't change the rune once placed, only use if absolutely necessary.

Once you've gotten a large amount of Added Cold Damage, you can try swapping to Herald of Ice. If you notice you're not Freezing stuff and activating Herald of Ice, then you need some more Cold Damage or Freeze Buildup.

How to Increase Energy Shield?

The biggest sources of Energy Shield is going to come from your Body Armor (Forgotten Warden), Pure ES Helmet, and Gloves (Way of the Stonefist Mods).

Once you have a solid base Energy Shield amount, you need to get sources of Increased and More Energy Shield. These can come from the Time-Lost Sapphire and other Jewels, Amulet Mods (% Increased ES / Global Defenses), Rite of Passage (Owl Spirit), Charge Regulation (20% More ES), Passive Tree Nodes, Runes (Rune of Foundations / Perfect Iron Rune), and more.

Way of the Stonefist will convert popular Defensive mods like % Increased EV / ES / AR into % More Global Evasion and Energy Shield which is extremely potent. I would try to always have this mod on your Gloves if possible.

I can't put Ailith's Chimes / Culmination II / Charge Profusion II in Shattering Palm?

The order of the Support Gems is extremely important! You need to first equip Culmination II as it allows Shattering Palm to build combo. Now that the skill has combo associated with it, you can then slot in Ailith's Chimes since this support revolves around combo. Now that you have Ailith's Chimes which grants Power Charges, you can now equip Charge Profusion II since this support revolves around charges.

Where's Flicker Strike?

This isn't really a Flicker Strike build at this point, I've found myself barely using it and its quite finicky and expensive to feel worth using. Can still be used in place of Pounce if wanted with these supports: Concentrated Area, Perpetual Charge, Hit and Run, Blindside, Elemental Armament II

Why not run both Herald of Thunder and Herald of Ice?

Its a bit overkill in my opinion to run both Heralds, especially since I get the Explode Mods on my Gloves from the Katla's Gloom Mod Pool. I find the 30 Spirit better spent on things like Mana Remnants for Mana Sustain and Ghost Dance for ES sustain.

How do I mitigate Slows, especially in Grand Expedition?

The expensive but full proof method is the Legacy of Wanderlust which will solve all your problems, but is usually quite expensive.

The cheaper method is to stack "Reduced Potency of Slowing Debuffs". This can come from things like the Soul Core of Quipolatl, Cyclonic Alloy Body Armor Mod, and Passive Tree Nodes (Freedom of Movement, Unhindered, Lasting Boons, Unyielding, etc...).

There's also the Commiserate support which can be slotted into one of your skills like Shattering Palm to remove the Chill debuff from yourself briefly. This is a bootleg way, but better than nothing. Silver Charm can also help but will likely run out of charges fast in Grand Expeditions.

Why Forgotten Warden over a Rare Body Armor?

The Companion from the Spirit Vessel Skill granted by the Body Armor can eat up to 15% of Deflected Damage for us. Since we cap our Deflection at 95%, this means most of the time we'll take 40% Less Damage, then the Companion will eat up to 15% of Deflected Damage. This gives us an additional 15% Damage Reduction.

We also can use the Loyalty support which is an extra 10% Damage Reduction and other cool supports like Catha's Brilliance and Amanamu's Tithe.

The Base Defenses on this Body Armor are also extremely high for how easy / cheap this can be. Not to mention the tons of Deflection Rating you'll get on top of it. This Body Armor will be better than most up until you start getting into 2K+ EV 600+ ES Body Armors which will be very expensive.

Can I use Duality as a budget Quarterstaff?
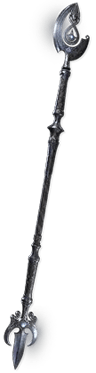
No, the Finality Buff from this Quarterstaff prevents us from gaining Combo. This will brick the Power Charge generation from Ailith's Chimes!

Is Shavronne's Satchel really that good and why isn't it healing my ES on use?

YES, its absolutely insane for survivability. Spam your Flask if you trip, get swarmed, or just get low and you'll be saved. If you have a really good flask then you'll really notice how powerful this belt is.

The only requirement is to have an Instant Recovery or % of Recovery is Instant Life Flask. For some reason, when using Chaos Inoculation you have to be running one of these mods to get any recovery. Otherwise the belt is useless.

More FAQ info to be added......

Changelog

9/30/26 - Added FAQ for troubleshooting, plenty more info to be added to it

9/26/26 - Updated all other Endgame Variants to match changes I made in 0.5.5. Please let me know if theres mistakes as this was a massive overhaul

9/25/26 - Updated Mirror Tier Variant, other variants will get updates soon

9/12/26 - Fixed Socketable mistake

9/10/26- Updated Atlas Tree

9/7/26 - Fixed issue with early leveling variant, added Atlas points to mirror variant
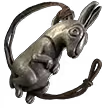
8/31/26 - Updated Leveling variant to feel a it smoother for league start. We'll utilize Hollow Form + Whirling Assault until we can drop / buy Ailith's Chimes since its kinda required to get our Endgame build up and running.

7/9/26 - Added Mirror Tier Investment Variant. This is a high skill and investment version of the build that is centered around farming the juiciest Expedition in the game. Can swap the Berserk tech for Legacy of Wanderlust if slow is too annoying.

6/27/26 - Added Tatto's since Mobalytics added support for it

6/23/26 - Updated ALL Endgame variants providing more clarity on what mods to prioritize. Updated to match Final Update changes with a video to come within a day or two.

6/20/26 - Updated descriptions, added Shark Fin Reward. Update video coming soon!

6/7/26 - Added link to new video, added new Body Armor Forgotten Warden (Cheap and OP). Updated descriptions further and corrected some typos.

6/7/26 - Added new Power Charge Tech which replaces Whirling Assault with Shattering Palm. Check the Tech out! Updated all Endgame variants to match. Added new info for Giga Invest variant revolving around Mageblood. Lots of other minor changes.

6/2/26 - Added new video going over New Power Charge Tech and the new Breachlord's Amalgam Lineage Gem. Updated Variants

6/2/26 - Did major updates to all variants to match the changes we've made due too the testing in 0.5. PoB file removed until I give it a full update, new YT video coming in a day or two to go over newest changes.

Comments

142
S
Spekter_Edβ€’2d ago

Hello FGKorbyn21,

First, thank you for creating the build and the guide, I'm using this since August and is incredible, I got a lvl 96 at the "High Investiment" stage.

My question is about the gloves, specifically the "explosion" mod, how did you searched for it? you self crafted?

I can't find one glove with this mod.

PS: Did you self crafted other items that you use?

Thank you

0
F
FGKorbyn21
Author
β€’1h ago

I crafted most of the items I'm using. The explode mod is "Magnitude of Poison / Bleeding" and comes from the Katlas Gloom socketable mod pool. Those mods get converted to % chance to explode thanks to Way of the Stonefist

Glad you've been enjoying the build and let me know if you need anything else!

0
L
LKβ€’5d ago

This was a great build until endgame. Now it's weak and pathetic. No fun.Shattering palm does nothing and the cooldown for falling thunder makes it pretty unusable even for mapping.

0
D
DeadlyStormβ€’5d ago

I am not the creator of the build, but why do have a cooldown on falling thunder ? Do you still use that support gem Breachlords amalgam perhaps ? Thats only for bossing and not even needed in engame.

0
View 1 reply
F
FGKorbyn21
Author
β€’1h ago

Use Nova Projectiles 1, not 2. 2 Adds a cooldown and nerfs your damage massively. Shattering Palm is purely used as a quick skill to expend combo for Power Charges for Falling Thunder. Fix these issues and it'll be night and day

0
G
GrimFlowerβ€’6d ago

I have reached the Mid Endgame Swap to Chaos Inoculation, but I currently cannot start Herald of Ice or Wind Dancer with 100 Spirit available - Not usable with current Weapon Set settings.

0
D
DeadlyStormβ€’11d ago

Really enjoying the build ! However i don't really understand the use of the level increase support gems for trinity, as it seems to stay at level 20 max for me no matter what. What am i missing ?

0
H
HUMAN FIELD GOALβ€’14d ago

How do you get the fire to load up on Trinity I only can get lining and cold

1
F
FGKorbyn21
Author
β€’12d ago

Need some sources of fire damage. That can be on the weapon, rings, Heart of the Well Diamond, Blazing Critical Support, etc....

1
C
CoolKeyβ€’17d ago

mana remnants feels entirely useless in this build. never have mana problems

1
F
FGKorbyn21
Author
β€’12d ago

It can be an issue in Grand Expeditions. Super tanky enemies that you have to kill 5-6 times with 25+ modifiers on them, toss in some mana drain / mana siphon ground and it can get scary. Can always swap it out for another Herald or something

2
S
ShinyMaskβ€’22d ago

Could you finish the build in case we swap for Morior Invictus (spirit)? What to do with leftover spirit ( its like 100+ spirit) Elemental conflux? Herald of thunder?

1
S
ShinyStormβ€’18d ago

Bro left the chat

0
F
FGKorbyn21
Author
β€’12d ago

Any Spirit gems of your choice. Conflux will mess up Trinity if you've managed to balance it but otherwise would be a good option. Extra Heralds, Convalesence, even a banner can all be slotted in.

0
C
Chinorriβ€’1 month ago

When switch to Mageblood. How do you deal with Energy Shield to heal it?

0
E
El Ticoβ€’25d ago

You dont it will be pure regen, evasion, deflect and almost no damage.

2
F
FGKorbyn21
Author
β€’12d ago

Expending Combo kicks off our ES recharge so as long as you get a Jade Flask on yout Mageblood yo should have an insane amount of EV / Deflection to help not get hit. Ghost Dance also tends to help and Convalescence is always an option too

1

Video Guide

Build Planner Export

Export this build variant directly to your game.

Table of Contents

Featured Builds

This 464% Rarity Ritualist Doesn't Need a Carry | PoE2 0.5.5
Updated on Nov 11, 2026
Chaos Totem Lich - League Starter / Early Endgame
Updated on Nov 11, 2026
[0.4] - Inferno Shaman Duid (METEOR APOCALYPSE) STARTER TO ENDGAME
Updated on Nov 10, 2026
[0.5] Elemental Ice Strike - Martial Artist - End Game build
Updated on Nov 10, 2026
[0.5.5] UNRIVALLED CHAYULA - Flicker Strike Build Guide
Updated on Nov 10, 2026

Become a Creator

Want to earn rewards by sharing your builds with your community?