This is my ACT ONE TO MAPS levelling route for Monk in 0.5 Return of the Ancients
The Monk in ACT ONE is a real pain and a struggle if you don't know what to run. I have spent a lot of time, testing 'The best start skills' and this is what I have come up with.
Everything below has been TESTED IN 0.4, paired with the patch notes and will be updated if something changes on league start.
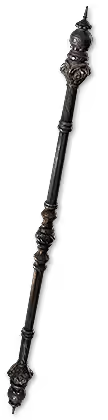
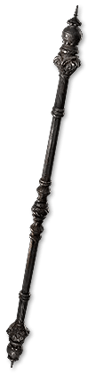
Quarterstaff levelling got smoother (I hope!), this is due to Quarterstaff base weapon range being changed from 1.3 to 1.4. Doesn't sound like a lot, but means you can 'melee' from further away...ish.
We will be branching into  Flicker Strike like we did in the previous leagues, stay tuned for updates!
Follow LIVE
-----------------------------------------------------------------------------------------------------------------------------------------------------------------------
0.5 Patch Notes - Possible Monk Impacts (good & bad)
Melee Splash Damage
- Melee Attacks can now only apply Splash Damage once per damaging area. Some Attacks create multiple damaging areas during use. For example,
 Whirling Assault creates multiple damaging areas around you as you move.
Passive Tree Changes
- The
 Chakra of Breathing Notable Passive Skill now grants 20% faster start of Energy Shield Recharge instead of 1% increased Energy Shield Recharge Rate per 4 Dexterity.
 - The
 Deadly Force Notable Passive Skill now provides 15% increased Critical Hit Chance (previously 10%), and 15% increased Damage if you've dealt a Critical Hit in the past 8 seconds (previously 25%).
 - The
 Shatter Palm Notable Passive Skill now provides 20% increased Critical Damage Bonus (previously 10% chance to Daze).
 - The
 Shimmering Notable Passive Skill now grants 10% faster start of Energy Shield Recharge, and 20% increased Evasion if you have been hit recently. It no longer grants 20% increased Energy Shield Recovery Rate if you haven't been Hit Recently.
 - The
 Staggering Palm Notable Passive Skill now provides 25% increased Physical Damage (previously 20%), and now provides 10% chance to Daze instead of 20% increased Critical Damage Bonus.
 - The
 Stormcharged Notable Passive Skill now provides Damage Penetrates 8% of Enemy Elemental Resistances and 5% increased Attack and Cast Speed with Elemental Skills. It no longer provides 15% increased Critical Hit Chance or 40% increased Elemental Damage if you've dealt a Critical Hit Recently.
 - The
 Patient Barrier Notable Passive Skill now grants 50% increased Maximum Energy Shield (previously 60%).
Skill Changes
 Gathering Storm Now causes Perfectly Timed dash to explode any Tempest Bell on hit, creating a massive shockwave that deals 564-869% Attack Damage at Gem levels 13-20. Shocked Ground is left in the wake of the Tempest Shockwave (previously on Perfect Dash), with a radius of 3.2 metres, turning precise timing into a devastating area-clearing combo. Perfect Timing Shockwaves can now only hit enemies once per skill use, and no longer interact with objects created by non-Tempest Bell skills. Shockwave limit is now 50. Quality now grants 0-20% longer Perfect Timing window (previously +0-8 Maximum shockwaves per use).
 Ghost Dance The interval between gaining Ghost Shrouds is no longer a duration. It now has "Modifiers to Cooldown Recovery Rate also apply to Ghost Shroud gain frequency". It also now has "When Hit, lose a Ghost Shroud", and "Regenerate Energy Shield equal to 2% of your Evasion Rating per second if you have lost a Ghost Shroud Recently". Now Gains a Ghost Shroud every 11.7-10.1 seconds at Gem levels 4-20 (previously 7.6-6.1)
 Ice Strike Quality now grants 0-20% increased Attack Speed (previously 0-10% more Attack Speed).
 Tempest Bell Can now be Ancestrally Boosted as though it were a Strike skill, and its maximum number of active Bells has been increased to 3 (previously 1), greatly improving its combo potential. Its Shockwave now deals 45-119% of Attack Damage at Gem levels 3-20 (previously 60-132%), and can trigger once every 0.3 seconds instead of 0.25 seconds.
- Whirling Assault Quality now grants 0-20% increased Attack Speed (previously 0-15% more Attack Speed).
Support Changes
- Culmination II No longer has Combo count loss for Supported Skills occurs 50% slower. It now has Supported Skills lose Combo if you generate no Combo for 6 seconds (previously 4 seconds). Supported Skills Can now Gain up to 10 Combo (previously 20), and Supported Skills now Deal 4% more Damage Per Combo (previously 2%).
- Dialla's Desire Now grants +5% to Quality of Supported Skills (previously +10%). BIG NERF!
- Overabundance III Now properly describes that it cannot support Persistent Skills.
- Overextend Can no longer be obtained, existing items are unaffected by this change. MEGA NERF!!
- Uhtred's Augury Now grants +2 to level of Supported Skills if exactly two other supports are modifying them (previously +3)
- Uhtred's Omen Now grants +2 to level of Supported Skills if exactly one other Support is modifying them (previously +3).
-----------------------------------------------------------------------------------------------------------------------------------------------------------------------
Acolyte of Chayula
- The
 Into the Breach Skill granted by the Waking Dream Notable Passive Skill now grant Leech 20% of your maximum Life to you when collecting a Red Flame of Chayula (previously 15%), and Leech 20% of your maximum Mana to you when collecting a Blue Flame of Chayula (previously 15%).
 - The wording of the Into the Breach Skill has also been updated to clarify behaviour ranges related to Flames of Chayula.
- now applies modifiers to remnant pickup range to the range at which Flames of Chayula can be seen. This is purely a visual change.