menu
MobalyticsUse your favourite features in-game with our Desktop App
PoE 2 Build

0.3 Doomslayer Deadeye Grenadier - SSF All Content Viable

Lolcohol
SSF
Verified
Starter
End Game
0.3 TTE
presentationRanger
presentationDeadeye
Updated on Nov 20, 2025
Nov 20, 2025

Build Overview

Changelog: Scroll to bottom of page to see what has changed.

12 Sept: Added latest and final Variant, Ultra Endgame.

Live Update of my character (updated daily): https://mobalytics.gg/poe-2/profile/lolcohol/builds/0-3-lolcohol-doomslayer-deadeye-live-update

IMPORTANT: With how scary Abyss is and the Grenade bounce, going Projectile Proximity Specialisation with Far Shot feels safer and a bit better and allows you to play from Distance. You can also use Longshot II with your Grenades to enhance the damage with this playstyle. If you go The Coming Calamity you'll either need to go close ranged, or get Presence Effect Jewels

Overview

This PoE 2 Deadeye Grenade build can do all content in PoE 2, is SSF-viable and beginner friendly. If you're looking for a well-rounded, thoroughly tested league starter build that won't let you down, this is the one.

In 0.2, this build was incredibly successful in both SSF and Trade and only received buffs in 0.3. In SSF, I was able to clear all T0 Pinnacle Bosses and comfortably run Tier 15 Waystones before merging to Trade League, where I was able to complete my Atlas Passives, all T3 Pinnacle Bosses as well as a Difficulty 4 Simulacrum.


This build is as simple as it gets: shoot Grenades, explode monsters and get loot. Incredible single target, excellent clear, zero budget. This is a build I have played in SSF, so it requires no expensive gear to get up and running. Just make sure to be diligent with your gearing, paying attention to your Crossbow and making sure to upgrade your Gems and Gear regularly to maintain high damage and survivability

Changes in 0.3

Leveling

WIth the changes to High Velocity Rounds and Galvanic Shards in Patch 0.3, these should be great options for leveling. I usually used those, but for 0.3 I'm going to try out Incendiary Shot and Rapid Shot which were both buffed (at least in terms of functionality) and could prove to be much less clunky to use in conjunction with Explosive Grenades. I'm not 100% sure of the best links for Incendary Shot, but I do want to test Eternal Flame and Fire Infusion or Swift Affliction on bosses, with Martial Tempo and Pierce for clear. If you prefer HVR and Galvanic Shot, feel free to make tweaks as you see fit

It won't be possible to test these changes before 0.3 launches, but on paper, this swap looks good. Either way, these skill are only used temporarily before fully swapping to Grenades in Act 3

Defenses

With the addition to Deflect, we should now feel even tankier than before. When comboed with the 3% less damage taken per Tailwind stack, I imagine this build is going to feel even better than before.

Crossbows

Crossbows should feel much smoother to play in PoE 2 0.3 The Third Edict. There is no longer a Movement Speed penalty while Reloading (which we do a lot), so it should feel much more fluid than before

Strengths and Weaknesses

  • High Movement Speed
  • Excellent Single Target and Good Clear
  • Fun Playstyle for those who enjoy it
  • SSF-Friendly
  • Very tanky for an SC Ranger
  • Very Beginner-Friendly and Easy to Understand
  • Delay between throwing Grenades and Detonating them - some people don't like this playstyle
  • Very important to update Crossbow regularly to maintain high damage
  • Requires quite a few buttons to play optimally

Build Variants

This version of the build will take you from the start of Act 1, until near the end when we add in new Gems at level 14 after defeating The Executioner. Pay attention to the Equipment and Skills sections, and move on to the next Build Variant once you reach Level 14.

Equipment

item
1
item
3
item
8
item
7
item
6
item
3
item
5
item
9
item
2
Equipment Priority
0
Main Hand
Makeshift Crossbow
1
Boots
Laced Boots
2
Left Ring
Iron Ring
3
Right Ring
Iron Ring
4
Gloves
Suede Bracers
5
Amulet
Lapis Amulet
6
Body
Rogue Armour
7
Helmet
Brimmed Helm
8
Belt
Linen Belt

Act 1 Vendor Regex:

"strength|crossbow|ent spee|to attack"

(Copy and paste into vendor to highlight possible upgrades)

Items

Important: Make sure to upgrade your Crossbow to ensure you are dealing as much damage as possible. Sockets with Elemental Runes such as Lesser Desert Rune. Lesser Glacial Rune or Lesser Storm Rune are extremely strong early on.


Iron Rings are a huge damage boost early on, so keep a look out for these!

You will be getting most of your damage early on from your Crossbow, but also Iron Rings and Gloves

Weapon: Crossbow

  • % increased Physical Damage (Prefix)
  • # to # Physical Damage, Fire Damage, Lightning Damage and/or Cold Damage (Prefix)
  • % increased Elemental Damage with Attacks (Prefix)
  • Level of All Projectile Skills (Suffix) - massive damage but increases your Mana Costs
  • % increased Attack Speed (Suffix)

Rings: Iron Ring

  • # to # Physical Damage, Fire Damage, Lightning Damage and/or Cold Damage (Prefix)
  • Maximum Life (Prefix)
  • Resistances (Suffix)
  • Attributes (Strength, Dexterity, Intelligence - Suffix)

Gloves

  • # to # Physical Damage, Fire Damage, Lightning Damage and/or Cold Damage (Prefix)
  • Maximum Life (Prefix)
  • Resistances (Suffix)
  • Attributes (Strength, Dexterity, Intelligence - Suffix)

Other Gear

Boots - Movement Speed, Life, Resistances

Body Armour, Helmet - Life, Resistances (particularly Cold Resistance for Act 1)

Amulet - Look for a base that grants increased Attributes. A Lapis Amulet is particularly useful as it allows you to increase the level of your Contagion up until Level 14

Flask Upgrades

It's very important to upgrade your Flasks regularly as this is one of the few sources of recovery early on

  • Level 1: Lesser Life Flask and Lesser Mana Flask
  • Level 4: Medium Life Flask and Medium Mana Flask
  • Level 10: Greater Life Flask and Greater Mana Flask
  • Level 16: Grand Life Flask and Grand Mana Flask

Try to get modifiers such as "#% increased Amount Recovered" early on

Crossbow Upgrade Breakpoints

  • Level 1: Makeshift Crossbow 7-12 Physical Damage
  • Level 4: Tense Crossbow: 8-15 Physical Damage, Str/Dex Required: 8/8
  • Level 10: Sturdy Crossbow: 11-26 Physical Damage, Str/Dex Required: 15/15
  • Level 16: Varnished Crossbow 12-36 Physical Damage, Str/Dex Required: 22/22

Skill Gems

Support Gem Requirements:

Str 0

Dex 35

Int 10

Expand all
1

Crossbow Shot

Crossbow Shot
supportrapidattacksplayer
2

Explosive Grenade

Explosive Grenade
supportmultishotplayer
supportmagnifiedareaplayer
3

Contagion

Contagion
supportswiftafflictionplayer
4

Incendiary Shot

Incendiary Shot
supportrapidattacksplayer
supportpierceplayer
5

Herald of Ash

Herald of Ash
supportmagnifiedareaplayer
6

Flash Grenade

Flash Grenade
supportmultishotplayer
7

Rapid Shot

Rapid Shot
supportrapidattacksplayer
Gem Priority
+7

Muling

First pick a Mercenary character, get to the end of The Riverbank, kill the Bloated Miller and make it to the Clearfell Encampment. This only takes a couple of minutes and is important for a couple of reasons:

  • Guarantees a Crossbow
  • Guarantees a Crossbow Skill
  • We get an extra Uncut Skill Gem - Use this to take Explosive Grenade
  • We get a bit of extra loot

Identify and keep any useful loot the Bloated Miller dropped, sell the rest and place the Skill Gem, useful loot and Makeshift Crossbow in your Shared Stash.

You don't have to do this and can gamble finding a white 
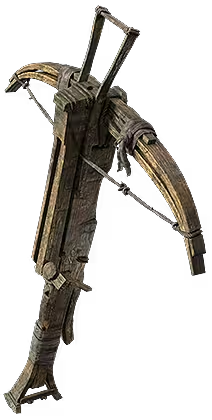
Makeshift Crossbow from Renly on your Ranger.

Act 1

Pick a Ranger character and make it through the Riverbank. As soon as you arrive in the Clearfell Encampment, identify the items that The Bloated Miller dropped and sell Renly the Bow and Quiver you got from The Riverbank. You won't have a lot of Gold but check for:

  • A Magic Crossbow with extra damage
  • Movement Speed Boots
  • Basic Normal-Rarity Energy Shield items to give us more life if he doesn't sell Boots or an affordable nicer Crossbow
  • A White Crossbow if you didn't Mule a Mercenary

If there are no affordable Crossbows and you didn't mule a Mercenary, it's time to do it now. It will only take 3 minutes!

Renly will also grant us an Uncut Skill Gem - you should have two; one from your Mercenary and one from your Ranger. Use this to allocate Contagion (found under the Occult Tab in the Gemcutting Window), and use your Basic Crossbow Attack or Fragmentation Rounds from the Riverbank for supplementary damage. Contagion is great for killing packs of monsters while still moving.

Note: If you DIDN'T MULE, use the Uncut Gem Renly gives you to allocate Explosive Grenade

Explosive Grenade has a fairly long Cooldown, but deals high damage, and only one use is usually needed to clear a pack. You will need to get used to the detonation time to place these correctly.

For normal clear in between your Explosive Grenade Cooldown, you can just use your Basic Crossbow Shot attack.

If you find an early Orb of Transmutation, you can use it on your Crossbow (if it is Normal Rarity) and follow up with an Orb of Augmentation to try to get more damage

Clearfell

If you didn't Mule, in Clearfell seek out the Mysterious Campsite and open the Chest which contains an Uncut Skill Gem and select Contagion.

  • Defeat Beira, use the +10% to Cold Resistance buff and then head to The Mud Burrow and defeat the Devourer who will drop an Uncut Skill Gem Level 2, which we use to level up our Explosive Grenade.
  • Hand in the quest to Renly who will give you an Uncut Support Gem which we can use to add Scattershot to our Explosive Grenade.
  • While in town, also check Renly for any Crossbow upgrades, Gloves that have Damage to Attacks and boots with increased Movement Speed

The Grelwood

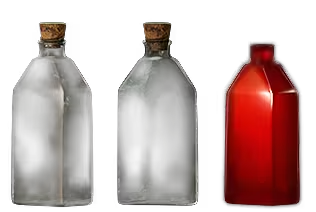
In the Grelwood, make sure to stop by Areagne's Hut and slay her to get another Uncut Support Gem, which we can use to get Magnified Effect for our Explosive Grenade. Her Cauldron also drops Flask upgrades which are important to Equip at Level 4

  • You can also slay The Brambleghast to get a Level 2 Uncut Skill Gem to increase the level of your Contagion if you have enough Intelligence for it

The Red Vale

After completing The Red Vale, The Rust King will drop a Level 3 Uncut Skill Gem which we can use to take Incendiary Shot.

You will need at least 10 Strength to use this Gem and might need to allocate a Strength Passive Point at the Ranger starting area

  • The next Level 3 Uncut Skill Gem you acquire, which will at the latest be from Lachlann in Cemetery of the Eternals, should be allocated to Flash Grenade

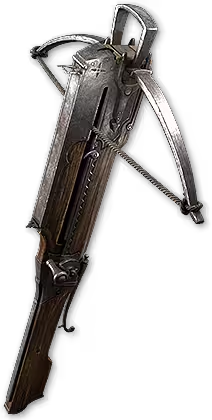
At this point, you can try to upgrade your Makeshift Crossbowto a 
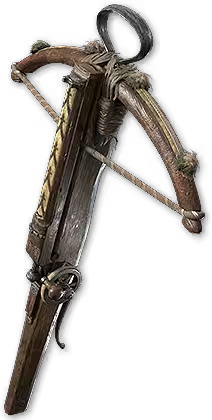
Tense Crossbow, but make sure to find some Strength on another piece of gear in order to make this swap. If you cannot find Strength anywhere, you can allocate a single point of Strength near the Ranger start as a temporary measure (but don't forget to unallocate it when you find that Strength)

The Grim Tangle

  • In The Grim Tangle, defeat The Den of the Druid to acquire another Support Gem which we can use to allocate Martial Tempo to Incendiary Shot

Cemetery of the Eternals

In The Cemetery of The Eternals, seek out The Sarcophagus beside a Checkpoint for a chance to get an Iron Ring, which will greatly increase your damage

  • In The Tomb of The Consort, you can defeat the Rare monster that spawns from the Haunted Chest to gain another Support Gem, which we use to add Pierce to Incendiary Shot.

Note: With the buffs to Ignite on Incendiary Shot, it might be worth using Fire Infusion or even something like Swift Affliction or Eternal Flame. I'll need to test these in game once the patch drops

This Gem setup will carry us until Level 14 when we acquire a Level 5 Uncut Skill Gem

Gem Leveling Priority

  1. Explosive Grenade
  2. Incendiary Shot
  3. Contagion (if you have enough Intelligence)
  4. Flash Grenade

Playstyle

Clear

Cast Contagion on a monster and shoot Explosive Grenades ahead of yourself and lure the pack of monsters into them, trying to time it so that the Grenades detonate as the monsters pass over them. The Contagion will spread throughout the pack. You can also just use your Basic Crossbow Attack or Fragmentation Rounds before level 3 to kill the monster affected by Contagion to cause it to spread throughout the pack.

Single Target

Dump your Explosive Grenades on the boss, then fire at it with Incendiary Shot to damage them and apply Ignite while your Explosive Grenades recharge. You can also use Flash Grenade to stun the boss more easily

This should set you up nicely as you approach the end of Act 1 and reach Level 14, where we make the change to the next Build Variant (scroll up to change)

Passive Tree

main:
123
123
set 1:
20
20
set 2:
20
20

The small Strength node at the start of the Tree is only required if you don't find an item with Strength before you reach Level 5. Tense Crossbow and many of the Tier 3 Skill Gems require 10 Strength, so you may need to allocate this point. Make sure to remove it later after you get enough Strength elsewhere

Make sure to acquire your two Books of Specialisation and Permanent Buffs as you go

  1. Hunting Grounds - Slay The Crowbell - Book of Specialisation
  2. Ogham Farmlands - Una's Lute - Book of Specialisation (hand in to Una)
  3. Freythorn - +30 Spirit
  4. Ogham Village: Renly's Tools (Allows you to Salvage items). Make sure to click the Blacksmith's Chest just next to his Tools as this grants you an Artificer's Orb and Blank Rune

Additional Information

HELP!

If you're struggling, make sure you're following the build guide properly. It's perfectly normal to overlook a few small things that all add up to make the build perform far worse than it should. If you're following everything properly, you should be having a smooth experience, but here's a check list in case you're struggling.

Also make sure you've been doing your Permanent Buffs and Quests throughout the Campaign! Link to that guide is here: Campaign Bonuses and Buffs

I DEAL NO DAMAGE!

Items

  • Weapon: Make sure you're upgrading your Crossbow when a new base becomes available and try to get modifiers on it that increase its damage. Check the Item section for a list of the types of mods we're looking for. If you're level 12 and using the same Makeshift Crossbow you were using at Level 2, you'll be dealing almost no damage
  • Do you have any Runes and Artificer's Orbs that you could use in your weapon?
  • Do you have any Blacksmith's Whetstones you could apply to your weapon?
  • Gloves: You can get extra damage to attacks on Gloves to increase your damage
  • Iron Rings: early on, Iron Rings can be a great boost to your damage. Rings can also roll modifiers that increase damage to Attacks
  • If you're in Act 3, have you done your first Ascendancy? You should do that around Level 22-26

Remember to check Vendors for upgrades once in a while

Gems

  • Have you been leveling up your Gems?
  • Are you using the correct Skill Gems?
  • Are you using the correct Support Gems?
  • Did you collect the Lesser Jeweller's Orb at in the first area of Act 3? It's located by the Orok Campfire
  • Have you been upgrading your Support Gems? New Tiers exist that can increase your damage

Passive Tree

Have you followed the Passive Skill Tree correctly? Make sure you've been doing your Permanent Buff Quests to get the very important additional Skill Points littered throughtout the campaign

I KEEP DYING!

  • Energy Shield can be a good source of survivability in the first few zones of Act 1. You can often find Energy Shield gear as drops or from Vendors
  • Maximum Life on gear is important - check to see if you have any
  • Evasion Rating and even Armour can be very useful early on. You can get a fairly high Evasion chance early on by just making sure that your Body Armour is of a fairly high item level
  • LIFE FLASKS! Have you been upgrading them? An improved version becomes available every few levels, so make sure you're keeping yours up to date! If one doesn't drop, check Vendors for Flask upgrades
  • Movement Speed on Boots will help you move through the battlefield more easily
  • Positioniong: there will be a delay between firing your Grenades and them Detonating - try to learn this rhythm and not get yourself into situations where you're surrounded by monsters, waiting for your Grenades to explode

Resistances

It's a great help to get your Fire, Cold and Lightning Resistances as high as possible and up to 75% by the time you reach the endgame. However, this isn't possible early in the campaign. Instead, try to follow this basic guideline

  • Act 1: Cold Resistance is most important, especially for the Geonor boss fight at the end of the Act
  • Act 2: Fire Resistance is very important up until you reach The Halani Gates. After that, Lightning Resistance should be prioritised
  • Act 3: Fire and Chaos Resistance will serve you well
  • Act 4: ???

Of course, try to increase all of your Resistances, but sometimes you'll need to pick one over the other while you gear up

I KEEP RUNNING OUT OF MANA

Mana costs should be greatly improved in PoE 2 0.3, but if you're still struggling, here's some ideas:

  • Have you been upgrading your Mana Flasks?
  • Roll your Mana Flasks with modifiers that grant 0.20 Charges per Second or increased number of Charges, or Reduced Charges per Use
  • Jewels can roll modifiers that grant #% Mana gained on Kill
  • Do you have too many + to Projectile Levels on your character?
  • Mana Gain on Kill is a decent modifier early on and can be found on many different gear pieces
  • Clarity II or even Clarity I is great to assist Mana Regen
  • Mana Regeneration on gear
  • Anoint Price of Freedom on your Amulet in the endgame
  • Lifetap can be used on Skills if you're really struggling
  • Inspiration Support can be used to reduce the Mana cost of Skills

I NEED MORE ATTRIBUTES!

  • For the first few levels, you may need to allocate a single point of Strength near the Ranger starting area. You can later unallocate this Point
  • An early Amber Amulet can go a long way if you're lucky enough to find it
  • Check Vendors for gear with Strength, and Intelligence if you need it

General Checklist

  • Are you under-leveled? Make sure you're not trying to go too fast
  • Have you done your Ascendancy Trial when you should have (~Level 20-26 for the first one)
  • Have you followed the Passive Tree properly?
  • Have you been doing your Permanent Buff and Passive Skill Quests?
  • Have you read the guide properly or just skimmed over it, missing crucial information?

How it Works

CHANGELOG

Updated Later Endgame: Tree, Supports and Gems updated. Read the section just below Gems for clearer changes

I've removed Trinity from the non-Coming Calamity version for now - it's a pain in the butt to setup and will rather wait til I've made a video explaining it.

Coming Calamity: Rather don't swap to this too early - you'll need Presence Area Jewels to make it long ranged otherwise you might suffer having to play at close range

Trinity Variant Support Gems are a little scuffed, need tweaking. If you're at this point, you're probably smart enough to make tweaks yourself but I will fix it

Changed Fire Exposure and added it to Explosive Shot - Fire Exposure Support only applies when IgnitING a target, not when hitting an IgnitED target so doesn't work on Gas Grenade when it is linked with Elemental Armament III or Elemental Focus

Tattoo Choices: Take the Resistances

15:25 30 August: Added Mortar Setup in the Level 14-33 Tree - feels really good. Might not need Cluster Grenade anymore

12:02pm 30 August: Updated Support Gems up to the Early Endgame Build Variant. Will update rest as I get there and check out new supports


Video Guide

Table of Contents

Featured Builds

Invoker Hollow Palm - Campaign to Endgame
Updated on Dec 4, 2025
0.3 Bigdaddy Arc/Spark CoC Stormweaver
Updated on Dec 4, 2025
LICH Minions Leaguestarter (being updated for 0.4, WIP right now)
Updated on Dec 4, 2025
0.3 Fubgun's Lightning Arrow Deadeye leveling Guide
Updated on Dec 4, 2025
[0.3] Skadoosh's Poison Pathfinder Leveling 1-58
Updated on Dec 3, 2025

Become a Creator

Want to earn rewards by sharing your builds with your community?