menu
MobalyticsUse your favourite features in-game with our Desktop App
PoE 2 Build

Ice Strike Alt Leveling (Witch Variant)

presentationWitch
Starter
Creator
0.1 Early Access
Updated on Mar 20, 2025
Mar 20, 2025

Build Overview

Hey guys, I'm Lazy Exile, and this is my leveling guide for Alt (your 2nd character).

In this guide, I'm assuming you have access to gold, support gem tier 3, and currencies to purchase the required power-level items.

This will give you the best player power throughout the campaign from Act 1 to Act 6. Destroy everything with ease with any class.

Summary

This variant is different because it locks down enemies, even bosses with freeze very fast. By using the 
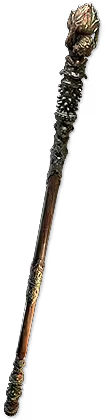
Pillar of the Caged God, and attributes stacking, this allows us to quickly stack damage, and keep the simple playstyle throughout the whole campaign.

We are using Polcirkeln in combination with Herald of Ice to blow up the screen. And for bossing, we add Tempest Bell to the rotation and bosses will also die.

Check out my alt-leveling setup for other classes here:

Mercenary Variant

Monk Variant

Sorcerer Variant

Ranger Variant

Warrior Variant

Disclaimer:

  • This build is not intended for endgame content and is meant to take you through the campaign from level 1 to 65 only. This build uses a specific attributes-stacking tree and will require you to respec later on to your build.
  • You'll also need some currency to get started because there are some required unique items in this build, and if you don't have it, expect the player's power to drop drastically.
  • This variant is rather squishy, and you'll have to make changes to fit in Hardcore environment, like Ghostwrithe for ES, Goldrim to cap resistances, I'll make another variant in due time.

The Guide

Equipment

Detail step-by-step gearing level-by-level so you know when to swap out gears. Most of the unique are optional except Pillar of the Caged God and Polcirkeln because they are the core of the build.

IMPORTANT: Pillar of the Caged God should be corrupted with flat Cold Damage and socketed with 2x Glacial Rune for the best possible damage, because our strength will scale the flat damage.

Note: Conservative Casting is a good anointment if you have mana issues (optional)

Skill Gems

Detail step-by-step on what skill to use level-by-level so just follow that.

Ice Strike is the main skill, so consider putting 20% quality + 4 sockets on to boost your power throughout the campaign. If you don't want to, remove Primal Armament, and use 3-link setup.

Make sure you also check the Rotation as well to understand how to play although it's quite simple.

Passive Trees

Also explained in detail with step-by-step what points to prioritize and take.

Attributes: you need to allocate your attribute mainly into strength, but if needed more dexterity or intelligence, go respec into those points to meet your requirements.

How it Plays

This section talks about the quest/bosses checklist in the campaign so you don't miss any permanent stats or don't waste time on killing optional bosses who don't give anything.

Equipment

item
1
item
7
item
5
item
2
item
6
item
9
item
1
item
3
item
8
item
4
item
item
item
Equipment Priority
+9

NOTES:

Always upgrade and use Orb of Transmutation + Augmentation on the highest-level flasks.

Watch my video on how to search for the best ring upgrade with your budget

Leveling Equipment Step-by-Step

Level 1 (In Town)

  • Equipped Wings of Caelyn - for Dexterity to equip other items
  • Equipped Foxshade
  • Equipped Pillar of the Caged God
  • Equipped Northpaw
  • Equipped Blackheart x2
  • Equipped Meginord's Girdle
  • Equipped Luminous Pace

Level 5

  • Equipped Greymake (replace Wings of Caelyn)

Level 8

  • Equipped Carnage Heart

Level 12

  • Equipped Wanderlust (replace Luminous Pace)
  • Equipped Polcirkeln (replace 1 Blackheart) - for single-target damage, use 2x Blackheart

Level 26-28

  • Equipped any rare Ring with double or triple T3+ Flat Damage and Attributes/Resistances (replace Blackheart)
  • For bossing, swap Polcirkeln with one of the rare Ring
  • For campaign clear, use Polcirkeln + 1 rare Ring

Level 27

  • Equipped Thrillsteel (replace Greymake)

Level 42-44

  • Upgrade your rare Ring with better rolls on flat damage, with double or triple T5+ Flat Damage and Attributes/Resistances

Level 52-55

  • Upgrade your rare Ring with better rolls on flat damage, with double or triple T7+ Flat Damage and Attributes/Resistances
  • OPTIONAL:
    • If you have Hand of Wisdom and Action, at level 52, you can equip it as well (remember to spec into Int)
    • or use any rare Gloves with T8 Flat Damage Rolls

Jewels

At least 1x Sapphire Jewel

  • Recover 1-2% of Mana on Kill (Mandatory)
  • #% Increased Mana Regeneration Rate
  • #% Increased Freeze Buildup
  • #% Increased Freeze Buildup with Quarterstaves
  • #% Increased Cold Damage
  • #% Increased Elemental Damage

Emerald Jewel

  • 1-2% Increased Movement Speed (Highly Recommended)
  • #% Increased Attack Damage
  • #% Increased Elemental Damage
  • #% Increased Damage with Quarterstaves
  • #% Increased Attack Speed
  • #% Increased Attack Speed with Quarterstaves
  • #% Increased Freeze Buildup with Quarterstaves
  • #% Damage with Hit against Rares and Uniques


Skill Gems

Support Gem Requirements:

Str 15

Dex 35

Int 35

Expand all
1

Ice Strike

Ice Strike
supportfasterattackplayer
supportcrescendoplayer
supporticebiteplayer
supportweaponelementaldamageplayer
2

Tempest Bell

Tempest Bell
supportmanaleechplayer
supportragefountainplayer
supportincreaselimitplayer
3

Playtest Attack

Playtest Attack
supportmanafountainplayer
supportcullingstrikeplayer
supportmeleephysicaldamageplayer
4

Herald of Ice

Herald of Ice
supportincreasedareaofeffectplayer
supportfarcombatplayer
supportcoldpenetrationplayer
5

Hand of Chayula

Hand of Chayula
hypothermiaplayer
freezingmarkplayer
supportcurseeffectplayer
6

Wind Dancer

Wind Dancer
supportblindplayer
supportknockbackwaveplayer
7

Overwhelming Presence

Overwhelming Presence
supportclarityplayer
Gem Priority
+19

Leveling Skill Step-by-Step

Note: Due to how accessible and cheap Lesser Jeweller Orb is, you should always put 3 sockets on your gems.

Always upgrade your skills to the highest level for more damage (don't worry about mana) - except Hypothermia

Important: Playtest Attack is another Tempest Bell, because we can use 2 bells. Make sure you unequip the 1st Tempest Bell before cutting the 2nd one. Because otherwise the game won't let you cut another Tempest Bell with a Tempest Bell already equipped.

Act 1

Level 2 (In Town)

  • With your Level 1 Skill Gem - Cut Glacial Cascade
    • Support with Upheaval, Martial Tempo, and Cold Infusion

Level 2-13

  • After killing The King in the Mist and get an Uncut Spirit Gem, cut Herald of Ice

Level 14

  • Cut a Skill Gem Level 5 for Ice Strike.
    • Drop Glacial Cascade
    • Now you can start using Tempest Bell + Ice Strike
  • With any 2 Level 3+ Skill Gem - Cut Tempest Bell x2

Act 2

  • No changes, use the same skill gems

Act 3

Level 31

  • Cut a Skill Gem Level 9+ for Hand of Chayula
    • Should only be used on bosses
  • Cut a Skill Gem Level 7 for Hypothermia and socket it in Hand of Chayula
    • If you need more int, respec attributes to have 52 int
  • Cut Freezing Mark to socket in Hand of Chayula as well

Act 4-5-6

  • No changes, use the same skill gems

Skill Rotation

  • You can bind 2 tempest bells to 2 different keys
  • Normal mobs clear:
    • Equipped Polcirkeln
    • Spam Ice Strike
  • Boss clear:
    • Swap in a rare Ring instead of Polcirkeln
    • Hand of Chayula (if available)
    • Spam Ice Strike
    • Drop both Tempest Bell when available

Passive Tree

main:
123
123
set 1:
20
20
set 2:
20
20

Attributes

Priority

Strength > Dexterity > Intelligence

The idea is to do more damage with strength; however, you need to cover the requirements of dexterity and intelligence as well. So, use respec to reallocate your attributes to fit the requirement.

Passive Skills Tree Pathing Order

  1. Flow Like Water
  2. Tenfold Attacks
  3. Proficiency
  4. Falcon Technique
  5. Martial Artistry
  6. Whirling Assault
  7. Pure Energy
  8. Life from Death
  9. Step Like Mist
  10. One with the River
  11. Reaching Strike
  12. Rapid Strike
  13. Coming Calamity
  14. Acceleration
  15. Pressure Points
  16. Maiming Strike
  17. Flow State
  18. Essence of the Mountain
  19. Conservative Casting
  20. Killer Instinct

Passive Skills Explanation

The idea of the passive skill trees is to grab as many attributes as possible while efficiently pathing to take all the attack speed, movement speed, damage around the pathing.

By using Ice Strike, we need strength for damage, but also a lot of dexterity for attack speed as well. In my experience, attack speed pairs very well with Ice Strike because we can build up our combo very fast to spend them on the Tempest Bell.

Depending on the starting location, but there are nodes that is universally good like Tenfold Attacks, Blurred Motion, Proficiency, and Falcon Technique. Martial Artistry and the Quarterstaves cluster is amazing for our build.

Life from Death is great for sustain.

Nodes that give both Movement Speed and Attack Speed are premium, like Acceleration and Step Like Mist (dexterity gives attack speed).

We are not taking any Cold Penetration on the skill tree because they are not too useful in the campaign, and for bosses, we have Hand of Chayula to lower their cold resistance.

I choose not to take Polymathy because it will require you to focus on getting more attributes on your gear, and by using a lot of unique items without swapping them out, it's not too beneficial for us. But if you focus on stacking a lot of attributes on gear, you can consider taking it.

You should also pay attention to taking more jewel sockets on the tree as well, since the jewel in PoE 2 is very strong, often 1 of the modifier on the jewel is equal to 1 small passive point.

How it Plays

Ascendancy

We can level this variant without any ascendancy points, so feel free to put points into whatever you want for your build.

Venom Draught

Again, there are no restrictions here, pick whatever you want.

Quests to do in the Campaign

When leveling a second character, you don't have to kill all the optional bosses. Here is a quick checklist for what quest/bosses to complete:

Act 1

  • Clearfell - Kill Beira of the Rotten Pack: +10% cold res
  • Hunting Grounds - Kill Crowbell: +2 passive points
  • Freythorn - Kill The King in The Mist: + 30 spirit
  • Ogham Farmlands - Find Una's Lute: + 2 passive points
  • Ogham Manor - Kill Candlemass, The Living Rite: +20 maximum life

Act 2

  • Keth - Kill Kabala, Constrictor Queen: +2 passive points
  • Keth + The Bone Pits - kill enemies within these 2 zones, and drop the Kabala and Sun Clan Relic.
  • Valley of the Titan - use the 2 Relics found above in the Altar to get:
    • 30% increased Charm Charges gained or
    • 15% increased Mana Recovery from Flasks
  • Deshar - Loot Final Letter from a body and give Shambrin: +2 passive points
  • The Spires of Deshar - Click on the Sisters of Garukhan Shrine: +10% lightning res

Act 3

  • Jungle Ruins - Kill Mighty Silverfist: +2 passive points
  • The Venom Crypts - Find Venom Vial and give Servi: Venom Draught bonuses (Stun Threshold/Elemental Ailment/Mana Regen Rate)
  • Azak Bog - Kill Ignagduk, The Bog Witch: +30 spirit
  • Jiquani's Machinarium - Kill Blackjaw, The Remnant: +10% fire res
  • Aggorat - Kill enemies until they drop Sacrificial Heart, sacrifice at the altar: +2 passive points

Act 1 Cruel

  • Clearfell - Kill Beira of the Rotten Pack: +10% cold res
  • Hunting Grounds - Kill Crowbell: +2 passive points
  • Ogham Farmlands - Find Una's Lute: + 2 passive points
  • Ogham Manor - Kill Candlemass, The Living Rite: 8% increased maximum life

Act 2 Cruel

  • Keth - Kill Kabala, Constrictor Queen: +2 passive points
  • Keth + The Bone Pits - kill enemies within these 2 zones, and drop the Kabala and Sun Clan Relic.
  • Valley of the Titan - use the 2 Relics found above in the Altar to get:
    • 30% increased Charm Charges gained or
    • 15% increased Life Recovery from Flasks
  • Deshar - Loot Final Letter from a body and give Shambrin: +2 passive points
  • The Spires of Deshar - Click on the Sisters of Garukhan Shrine: +10% lightning res

Act 3 Cruel

  • Jungle Ruins - Kill Mighty Silverfist: +2 passive points
  • The Venom Crypts - Find Venom Vial and give Servi: Venom Draught bonuses (Chao res/All attributes/reduced Slowing Debuff)
  • Azak Bog - Kill Ignagduk, The Bog Witch: +40 spirit
  • Jiquani's Machinarium - Kill Blackjaw, The Remnant: +10% fire res
  • Aggorat - Kill enemies until they drop Sacrificial Heart, sacrifice at the altar: +2 passive points

How it Works

FAQs

Why is my damage low?

  • The Pillar of the Caged God scales with flat damage on the weapon, so you want to socket 2x Glacial Runes for more flat damage. Corrupted with Flat damage is great, but 3rd socket corruption is also fine.
  • Besides that, upgrading your ring slot with good flat damage rings will also help you get more damage. Check the Equipment Section notes.
  • Quality your Ice Strike and Tempest Bell to 20% quality

Why do I run out of mana before killing anything?

  • Get more damage means you kill things faster
  • Upgrade your mana flasks
  • At least 1x mana recover on kill sapphire jewel
  • Anointment on Amulet with Conservative Casting, or allocate that in the passive skill trees
  • Mana regen on jewels or from venom draught also helps

Need more help?

  • Check the comment section or ask in my discord. The link is in the description of the video or in my Mobalytics profile.

Changelog

Jan 24th - Initial Post

Video Guide

Table of Contents

Featured Builds

[0.4] CaptainLance9's Meteor Bear Shaman
Updated on Dec 20, 2025
Ben's HCSSF Bear Slam Pre League Plan
Updated on Dec 20, 2025
[0.4] Limitless Thunderstorm Sorceress
Updated on Dec 20, 2025
0.4 Fubgun Poisonburst Pathfinder
Updated on Dec 20, 2025
Pathfinder Poisonburst Build
Updated on Dec 20, 2025

Become a Creator

Want to earn rewards by sharing your builds with your community?