Build Overview
This is my Storm Wave + Flicker Invoker Monk Build for 0.4 and 0.5
How to League Start and Level - Guide Link
If you have questions - hit me on Twitch https://www.twitch.tv/ronarray I will help!
❗I also heavily recommend Dragon Monk for 0.5 League - Guide Link
▬▬▬▬▬▬▬▬▬▬▬▬▬▬▬▬▬▬▬▬
In 0.5 we dont have a lot of changes for the build, main kit still works the same.
▬▬▬▬▬▬▬▬▬▬▬▬▬▬▬▬▬▬▬▬
This Invoker Monk Build utilizes  Storm Wave - destroying enemies with almost 100% Crit Chance + AoE Branching Fissures II +
  Herald of Ash /
  Herald of Thunder.
For Bosses we have  Flicker Strike +
  Infernal Cry to ONE TAP even T4 Pinnacles.
That way Build can avoid downsides of Flicker Strike inconsistency in maps while keeping all cool bonuses to destroy stuff with it.
The Build is Tanky, enough to clear T3 Simulacrum or Juiced T15's and has GREAT Sustain with ES Recharge.
USE BUILD VARIANTS BELOW TO SEE BOSS / TANK SWAPS
Strengths and Weaknesses
- Very Tanky
- Great Sustain
- One Shots T4
- 100% Crit Chance
- Chaos + DoT Immunity
- Charge Management for Bosses
- Can be Mana Hungry
- Requires some Weapon Set setup
Build Variants
ES (Main Version)
T4 Bosses Swap (1 Item + 1 Gem)
Full Tank (T4 Simu)
Old Version (Legacy)
Equipment
ES (Main Version)
T4 Bosses Swap (1 Item + 1 Gem)
Full Tank (T4 Simu)
Old Version (Legacy)


IMPORTANT - Onset Ring is a must have to fit all the skills.
▬▬▬▬▬▬▬▬▬▬▬▬▬▬▬▬▬▬▬▬
Weapon:
For weapon Aiming for higher Physical damage + Elemental Damage with Attacks is the way for Prefixes.
At Suffixes getting + to level of Melee skills + Critical Chance / Critical Damage is the best combination as well. Make sure that you have 11% or Higher Crit Chance on the weapon to cap the crit.
Stat Priority should be:
Melee Levels > Crit Chance > Crit Damage > DPS > Ele Damage with Attacks > The Rest
For runes, go with Crit Damage 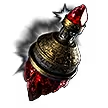 Soul Core of Ticaba.
If you cant afford those using  Greater Iron Rune could be a good option.
Weapon SWAP (Important):
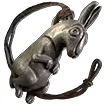
At the Weapon Swap we will need to use any  Rattling Sceptre to get some skeletons up +
  Redblade Banner to improve the Infernal Cry.
Add some  Soul Core of Zantipi to the Redblade Banner to make STR requirement lower.
Also make sure that you clicked on + to summon MORE skeletons at the second weapon set too.
Chest Armor:
For the body armor you need to focus on rolling Energy Shield prefixes to guarantee maximum amount of spirit from the Ascendency passive.
You can still roll resistances there too but maximizing amount of ES is the main goal.
You can get a hybrid Evasion + Energy Shield armour as well, but make sure that you're not sacrificing your Energy Shield numbers.
Helmet:
Take one with as much ES as possible to increase your pool and mminimize the chance for one shots. Aim for at least 350-400 ES on the helmet after quality and Greater Iron Rune
Rolling some Critical Hit Chance (20%+) is recommended. If you can get Resistances it will be perfect.
Gloves:
Gloves are playing huge role in our DPS, rolling Attack Speed / Lightning Damage and Level of Melee Skills there helps a lot. Aim to get at least 2 of those out of the 3 - the rest are ES and Defensive stats.
Priority should be:
+to Melee Skills >> Lightning / Fire Damage >> Attack Speed is less important
Use  Thane Grannell's Rune of Mastery to get more dmg,
  Idol of Sirrius for more attack speed OR
  Boar Talisman if you don't have RAGE on the Jewels.
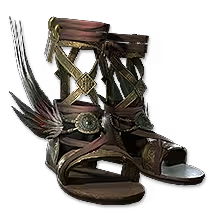
Boots:
At the boots we need at least 25% Movement speed to feel comfortable.
The rest is Rarity + Some Resistances. It can also be a good source of Energy Shield so you can get at least 250+ ES there if you have the budget.
Amulet:
Amulet provides a lot of ES and damage, since we can roll Critical Hit Chance, Critical Hit damage and +Melee Skills levels which are great. Priority should be:
Melee Skills > Crit Chance > Energy Shield > The rest is less important.
We need to anoint  Stormcharged for extra dmg.
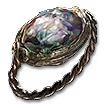
Rings:
IMPORTANT - To fit all skills in the list you will need at least 1  Unset Ring
For the rest of the stats - Rings should provide Flat Lightning damage to improve DMG.
You can also roll resistances, mana, other types of flat damage (fire would be the best) and rarity there.
Make sure to have at least 1 ring with Mana / Mana Regeneration to feel better.
Use Catalysts to improve damage - Reaver Catalyst or Esh's Catalyst would be perfect for that.
Belt:
Your best option there is  Headhunter but you can use
  Shavronne's Satchel on a budget.
Shavronne's Satchel provides great QoL making our Life Flask applied to ES so we can drop  Eternal Youth from the build and KEEP RECHARGE making the sustain very comfortable.
If you want a DPS option - use  Darkness Enthroned with offensive runes from the Gloves.
IMPORTANT - For Shavronne's Satchel to work properly it SHOULD be Combined with  Olroth's Resolve or Magic Instant Life Flask (where some % recovery is instant).
❗To recover ES, you need to tap the flask MULTIPLE times.
You can get a corrupted version for some resistances or ES% and INT from it comes in handy too.
Jewels (Important):
2% Of Mana Recovery on Kill is MANDATORY to fix your man. Perfectly you need to run 2 or even 3 of those. After that look for Energy Shield % + Critical Hit Chance.
 Heart of the Well can help you with Rage Generation and add extra dmg.
 Against the Darkness with extra Lightning Damage is recommended, it can be relatively cheap without the second stat. Place it around
  One with the Storm.
If you've got the budget, get Extra Lightning and Extra fire or Cold.
Flasks:
Olroth's Resolve is the best option for Life Flask - if you cant afford it run any Life Flask with % of instant Recovery. Instant recovery is Necessary for Shavronne's Satchel to work properly.
For Mana Flask just aim to get as many Charges as you can. Perfectly your mana Flask should have ~120 Charges for Ambrosia
Rarity:
To get the Rarity into the build you can roll some on the Boots, Rings, Gloves or Helmet.
It is usually recommended to only focus on ES for Helmet so try to get enough for your goals from the rest of the items mentioned.
Skill Gems
ES (Main Version)
T4 Bosses Swap (1 Item + 1 Gem)
Full Tank (T4 Simu)
Old Version (Legacy)
Support Gem Requirements:
Str 35
Dex 70
Int 35
1
Storm Wave
2
Flicker Strike

3
Charged Staff
4
Herald of Ash
5
Herald of Thunder
6
Infernal Cry

7
Profane Ritual

8
Sacrifice

9
Skeletal Warrior

10
Cast on Critical
Gem Priority


+14
IMPORTANT
1. Click on Boss Variation Above to See swap for T4 Pinnacles (It is 1 Gem + 1 Item only).
2. You will need at least 1 Unset Ring with Grant Additional Skill Slot to Fit ALL Skills
3. Make sure that Profane Ritual, Infernal Cry are set ONLY to Weapon Set 2 while Cast on Critical Herald of Ash are set to Set 1
4. Sacrifice should now be active in both Weapon sets (1 and 2) in 0.3
▬▬▬▬▬▬▬▬▬▬▬▬▬▬▬▬▬▬▬▬
We are now using Storm Wave with Branching Fissures II and Pinpoint Critical to provide AOE and better clear.
Against Bosses we will use Flicker Strike together with Infernal Cry to deal HUGE Amount of damage and one tap even T4 Pinnacles.
Cast on Critical + Profane Ritual is going to generate charges for us and Sacrifice will be used to generate before boss fights.
New Setup for Flicker Strike:
After all the changes it is heavily recommended to add Garukhan's Resolve support to your Flicker setup, it can help you with both, crit chance to reach a hundred AND improving the damage.
Perfectly you need to have 100% crit chance without it to always have an additional damage boost.
How to Generate Charges on Bosses:
After all the changes you will need to have Sacrifice active in BOTH Weapon Sets. We dropped some spirit gems to achieve that.
To generate charges before the boss fight you will need to swap to weapon set 2 so it will summon your Skeletal Warrior from Rattling Sceptre.
Now just cast Profane Ritual at them and receive charges. Make sure that your Profane Ritual is assigned to weapon set 2.
After you are at maximum (usually 6 or 7 charges) cast Charged Staff and get to the maximum charges again by sacrificing Skeletons before entering the fight and casting the Flicker Strike.
How to Generate Charges in Maps:
In maps charges are generated automatically from your Cast on Critical + Profane Ritual setup.
You can use those charges to cast Charged Staff with 100% uptime and use Flicker Strike against Map bosses or tougher rares if you like it.
Do NOT Flicker into the packs of monsters, it can lead to bad results - Just clear them with your Storm Wave instead.
What Improves our Clear:
To improve the clear speed we are using Branching Fissures II at wave together with nice explosions from Herald of Ash and additional help from Herald of Thunder.
What If I don't have an Additional Skill Slot:
In such case you will need to drop 1 Skill and will have a few options which one:
1. Cast on Critical - CoC there to just generate charges and can be dropped without losing too much. You can always just weapon swap to get the charges, but it will be more clunky.
2. Infernal Cry - since cry is used mostly for pinnacles you can drop it and add it back replacing one of the Heralds before the Pinnacle fight.
Potential Swaps:
When you are fighting T4 Pinnacles - add Overcharge to your Charged Staff for more damage.
You can also replace Inevitable Critical or Excise with Concentrated Effect or Close Combat for Flicker Strike setup if you have too much crit chance on the weapon and already have 100%.
 Convalescence can be replaced with
  Wind Dancer or
  Blink or even
  Blasphemy if you have enough spirit or would like it more.
What If you Lack Spirit:
Make sure that Sacrifice is allocated IN BOTH in the weapon Set 2 and Weapon Set 1.
In such case start with dropping Persistent Supports. Precision is the first one to drop.
After that Herbalism and even Clarity if you still out of spirit.
Can we use BLINK to be Faster:
If you feel like Blink is necessary for comfortable gameplay for you - deactivate Sacrifice and run Blink it instead. Get Sacrifice back for boss fights.
How to Sustain your ES:
Shavronne's Satchel will make your flask regenerate ES so you can just heal yourself with Flask if needed. Make sure that for it to work you will have Flask with INSTANT Recovery or Olroth's Resolve Herbalism will help a lot with it making our recovery pretty big from a single flask use.
You will also constantly recover your ES since you have Recharge with only ~2seconds delay so just try to run back and avoid enemies if you need to recharge.
Rotation Against Pinnacle Bosses:
You can check the item + gem swap for T4 Pinnacles in the Build VERSIONS Above. Just Click to see it.
Charges --> Charged Staff --> Charges Again --> Wait for Boss to Spawn (His Health will Appear) -->
![]() Unbound Avatar if you have it --> Infernal Cry Twice --> Flicker Strike
Unbound Avatar if you have it --> Infernal Cry Twice --> Flicker Strike
More info about rotation with timestamp - youtu.be/JrsFRvOKblg?t=760
Quality Priority:
Flicker Strike → Cast on Critical → Storm Wave → The Rest is less important.
Passive Tree
ES (Main Version)
T4 Bosses Swap (1 Item + 1 Gem)
Full Tank (T4 Simu)
Old Version (Legacy)
main:
123
123
set 1:
20
20
set 2:
20
20
We are still going full Lightning Crit, Investing heavily into both Crit Chance / Crit Bonus nodes.
How to get RAGE:
Rage sgould be generated from Heart of the Well mod OR Boar Talisman in the gloves.
Flasks and Recovery:
For Shavronne's Satchel to work properly you will need  Ultimate Life Flask with Instant Life recovery OR Olroth's Resolve.
How to Cap Crit Chance:
For that we will need to take all Crit chance nodes that are in the way. If you have a choice between Crit Chance and Crit Damage - Always Pick Crit Chance if you are not capped.
We are also using Rare jewels with Crit Chance and you can read about those above.
Pinpoint Critical should help a lot to reach ~90% Crit chance for Storm Wave
And for Flicker Strike combo of Excise + Inevitable Critical should bring you close to 100% Crit.
If you are NOT Close to 100% at Flicker Strike try to drop  Throatseeker and invest points into small 10% Crit Chance Nodes around.
Mana Management:
We are using 2 (or even 3) Jewels with 2% Mana on Kill so it should be enough in the most cases.
Adding Clarity + Mana / Mana Regeneration on Rings should help a lot so make sure that you have at least 1 Ring with some mana.
If it is still not enough pick  Conservative Casting for 3 points lowering your mana cost.
You can also use Efficiency IIas a support for Storm Wave if your damage is high enough.
If You are lower level / short on Points:
In such case you can drop  Maiming Strike,
  Pure Energy, One with the Storm or small ES + Evasion nodes.
Stuns + Freeze Avoidance:
To make sure you are not getting stunned too often or frozen we are using  Dampening Shield + 8% Stun and Ailment Small Passive close to
  Chaos Inoculation.
Apart from that  Stone Charm +
  Thawing Charm should help with it as well.
If it is still not enough and Ailments / Stuns are bothering - take  Abasement + Shimmering Mirage
Those nodes are in the tree a little to the right from Chaos Inoculation
Why Charge Nodes are Important:
Both  Overflowing Power AND The Power Within can boost our DPS and pretty important to the build. More charges will give us more flat damage from Charged Staff AND Improve the damage cap of Flicker Strike as well.
So make sure you have both allocated early.
Ascendancy Order:
1.  Sunder my Enemies...
2.  I am the Thunder...
3.  Lead me through Grace...
4. ![]() Unbound Avatar
Unbound Avatar
Atlas Tree
ES (Main Version)
T4 Bosses Swap (1 Item + 1 Gem)
Full Tank (T4 Simu)
Quest Rewards
Check which quests you’ve completed on your character
Clearfell — Beira of the Rotten Pack
Not Specified1 choice
Hunting Grounds — The Crowbell
Not Specified1 choice
Freythorn — The King in the Mists
Not Specified1 choice
Ogham Farmlands — Una's Hut
Not Specified1 choice
Ogham Manor — Candlemass, the Living Rite
Not Specified1 choice
Keth — Kabala, Constrictor Queen
Not Specified1 choice
Valley of the Titans — Medallion
Not Specified2 choices
Deshar — Final Letter
Not Specified1 choice
The Spires of Deshar — Sisters of Garukhan
Not Specified1 choice
Jungle Ruins — Mighty Silverfist
Not Specified1 choice
The Venom Crypts — Venom Draught
Not Specified3 choices
Jiquani's Machinarium — Blackjaw, the Remnant
Not Specified1 choice
The Azak Bog — Ignagduk, the Bog Witch
Not Specified1 choice
The Molten Vault — The Molten Vault
Not Specified1 choice
Aggorat — Blood Sacrifice
Not Specified1 choice
Journey's End — Captain Hartlin
Not Specified1 choice
Eye of Hinekora — Navali's Rest
Not Specified1 choice
Halls of the Dead — Yama The White
Not Specified1 choice
Halls of the Dead — Tawhoa's Test
Not Specified2 choices
Abandoned Prison — Goddess of Justice
Not Specified2 choices
Halls of the Dead — Tasalio's Test
Not Specified2 choices
Halls of the Dead — Ngamahu's Test
Not Specified2 choices
Wolvenhold — Oswin, the Dread Warden
Not Specified1 choice
The Khari Crossing — Akthi and Anundr
Not Specified1 choice
The Khari Crossing — Molten Shrine
Not Specified1 choice
Qimah — Tabana's Pillar
Not Specified7 choices
Kriar Village — Lythara, the Wayward Spear
Not Specified1 choice
Howling Caves — The Abominable Yeti
Not Specified1 choice
Video Guide
Build Planner Export
Export this build variant directly to your game.
Path of Building Code
Table of Contents
Featured Builds


Become a Creator
Want to earn rewards by sharing your builds with your community?