Perimeter, the starting zone, on the outskirts of the colony (5 teams of 3).
Updated on June 2nd 2026
Perimeter, the starting zone, on the outskirts of the colony (5 teams of 3).
Updated on June 2nd 2026
Perimeter is the starting zone on Tau Ceti IV, situated on the outskirts of the UESC colony and originally designated as an expansion and terraforming site.
The map features wide exterior terrain and industrial infrastructure tied to early settlement efforts, including Points of Interest such as the Data Wall, the Hauler, and the Twin Relays, which indicate large-scale data collection and transmission systems—many of which now appear dormant, though still guarded by UESC forces.
"You're going to start with Perimeter, where you're on the outskirts of the colony. It's a little more spread out with more areas to be safe and to sneak around. But it's also a little more straightforward. It really brings the sense of scale. It sits in our fantasy as an expansion site for the colony on the very edges where they had settled on Tau Ceti. UESC are also there trying to understand what has happened and secure the area."
Players | Teams | Threat |
|---|---|---|
15 | 5 teams of 3 | Low |
For more explanation on how to complete Perimeter's map events, check out this in-depth video by our expert, Wallzer.
The Intercept requires you to find a panel with a three number code and activate it.

From there, you'll see multiple highlighted pings for other panels on the map, and you must find the one that matches the number on the original panel.

You can see the original number at all times at the top right where your contract is listed.
Once you find it, activate it and then wait for a keycard to pop out of it and reveal a ping for the last location.

At the last location, enter the keycard into the terminal to spawn three UESC dropships. These will have high-tier enemies and one ship will have a bright yellow supply crate.

You must shoot it down before it leaves or you will miss out on its rewards.
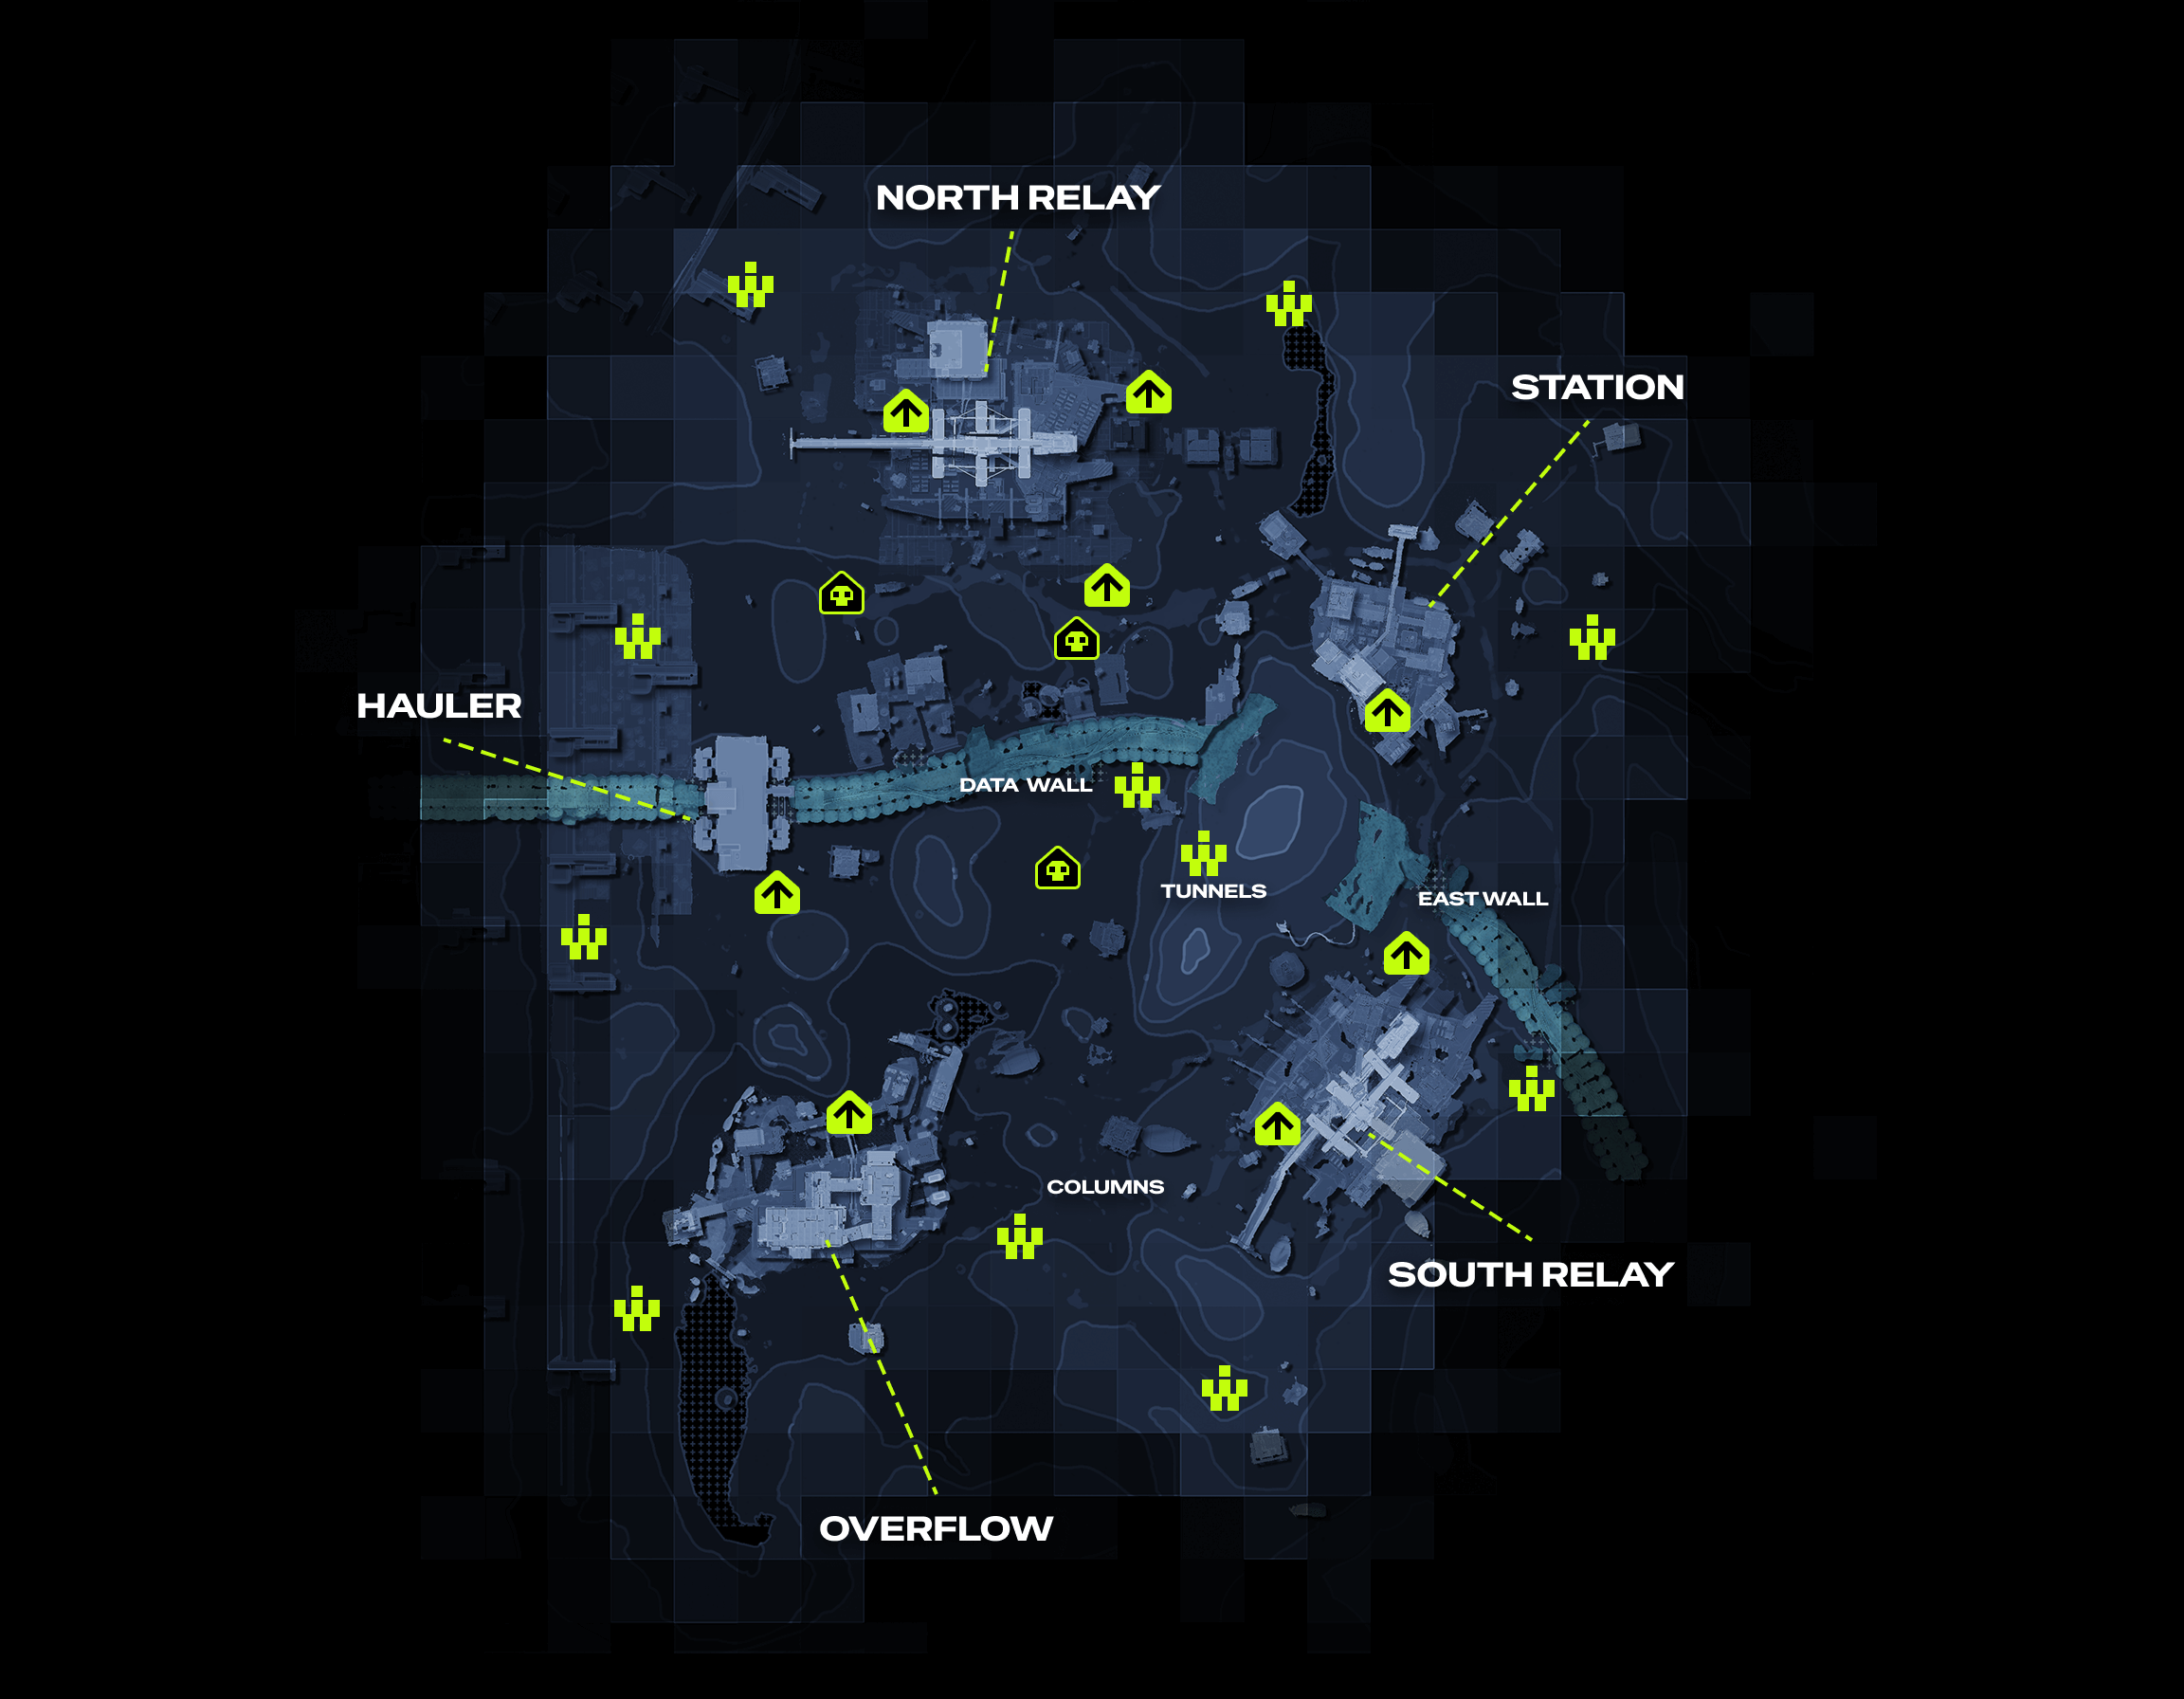
Press on the Map to see in full-screen
Map Legend | Number on the Map |
|---|---|
| 11 |
| 7 |
| 3 |
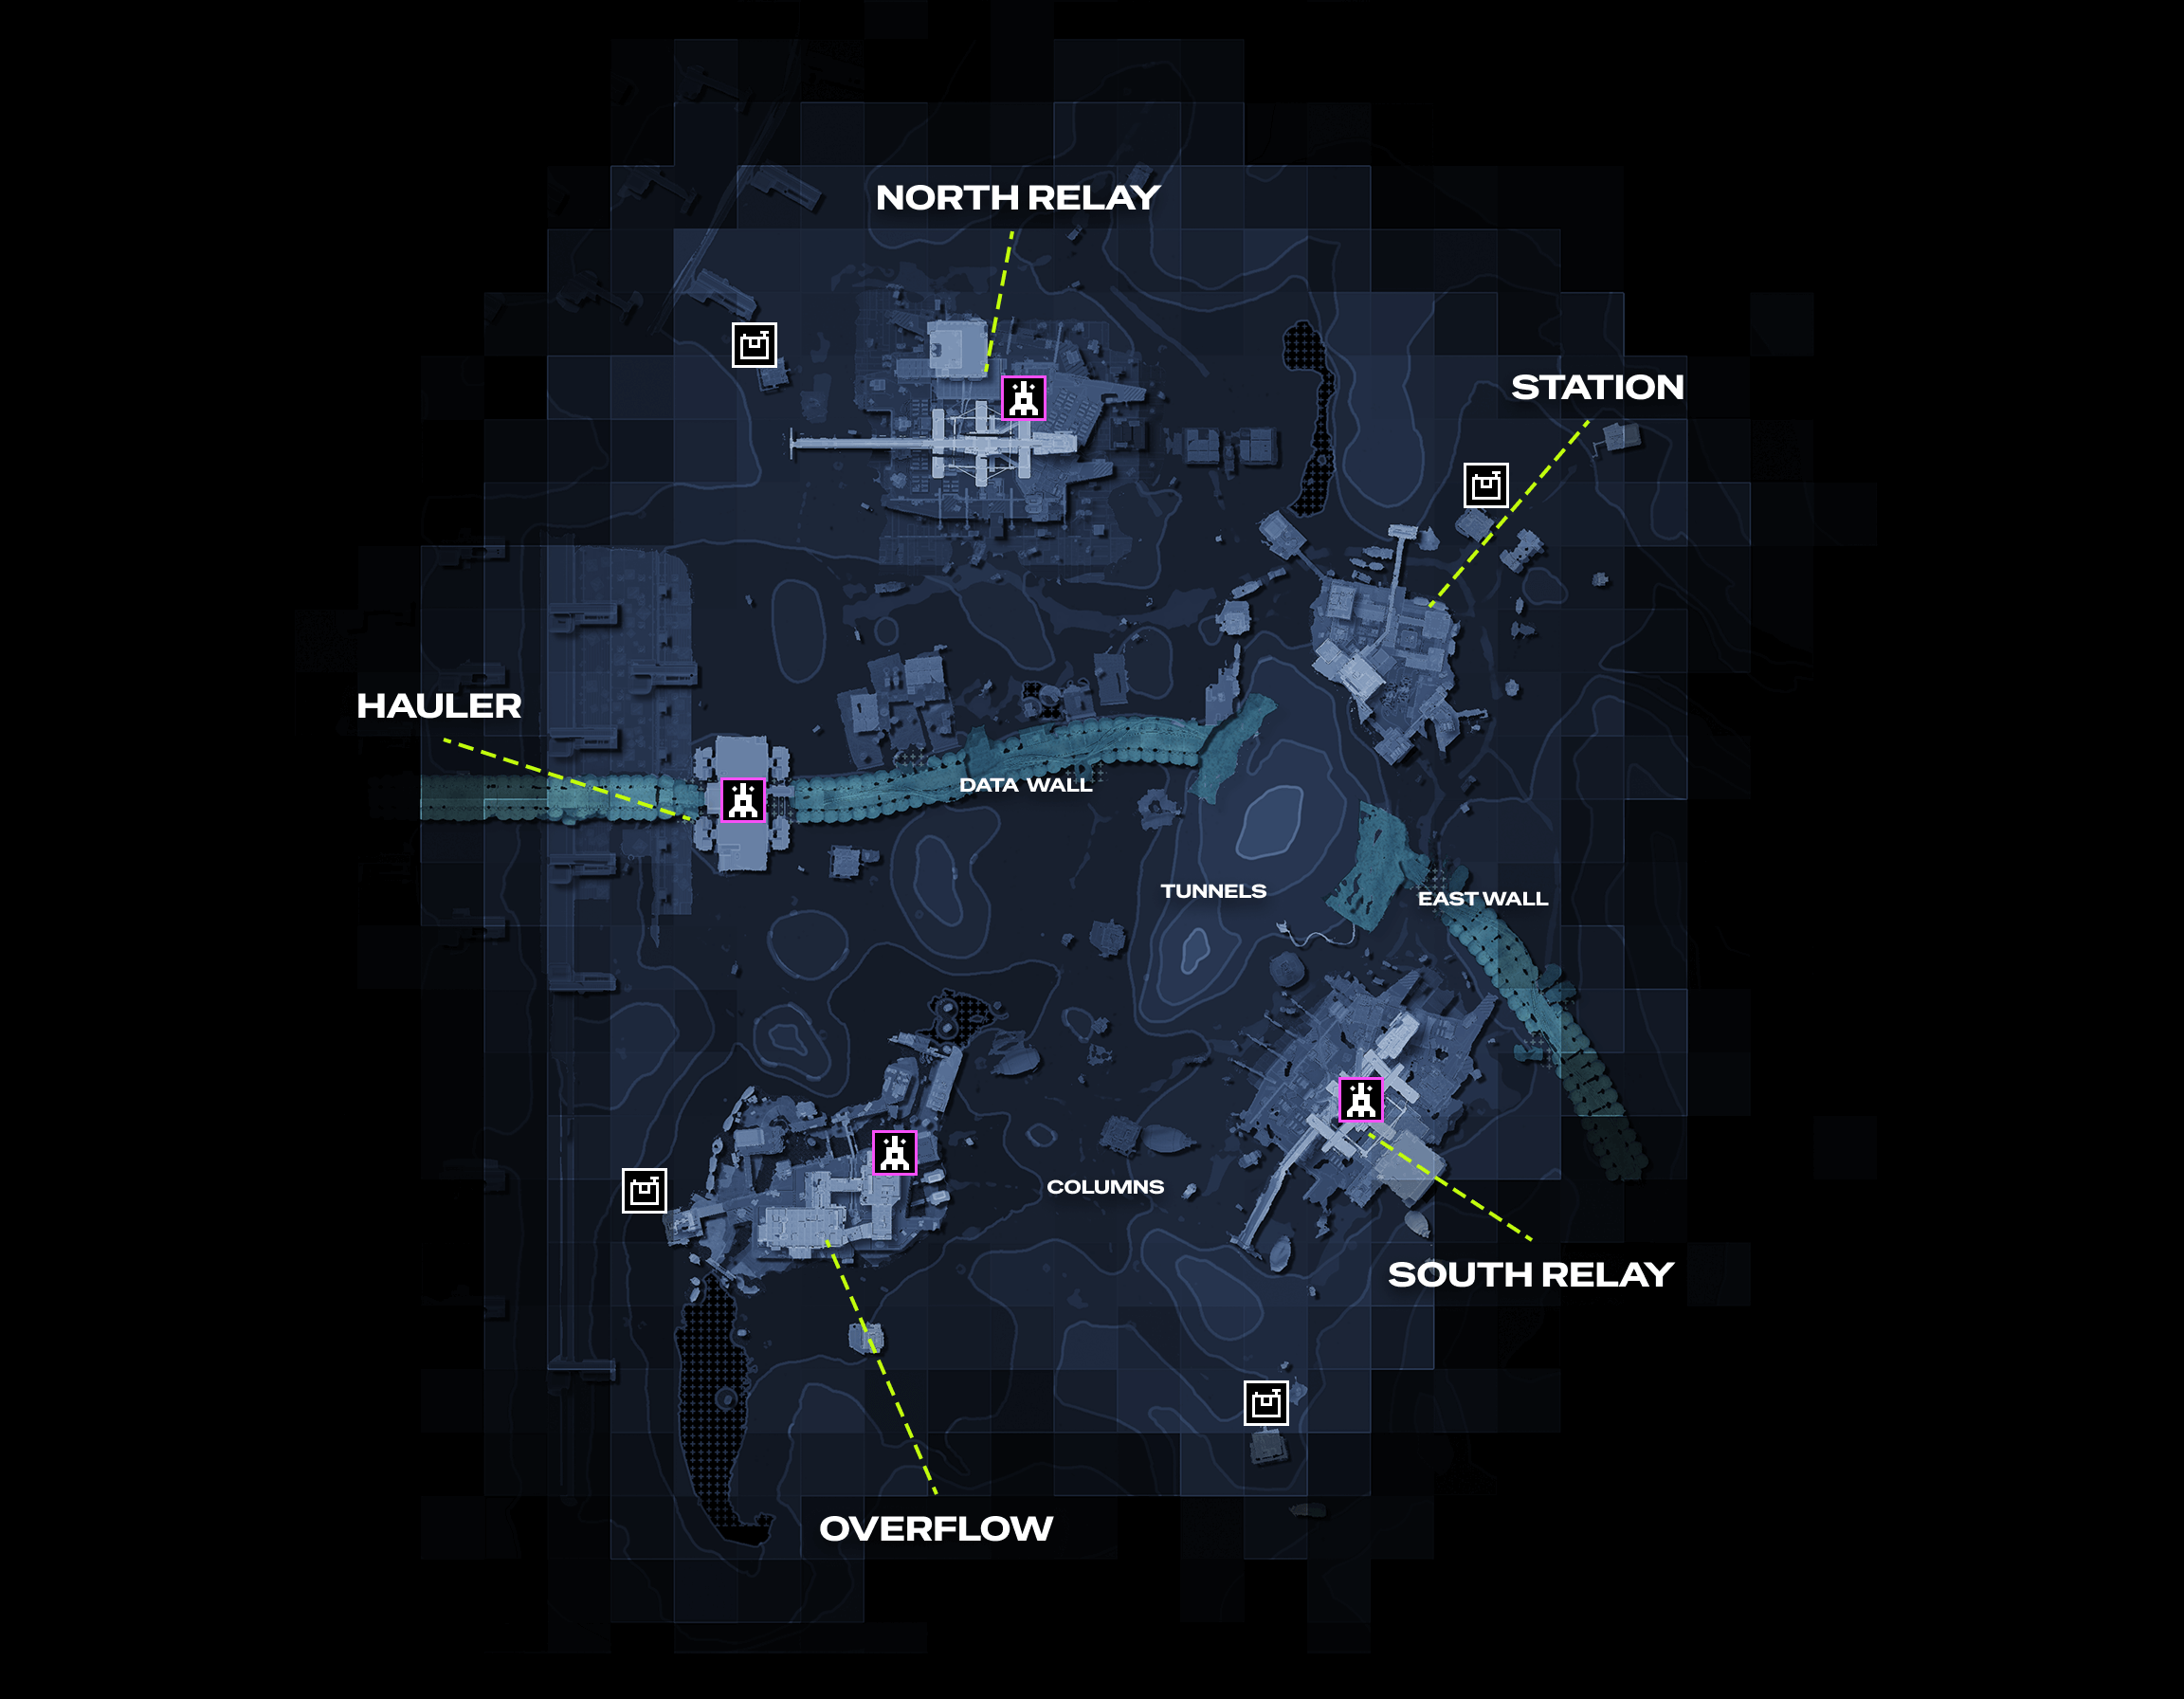
Press on the Map to see in full-screen
Map Legend | Number on the Map |
|---|---|
| 4 |
| 4 |
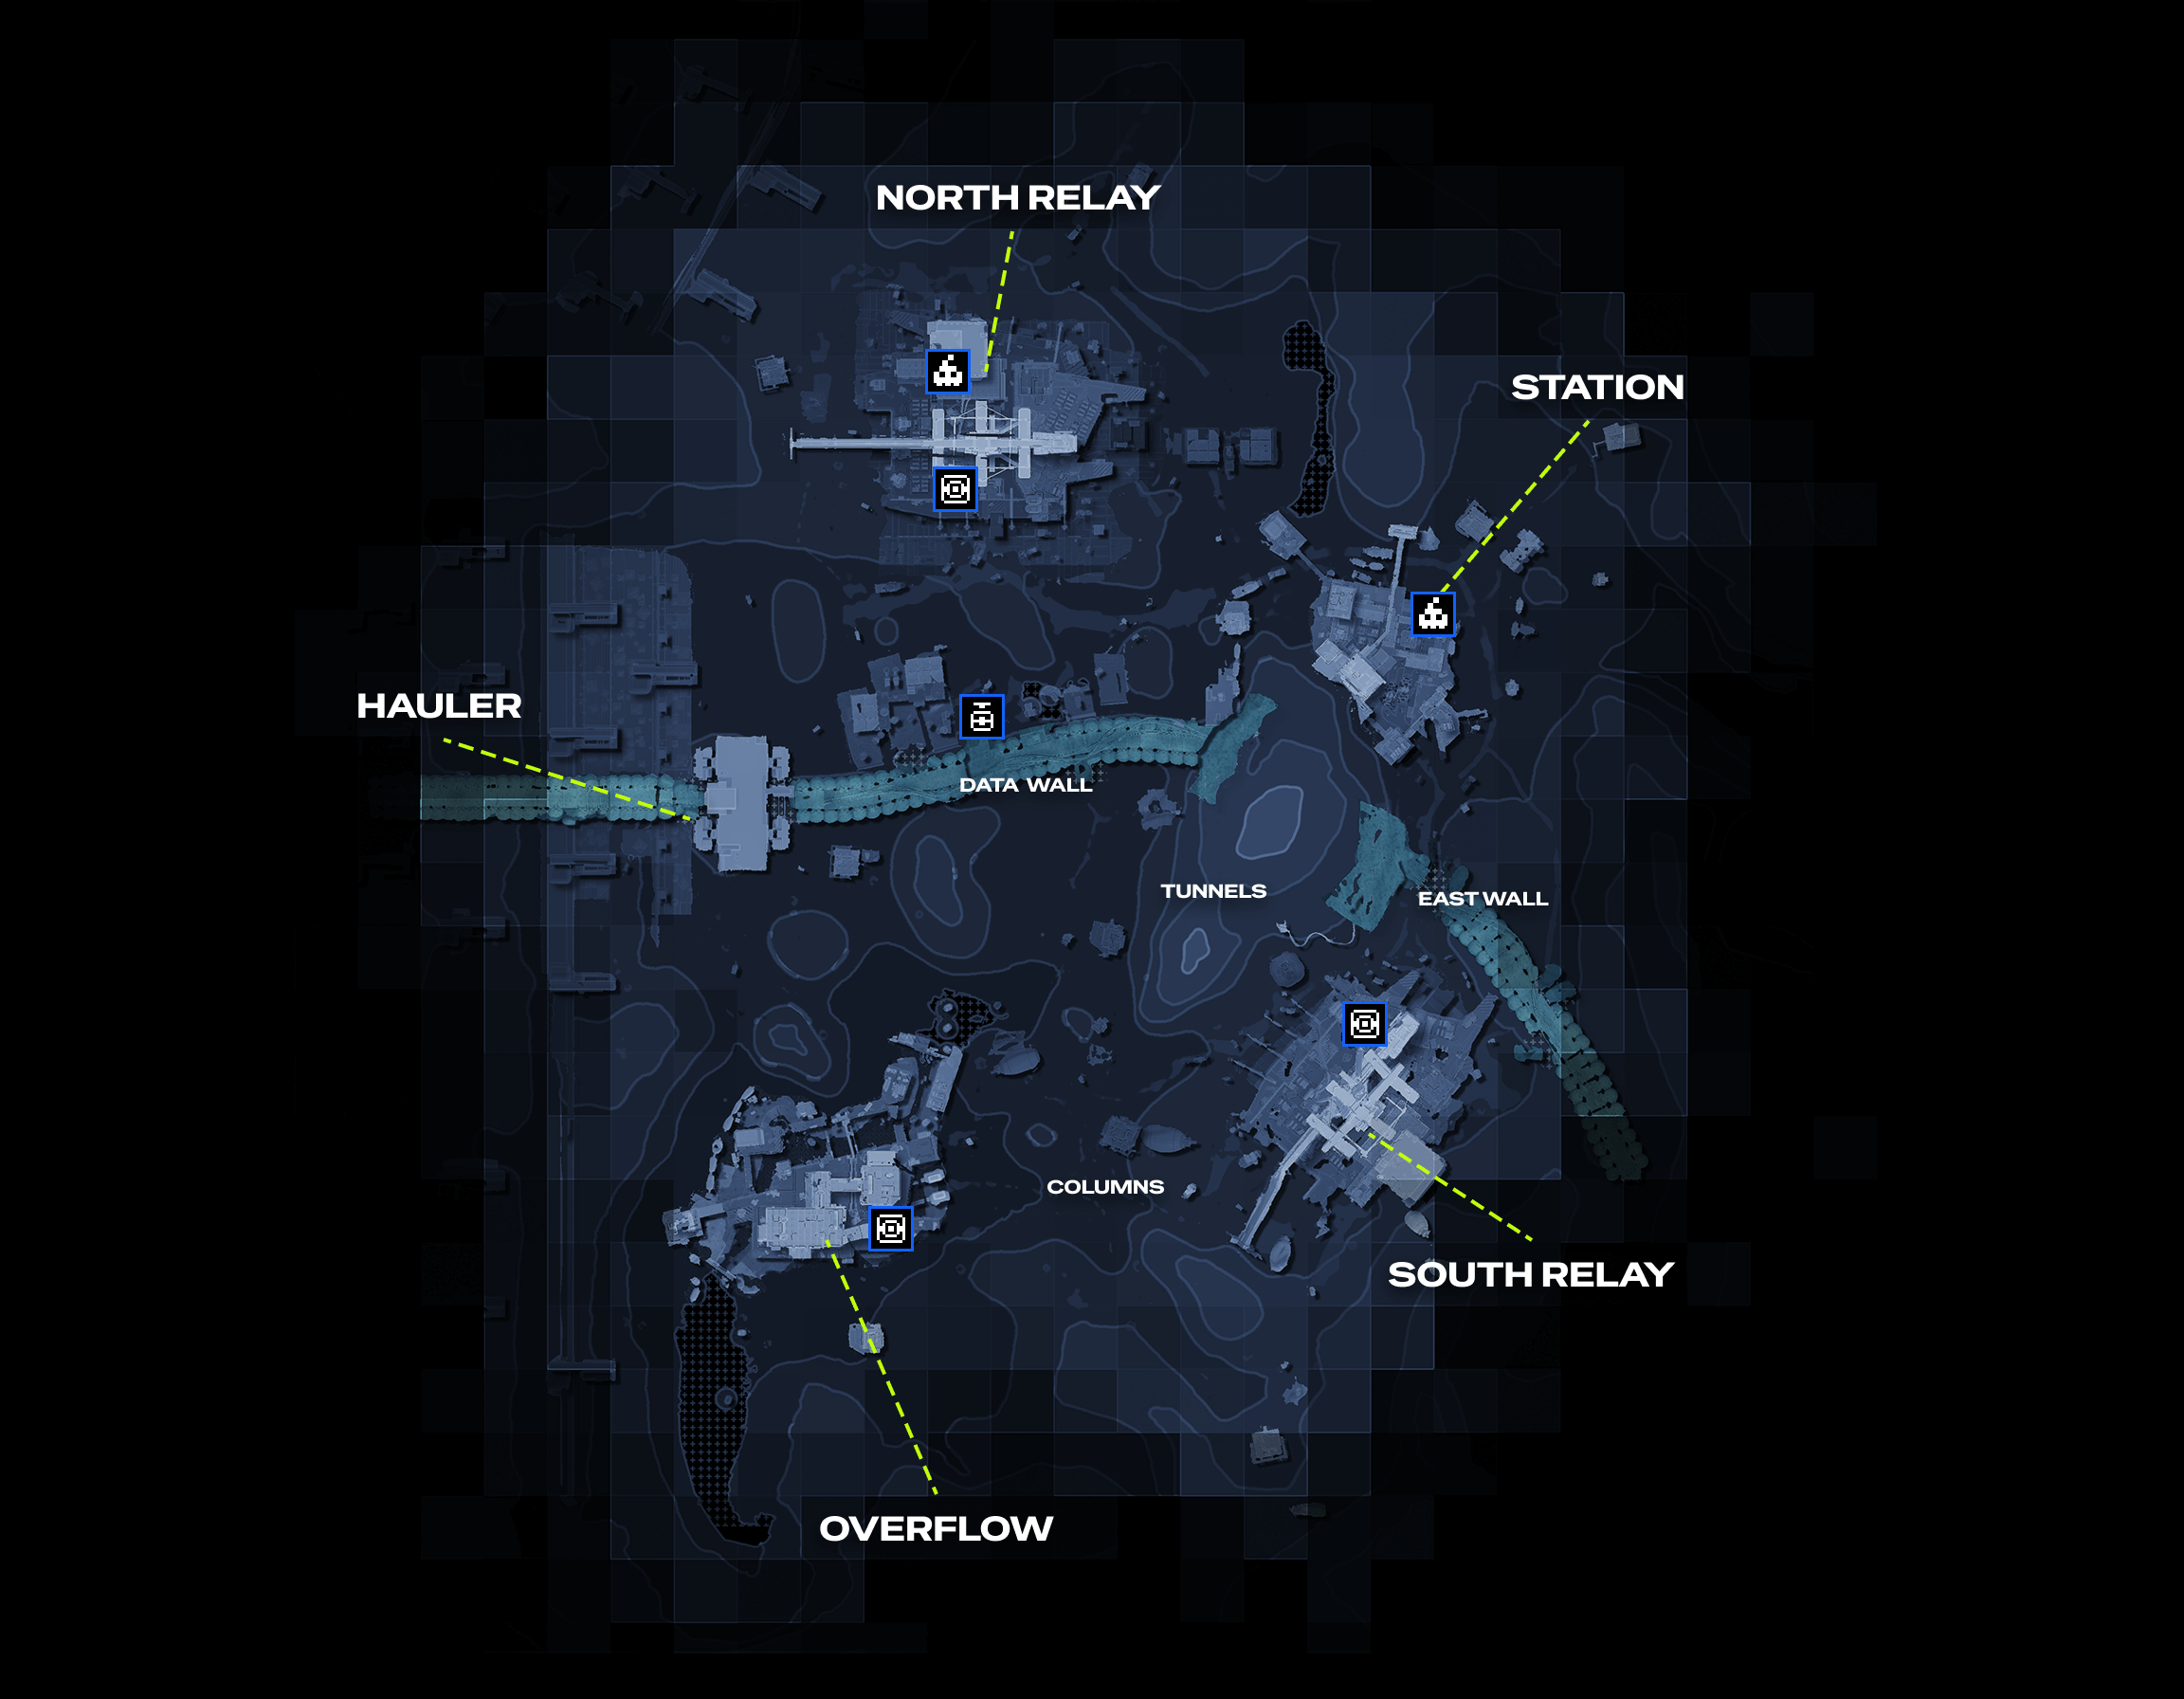
Press on the Map to see in full-screen
Map Legend | Number on the Map |
|---|---|
| 1 |
| 2 |
| 3 |
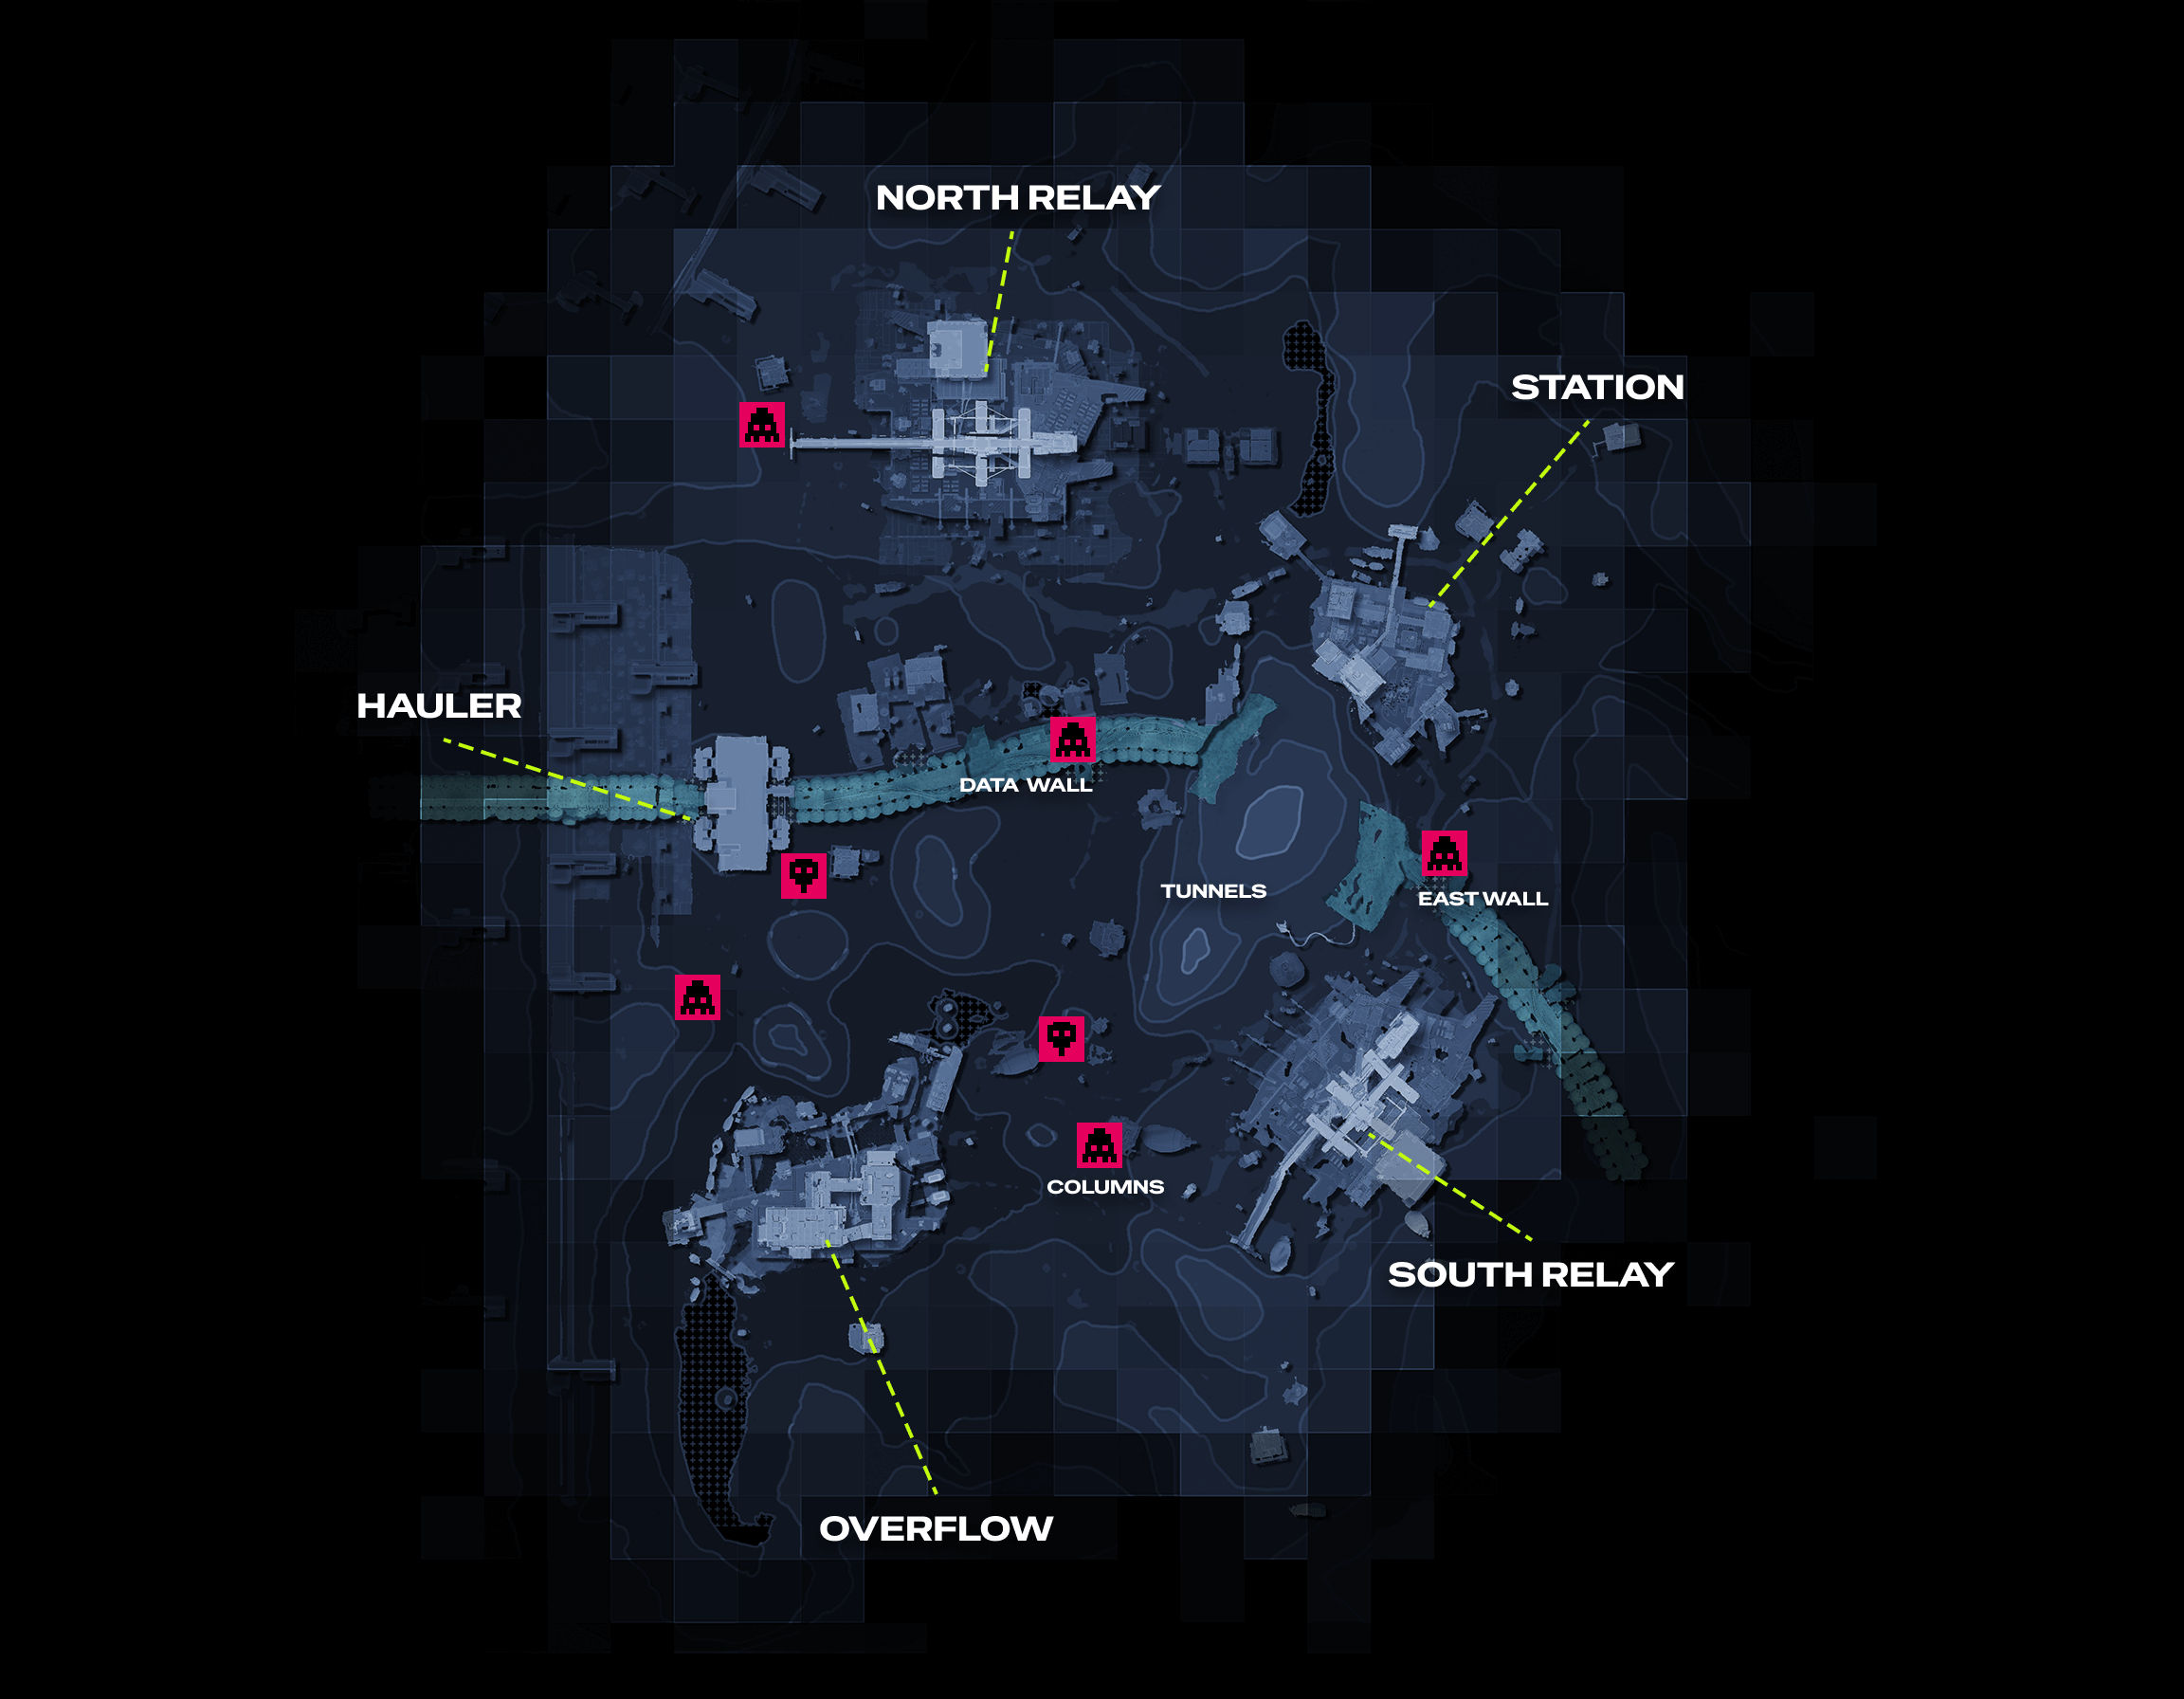
Press on the Map to see in full-screen
Map Legend | Number on the Map |
|---|---|
| 5 |
| 2 |


