menu
MobalyticsUse your favourite features in-game with our Desktop App
Gamebase

Aniimo Tier List - All Best Aniimo Ranked

Guides
Lists
Aniimo
By Mobalytics
Updated on Nov 6, 2026
Nov 6, 2026

Overview

This is a general ranking covering the final-stage form of every Aniimo across the five separate roles: DPS, Heal, Regen, Break, and Support.

For Aniimos that can perform on multiple different roles, such as Luminelle, the placement below reflects their best-performing role, since that's where their real value sits.

This list was curated by our experts, Augiesaint and CoffeeASAP. Make sure to check out the individual Tier Lists below, broken down by role, for more explanations and videos explaining the rankings.


Tier List

SS
Fulmintis
Somniwing
Hypnyto
S
Malevsera
Irisalis
Grizbo
Gachapus
Glacy
Glameep
Wavwal
Tubster
Glynsera
Eklue
Dreaple
Whirlbite
Ekrim
Scrubbit
Turbo
A
Fenmane
Pawney
Infergon
Lunara
Waleetle
Thornblade
Stellarys
Leafy
Erlath
Melloblum
Geoclaw
Besauce
Minespine
Helgon
Panpanta
Rookey
Tromber
Luminelle
Coraliz
Fragrancier
Gracewing
Piopiota
Dazmand
Scorchhowl
Inferlupa
Jeburst
B
Helion
Ignitis
Cornet
Flamerion
Pomawk
Blazen
Tuckin
C
Hexxin
Shrubclaw
Bailite
Sherro
D
Irisal
Magmarex
Bouldus

Ranking Explanations

SS Tier

  • Fulmintis: The best DPS in the game. Has a self-sustaining loop of crits, resource refunds, and stuns that snowballs harder than anything else on this list.
  • Somniwing: The best regen Aniimo in the game, attacking the EP problem from every angle at once without needing any specific team build.
  • Hypnyto: Very strong new ranged Wind dps from the battle pass that focuses on crits to deal tons of damage hes kit also gives increased crit and is best used with Eklue as he's support.

S Tier

  • Malevsera: The second-best DPS Aniimo in the game, a self-harming, self-healing loop that gets stronger the lower its health drops.

  • Irisalis: Another top DPS Aniimo with an overloaded kit of clones, cost reduction, team healing, and self-revival, with its clone-based heal effect just a side bonus to its real strength.

  • Grizbo: A simple, high-ceiling DPS Aniimo whose ultimate skips its setup entirely and cashes out for big damage.
  • Gachapus: A luck-based DPS Aniimo whose ultimate bypasses RNG to enter a fully powered mode.
  • Glacy: A pure healing Aniimo with a 10% instant team heal and no gimmicks required to use it.
  • Glameep: A heavy healing and shielding Aniimo held back only by needing consistent field time.
  • Wavwal: A break Aniimo that can deliberately trigger its own low-health state for a 40% break boost, then heal and shield the team off the back of it.
  • Tubster: A self-sufficient break Aniimo that shields itself for a 40% boost while also protecting and buffing the whole team.
  • Eklue: A wind support Aniimo offering damage buffs, resistance reduction, and crowd control with almost no setup required.
  • Dreaple: A dark support Aniimo whose nightmare mechanic lowers enemy resistance and buffs team damage, heals, and can silence enemies.
  • Turbo: A flexible healing and support Aniimo that works in any team.
  • Whirlbite: New Melee Water dps that relies on moving a lot to proc hes passive for some Insane burst damage and also relies a lot on water debuff stacks best paired with Dewple.
  • Ekrim: Newly added Dark breaker that is built around crit damage and crit to proc hes passive that pull him to hes target and heals him at the same time, dealing tons of break damage at the same time.
  • Scrubbit: Insane New water Breaker that can basically do everything. He has very strong break a personal shield and a self heal little froggy is a one man army!

A Tier

  • Fenmane: A lightning DPS Aniimo one good setup away from S tier, chaining bursts into stored, marked damage.
  • Geoclaw: A break Aniimo that builds its own ice stacks and hits 40% better break with zero outside setup.
  • Gracewing: The single most locked-in top pick across every role covered, an off-field healer delivering massive team healing and cleansing without ever needing to be summoned.
  • Pawney: A boss-killing DPS Aniimo that explodes in damage once an enemy is broken or stunned.
  • Infergon: A DPS Aniimo that applies its own fire stacks instantly for a self-sufficient damage spike.
  • Luminelle: One of the very best Aniimo in the game overall, a support that buffs lightning damage, basic attacks, break, and healing all from one kit that only gets stronger as the lightning roster grows.
  • Lunara: A complete, self-sustaining DPS Aniimo that buffs, heals, and permanently strengthens itself.
  • Coraliz: A regen Aniimo trusted alongside Somniwing, with a 30 EP refill built into its base kit regardless of team composition.
  • Inferlupa: Good Aniimo, pairing one of the highest raw break stats with a debuff that makes the enemy itself easier for the whole team to break.
  • Waleetle: A high-ceiling DPS Aniimo that charges into a stronger, faster attack against vulnerable enemies.
  • Melloblum: A grass crit support Aniimo capable of a 70% crit damage buff that turns an entire team's crits into a snowballing engine, with its weak dedicated healing skill irrelevant next to that kit.
  • Thornblade: A clean combo DPS Aniimo rewarding precise counter timing and crit scaling.
  • Stellarys: A reliable DPS Aniimo built around mobility, clone summons, and crowd control escape.
  • Leafy: A grass-locked but powerful healing Aniimo with a large instant team heal and EP restoration, more ordinary outside a grass team.
  • Erlath: A water-locked regen Aniimo capable of S tier output in the right team through its bubble mechanic.
  • Besauce: A clean, restriction-free regen Aniimo with a strong free refill and no team requirements.
  • Minespine: A break Aniimo tied for the highest break stat in the game, boosted further and made safer while underground.
  • Helgon: A break Aniimo that rewards aggressive, close-range play with big bonuses if the timing lands.
  • Panpanta: A break Aniimo with one of the highest ceilings in the game, held back by a fiddly family and puddle setup.
  • Rookey: A break Aniimo that makes the enemy itself easier to break for the whole team.
  • Tromber: An underrated wind support Aniimo boosting team damage while steadily weakening enemy resistance.
  • Fragrancier: A dark support Aniimo that weakens the enemy, buffs damage, heals, and stuns.
  • Piopiota: A water support Aniimo combining a team damage buff with team healing, limited by a specific team requirement, with the puddle-based healing form of its kit just the same engine at work.
  • Dazmand: A lightning support Aniimo offering free abilities, a crit rate buff, and one of the longest stuns on this list.
  • Jeburst: Great new Wind Breaker that can pop hes ult quite often due to hes passive and he flys around avoiding damage doing a ton of break damage making him a very solid wind breaker.

B Tier

  • Helion: A safe, self-sustaining starter DPS Aniimo with no major weaknesses but no standout mechanic either.
  • Ignitis: A DPS Aniimo that snowballs against groups but loses power in single-boss fights.
  • Cornet: A fast, safe ranged DPS Aniimo held back by vulnerability during its strongest attacks.
  • Flamerion: A regen Aniimo that returns solid EP in a fire-stacking team but underwhelms without one.
  • Pomawk: A break Aniimo built around a timing mechanic that rewards precise execution.
  • Blazen: A break Aniimo that gets faster and cheaper once it enters overcharge, but lacks a defining break multiplier.
  • Tuckin: A minion-based break Aniimo whose ceiling depends entirely on its summons performing.
  • Scorchhowl: A hard-hitting but inconsistent DPS Aniimo that depends heavily on precise dodge timing.

C Tier

  • Glynsera: A DPS Aniimo that builds toward one big attack but is slow and repetitive to reset.
  • Hexxin: A regen Aniimo with a guaranteed but unremarkable EP return.
  • Shrubclaw: A break Aniimo with a strong bonus once active, but the slowest setup and lowest break stat on the list.
  • Bailite: A support Aniimo that leans too far into dealing damage itself instead of empowering the team's main damage dealer.
  • Sherro: A high-ceiling DPS Aniimo that demands too much setup and resources for its payoff.

D Tier

  • Irisal: A DPS Aniimo that builds far too slowly and is fully outclassed by its own upgraded form.
  • Magmarex: A break Aniimo with a decent base stat but no real way to break faster or weaken the enemy's guard.
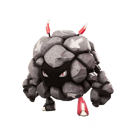
  • Bouldus: A support Aniimo whose entire value depends on a separate specific DPS Aniimo to activate, making it too restrictive to rely on.

Comments

0

Video

Table of Contents

See More

Hoptail Event Guide - How to Get Perfect and Elite Hoptail, Sparking Odds and More
Updated on Nov 7, 2026
Aniimo Support Tier List - Best Support Aniimo Ranked
Updated on Nov 6, 2026
Aniimo Break Tier List - Best Break Aniimo Ranked
Updated on Nov 6, 2026
Aniimo Regen Tier List - Best Regen Aniimo Ranked
Updated on Nov 6, 2026
Aniimo Heal Tier List - Best Heal Aniimo Ranked
Updated on Nov 6, 2026

Like our guides?

Add Mobalytics as a preferred source on Google!