menu
MobalyticsUse your favourite features in-game with our Desktop App
Gamebase Guide

Level 70 Ascension and EXP Farming Guide - Aniimo Season 1 Part 2

Guides
Aniimo
By Verlisify
Updated on Nov 2, 2026
Nov 2, 2026

Overview

Aniimo level 70 training is a substantial investment, so start with your main damage dealers, develop your breakers next and check what your supports actually gain before spending the rest of your resources.

Season 1 Part 2 adds new level caps and an Ascension requirement, but unlocking those levels is only the beginning. You also need enough EXP, evolution materials and Awakening resources to develop your chosen companions.

Training several Aniimo through catching activities can help stretch your resources, while saving the most expensive Star Up upgrades gives you more room to build a complete team.

For more advice on preparing upgrade materials, planning Prismana hunts and managing seasonal resources, check out our Aniimo Season 1 Part 2 tips and tricks guide.
How to Unlock Levels 65 and 70

Your title progression and each Aniimo’s Ascension both affect how far you can train.

Trailblazer II raises the Aniimo level cap to 65. Trailblazer III raises it to 70. Reaching Trailblazer II does not immediately let you train every companion to level 70.

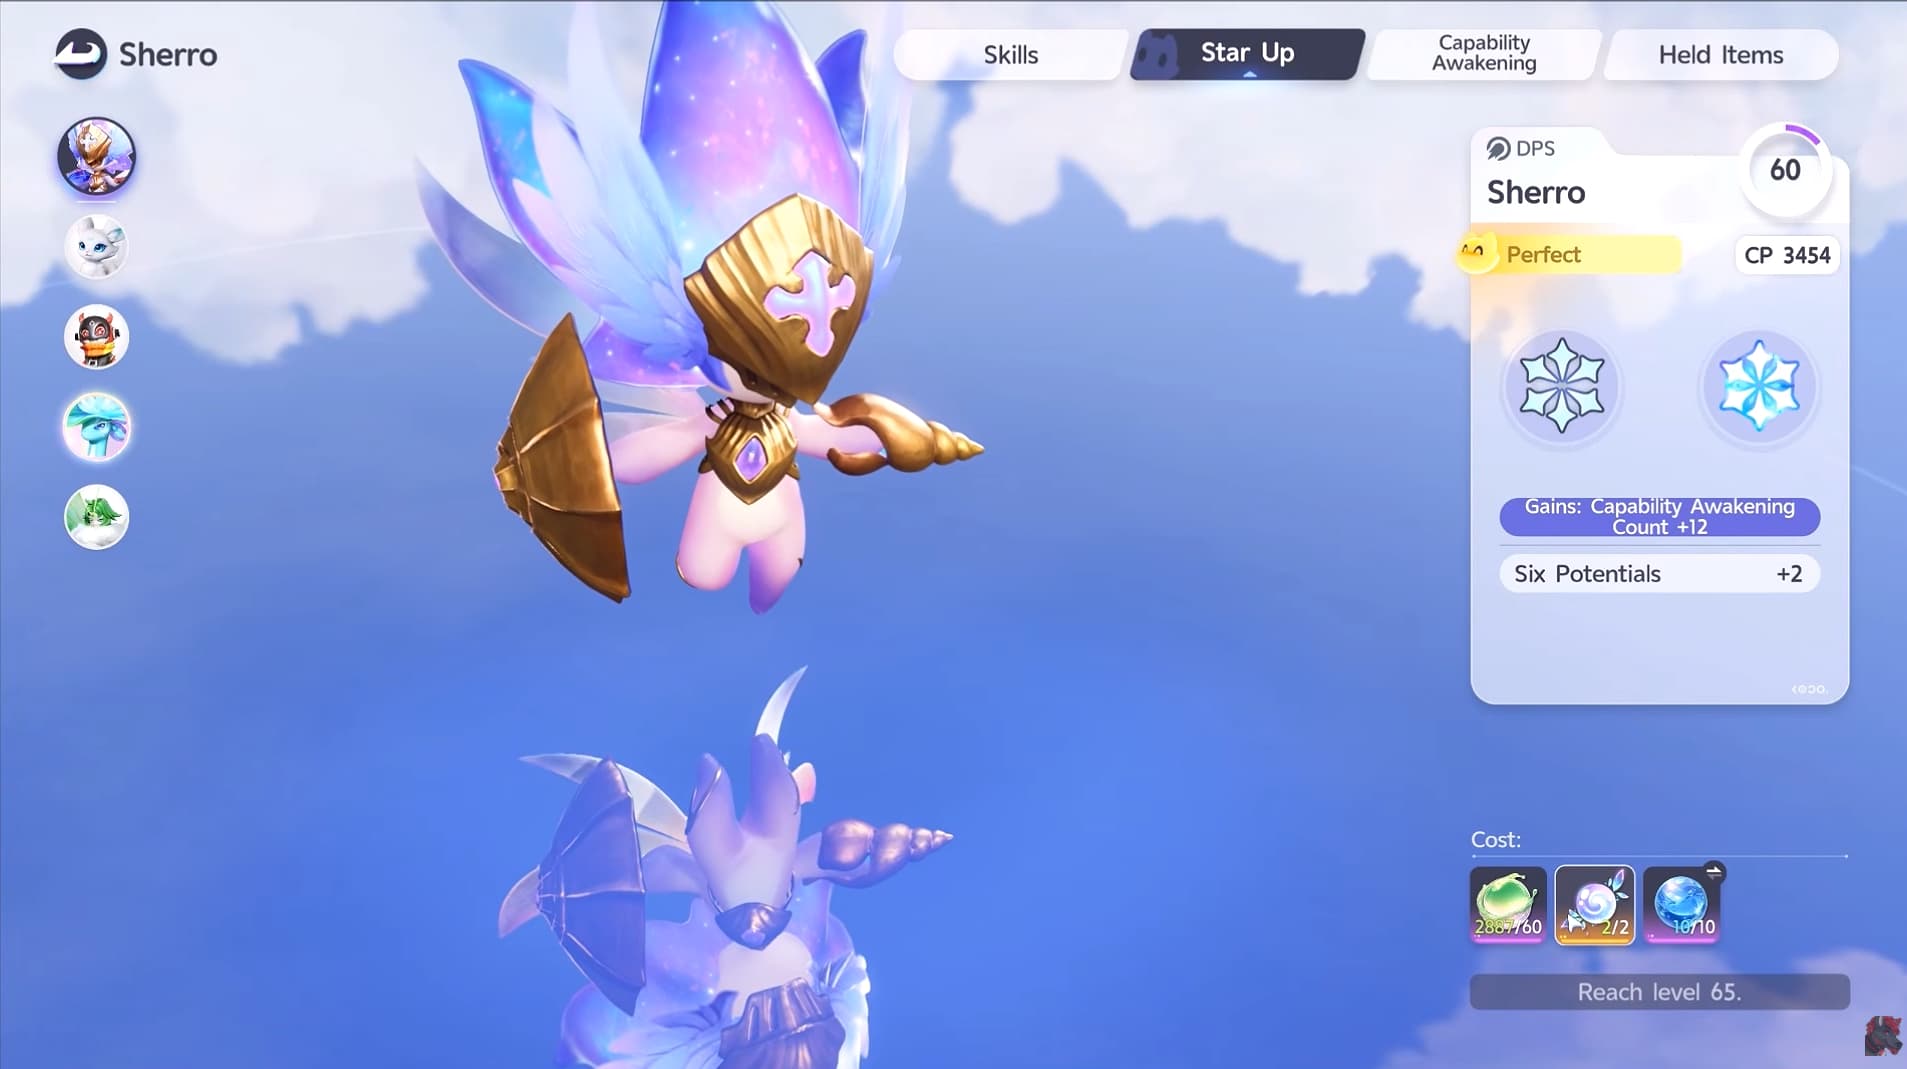
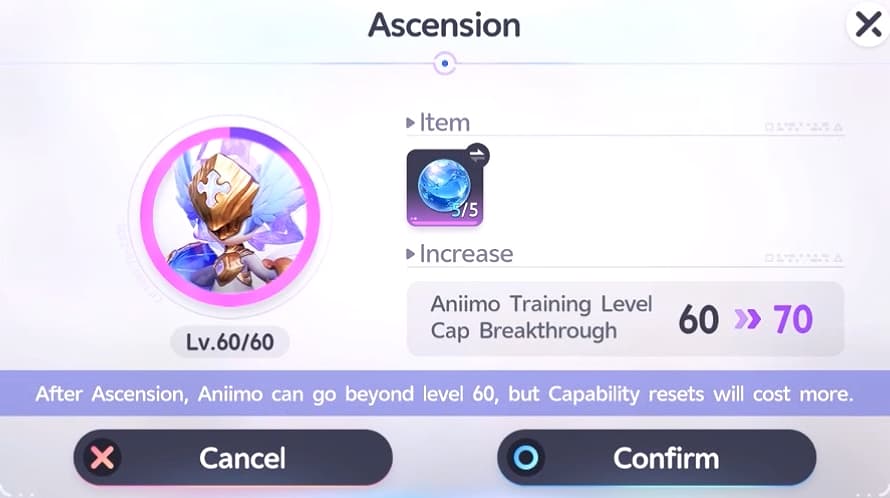
An Aniimo also needs an Ascension to continue levelling beyond 60. This costs five evolution materials matching its main element. Complete that Ascension, then continue training within the limit allowed by your current title.

If you still need to complete the relevant assessments, our Whisperwake Isles tips and tricks guide covers the opening progression steps and higher level caps.

As your Aniimo gains levels and completes Resonance Star Up breakthroughs, its available Capability Awakening count also increases. Revisit its training screen as you progress so newly available points do not sit unused.

Which Aniimo Should You Level First

Prioritise the damage dealers you regularly use, then develop your main breakers as your resources allow. These are sensible starting points when you need more combat power from a limited training budget.

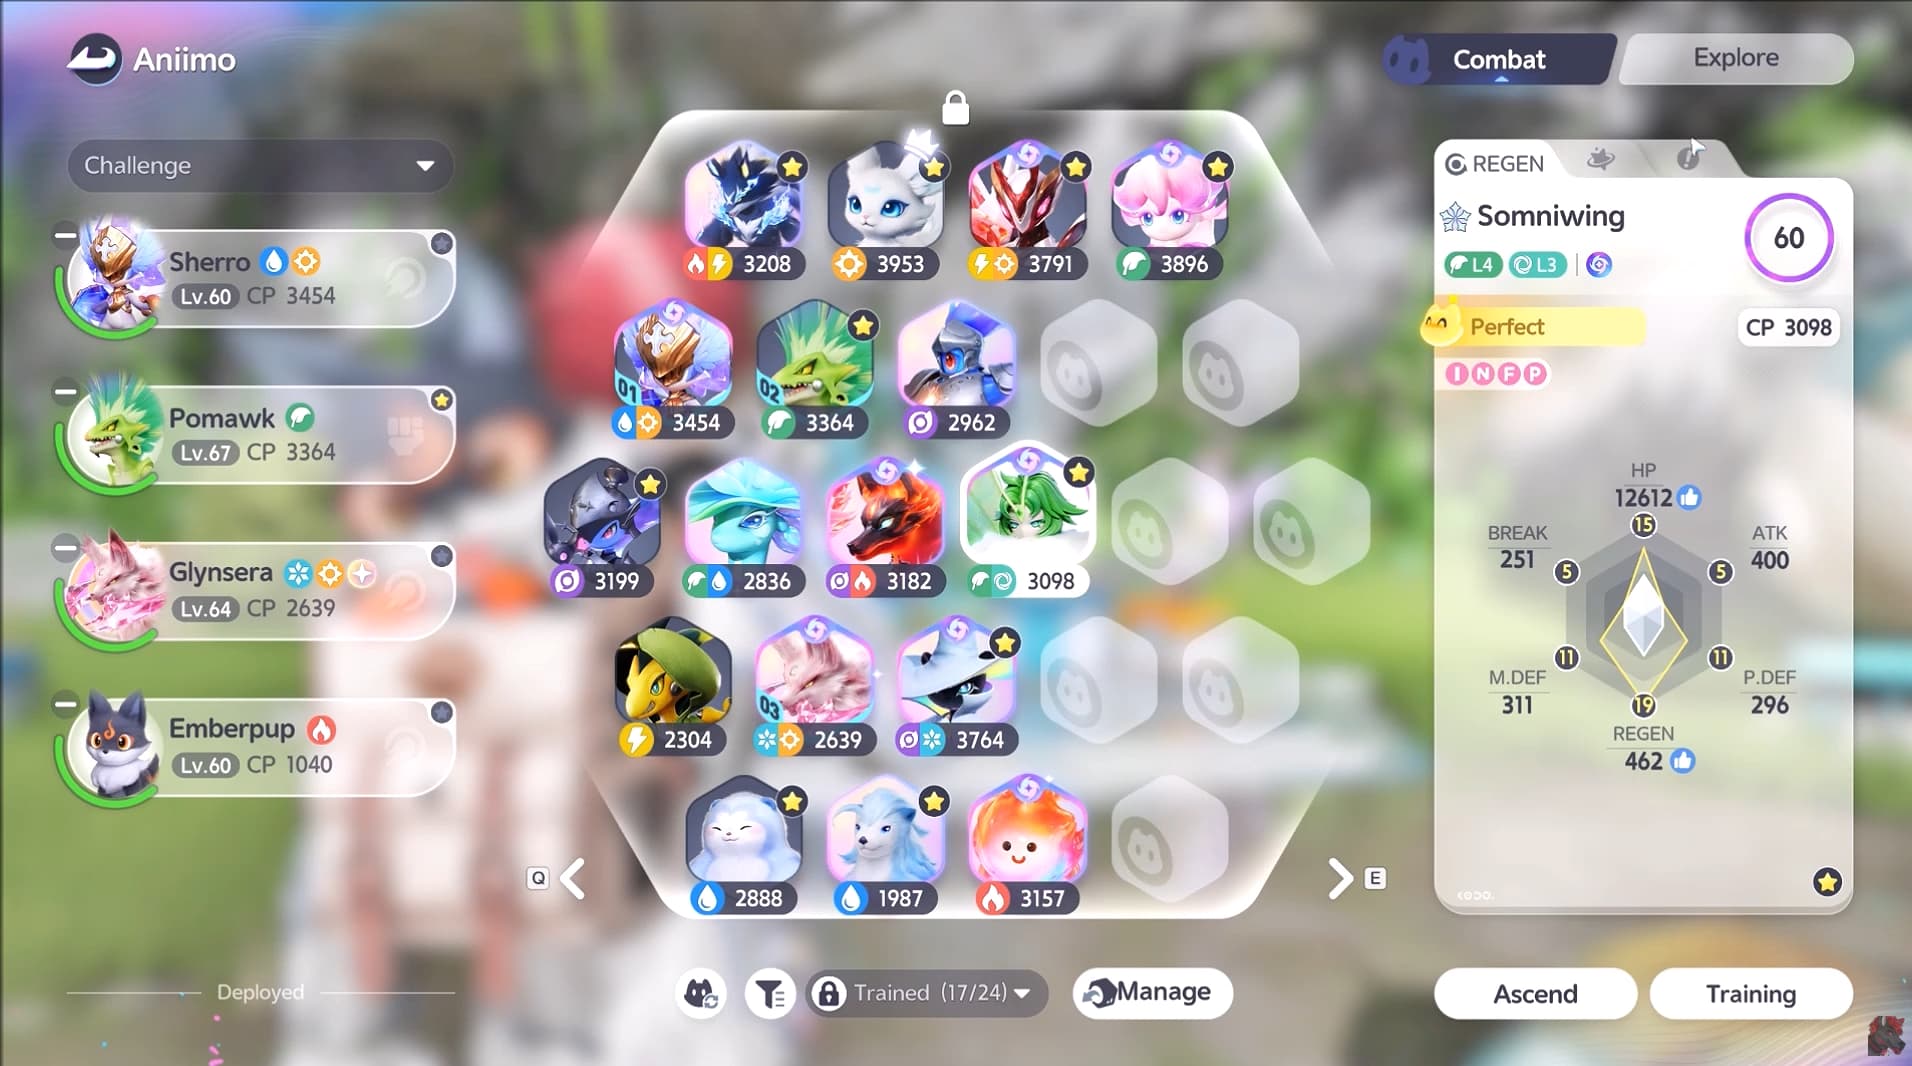
Supports need a closer look. Check the ability you use them for, the stat it scales with and whether its effect is already approaching its maximum. A support that provides nearly its full useful bonus at level 60 may offer less immediate value from the final ten levels than an underdeveloped damage dealer.

Somniwing is worth checking this way before committing a large amount of EXP. For a support such as Sparkelf, whose useful effect scales with ATK, compare the next improvement with the cost of reaching it. An intermediate stopping point can be enough for your current team.

Before investing heavily in a replacement, our Aniimo Potential guide explains how to compare catches, personalities and other traits.

Spend Phenomena Crystals on Your Core Team

The Star Up that costs one Phenomena Crystal is a useful priority for companions you intend to keep developing. It also opens further training stages where Dewdrop Crystals provide additional stat improvements.

The later breakthrough available at level 65 costs two Phenomena Crystals. It adds 12 Capability Awakening points and +2 to each of the six Potentials, but it does not open another sequence of Dewdrop upgrades afterward.

That makes it a different spending decision. You are paying for those additional Awakening points and Potential bonuses, rather than unlocking another long stretch of stat upgrades.

For a developing team, prioritise the earlier breakthrough on your important companions before spending two crystals to push one Aniimo further. The final upgrade can still be worthwhile for a heavily invested favourite or a build that needs the extra points.

Keep some Phenomena Crystals available for new companions you want to train, especially while you are still deciding on your long-term team.

Farm Evolution Materials When Your Dewdrop Upgrades Are Finished

Check the next upgrade your chosen Aniimo actually needs before spending Primergy.

If you are developing a Breezy Plains Aniimo and have already completed the Dewdrop stages you intend to buy, continuing to farm Tubster for more Dewdrops may no longer be your immediate priority. The final Star Up does not unlock another set of Dewdrop stages, so evolution materials for Ascension can become the more useful target.

Choose encounters that reward the correct material for the Aniimo’s main element. Each Ascension requires five, so plan around the companions you are actively preparing.

Where available, the Monthly Pass double-reward claim can reduce the number of battles needed. It spends more Primergy for the larger reward bundle, so its advantage is saving battle time rather than lowering the energy cost per material.

This is a change in priority once your planned Dewdrop upgrades are finished. Other companions may still need those crystals.

Choose Which Seasonal Dewdrop Crystals to Spend

Aniimo with a Season Tag can use Dewdrop Crystals from different regions for Resonance Star Up training.

When the conversion menu gives you a choice, select the supply you can most comfortably spend. Using spare Breezy Plains Dewdrops on an eligible seasonal Aniimo can preserve your Whisperwake Isles stock for other companions.

Check the selected material before confirming a large batch of upgrades. A conversion choice that made sense for one training session may not suit your next project.

This flexibility applies to eligible seasonal Aniimo. Do not assume every ordinary companion can use either region’s crystals.

Farm Party EXP Through Wild Surges and Mass Outbreaks

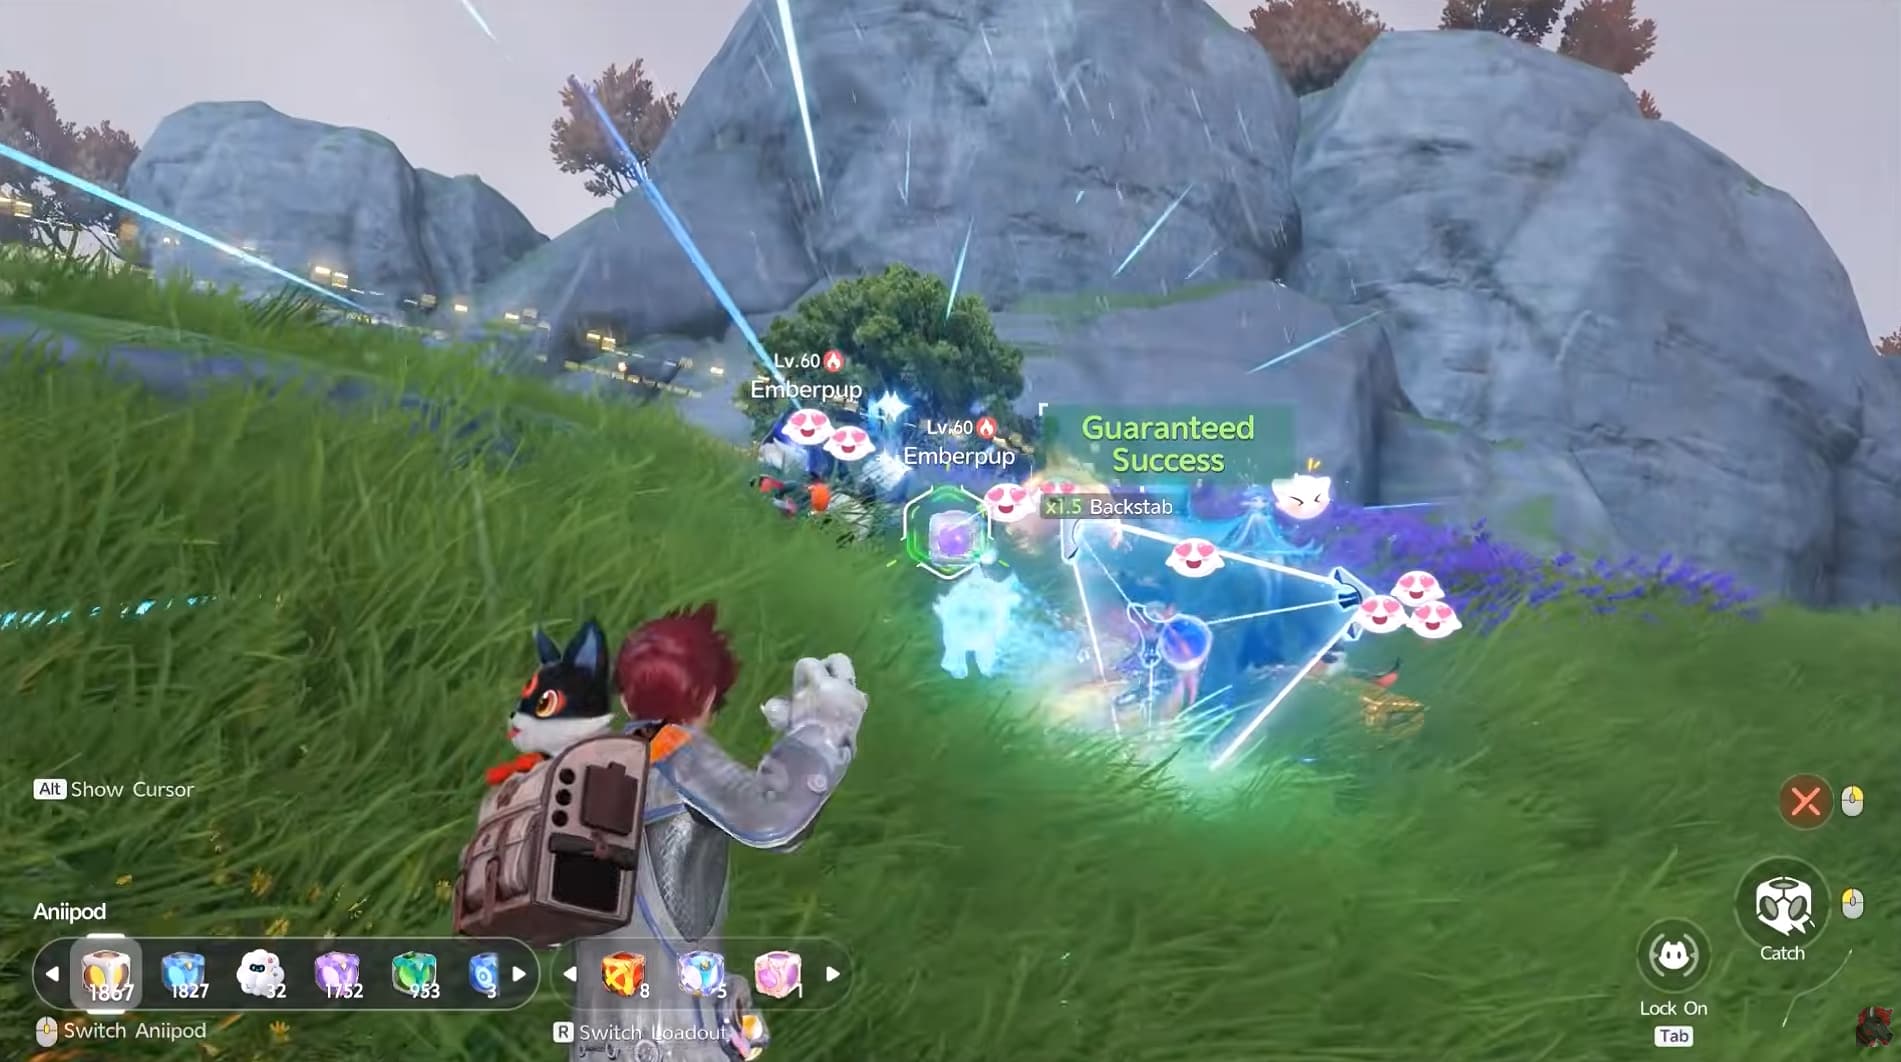
Wild Surges and Mass Outbreaks let you combine catching with companion training. Take advantage of Vein Abundance bonuses when the event is available, and bring the Aniimo you actually want to level.

Set up a separate training party before starting your catching session. Fill its eligible slots with companions that still need EXP and check any relevant experience bonuses in your setup.

The main advantage is developing several Aniimo at the same time. A session can also contribute towards collection goals, better Potential catches and Prismana progress, giving you useful rewards alongside the EXP.

Our Aniimo Prismana guide explains nurturing, Wild Surges and building Prismatic Energy if you want to combine those goals.

Remember to change your party when a companion reaches its current training limit, so your next session benefits the Aniimo that still need levels.

When to Catch Aniimo and When to Use Growth Fruit

Catching becomes especially useful when you are training several companions together.

For example, a catch awarding 1,500 EXP to each of four eligible party members provides 6,000 EXP across the party. That is still only 1,500 EXP for each individual companion, so it should not be compared directly with a fruit that gives its entire reward to one Aniimo.

Reporting your catches can return Credits and provide additional rewards, including seeds that contribute more training EXP. Those returns improve the value of a catching session, although your results depend on the catches and rewards involved.

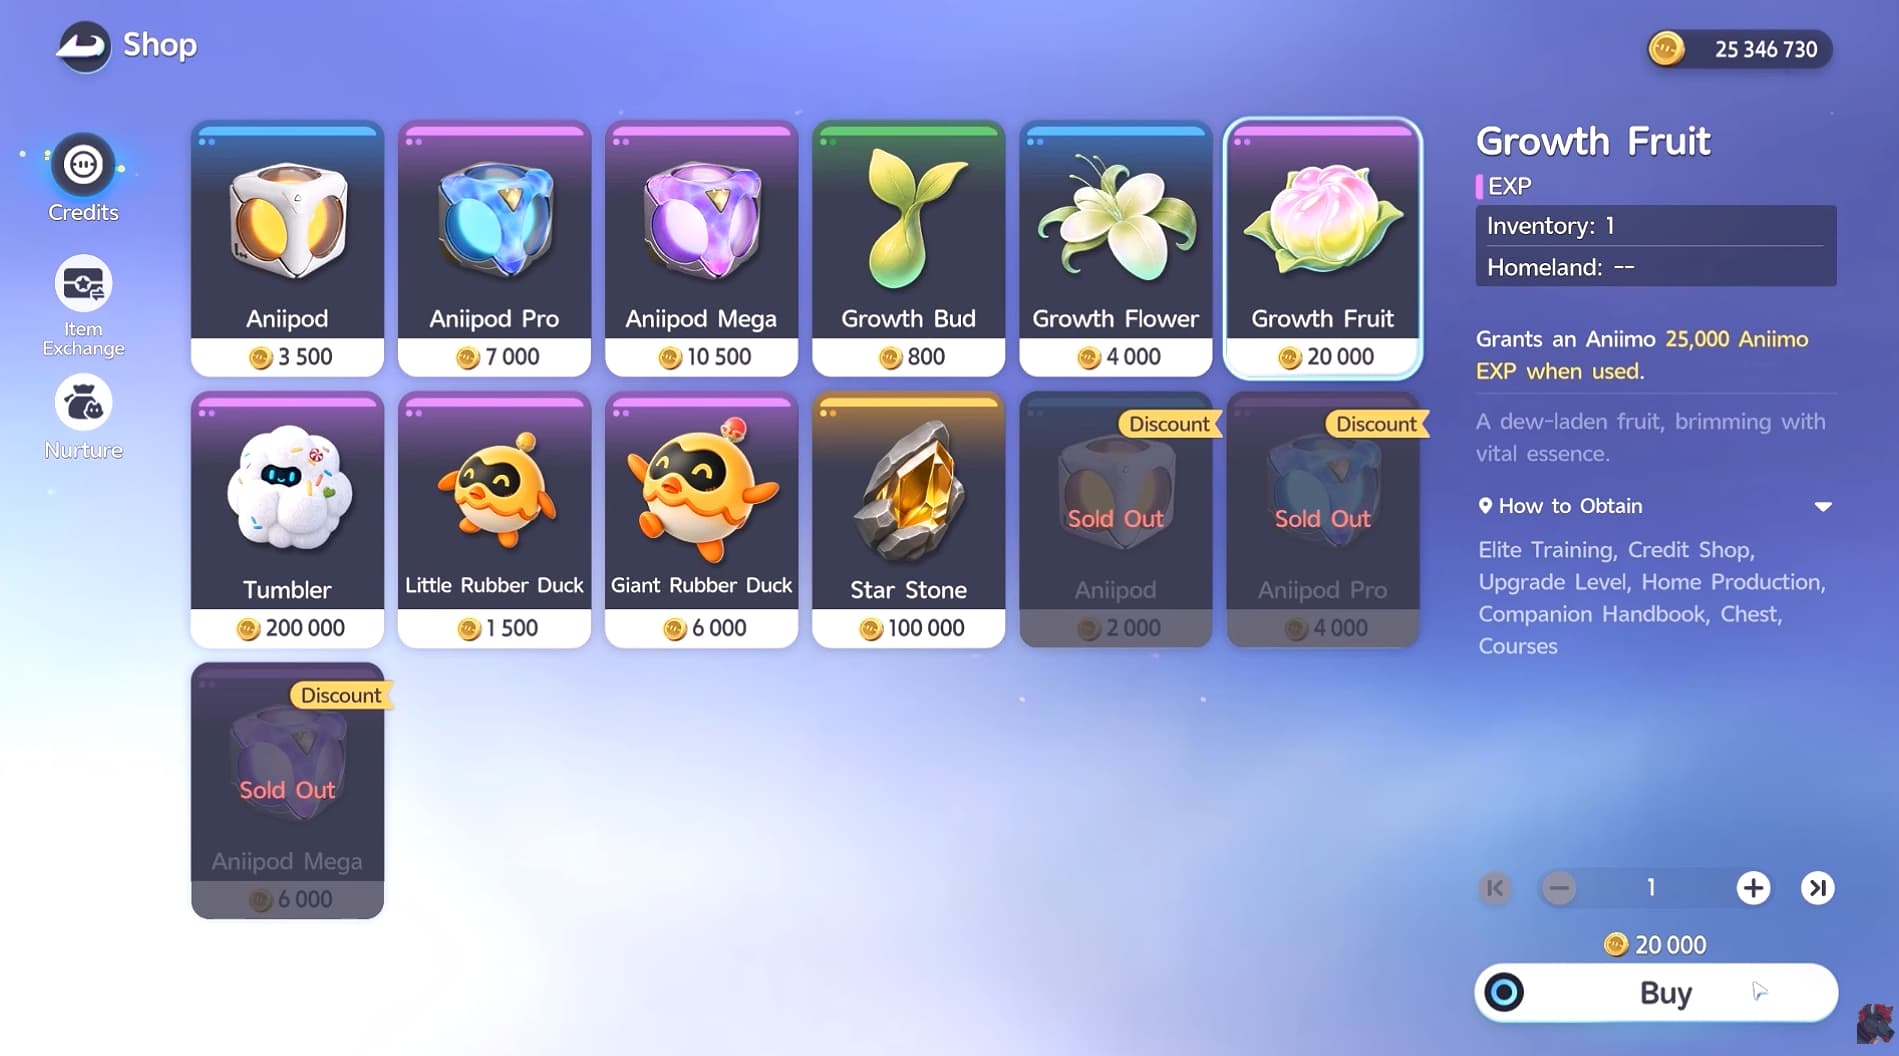
Growth Fruit offers a quicker way to concentrate EXP on one target. Use it when an important damage dealer needs an immediate upgrade or when you want to finish a level without another farming session.

Check any character trait that improves EXP-item gains before spending your stored fruit. When you have several companions to train and other catching goals to complete, party EXP farming can make better use of your time and resources together.

Check Capability Awakening Reset Costs Before Investing

Capability Awakening can be reset beyond level 60, but recovering your investment can require Potential Reset Cards as well as Credits.

The card requirement is based on the number of Starcryst Essence previously invested in that Aniimo. A 15-card allowance reduces the amount you need to pay.

If you have invested no more than 15 Starcryst Essence, the allowance covers the card requirement and you only pay the Credit cost. If you have invested 16, the remaining cost is one Potential Reset Card plus Credits.

As you invest more Essence, resetting becomes more expensive. Check the final confirmation screen before proceeding, especially when rebuilding a heavily trained companion.

Choose the stats and abilities you want to support before spending large amounts of Essence. Having more Awakening points available does not mean you need to spend them immediately on a build you are still testing.

Collect Starcryst Essence From Holo Battles

Keep collecting Awakening materials while you work towards level 70. Reaching the level cap can give you more training opportunities than your current Starcryst Essence supply can support.

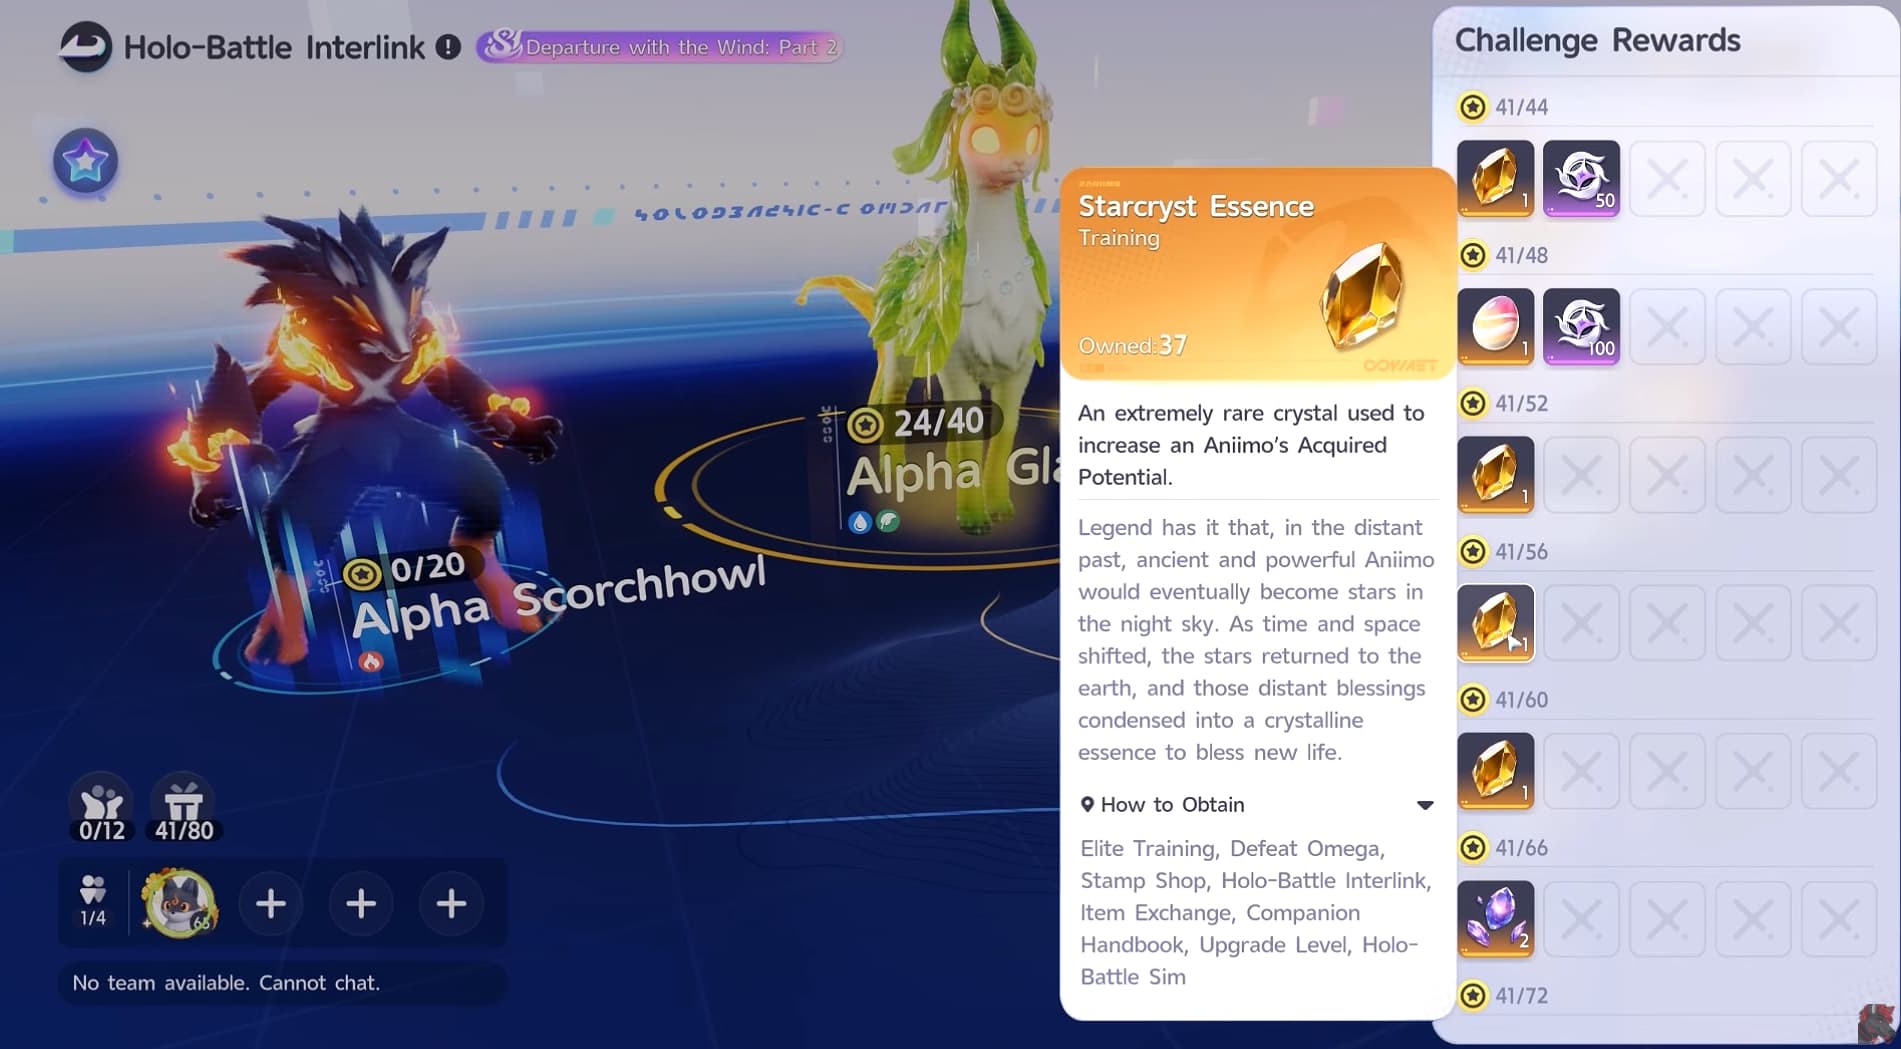
In Season 1 Part 2, Holo-Battle Interlink offers five Starcryst Essence through its weekly rewards. Check the reward requirements and claim the available Essence as part of your regular progression.

Holo-Battle Sim provides another source. Its Trial rewards include additional Starcryst Essence compared with Challenge, giving you a reason to attempt the higher difficulty when your team is ready. Check each available stage and its reward track before the current period ends.

Use those rewards to finish the upgrades that matter most to your core team. Once your main damage dealer is trained, move on to your next useful breaker or support instead of spreading your remaining materials across every companion at once.

Comments

0

Video

Table of Contents

See More

Level 70 Ascension and EXP Farming Guide - Aniimo Season 1 Part 2
Updated on Nov 2, 2026
Must Know Tips and Tricks for Aniimo Season 1 Part 2
Updated on Nov 1, 2026
All Lumin Amber Locations in Aniimo Season 1: Part 2
Updated on Nov 1, 2026
Scrubbit Capture Guide & All Evolutions - Aniimo Season 1 Part 2
Updated on Oct 30, 2026
Royalby Capture Guide & All Evolutions - Aniimo Season 1 Part 2
Updated on Oct 30, 2026

Like our guides?

Add Mobalytics as a preferred source on Google!