Build Overview
Arsenal Selection
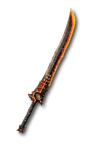
This build will be running on a Two-handed Mace as your Arsenal selection
Fury Management
 Shard of Verathiel will cause
  Frenzy to cost Fury. That combined with
 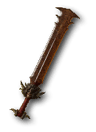 Ramaladni's Magnum Opus can be a strain on your fury. Below is your steps to manage that.
Affixes
- Resource Generation will help increase the amount of Fury you gain and pairs really well with
 Rallying Cry. You can Temper this onto your Rings and Amulet.
 - Fury Regeneration needs to be added onto the Helmet, Chest piece, Pants and Boots.
- Do not spam
 Lunging Strike if you are not near monsters if you can't maintain Fury.
Defense (Non-Selig)
- Take all defense nodes inside the Paragon board first. All Maximum Life, Resistances, and Armor nodes.
- You can use glyphs like
 Ire or
  Territorial to help keep yourself alive.
 - Make sure all your gear has Maximum Life on it and you can then add Resistances, and Armor as needed.
- Life on Hit is a great option for you, but it will only heal you when you hit with
 Leap
Leap
If you want to learn how to set your defenses up, watch this video: How to avoid getting one-shot video
Offense
If you want to learn the basics about Multipliers watch this video: Additive vs. Multiplicative Damage video.
Found a Mythic and want to know if it's useable? Is this Mythic usable with my build video?
Early post 70 loot filter (All 850 items, in T1):
Cg8QAB0AAP//IgQIASAwKAEKDxAAHQAA//8iBAgDMAEoAQodEAAdAAD//yIECAEgeCIMCAUVgH4jABUF7SIAKAEKJhAAHQAA//8iGwgJFRX7IgAV5jEjABWTPCMAFYovIwAVQlkjACgBCiYQAB0AAP//IhsICRXp/CIAFUH7IgAVIFEjABXr/CIAFe78IgAoAQoPEAEdAAD//yIECAIgASgBEg9DbGlwdGlzIFN0YXJ0ZXIYASAB
Mid game loot filter (Torment 4 to 8):
ChEQAB0AAP//IgYIBCABMAEoAQodEAAdAAD//yIECAEgeCIMCAUVgH4jABUF7SIAKAEKJhAAHQAA//8iGwgJFRX7IgAV5jEjABWTPCMAFYovIwAVQlkjACgBCjsQAB0AAP//IgUIACiEByIECAMwASIbCAkV6fwiABVB+yIAFSBRIwAV6/wiABXu/CIAIgYIBCABMAEoAQoPEAMdAAD//yIECAEgDygBEg9DbGlwdGlzIE1pZGdhbWUYAiAC
Late game Loot Filter (Torment 8 to 12):
ChoQAh0AAP//IgkIBhU4Xh0AIAEiBAgCIAQoAQoREAAdAAD//yIGCAQgATABKAEKHRAAHQAA//8iBAgBIHgiDAgFFYB+IwAVBe0iACgBCiYQAB0AAP//IhsICRUV+yIAFeYxIwAVkzwjABWKLyMAFUJZIwAoAQo7EAAdAAD//yIFCAAohAciBAgDMAEiGwgJFen8IgAVQfsiABUgUSMAFev8IgAV7vwiACIGCAQgATABKAEKDxADHQAA//8iBAgBIA8oARIPQ2xpcHRpcyBFbmRnYW1lGAMgAw==
Leveling Walkthrough Document
Sheets Document Info
Leveling Guide: Lunging Strike Leveling Guide
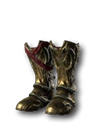 Hooves of the Mountain God and
  Paingorger's Gauntlets for some really powerful damage.


 0 (0)
0 (0)