In this article we'll explore all of the new TFT Set 16 Champions and Traits from the "Lore & Legends" reveal.
Set 16's roster is the largest one yet, showcasing a total of 100 unique champions alongside the new "Unlockables" Set Mechanic. We'll quickly explain how this works before we dive in to our early impressions of the set.
Balance changes occur frequently on the PBE, so keep in mind that the actual numbers will vary. Our website will be regularly updated, so be sure to check out the Champions Page to stay familiar with any changes.
TFT Set 16: Lore & Legends is planned to release on December 3rd, with the PBE going live on November 18th.
TFT Set 16 Mechanic: Unlockables
TFT Set 16's "Unlockables" mechanic introduces 40 additional champions alongside the regular 60 champion pool. However, each of these can only be acquired if you're able to fulfill their specific unlock conditions.
These requirements create an interesting layer and help prevent the pool from feeling diluted by the otherwise overwhelming quantity. They're like mini side-quests, many of which lead to a powerful and exciting reward!
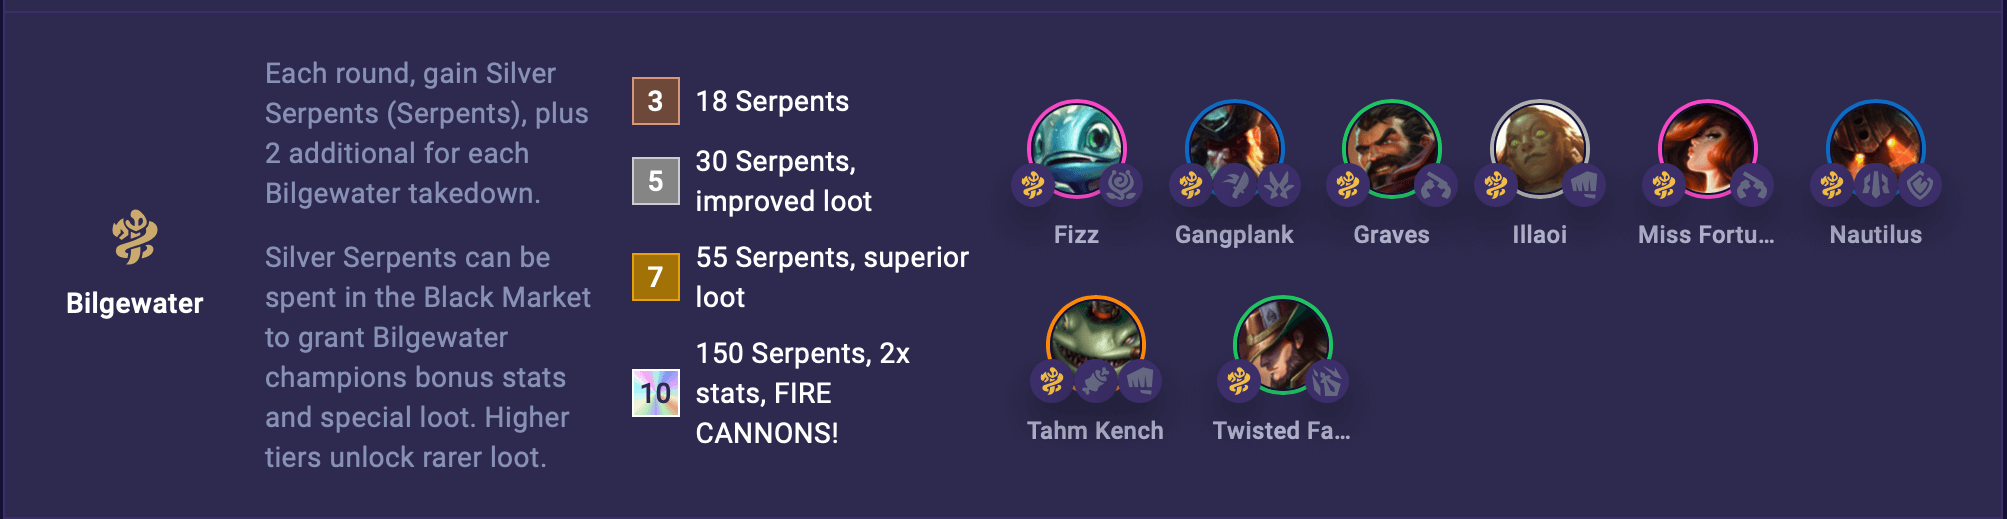
Each round, gain Silver Serpents, plus 2 additional for each Bilgewater takedown.
Silver Serpents can be spent in the Black Market to grant Bilgewater champions bonus stats and special loot. Higher tiers unlock rarer loot.
(3) 18 Serpents
(5) 30 Serpents, improved loot
(7) 55 Serpents, superior loot
(10) 150 Serpents, 2x stats, FIRE CANNONS!
First Impressions:
Bilgewater rewards players for getting ahead early, offering a currency that can be traded for various benefits. It appears to be a high ceiling low floor playstyle, but one with promising treasure to those who succeed!
Darkin
Champions: Aatrox 5g / Zaahen 7g
(1) Darkin gain 15% Omnivamp.
(2) AND you heal for 25% of the player damage you deal.
(3) AND whenever Darkin restore 100 Health, they deal 100 magic damage to the 2 closest enemies.
First Impressions:
Darkin is a specialized trait that mostly applies to the late game, especially as both of its champions need to be unlocked. However, with the addition of four Darkin Artifact Weapons, players will have the chance to obtain it earlier, granting Omnivamp to their champ of choice. Seems solid.
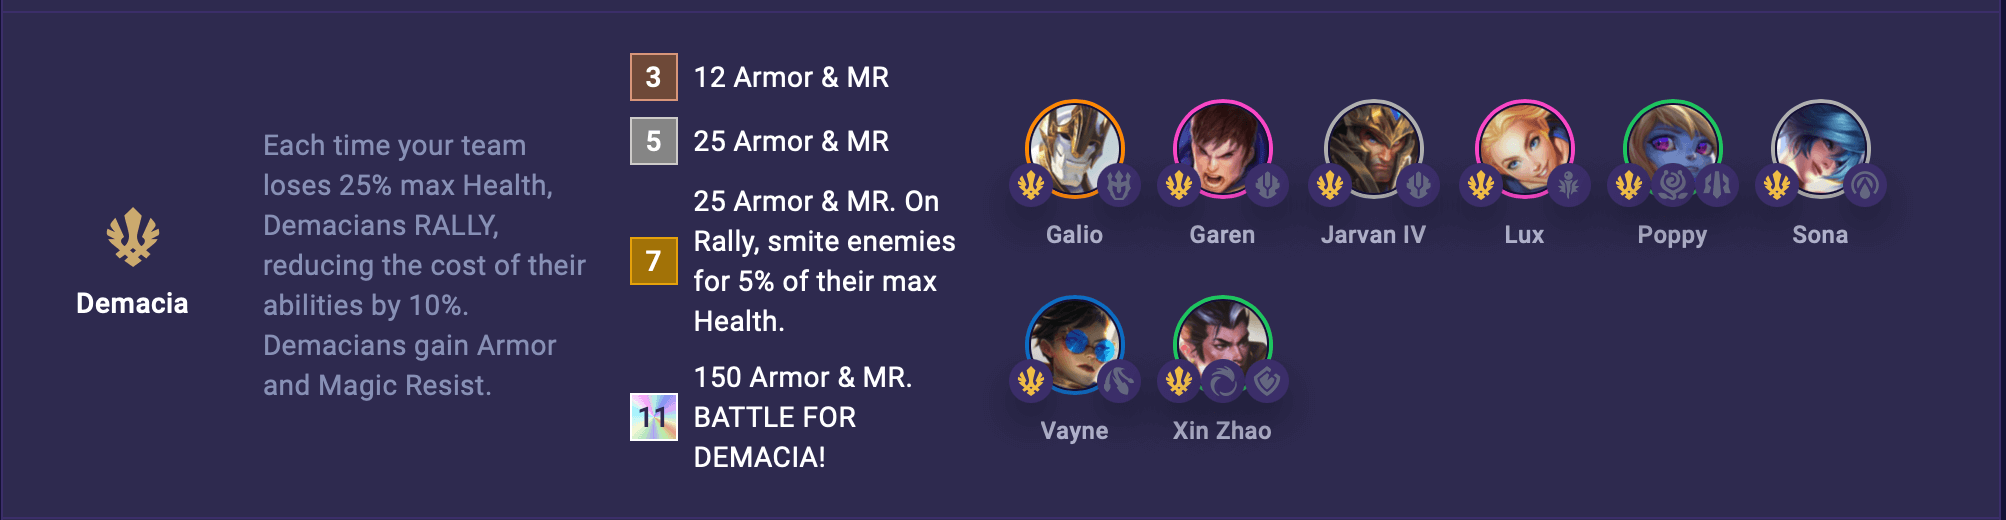
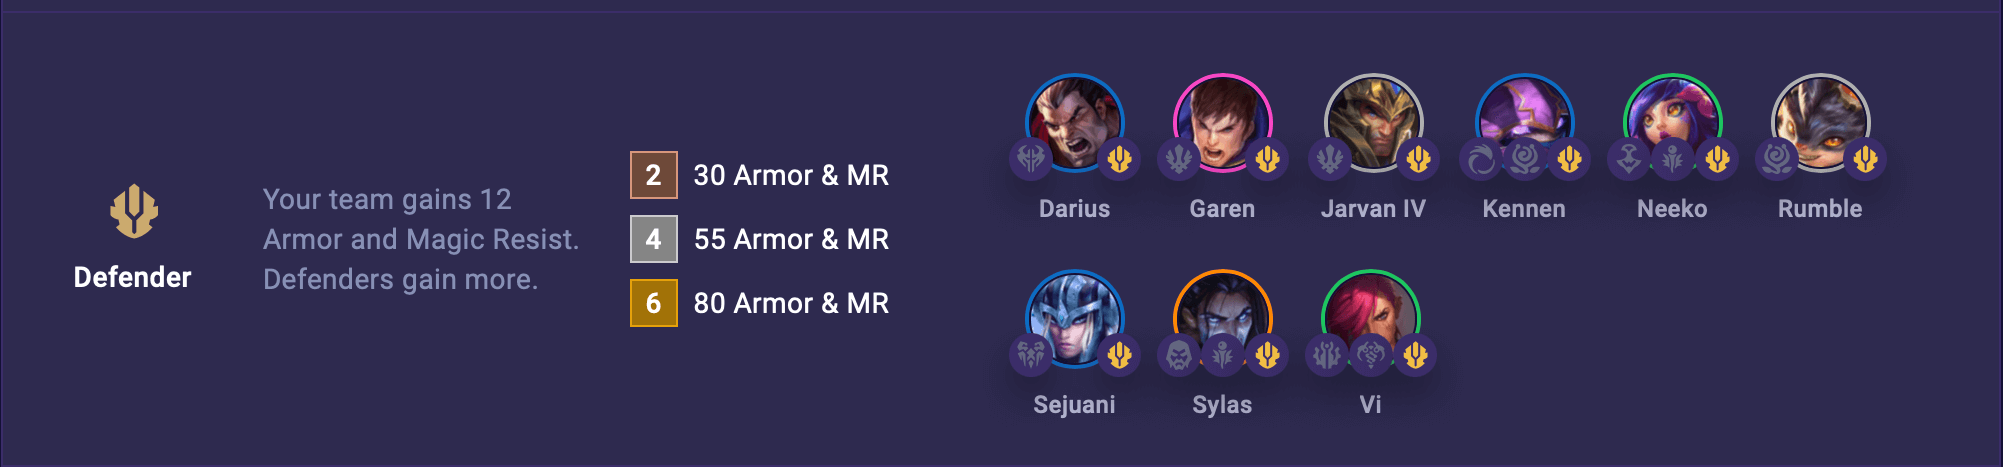
Each time your team loses 25% max Health, Demacians RALLY, reducing the cost of their abilities by 10%. Demacians gain Armor and Magic Resist.
(3) 12 Armor & MR
(5) 25 Armor & MR
(7) 25 Armor & MR. On Rally, smite enemies for 5% of their max Health.
(11) 150 Armor & MR. BATTLE FOR DEMACIA!
First Impressions:
Demacia allies show strength in numbers, bolstering each other in combat as their health begins to decline. It offers a respectable boost even with a small frontline, but could have real potential if you rally a full army.
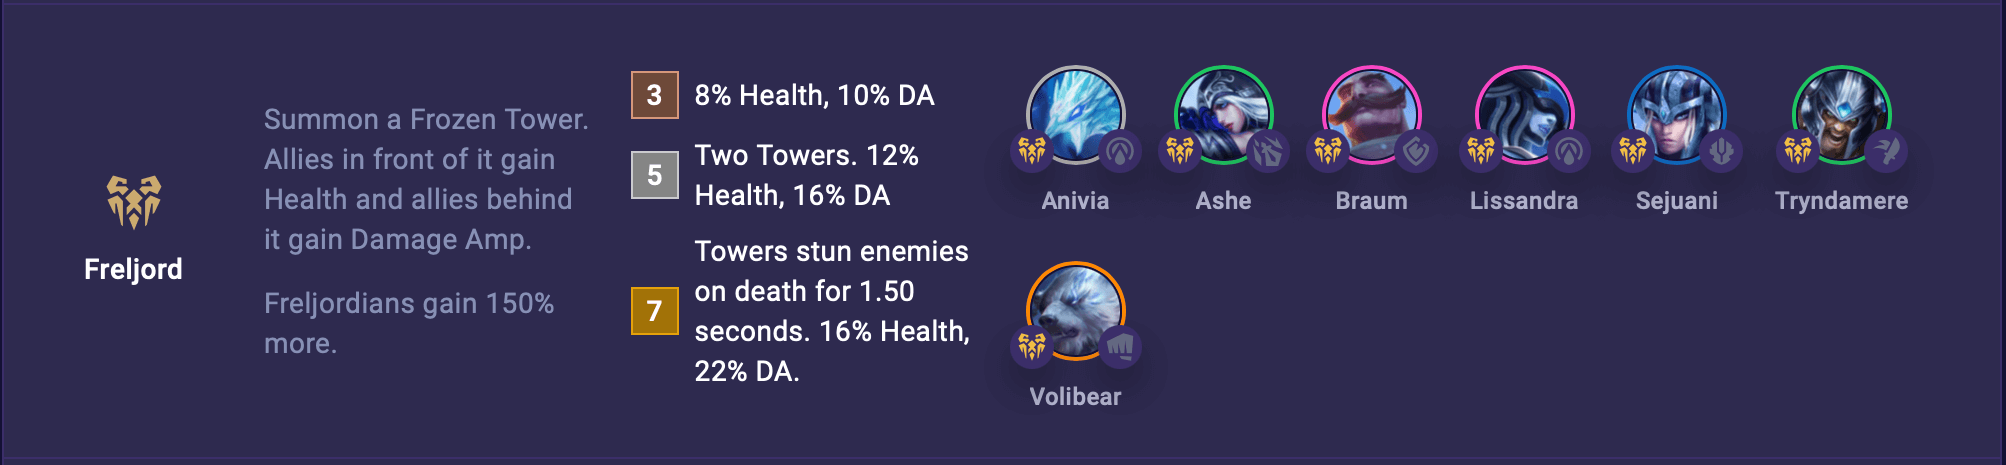
Summon a Frozen Tower. Allies in front of it gain Health and allies behind it gain Damage Amp.
Freljordians gain 150% more.
(3) 8% Health, 10% DA
(5) Two Towers. 12% Health, 16% DA
(7) Towers stun enemies on death for 1.50 seconds. 16% Health, 22% DA.
First Impressions:
Freljord provides a reasonable increase to both offense and defense, while also benefiting all your allies, regardless of their traits. Its vertical bonus packs some solid CC as well, though I imagine the three-piece will be more common.
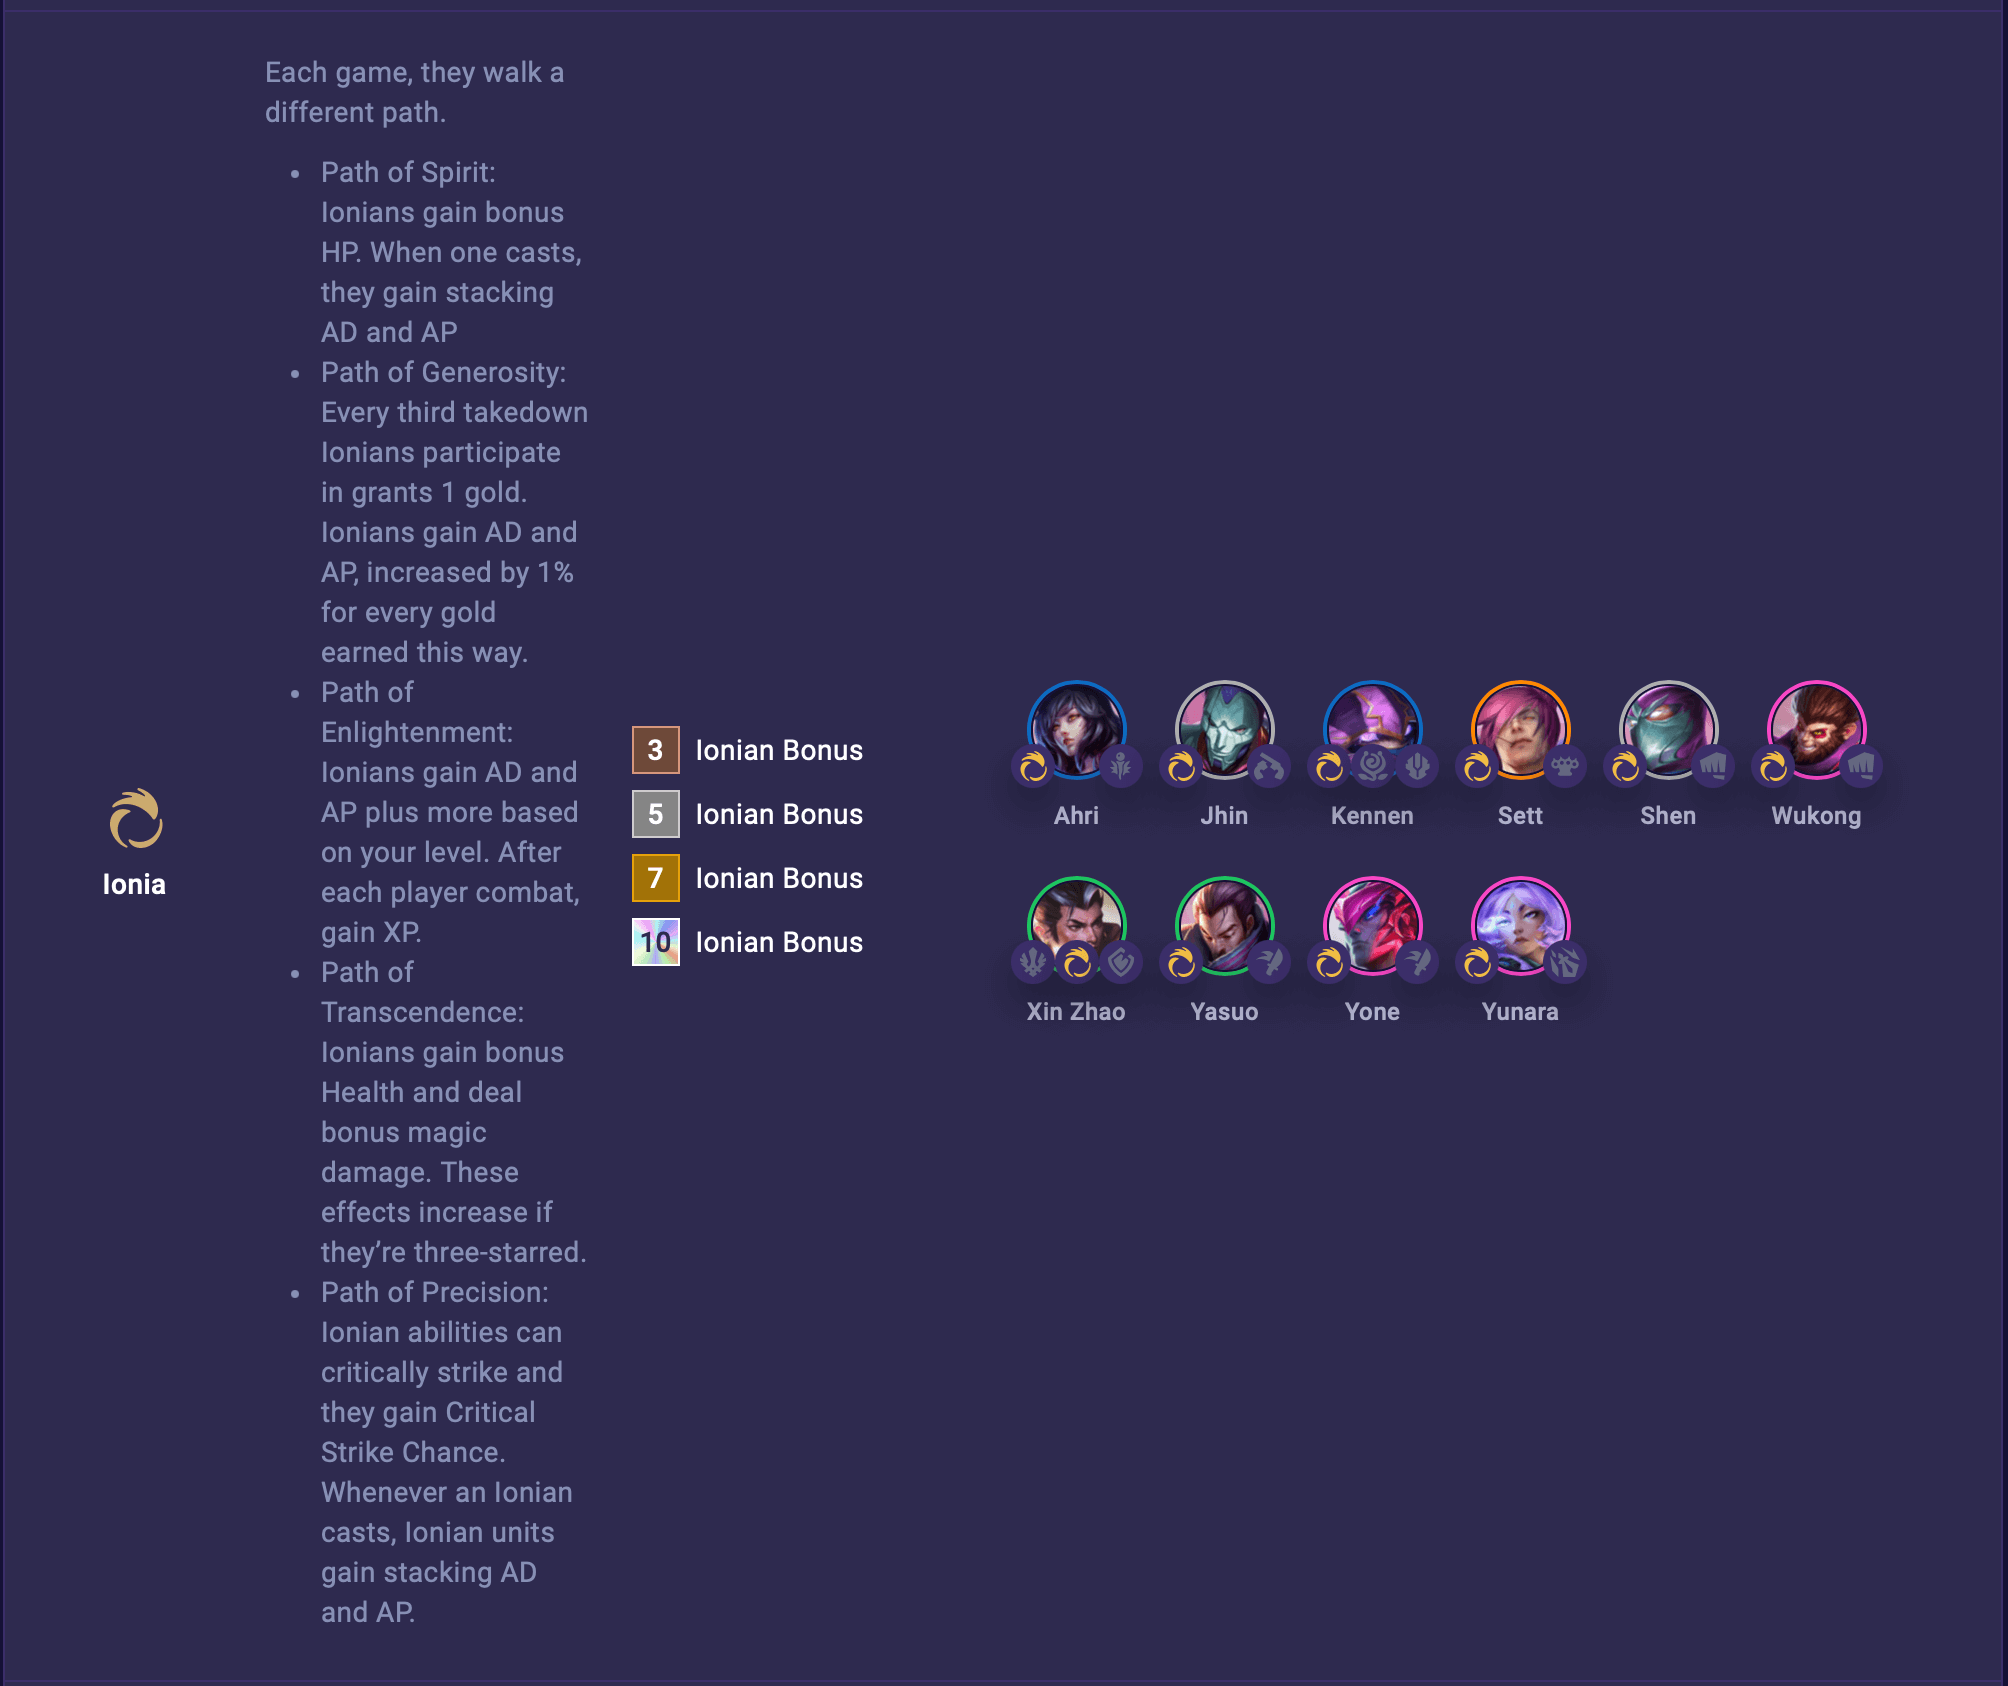
Path of Spirit: Ionians gain bonus HP. When one casts, they gain stacking AD and AP.
Path of Generosity: Every third takedown Ionians participate in grants 1 gold. Ionians gain AD and AP, increased by 1% for every gold earned this way.
Path of Enlightenment: Ionians gain AD and AP plus more based on your level. After each player combat, gain XP.
Path of Transcendence: Ionians gain bonus Health and deal bonus magic damage. These effects increase if they’re three-starred.
Path of Precision: Ionian abilities can critically strike and they gain Critical Strike Chance. Whenever an Ionian casts, Ionian units gain stacking AD and AP.
First Impressions:
Ionia is tricky to evaluate given the fact it plays differently each game. From what we can see, it's clearly a trait that incentivizes going vertical.
How you build your items may change depending on what's offered, making it a rewarding playstyle to those who can adapt on the fly.
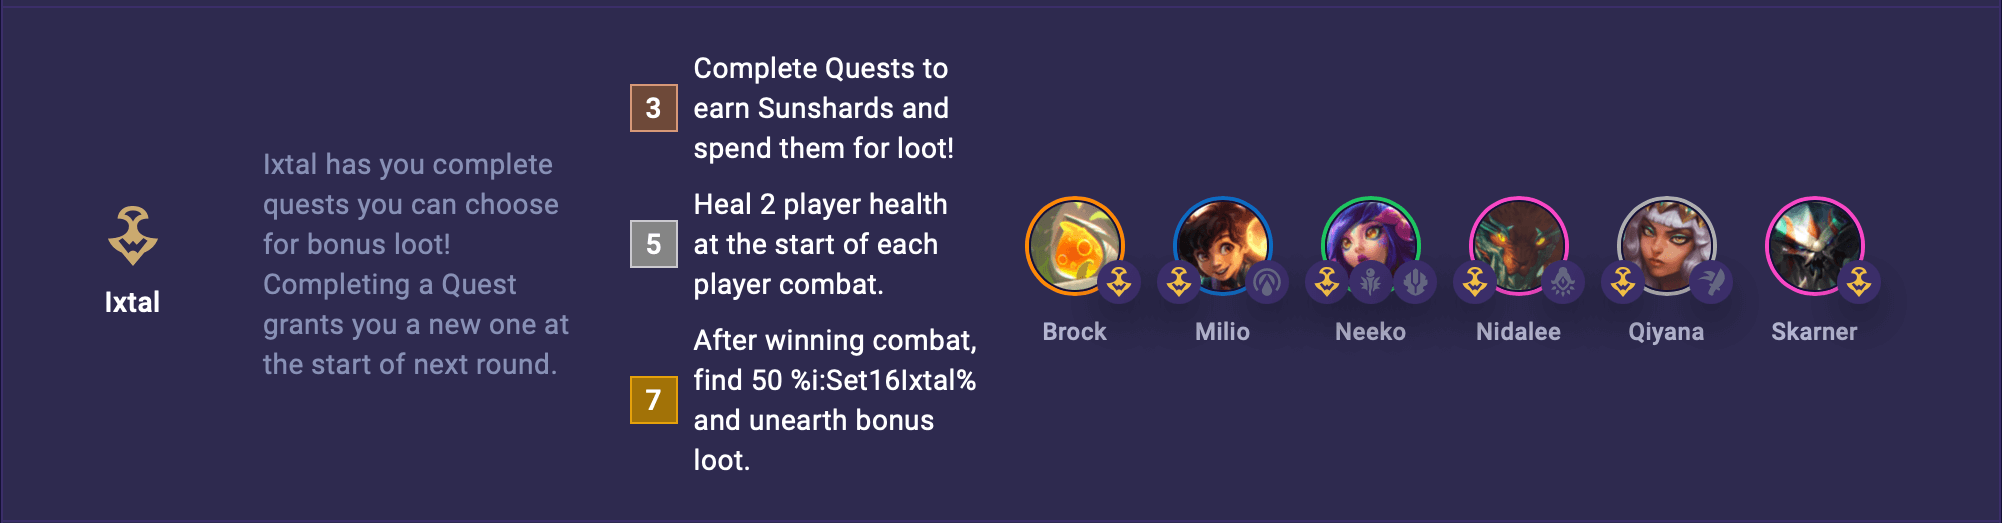
(3) Complete Quests to earn Sunshards and spend them for loot!
(5) Heal 2 player health at the start of each player combat.
(7) After winning combat, find 50 and unearth bonus loot.
Completing a Quest grants you a new one at the start of next round.
First Impressions:
Ixtal introduces a fun Quest system, awarding loot to those who can complete them. It's a neat way to obtain some extra stuff, and doesn't require a big investment. Though if you do decide to field 5+ champs, gaining player health is a nice perk.
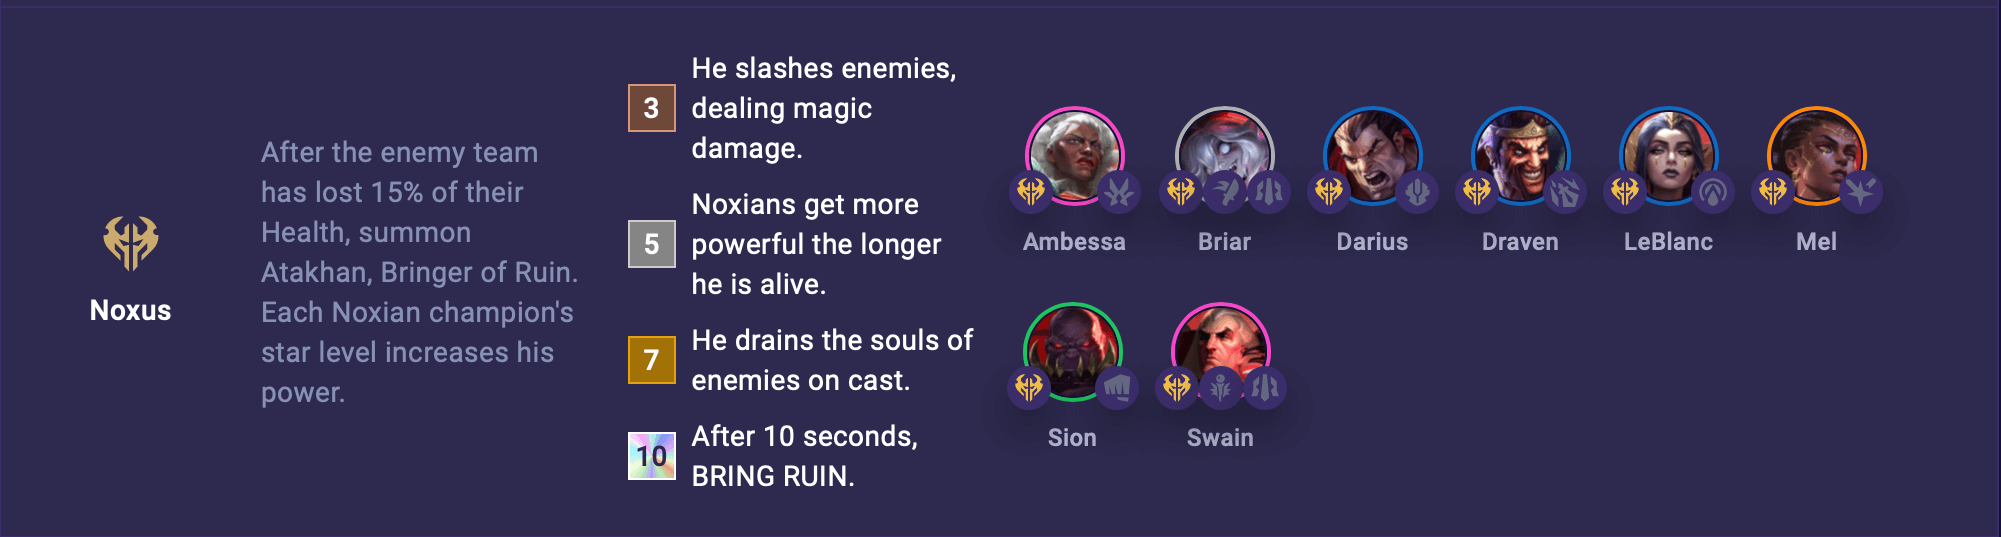
After the enemy team has lost 15% of their Health, summon Atakhan, Bringer of Ruin. Each Noxian champion's star level increases his power.
(3) He slashes enemies, dealing magic damage.
(5) Noxians get more powerful the longer he is alive.
(7) He drains the souls of enemies on cast.
(10) After 10 seconds, BRING RUIN.
First Impressions:
Noxus brings forth Atakhan as Set 16's summoning trait. This should provide a pretty sizeable early game boost, while offering a real top-end threat if you commit to the strategy.
Build an invention on the right side of the board. After 8 seconds, the invention activates, triggering each of its Modules.
(2) Choose a Module
(4) Choose a Second Module
(6) Choose a Third Module
First Impressions:
Piltover showcases its prowess with its unique inventions mechanic. Not much is currently known, but given its eight second activation time, I would hope the effect is decently strong.
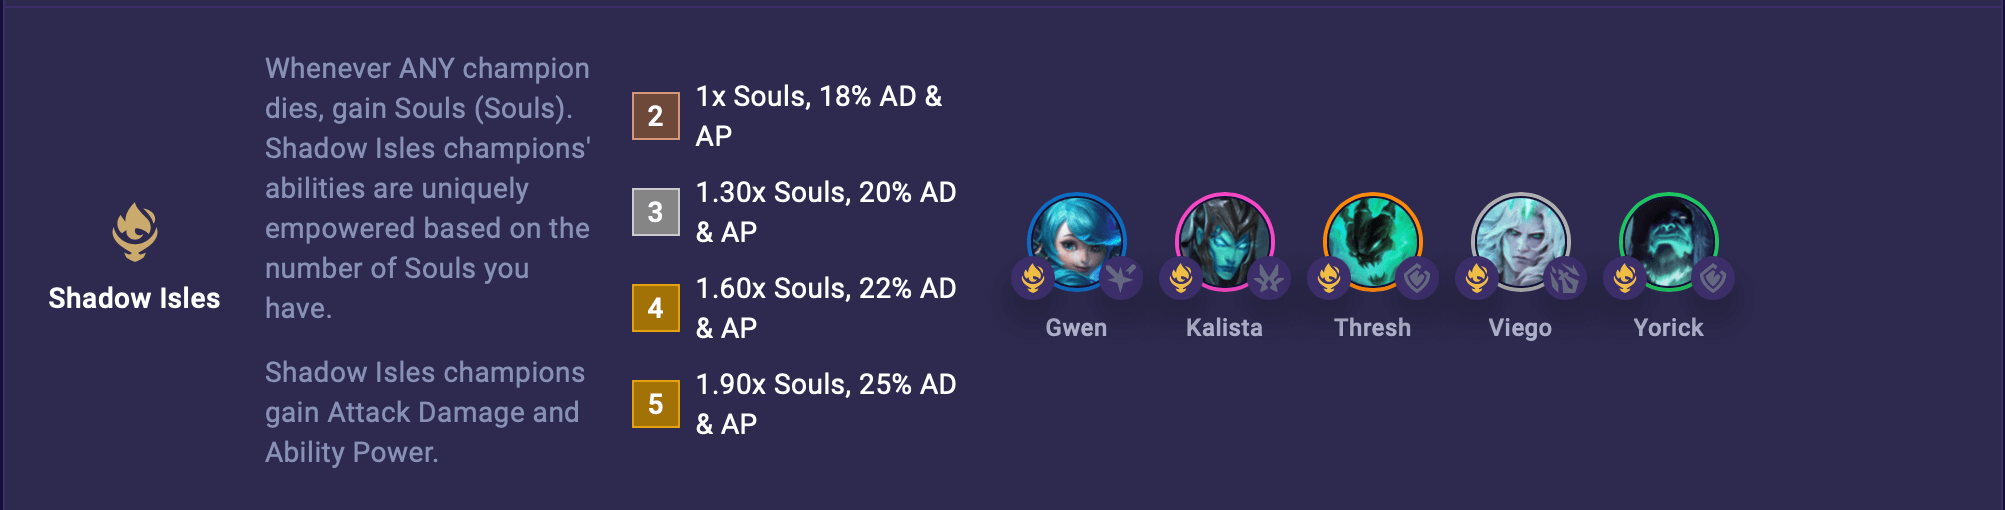
Whenever ANY champion dies, gain Souls. Shadow Isles champions' abilities are uniquely empowered based on the number of Souls you have.
Shadow Isles champions gain Attack Damage and Ability Power.
(2) 1x Souls, 18% AD & AP
(3) 1.30x Souls, 20% AD & AP
(4) 1.60x Souls, 22% AD & AP
(5) 1.90x Souls, 25% AD & AP
First Impressions:
Shadow Isles plays quite differently from the other Origin traits. Its champions get stronger over time whenever ANYONE dies, scaling their stats and abilities to an impressive level.
However, there's a catch. Viego is the only base champion in the region, meaning you'll have to unlock the rest in order to reap the rewards. It may be tough, but the power is certainly present.
Each second, Shurimans gain 2% Attack Speed and restore 20 Health. At combat start, they gain additional effects.
(2) 20% max Health
(3) 50 Armor and Magic Resist
(4) A Shuriman ascends to GODHOOD every 3 seconds.
First Impressions:
Shurima is another trait that contains only one base champion, Azir. What makes it even more unique is that the others are unlocked depending on whether you win or lose combats.
The bonuses are pretty strong if you manage to enable them, but considering Azir is a 5-cost unit, this won't come online until much later.
Targonians are forged by the stars. They are traitless, but stronger than the average champion.
First Impressions:
Targon champions gain no extra benefits, nor provide any synergies. However, if they really are above rate, they could be a nice inclusion outside of your main breakpoints.
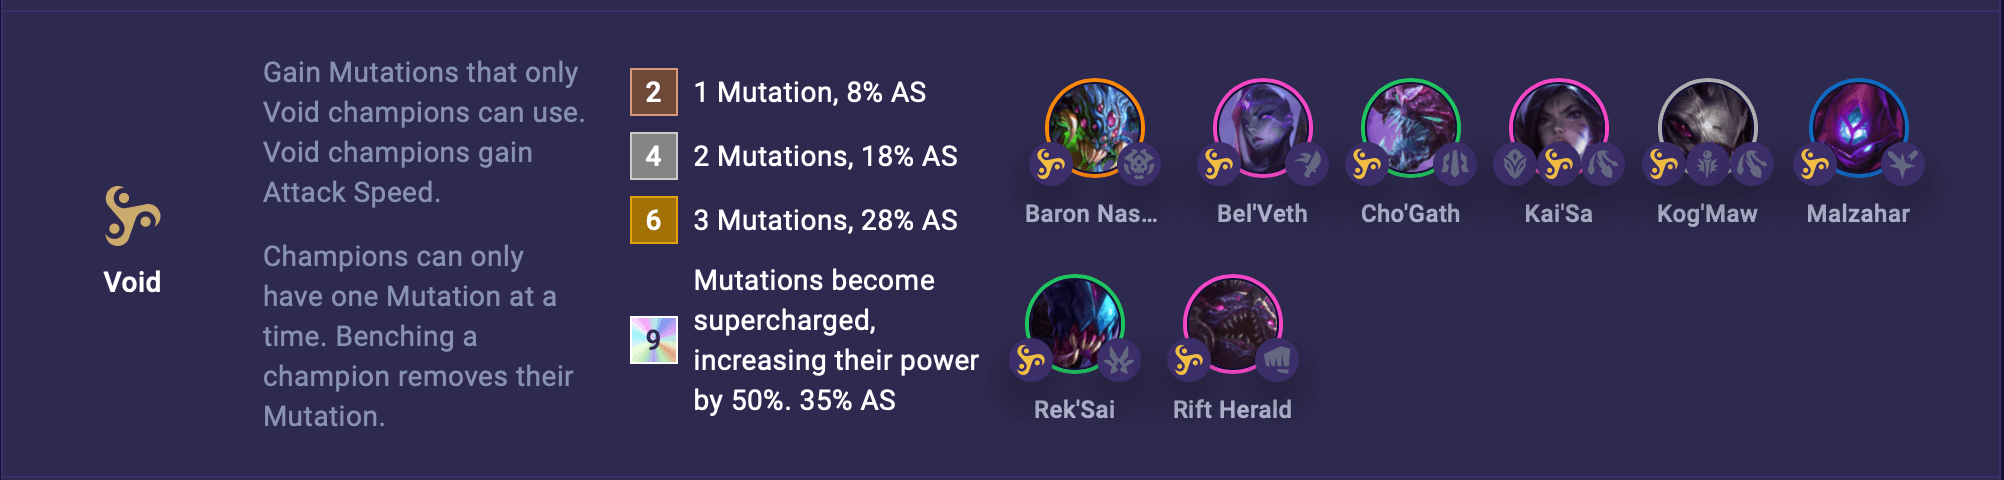
Gain Mutations that only Void champions can use. Void champions gain Attack Speed.
(2) 1 Mutation, 8% AS
(4) 2 Mutations, 18% AS
(6) 3 Mutations, 28% AS
(9) Mutations become supercharged, increasing their power by 50%. 35% AS
Champions can only have one Mutation at a time. Benching a champion removes their Mutation.
First Impressions:
Void Mutations can be utilized with as few as two pieces, making it quite accessible to pick up. While we don't have all the details, the Attack Speed alone is a nice benefit if you're aiming for a vertical comp.
(2) Yordles gain 50 Health and 7% Attack Speed for each Yordle fielded. 3 star Yordles grant 50% more!
(4) AND your first shop each round has a Yordle in it!
(6) AND get 2 free rerolls each round!
(8) AND get a Yordle Grab Bag each round!
First Impressions:
Yordle is Set 16's reroll trait, and on the surface, it looks pretty strong. The Health and Attack Speed can quickly stack up early on, while offering significantly more power once units become 3-starred.
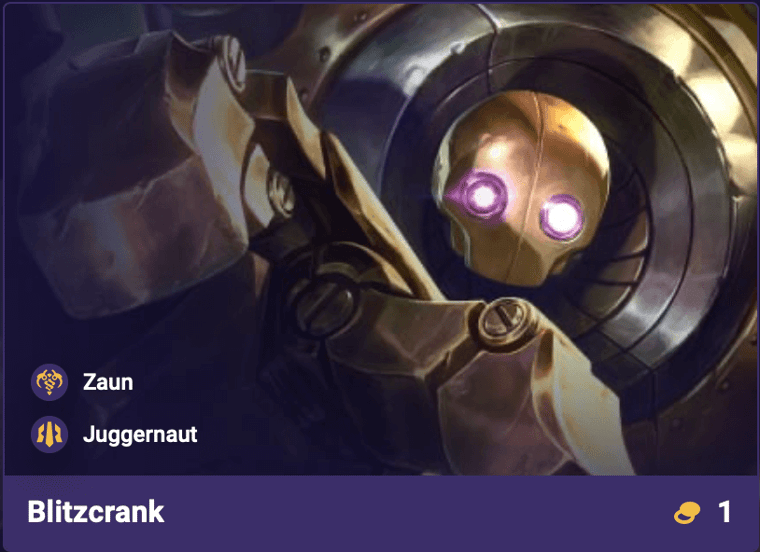
Zaun
Champions: Blitzcrank 1g / Ekko 2g / Vi 2g / Dr. Mundo 3g / Jinx 3g / Singed 4g / Warwick 4g / Ziggs 5g
After 4 seconds, Zaunites become Shimmer-Fused, granting them 10% Durability and 90% decaying Attack Speed for 4 seconds.
After a short cooldown, they become Shimmer-Fused again.
(3) Refresh after 4 seconds.
(5) At 60% Health, Zaunites restore 25% Health over 3 seconds and instantly become Shimmer-Fused.
(7) Shimmer-Fused bonuses are increased by 30%. Refresh after 3 seconds instead.
First Impressions:
Zaun champions gain an absurd amount of Attack Speed, but only in short bursts at a time. Timing and positioning could play a key role here, as in some scenarios the Shimmer-Fused trigger may be wasted.
There's certainly potential to capitalize on the window, but I imagine it'll be more matchup dependent compared to other comps.
Your team gains Ability Power, Arcanists gain more.
(2) 18 AP, 25 AP for Arcanists
(4) 25 AP, 45 AP for Arcanists
(6) 40 AP, 70 AP for Arcanists
First Impressions:
Arcanist is a simple and straightforward trait that provides Ability Power. Being beneficial to the whole team makes this almost always useful, and it's very accessible since it starts at two pieces.
Disruptor grants an inherent debuffing effect, allowing these units to weaken foes, while also dealing more damage to them. The flat damage reduction is a decent benefit for only requiring two pieces.
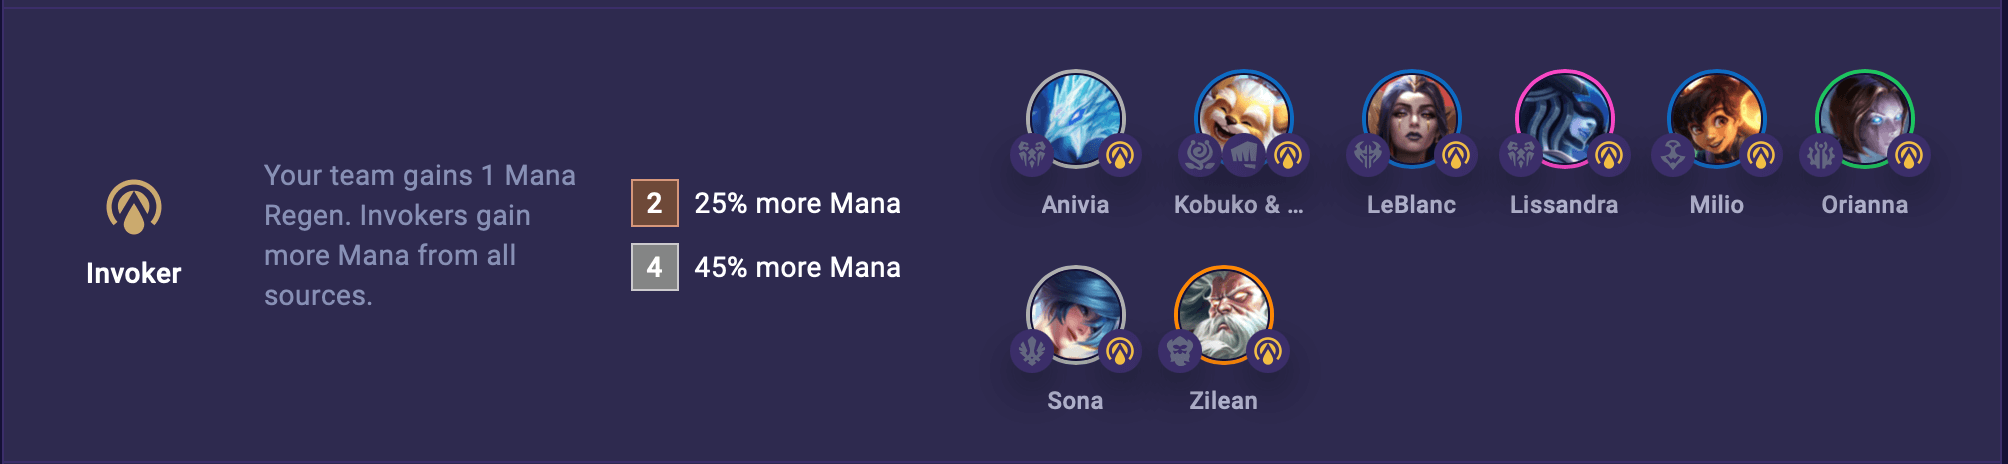
Your team gains 1 Mana Regen. Invokers gain more Mana from all sources.
(2) 25% more Mana
(4) 45% more Mana
First Impressions:
Invoker is generically useful across all comps, but definitely shines more when investing into Mana. For casters especially, it's a solid 2-piece pickup.
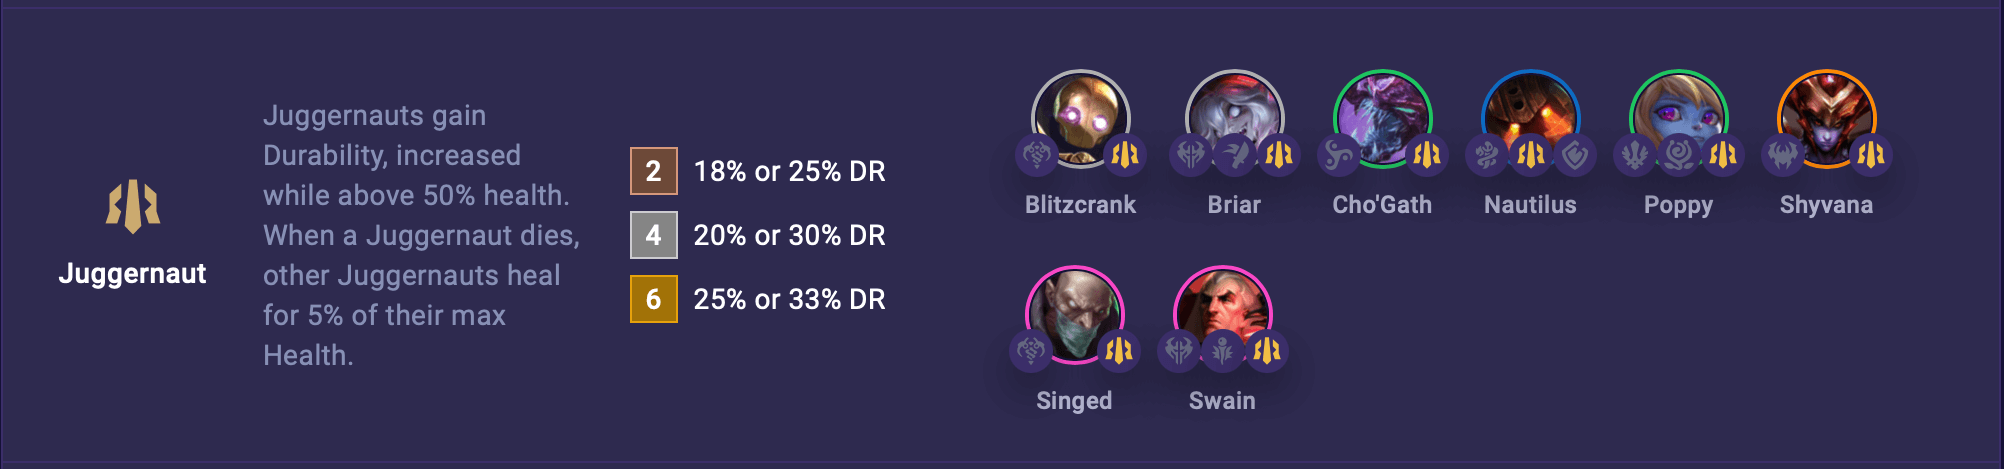
Juggernauts gain Durability, increased while above 50% health. When a Juggernaut dies, other Juggernauts heal for 5% of their max Health.
(2) 18% or 25% DR
(4) 20% or 30% DR
(6) 25% or 33% DR
First Impressions:
Juggernaut units are great on the frontline and work particularly well when fielded together. Having a pair is a solid early game inclusion, but stacking multiples can create quite the tanky troop.
Longshots gain Damage Amp and deal more damage to targets farther away.
(2) 18% DA + 2% per Hex
(3) 20% DA + 3% per Hex
(4) 24% DA + 4% per Hex
(5) 30% DA + 5% per Hex
First Impressions:
Longshot encourages backline setups that can remain at a distance for as long as possible. While you usually can't run too many without hindering your defenses, it's a considerable increase even with 2-3 pieces.
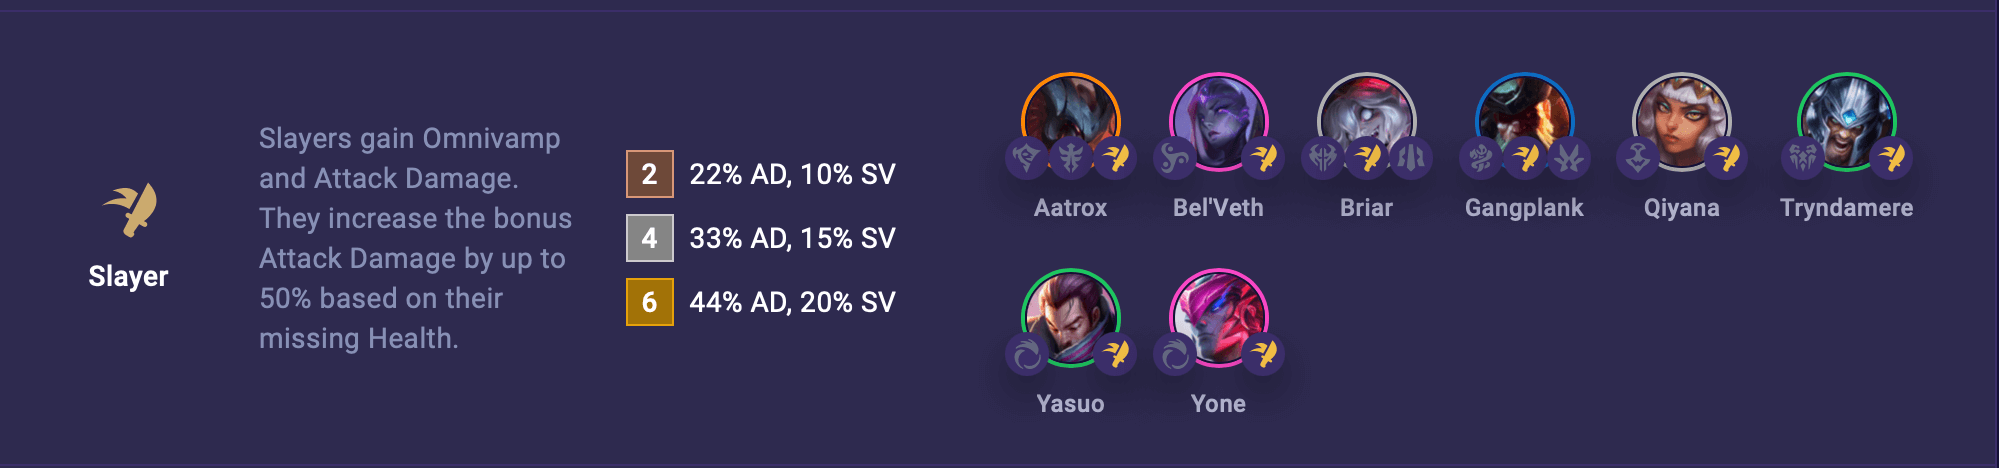
Slayers gain Omnivamp and Attack Damage. They increase the bonus Attack Damage by up to 50% based on their missing Health.
(2) 22% AD, 10% SV
(4) 33% AD, 15% SV
(6) 44% AD, 20% SV
First Impressions:
Slayer units get a respectable amount of Omnivamp and Attack Damage when aligned together. If you're planning to play one, it definitely makes sense to have another, allowing you to at least enable the 2-piece bonus.
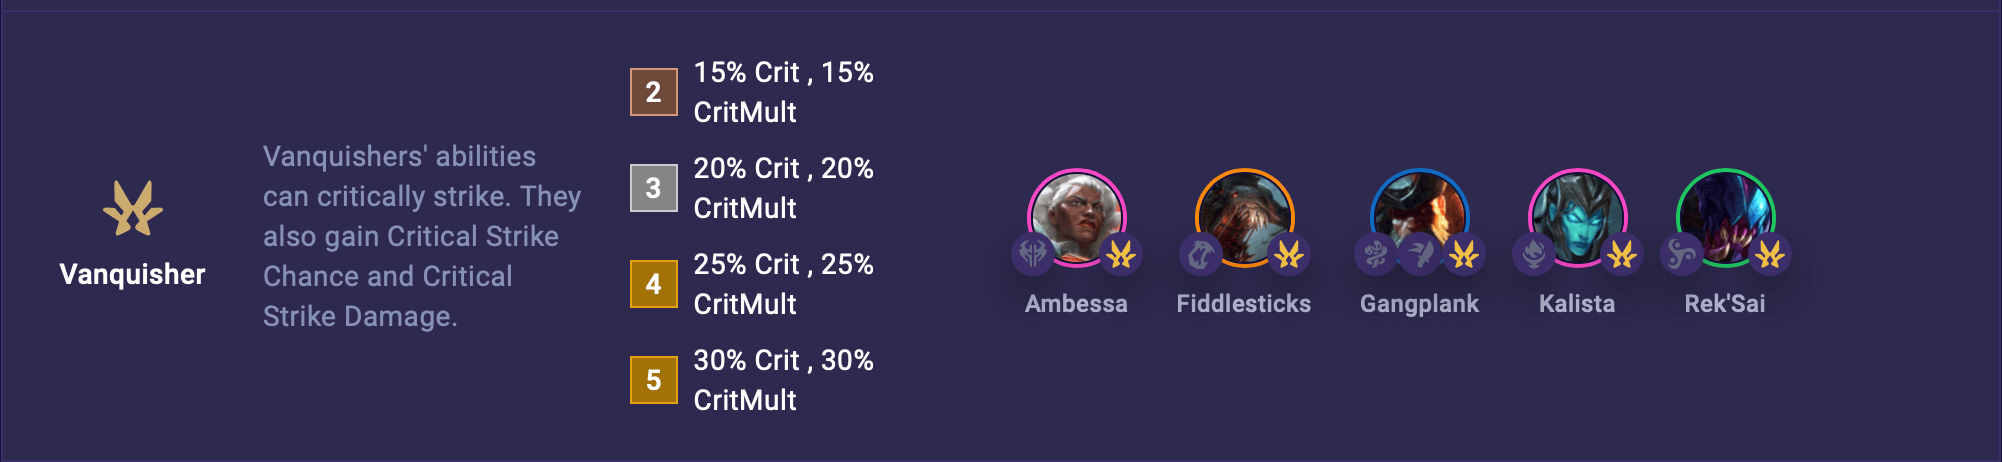
Vanquishers' abilities can critically strike. They also gain Critical Strike Chance and Critical Strike Damage.
(2) 15% Crit , 15% CritMult
(3) 20% Crit , 20% CritMult
(4) 25% Crit , 25% CritMult
(5) 30% Crit , 30% CritMult
First Impressions:
Vanquisher is similar to Slayer in that it provides a strong form of offense to its units. If you're going to make one of these your carry, it's definitely worth grabbing another to enable the Crit.
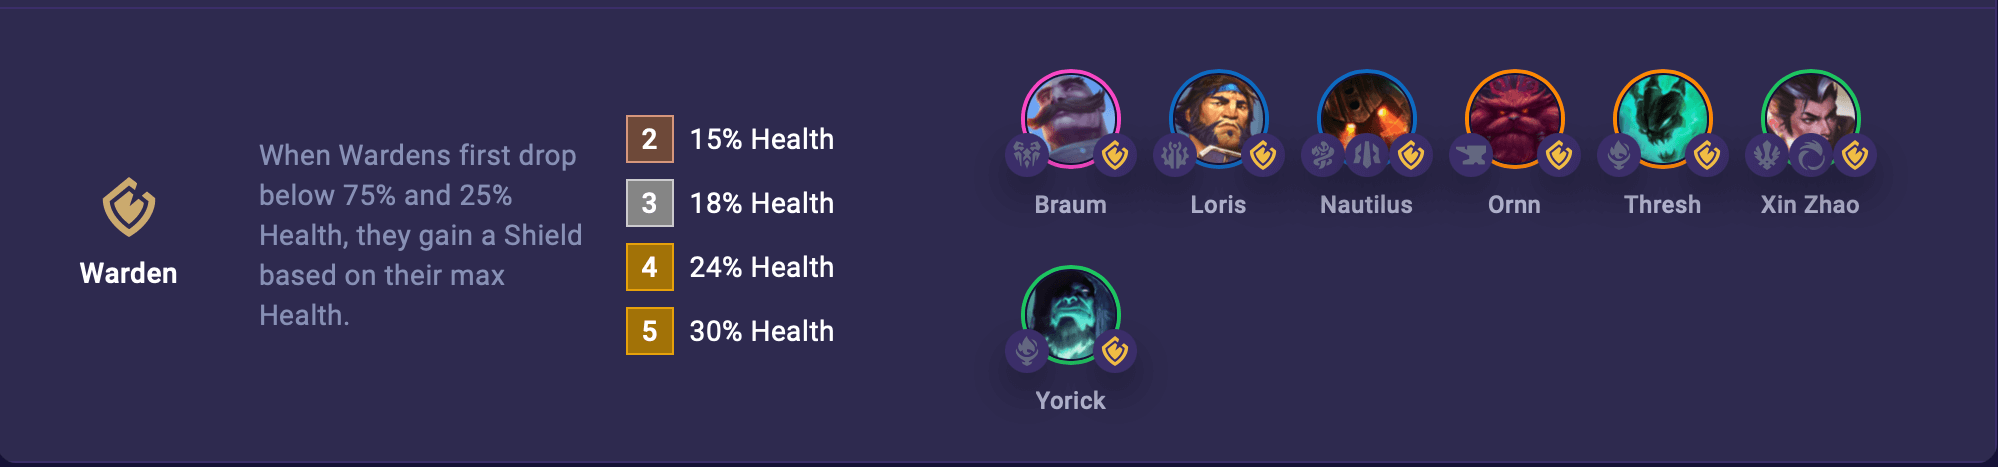
When Wardens first drop below 75% and 25% Health, they gain a Shield based on their max Health.
(2) 15% Health
(3) 18% Health
(4) 24% Health
(5) 30% Health
First Impressions:
Warden champions are another group of tanky frontliners. For a reasonably low investment, they can likely sponge a considerable amount of damage.
TFT Set 16 New Champions: Abilities, Positioning, and First Impressions
Now that we've reviewed the upcoming mechanics and traits, let's take a quick look at all of the new champions coming to Set 16.
Knowing this is TFT's 16th set, some champions may have similar/returning mechanics. Even so, the different combinations and trait webs are what make new sets exciting.
We’ll be providing basic positioning suggestions for every champion to get the ball rolling for you. Just remember that positioning is incredibly contextual in TFT and to always adapt to the situation at hand.
The terminology we’ll be using here is frontline, midline, and backline.
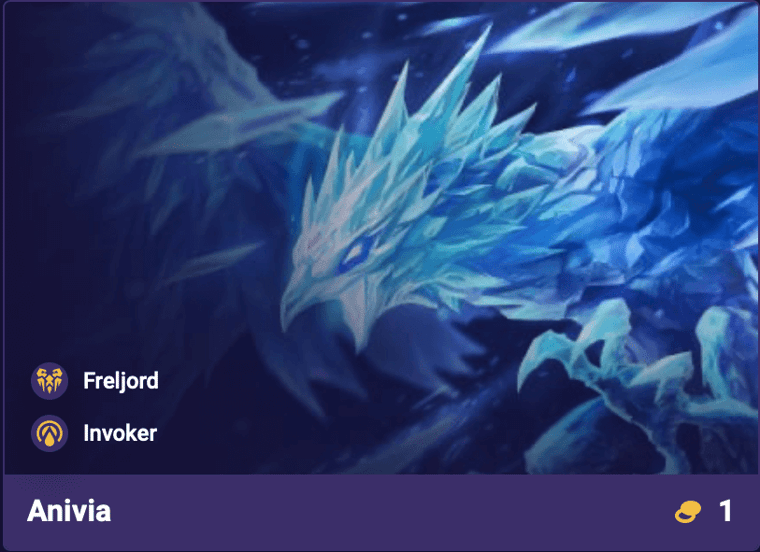
Fire an ice shard at target that deals 325/455/650 (AP) magic damage. If they are Chilled, the damage Critically Strikes.
Positioning: Backline
First Impressions:
Anivia is a pretty simple AP caster that focuses on single-target magic damage. Being able to Crit against Chilled enemies adds an additional layer of synergy, and Invoker helps her cast more frequently.
Gain 325/400/500 (AP) Shield for 4 seconds and deal 1.4/2.1/3.15 (MR) magic damage to all enemies within 1 hex.
Positioning: Frontline
First Impressions:
Blitzcrank's Static Field ability gives him a solid Shield on top of his natural defenses. Combined with the extra Durability from Juggernaut, you get a reliable 1-cost tank for the early game.
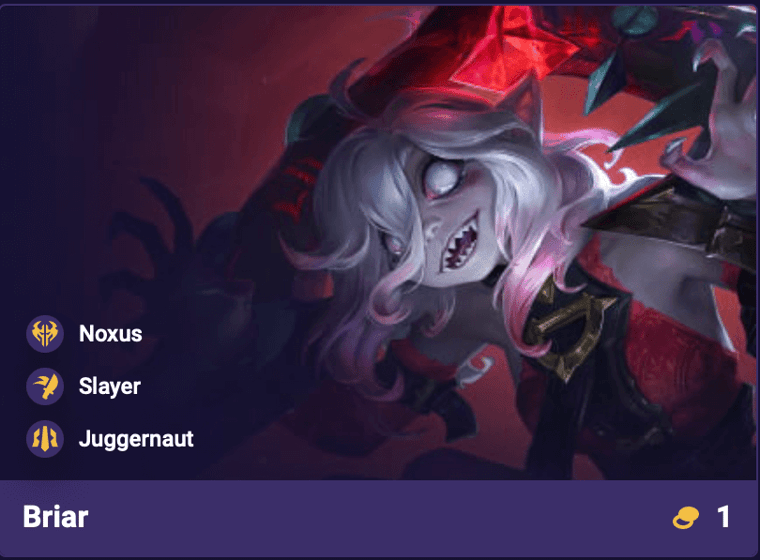
Leap to the furthest enemy within 3 hexes. For 4 seconds gain increased Move Speed, 0.3% Attack Damage, and 3 (AP) decaying Attack Speed.
Positioning: Midline
First Impressions:
Briar is a mobile early game threat, leaping to distant enemies within range while gaining a boost in stats. Slayer + Juggernaut also gives her some resilience, helping increase the odds of striking the backline.
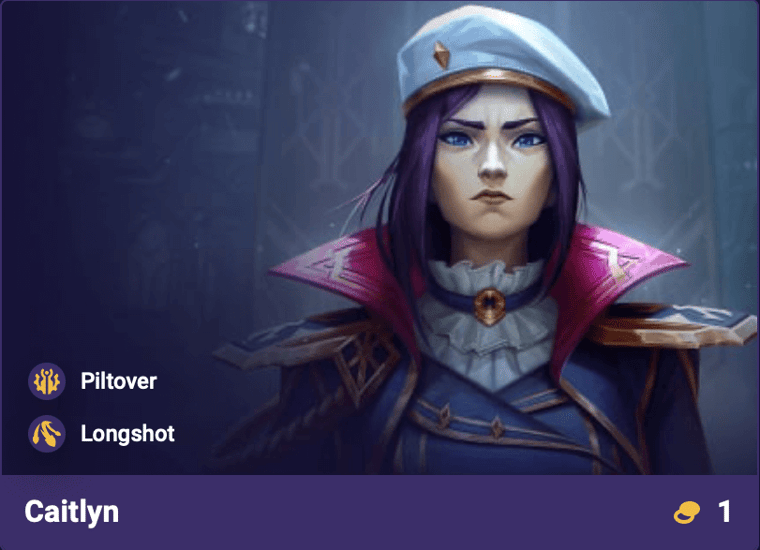
Fire a bullet towards the farthest enemy, dealing 475/715/1105 + 40/60/100 (AD & AP) physical damage to the first enemy it hits. If they die, the bullet ricochets, dealing excess damage to the next enemy hit.
Positioning: Backline
First Impressions:
Caitlyn returns as the classic long-ranged sniper that aims right for the backline. Her Longshot trait makes it easier to pick off squishy foes, increasing the likelihood of triggering the ricochet effect.
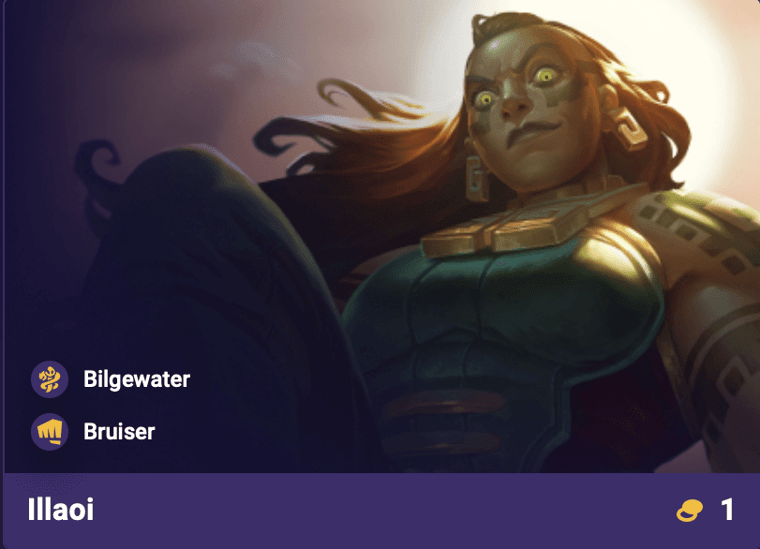
Restore 200/240/280 + 0.07 (Health & AP) Health and slam a tentacle, dealing 180/270/405 (AD) physical damage to enemies in a line.
Positioning: Frontline
First Impressions:
Illaoi is a basic frontline tank with a standard healing/damage ability. If you're looking for an early Bruiser, she's one of the first available options.
Gain 350/425/500 (AP) Shield for 4 seconds. Grant all allies 0.15/0.2/0.33 (AP) Attack Speed for 4 seconds.
Positioning: Frontline
First Impressions:
Jarvan IV can help hold the frontline with his Demacian Standard ability, granting him a respectable Shield. The added Attack Speed gives him some extra utility, which could be particularly nice for certain comps.
For the next 4 attacks, gain infinite range and replace attacks with a cannon shot. Cannon shots deal 125/190/280 + 15/22/34 (AD & AP) physical damage. The 4th shot deals 1.44% more damage.
Positioning: Backline
First Impressions:
Jhin is a backline AD carry that deals significantly more damage on every fourth hit (both from Curtain Call and Gunslinger). If you can give him some Attack Speed, he could become a pretty solid 1-cost threat.
Deal 140/200/300 (AP) magic damage to target and reduce their Armor and Magic Resist by 8/10/15. Adjacent enemies are dealt 0.5% of the damage and effect.
Positioning: Backline
First Impressions:
Kog'maw has some impressive utility for a 1-cost unit. Having three traits is always a huge plus, but the AoE Armor/MR reduction can improve the damage output of your entire team.
Deal 280/420/630 (AP) magic damage to target and make them dance for 2 seconds. The projectile then bounces to the nearest target, dealing 120/180/270 (AP) magic damage.
Positioning: Backline
First Impressions:
Lulu is backline mage with a useful CC ability. Forcing an enemy to dance for two seconds could definitely impact the fight, and on top of that, it deals respectable magic damage to two foes.
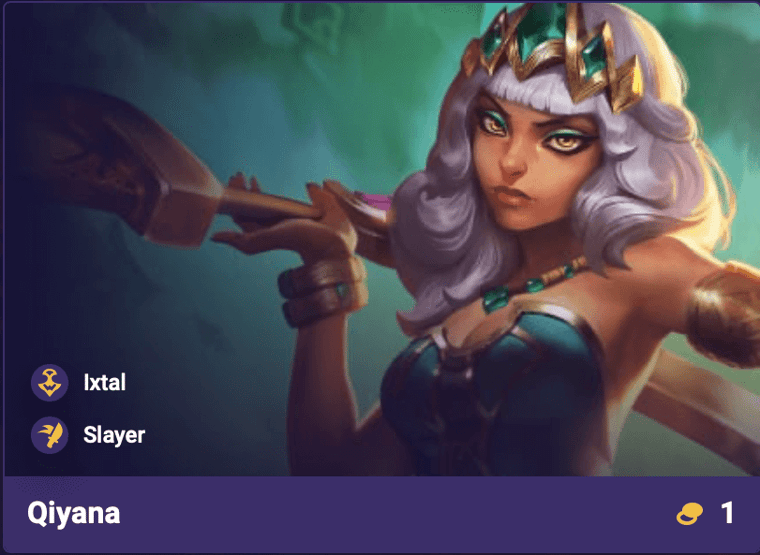
Dash to a nearby hex and swing forward, dealing 140/210/315 + 20/30/45 (AD & AP) physical damage to enemies in a 2-hex line.
Positioning: Midline
First Impressions:
Qiyana's Clear The Brush ability deals AoE physical damage to nearby enemies within range. Slayer compliments this well, granting more damage and some sustain as she dashes into the fray.
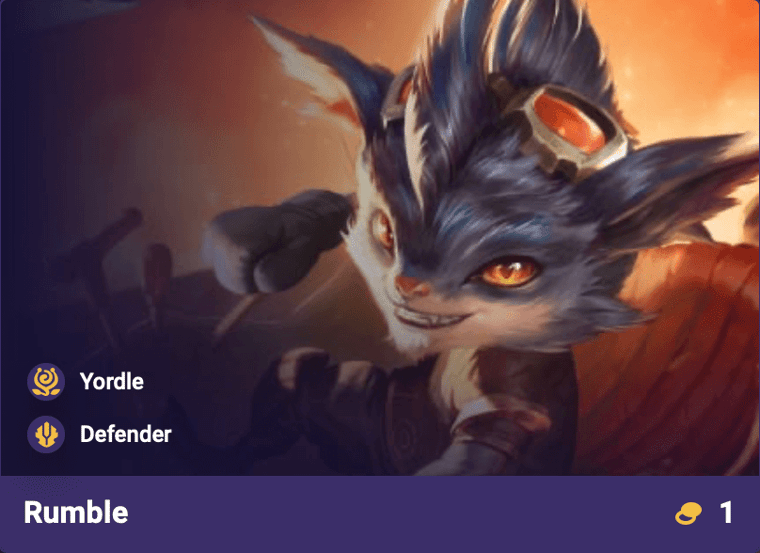
Gain 325/400/500 (AP) Shield for 4 seconds. Fire a burst of flames, dealing 1.8/2.7/4.05 + 0 (Armor) magic damage in a cone.
Positioning: Frontline
First Impressions:
Rumble provides early access to Defender, helping to fulfill the tank role when investing into Yordles. His Junkyard Titan ability also scales based on Armor, allowing him to deal magic damage while focusing on his defenses.
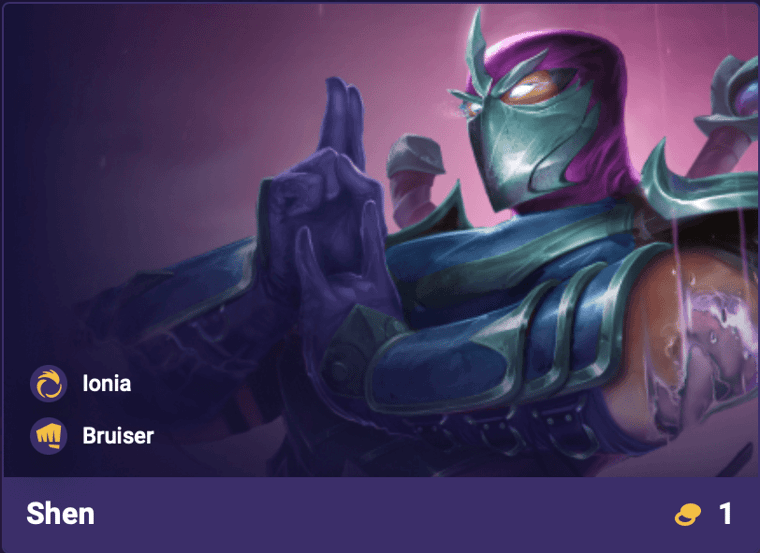
Grant 250/325/425 (AP) Shield to this unit and a nearby damaged ally for 4 seconds.
Positioning: Frontline
First Impressions:
Shen is the other 1-cost Bruiser in the pool, and is also one of Ionia's first units. While most tanks mainly focus on bolstering themselves, Shen does a good job of aiding allies with Stand United.
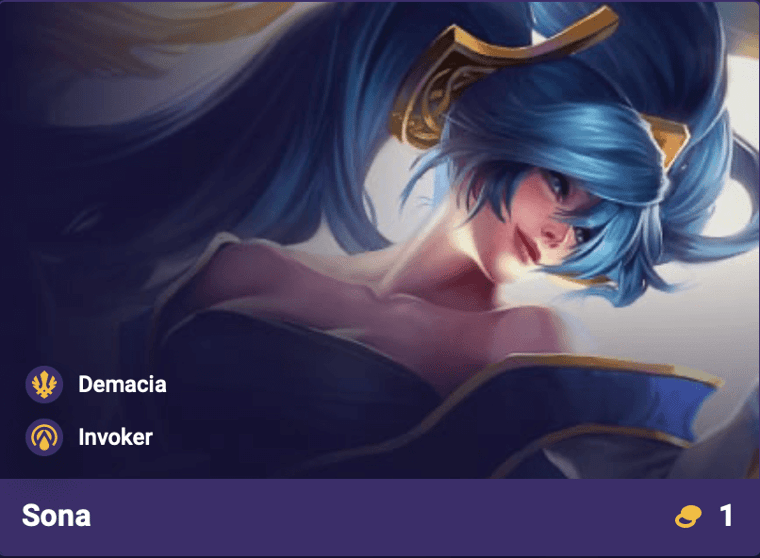
Deal 120/180/270 (AP) magic damage to 2 nearby enemies and restore 40/50/80 (AP) Health to the lowest Health ally.
Positioning: Backline
First Impressions:
Sona's Power Chord ability helps heal the weakest ally while dealing magic damage to two nearby foes. It's a simple effect, but could be cast quite often thanks to Demacia's rally and the Mana Regen from Invoker.
Active: Deal 55/85/125 (AD) physical damage to target. For the rest of combat, Viego's attacks deal 24/36/54 (AP) bonus stacking magic damage.
Positioning: Frontline
First Impressions:
Viego is the only base Shadow Isles champion in the pool, and looking at his passive ability, it's no surprise. Being able to permanently stack Attack Speed throughout the game gives him a ton of scaling potential.
He's the first piece of the puzzle to getting the trait up and running, so I imagine he'll be highly contested among 1-cost units.
Start with Infernum equipped. On cast, switch to Severum for 8 (AP) attacks.
Infernum: Attacks hit 3 enemies and apply 0.3% Sunder for 6 seconds.
Severum: Gain 2% Attack Speed and 0.1% Omnivamp. Attacks are replaced with swipes that deal 75/110/175 (AD) physical damage.
Positioning: Backline
First Impressions:
Aphelios is the first of the Targon champions, which effectively have zero traits, but are well above rate for their cost. This is clearly evident seeing as his basic attacks multi-target and apply Sunder.
If you've got the space, Aphelios provides great utility for physical based teams, making him worth splashing in outside of key breakpoints.
Fire an arrow at target that deals 125/185/290 + 15/25/35 (AD & AP) physical damage to them and 125/185/290 + 15/25/35 (AD & AP) damage to adjacent enemies. Targets below 0.3% max Health take true damage instead. 30% Chill all enemies hit for 3 seconds.
Bloodsword Bond: When you field Ashe and Tryndamere, your strongest copies permanently increase their power on kill.
Bloodsword Bond: Attacks fire a bonus arrow for every 0.05% Attack Damage granted to Tryndamere by Bloodsword Bond. These arrows deal 0.07 (AD) physical damage.
Positioning: Backline
First Impressions:
Ashe is a backline AD carry that is key to unlocking Tryndamere. Once both units are aligned, her Bloodsword Bond passive grants permanent scaling throughout the course of the game. With enough time, she's got potential.
Unlock Condition: Reroll 4 times before Stage 2 Carousel.
Unique Trait: Caretaker
After winning player combat, gain a random unit from Runeterra. After losing combat, gain free rerolls, with the amount increasing by stage.
Ability: Traveler's Call
Launch 6 Meeps at nearby enemies that deal 105/160/240 (AP) magic damage. Add an additional Meep for each 3-star unit on your board.
Positioning: Backline
First Impressions:
Bard is an unlockable early game champion that's built specifically for reroll comps. His unique Caretaker trait repeatedly grants random units and rerolls, making him an excellent addition to your economy.
As for in combat, the more you level up your board, the stronger he gets. This gives him the potential to scale well into the late game, adding an extra source of damage alongside your team of 3-stars.
Restore 180/200/250 (AP) Health and rupture a 2 hex circle beneath target. After a brief delay, enemies within are knocked up for 1.5 seconds and take 0.05 + 45/75/110 (Health & AP) magic damage.
Positioning: Frontline
First Impressions:
Cho'Gath's Rupture ability provides a great form of crowd control to the team. An AoE knockup is always welcome, and having healing combined with Juggernaut makes him quite tanky.
Create a 1 hex zone around the target that lasts 3 seconds. The next 3 attacks deal 105/160/240 (AP) bonus magic damage.
When the zone ends, it deals 130/195/295 (AP) magic damage + 0.1% of the target's damage taken during the duration to all enemies in the zone.
Positioning: Midline
First Impressions:
Ekko's Parallel Convergence focuses his attacks on one foe before applying area magic damage to enemies within range. While simple on the surface, the Disruptor trait lets it apply a damage debuff to everyone hit.
Unlock Condition: Field a Twisted Fate with 2 items in combat.
Ability: Collateral Damage
Passive: Attacks fire in a cone on target, dealing 0.45% damage to other enemies hit.
Active: Fire an explosive shell at target, dealing 170/255/385 + 20/30/45 (AD) physical damage split among enemies in a 1 hex circle.
Partners in Crime: When you field Graves and Twisted Fate, both gain bonuses.
Partners in Crime: Your strongest Twisted Fate's ability marks targets for your strongest Graves. Graves gains 0.02% stacking Attack Speed when attacking marked targets.
Positioning: Backline
First Impressions:
Graves makes great use of Gunslinger thanks to his passive cone-firing ability. Once unlocked by Twisted Fate, he's an easy slot-in to fill out your Bilgewater comp.
Leap at target and gain 400/500/600 (AP) Shield for 4 seconds. Slam down after a brief delay, dealing 150/225/350 (AP) magic damage to enemies within two hexes and 20% Chilling them for 3 seconds.
Positioning: Frontline
First Impressions:
Neeko is a frontline AP tank with an ordinary Shield/AoE magic damage ability. A reasonable inclusion to enable Arcanist and/or Defender, but also has some utility via Chill.
Send the Ball to target, dealing 220/330/500 (AP) magic damage and splitting 100/150/250 (AP) magic damage among enemies within a 1 hex circle.
Then grant 80/120/200 (AP) Shield to the two lowest Health allies for 3 seconds.
Positioning: Backline
First Impressions:
Orianna essentially becomes a free unlock if you're playing Piltover, although with few champs in the pool, it won't be immediately. Regardless, she's a fine caster that will help you skip to the four-piece threshold.
Unlock Condition: Field a Demacian or Yordle with 2 items in combat.
Ability: Hammer Shock
Gain 300/375/450 (AP) Shield for 4 seconds and deal 70/105/165 (AD) physical damage to target. After a delay, briefly knock them up and deal the damage again. Bucklers fly out from the target, granting 2 nearby allies 0.3% of the Shield gained.
Positioning: Frontline
First Impressions:
Poppy is an excellent addition to a Demacia or Yordle comp, offering solid Shielding and a single-target knockup. Her unlock requirement is pretty simple, giving players easy access to improving their vertical comps.
Dash to the furthest enemy within 3 hexes and deal 140/210/315 + 20/30/45 (AD & AP) physical damage to them. The next 3 attacks hit adjacent enemies and deal 100/150/225 (AD) physical damage.
Positioning: Frontline
First Impressions:
Rek'Sai's Burrow ability provides a bit of backline reach, making her more unique among frontline tanks. With lucky timing and positioning, she can hit multiple enemies at once for a decent chunk of physical damage.
Passive: Takedowns grant 20/25/60 permanent max Health.
Active: Gain 0.1 (Health & AP) Shield for 4 seconds. When it breaks, deal 0.07 (Health) magic damage to adjacent enemies.
Positioning: Frontline
First Impressions:
Sion has the ability to permanently scale his max Health upon takedowns. If well fed, this gives him great longevity for the late game. Worst case, he's still helpful as a 2-cost Bruiser.
Shoot the closest unpoisoned enemy, dealing 125/185/285 (AP) magic damage and poisoning them for 8 seconds. Poisoned enemies take 30/45/70 (AP) magic damage each second.
Positioning: Backline
First Impressions:
Teemo's Toxic Dart ability pesters his enemies with poison. Standalone this seems okay, but with extra Attack Speed from Yordle, Teemo can truly showcase what makes him so "lovable".
Fire a massive cannonball at the closest enemy, dealing 250/375/565 + 30/45/70 (AD & AP) physical damage. If they are within 2 hexes, knock them back 2 hexes and briefly Stun them.
Positioning: Backline
First Impressions:
Tristana is a backline AD carry that has extra utility via her conditional knockback and Stun effect. It's a great deterrent against enemies that get up close, giving her a chance to temporarily escape their target.
Unlock Condition: Field an Ashe with 2 items in combat.
Ability: Undying Rage
Become enraged for 5 seconds. While enraged, gain (AP) Durability and attacks are replaced with a strike that deals 120/180/270 (AD) physical damage. Ignore 0.3% of Armor against Chilled enemies.
Bloodsword Bond: When you field Ashe and Tryndamere, your strongest copies permanently increase their power on kill.
Bloodsword Bond: Gain increased Move Speed. Gain 0.1% Attack Damage, permanently increased by 0.01% whenever Ashe or Tryndamere score a kill.
Positioning: Frontline
First Impressions:
Tryndamere goes hand in hand with Ashe, both from the Bloodsword Bond ability, and also with his synergy against Chilled enemies. If you're playing one, you're playing the other, and both have incredible scaling potential.
Passive: Attacks deal 30/45/70 (AP) bonus magic damage. After every 3rd attack, throw 3 cards in a cone that deal 70/105/160 (AP) magic damage, reduced by 0.5% for each enemy they pass through.
Partners in Crime: When you field Graves and Twisted Fate, both gain bonuses.
Partners in Crime: Twisted Fate's ability marks targets for Graves. When Graves kills a marked target, gain 10% Ability Power until end of combat.
Positioning: Backline
First Impressions:
Twisted Fate will likely be a priority pickup when playing Bilgewater, simply due to the fact he unlocks Graves. If you're leaning towards going vertical, TF seems like a no brainer.
Gain 125/150/175 (AP) Shield for 2 seconds. Slam on target, dealing 110/165/250 (AD) physical damage to enemies in a 1 hex range. Every third cast deals 140/210/315 (AD) damage in a 2 hex range instead and knocks up enemies hit for 1 second.
Positioning: Frontline
First Impressions:
Vi offers a lot of value for a 2-cost unit. She has three different traits, two of which are Origins, making her a flexible fit early on.
In combat she's a respectable frontliner, and the longer the fight lasts, the more opportunities she has to knockup her foes. What's not to like?
Strike target 3 times. Each strike deals 65/100/150 (AD) physical damage and restores 95/135/170 (AP) Health. The final one Stuns for 1.5 seconds.
Positioning: Frontline
First Impressions:
Xin Zhao is another 2-cost unit with three traits, and again, two of these are Origins. Since Demacia and Ionia are vertical traits, he'll likely be contested, especially in the beginning.
Similarly to Vi, he also has CC but in the form of a Stun. Better yet, it's not restricted to every third cast, giving Xin Zhao fantastic utility in combat.
Dash, then deal 75/115/175 + 6/9/14 (AD & AP) physical damage to adjacent enemies. If only one enemy is hit, deal double damage.
Blade Brothers: When you field Yasuo and Yone, Yasuo assists Yone's casts.
Blade Brothers: When Yone casts, your strongest Yasuo blinks to every target Yone hits and deals 1% (AD) physical damage to each.
Positioning: Frontline
First Impressions:
Yasuo is fairly ordinary on his own, acting as a strong and mobile frontliner that's effective in 1v1, or against multiple enemies. However, where he truly shines is alongside Yone.
Getting Yasuo to 3-stars unlocks his real potential with Blade Brothers. It's definitely not an easy condition to fulfill, but offers a great reward if you can pull it off within a reasonable time.
Unlock Condition: Field a 2-star Viego with 2 items in combat.
Ability: Mourning Mist
Restore (AP & Souls) Health. Throw a globule of black mist at the enemy who has dealt the most damage this combat, preferring unique enemies. It 20% Chills them for 4 seconds and raises the Mana cost of their next cast by 20. It then deals 0.05 + 80/110/150 (Health) magic damage in 1 hex radius.
Positioning: Frontline
First Impressions:
Yorick is the next entry into the Soul collecting region of Shadow Isles. He's accessible once you've invested into Viego, and acts as a disruptive tank with a scalable heal ability. Likely the first opportunity to enable the trait.
Fire 3 flames at target, each dealing 85/130/200 (AP) magic damage. Every 3rd cast, fire 9 flames split between the target and up to 2 nearby enemies.
If there are nearby enemies, dash away.
Positioning: Backline
First Impressions:
Ahri is a standard backline AP carry with some built-in mobility. She excels in longer fights where Fox-Fire can be cast frequently, and her dash helps to escape from harm.
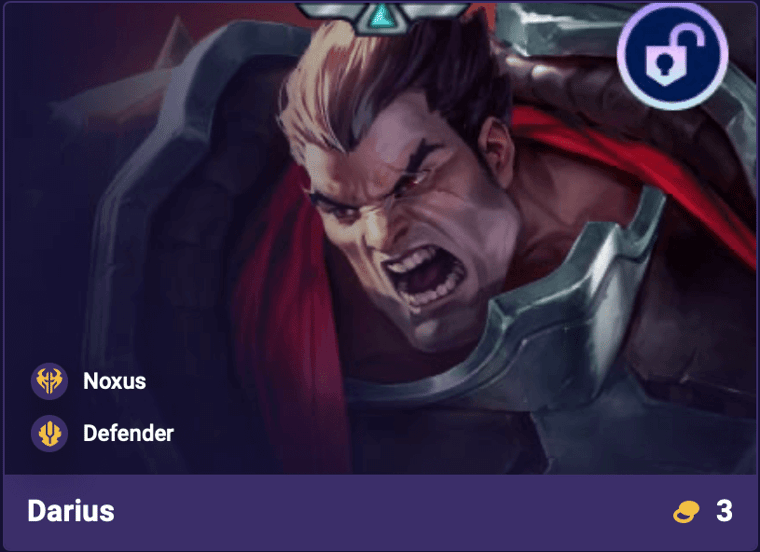
Restore 160/190/220 + 0.1 (Health & AP) Health and spin, dealing 90/135/210 (AD) physical damage to adjacent enemies and applying a stack of Hemorrhage that deals 15/25/40 (AD) physical damage each second for 4 seconds.
If an enemy with Hemorrhage drops below 0.08% Health, slam on them, instantly killing them. (Each stack increases the execute threshold by 0.05%)
Positioning: Frontline
First Impressions:
Darius spins into the fray, dealing considerable damage to his foes. His Hemorrhage effect makes him great at finishing off weak enemies, instantly deleting them. If you're playing Draven, it's only a matter of time before Darius shows up to join the party.
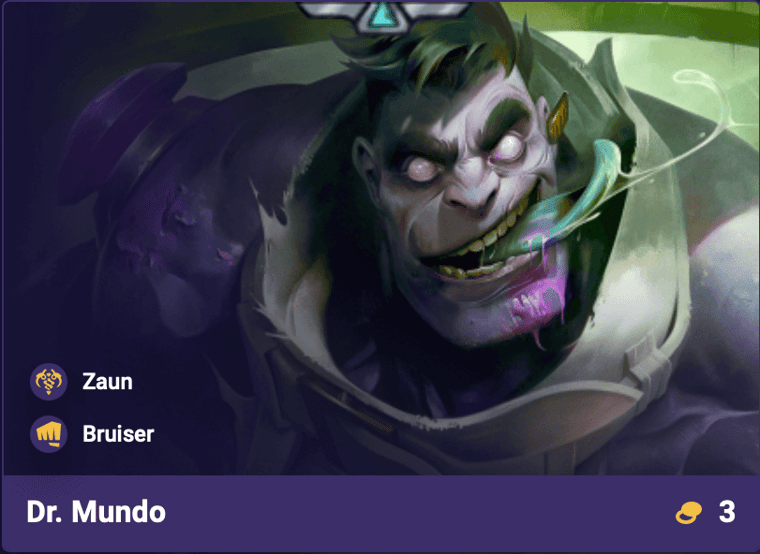
Bulk up for 5 seconds. While bulked, restore 0.06 + 60/80/100 (Health & AP) Health every second and attacks deal 60/90/145 + 0.05 (Health & AD) physical damage.
Positioning: Frontline
First Impressions:
Dr. Mundo is a frontline tank that takes advantage of Health scaling. This pairs well with Bruiser, and with investment, should become quite annoying to deal with due to the continuous healing.
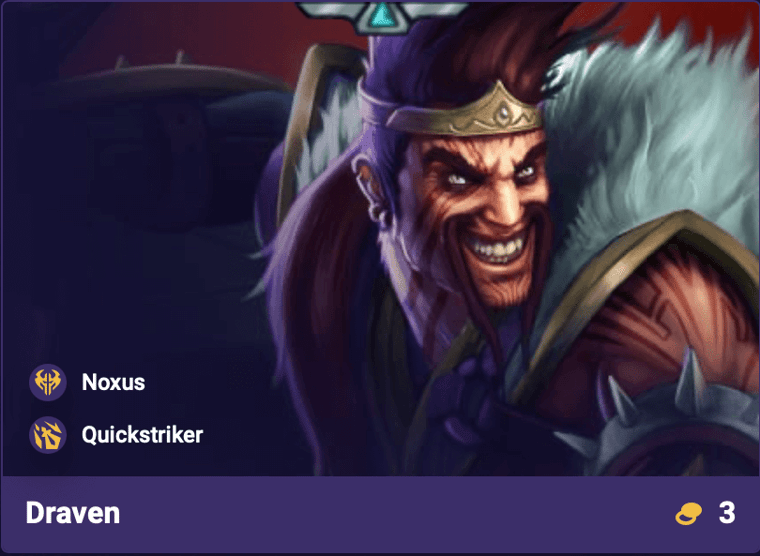
Passive: If Draven has an empowered axe in hand, his next attack will throw it. On takedown, gain an Adoration stack, doubled if Draven or Darius scored the kill. Every 11 Adoration stacks grants 1/3/5 Gold.
Active: Spin an empowered axe that replaces his basic attack and deals 140/210/350 + 10/15/25 (AD & AP) physical damage and returns to Draven after hitting an enemy.
Positioning: Backline
First Impressions:
Draven's passive ability occasionally grants gold, assuming you're able to reliably get takedowns. Doing so will unlock Darius, adding another Noxus unit to your team. Aside from that, he seems like a fine AD carry.
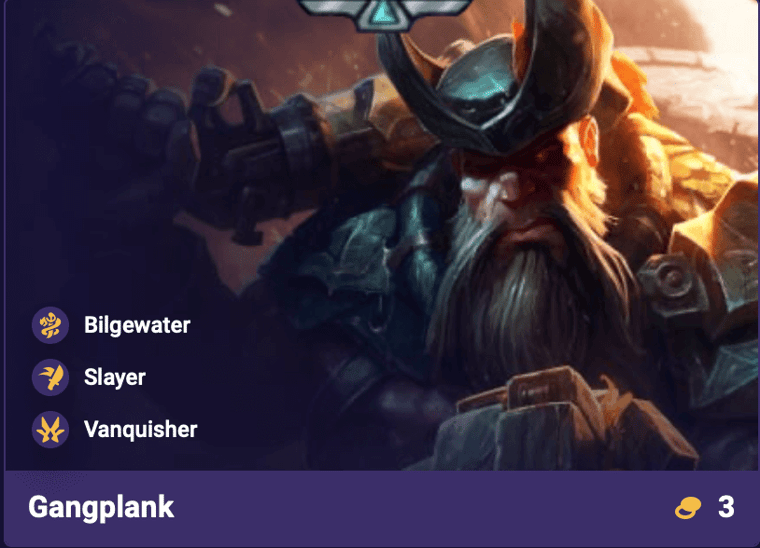
Toss barrels at the 3 nearest enemies and detonate them. They deal 190/285/450 + 10/15/25 (AD & AP) damage, reduced by 0.2% for each barrel in the chain. Barrels reduce their target's Armor by 10, increased to 30 if the damage critically strikes.
Positioning: Frontline
First Impressions:
Gangplank's Powder Kegs have some real burst potential, especially if you can line up a Crit with Vanquisher. The Armor reduction is also great for physical based teams, and having three traits makes him considerable outside of just playing Bilgewater.
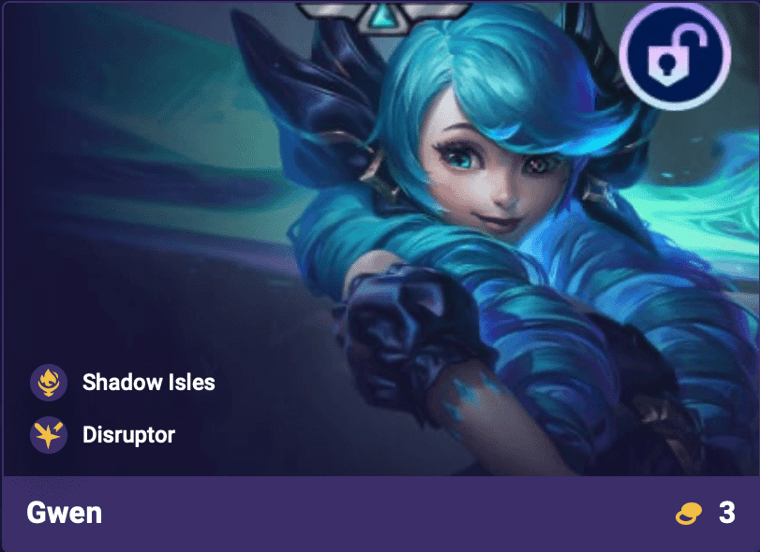
Dash around target and snip (Souls) times, dealing 45/68/105 (AP) magic damage to them and 20/30/50 (AP) damage to all other enemies in a cone.
Positioning: Frontline
First Impressions:
Gwen has massive scaling potential with Souls, and her ability pairs very well with Disruptor because of the sheer quantity of hits. Assuming you've got the time to scale, she'll likely become a great asset to the team.
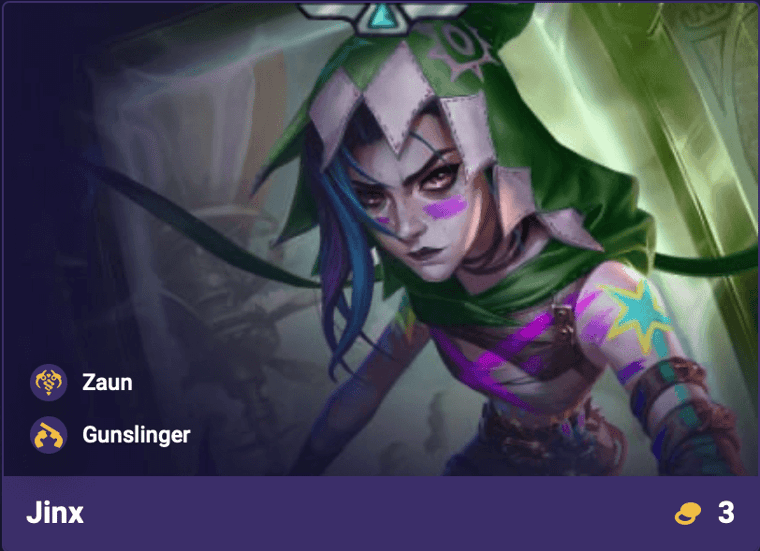
Passive: After attacking 18/18/16 times, switch to Fishbones. While equipped, attacks are replaced with 3 rockets that target random enemies and deal 36/54/92 + 4/6/9 (AD) physical damage.
Positioning: Backline
First Impressions:
Jinx is a backline Gunslinger that puts emphasis on scaling Attack Speed. If you can quickly accelerate to Fishbones (by attacking enough times), her damage output skyrockets.
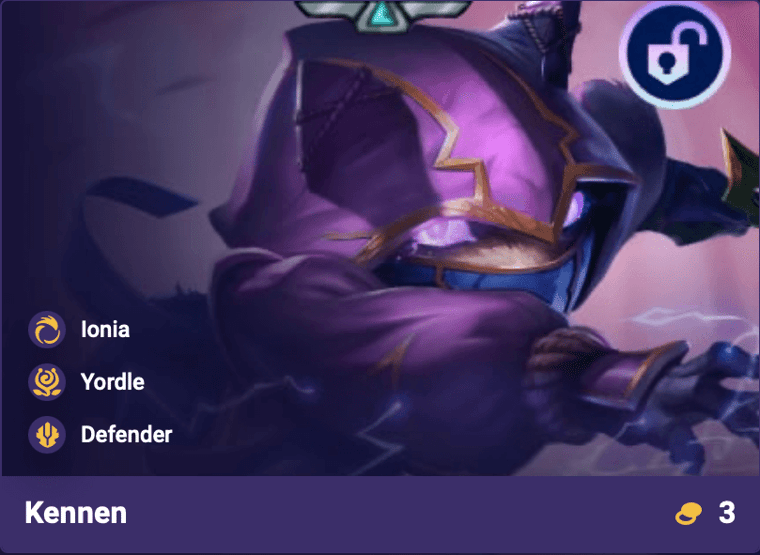
Unlock Condition: 8 star levels of Ionia, Yordle, or Defender.
Ability: Slicing Maelstrom
Gain 600/700/900 (AP) Shield and summon storm of lightning. 6 waves of bolts hit enemies within, dealing 120/180/290 (AP) magic damage over 3 seconds. The first 3 targets to be struck by 3 bolts are Stunned for 1.5 seconds. Multiple Stuns on the same enemy have 0.5% effectiveness.
Positioning: Frontline
First Impressions:
Kennen has a very flexible unlock condition, allowing him to be acquired by Ionia, Yordle, and Defender comps. On top of that, he's very effective on the battlefield, providing AoE magic damage and a multi-target Stun (up to 3).
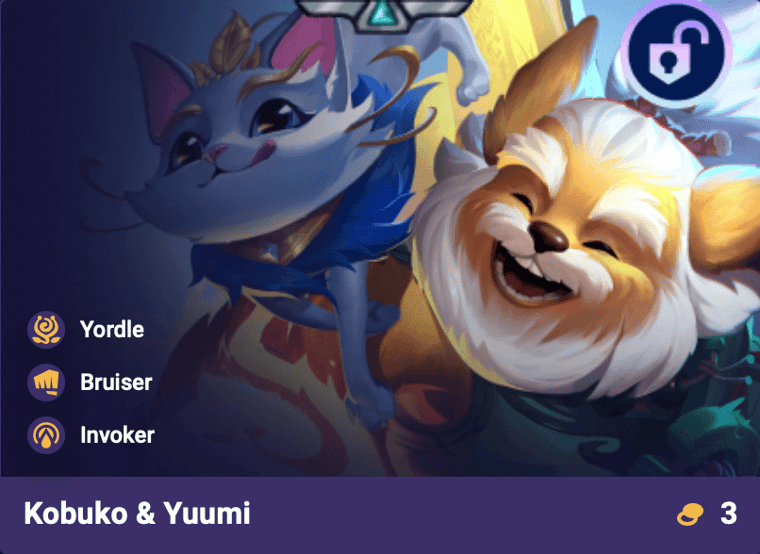
Unlock Condition: 6 star levels of Bruiser, Yordle, or Invoker.
Ability: You & Me!
Passive: Yuumi joins your strongest Kobuko. Every 3 seconds, she alternates between healing the lowest Health ally for 140/180/240 (AP) Health or granting 25/33/50% Attack Speed to the ally who has dealt the most damage for 4 seconds.
Active: Dance, restoring 100/140/200 + 0.08 (Health & AP) Health over 3 seconds.
Positioning: Frontline
First Impressions:
Kobuko & Yuumi also follows a similar unlock condition, requiring some investment into Brawler, Yordle, or Invoker. Once found, this tanky duo provides excellent support for your team, either via heals or AS buffs.
Unlock Condition: Field a Sion with 2 items in combat.
Ability: Distortions
Summon 3 dashing mirror images that strike the target and up to X other nearby enemies. The target takes 250/375/580 (AP) magic damage and is Stunned for 1 second, while other units hit take 140/210/325 (AP) magic damage.
Positioning: Backline
First Impressions:
LeBlanc is your reward for investing into Sion, which if you can recall, is pretty well worth it for the permanent Health scaling. As for herself, she deals respectable magic damage and has a Stun. A nice addition to Noxus.
Passive: Reduce instances of incoming damage by 15/40/80 (AP).
Active: Call down sun beams on the 3 nearest enemies, Stunning them for 1 second and dealing 90/130/220 (AP) magic damage. Wound and 1% Burn them for 4 seconds.
Positioning: Frontline
First Impressions:
Leona's passive gives her impressive tanking potential, as all sources of damage get reduced. Even better, she has a multi-target Stun that also applies Wound and Burn.
Of course, there's no synergies with Targon, but her baseline power is undoubtedly strong and well worth considering.
Gain 700/800/1000 (AP) Shield for 4 seconds. Charge and knock the target backwards, Stunning them and units hit for 1.25 seconds and dealing 150/225/360 (AP) magic damage to them. After charging, force nearby enemies to target this unit.
Positioning: Frontline
First Impressions:
Loris is another excellent tank with ridiculous Shield capabilities. His Piltover Tussle ability grants him a large Shield, which could certainly get out of hand alongside Warden.
If that's not enough, he has a single-target knockback that can lead into an AoE Stun, all while drawing nearby enemies to target him instead. If you're looking to improve your frontline, Loris is a great choice.
Summon 2 Voidlings that each attack a nearby enemy 15 times. Each attack deals 22/33/60 (AP) magic damage.
Positioning: Backline
First Impressions:
Malzahar's Void Swarm perfectly compliments the Disruptor trait, taking full advantage of the multiple small hits. Without it he's a bit underwhelming, but when enabled it will greatly affect the enemies' output.
Launch a fuemigo at target that bounces 3 times, dealing 180/270/420 (AP) magic damage to enemies hit. The last bounce deals 160/240/375 (AP) magic damage to enemies in a 1 hex radius.
Positioning: Backline
First Impressions:
Milio appears to be pretty basic compared to the other AP casters. If you're investing into Ixtal or Invoker he's a suitable pickup, but otherwise there's no real extra utility here.
Passive: Every 4 seconds and on cast, the next attack deals damage in a 1 hex circle and deals 0.9/1.35/2.15 (MR) bonus magic damage.
Active: Gain 0.1 + 375/400/425 (Health & AP) Shield for 4 seconds.
Positioning: Frontline
First Impressions:
Nautilus is fairly standard frontline tank, but has the ability to deal magic damage based on his MR. With the right items, he can become threatening while still focusing on his defenses.
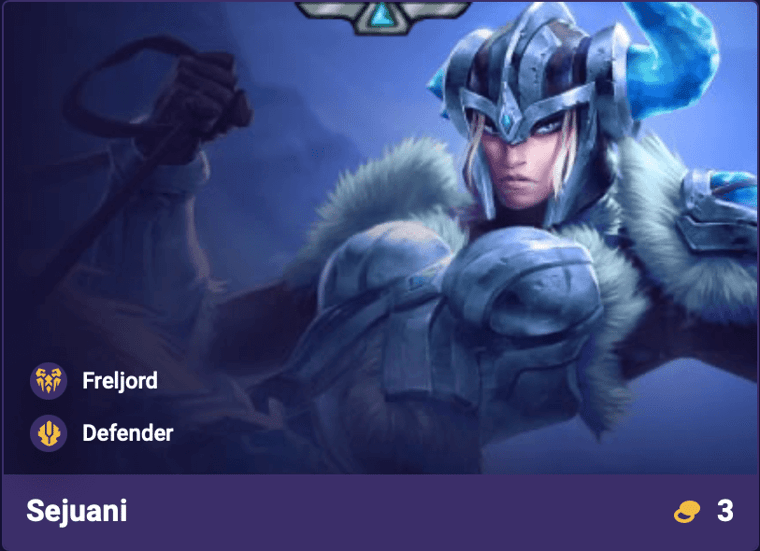
However even on the surface, he's a pretty flexible inclusion thanks to having three traits, two of which are great for tanky comps.
Gain 475/525/625 (AP) Shield for 4 seconds. Strike in a cone and a line. Enemies hit take 70/105/170 (AP) magic damage and are 30% Chilled for 4 seconds. If they are already Chilled, Stun them for 1 second.
Positioning: Frontline
First Impressions:
Sejuani provides great support for units that care about Chilled enemies, or alongside others who can apply Chill themselves. AoE Stuns are always great to have, but you'll need the right comp to truly capitalize on her.
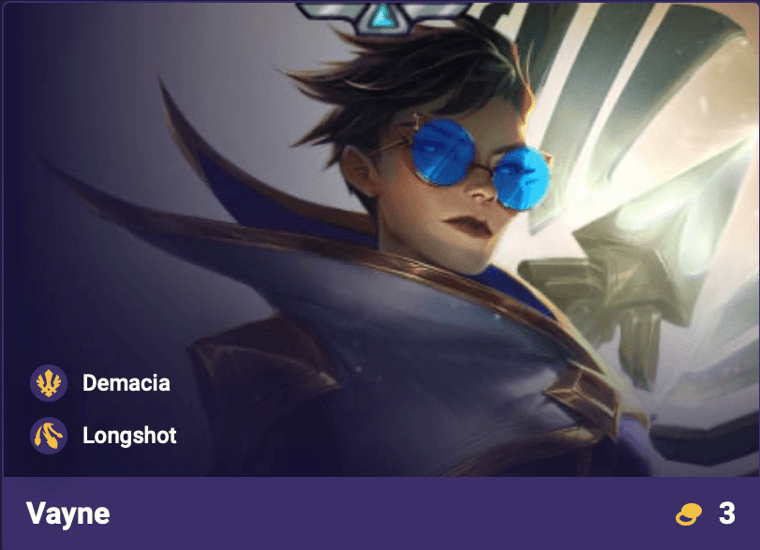
Tumble to a nearby hex, then fire a bolt at target that deals 100/150/230 + 6/10/15 (AD & AP) true damage.
Positioning: Backline
First Impressions:
Vayne is a powerful AD carry thanks to her inherent true damage. This lets her strike through tanky foes, allowing you to focus on maximizing her output. Longshot grants a pretty sizeable boost, so you'll likely want to enable it as soon as possible.
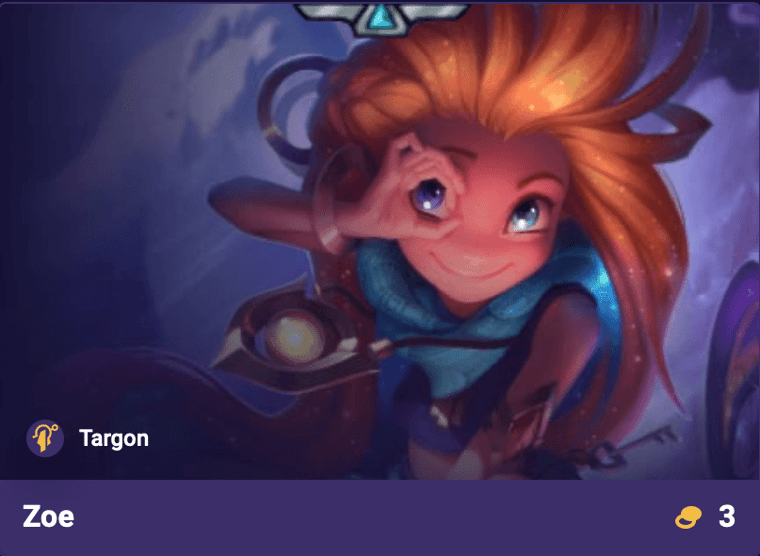
Passive: Damaging an enemy applies 30% Shred for 6 seconds.
Active: Kick 2 bubbles at nearby enemies, dealing 330/500/825 (AP) magic damage and 30% Chilling them for 3 seconds.
Positioning: Backline
First Impressions:
Zoe's passive Shred ability can set up your team (and herself) for some really bursty casts, helping you get through the enemy frontline. The fact that it's a persistent effect makes her a great addition to AP based comps.
Additionally, she may also have some utility with Freljord thanks to the AoE Chill from Double Trouble Bubble. It's definitely clear that she's above rate, which certainly justifies why she has no traits.
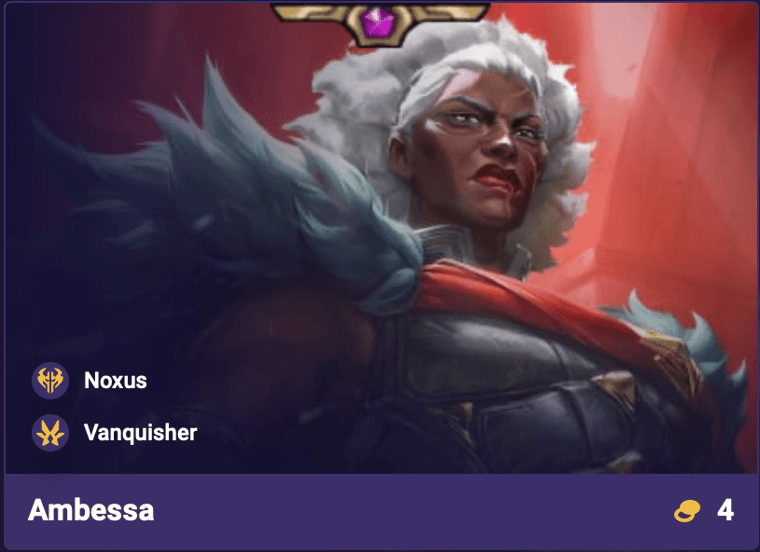
Swipe and dash around target, dealing 45/65/300 + 5/10/25 (AD & AP) physical damage to enemies in the path. Then slam chains on target, dealing 45/65/300 + 5/10/25 (AD & AP) physical damage in a line. If any enemies are killed, immediately recast this ability, dealing 1% damage.
Positioning: Frontline
First Impressions:
Ambessa is a physical frontline damage dealer that has some snowball potential during fights. Her Lacerate ability has the chance to recast upon kill, making her quite the threat, especially with the Crit from Vanquisher.
Passive: On takedown, gain 0.7/0.7/2% stacking Attack Speed that decays over 3 seconds.
Active: Deal 150/225/900 (AD) physical damage in a 2 hex radius and transform for the rest of combat.
While transformed, gain 0.33/0.33/1.33 (AP) Attack Speed, 0.33% max Health, and increased Move Speed. Attacks deal 15/25/100 bonus true damage, increased by 3/5/25 for each time the same enemy is hit.
Positioning: Frontline
First Impressions:
Bel'Veth should be quite effective at taking down defensive foes. Once she's transformed from Endless Banquet, her attacks will continue to deal bonus true damage for the remainder of the fight.
While it may take some time before she can cast, the Omnivamp from Slayer should help keep her alive.
Raise shield for 4 seconds, gaining (AP) Durability and redirecting projectiles to towards Braum instead. When hit, deal 0.2/0.3/3 + 15/25/1000 (Armor & AP) magic damage to nearby enemies and 30% Chill them for 2 seconds.
Positioning: Frontline
First Impressions:
Braum's Unbreakable Frost ability creates interesting counterplay against units that shoot projectiles. Redirection can be a huge asset, allowing you to keep important units safe from harm. Plus with Chill, he's definitely a great support for the other Freljord folk.
Unlock Condition: Field a 2-star Leona with 3 items in combat.
Ability: Lunar Rush
Passive: Ability damage from your strongest Leona and strongest Diana marks enemies as Moonlit, reducing their damage by 0.1%.
Active: Gain 200/250/300 (AP) Shield for 2 seconds. Unleash a bolt of lunar energy at the farthest non-Moonlit enemy within 4 hexes, dealing 165/250/500 (AP) magic damage. Then, dash to all Moonlit enemies, dealing 150/225/1250 (AP) magic damage to them.
Positioning: Midline
First Impressions:
Diana has a lot of magic burst potential alongside Leona. Lunar Rush can potentially rip through a ton of enemies, provided they're able to mark targets efficiently.
She's likely only useful when paired with Leona, but given the specific unlock requirements, will only really show up when you need her.
Unlock Condition: Field 5 Yordles or Bilgewater units + Level 7.
Ability: Playful Trickster
Become briefly untargetable, then jump to the farthest enemy within 4 hexes and deal 75/115/300 (AP) magic damage to adjacent enemies. For the next 4 attacks, gain 0.5% Attack Speed and deal 70/105/450 (AP) bonus magic damage on hit.
Positioning: Midline
First Impressions:
Fizz is an easy unlock for those playing a vertical Bilgewater or Yordle comp. However, he'll likely be more present in Bilgewater since Yordle will probably slow roll to hit more 3-stars.
On the battlefield he's a slippery AP caster, looking to hop around and annoy his enemies in true Fizz fashion. While simple, becoming untargetable does give him some carry potential.
Spin for 3 seconds, gaining 0.55/0.55/0.9% Durability and healing for 300/350/1000 + 0.1 (Health & AP) over the duration. Each second, deal 100/150/1700 (AD) physical damage to adjacent enemies and reduce their Armor and Magic Resistance by 5.
Positioning: Frontline
First Impressions:
Garen is a basic frontline tank that can gain Durability, healing, and apply a Sunder/Shred-like effect to nearby enemies. If you're playing Demacia, he's a fine addition on the field.
Unlock Condition: Field a Longshot with 3 items in combat + Level 8.
Unique Trait: Assimilator
Kai'Sa has a different Ability depending if her Attack Damage or Ability Power is higher.
Ability: Icathian Rain
Dash away from all enemies, then fire 15/15/25 missiles split across the 4 nearest enemies. Each missile deals 38/57/120 + 6/9/20 (AD & AP) physical damage.
Positioning: Backline
First Impressions:
Kai'Sa has a fairly steep unlock condition that won't likely be met until later into the game. Level 8 sets a high floor, but it could be well worth the wait.
She actually has her own unique trait which changes her ability depending on which offense stat is higher. Unfortunately, at the time of writing this, we don't know the details. However, Icathian Rain alone is already very nice.
Summon (Souls) spears split among the 3 nearest enemies. After a brief delay, they each impale their target, dealing 28/42/450 + 2/3/15 (AD & AP) physical damage and reducing Armor by 1.
Positioning: Backline
First Impressions:
Kalista is the next Soul collecting milestone, rewarding you with a powerful backline carry for your efforts. Her Endless Rend can summon an insane amount of spears, and it only continues to scale as time goes on.
Encase target in ice, Stunning them for 1.5 seconds and dealing 275/415/2500 (AP) magic damage. All enemies within 2 hexes of them split 440/660/2800 (AP) magic damage. If the target dies, shards fly out and split excess damage between the 2 nearest enemies.
Chilled enemies take 0.12% more damage from this ability.
Positioning: Backline
First Impressions:
Lissandra's Frozen Tomb is great for locking down a foe and bursting nearby enemies. Like many Freljord allies, she has inherent synergy with Chill effects, encouraging players to build vertically.
Fire a ball of light at the most enemies, dealing 30/45/100 (AP) magic damage to the first 2 enemies hit and Rooting them for 1 second. Then fire a beam, dealing 290/435/1500 (AP) magic damage to enemies hit by the ball and 90/135/750 (AP) magic damage to all other enemies hit.
Positioning: Backline
First Impressions:
Lux is Demacia's primary spellcaster. While relatively simple in design, the Root effect of Final Spark can help hold foes within range of her allies. A fine addition to the vertical comp, but perhaps less useful outside of it.
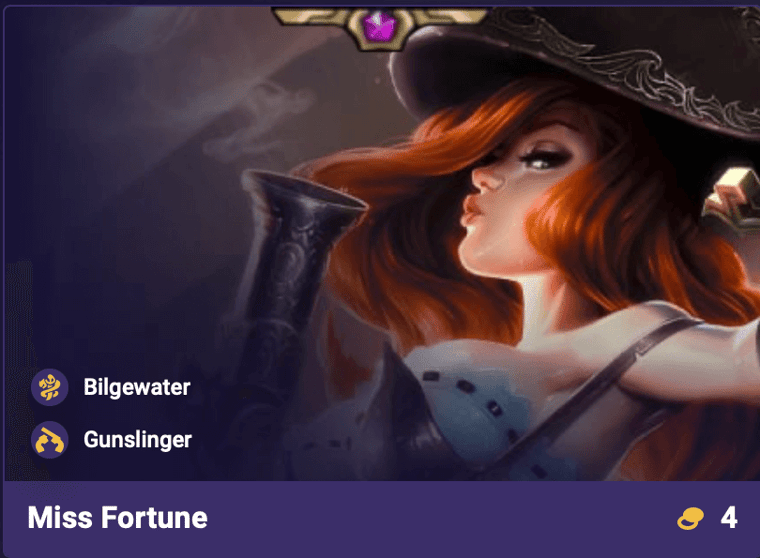
Passive: Attacks ricochet to the highest current Health enemy, dealing 0.5% damage.
Active: Fire waves of bullets that land on the 2 nearest enemies. The first wave deals 115/175/600 + 15/25/70 (AD & AP) physical damage and the rest deal 115/175/600 + 15/25/70 (AD & AP) physical damage. Every 3rd cast, increase the number of waves by 1.
Positioning: Backline
First Impressions:
Miss Fortune has great carry potential during longer fights thanks to her ricochet passive and scaling active ability. Every third cast of Heartbreaker increases the number of waves, letting her output a ton of damage if you can keep her safe.
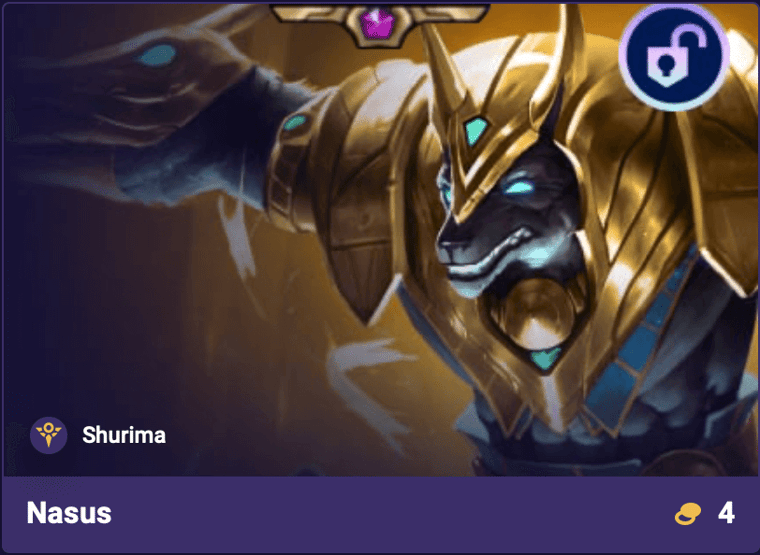
Steal 500/650/3000 (AP) Health split between the 4/4/8 nearest enemies. For 8 seconds, gain 30 Armor and Magic Resist and deal 0.015/0.015/0.12 (Health) magic damage to adjacent enemies each second.
Positioning: Frontline
First Impressions:
Nasus is a tanky threat that drains Health from nearby enemies while improving his defenses. If you're having a rough time while using Azir, Nasus is right around the corner to save the day.
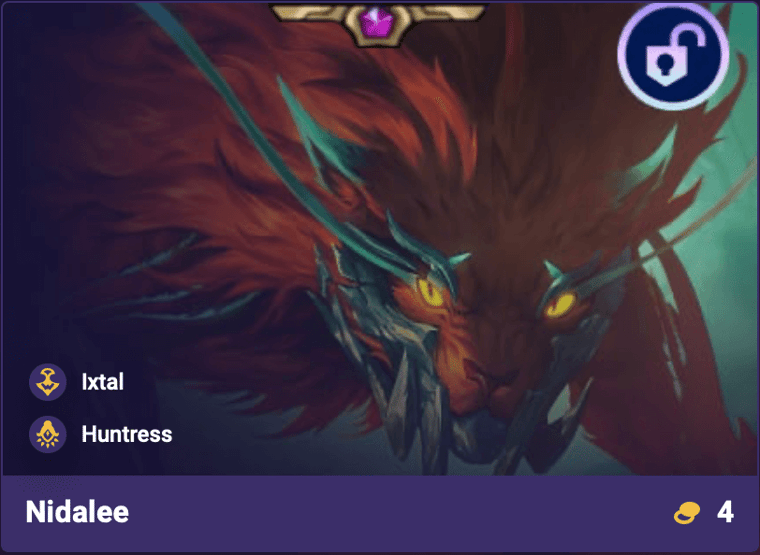
Unlock Condition: Field two 2-star Neekos in combat together.
Unique Trait: Huntress
While your strongest Neeko is alive, your strongest Nidalee is untargetable.
Ability: Relentless Pounce
Jump on an adjacent enemy with the lowest health, then deal 300/450/1400 (AP) magic damage to them and 100/150/600 (AP) magic damage to adjacent enemies. If any die, cast again, dealing 0.7% damage.
Tanks take 0.5% more damage from this ability and Fighters take 0.25% more.
Positioning: Frontline
First Impressions:
Nidalee has a very unusual unlock condition compared to most others, requiring you to field two 2-star Neekos at the same time. However, doing so grants you an untargetable ally that can ravage the enemy.
Relentless Pounce is great for picking off frail foes, and depending on timing, has the ability to recast for even more damage. By default she deals more to Tanks and Fighters, so no matter the target, Nidalee strikes hard.
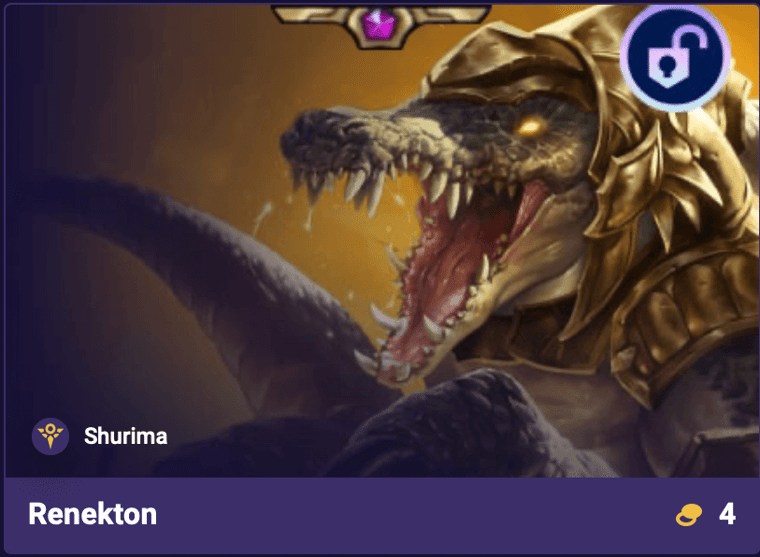
Dash to the farthest enemy within 2 hexes, dealing 80/120/360 (AD) physical damage to all enemies in the path. Then slash 4 times, each dealing 60/90/550 + 5/10/50 (AD & AP) physical damage. Subsequent casts increase the number of slashes by 1.
Positioning: Frontline
First Impressions:
Renekton deals a ton of damage on the frontlines, dashing between enemies and scaling stronger with each cast. His unlock condition is the opposite to Nasus, rewarding you for winning with Azir.
However with enough time, you could very well acquire both, and given Shurima's bonuses you'd be well rewarded for doing so.
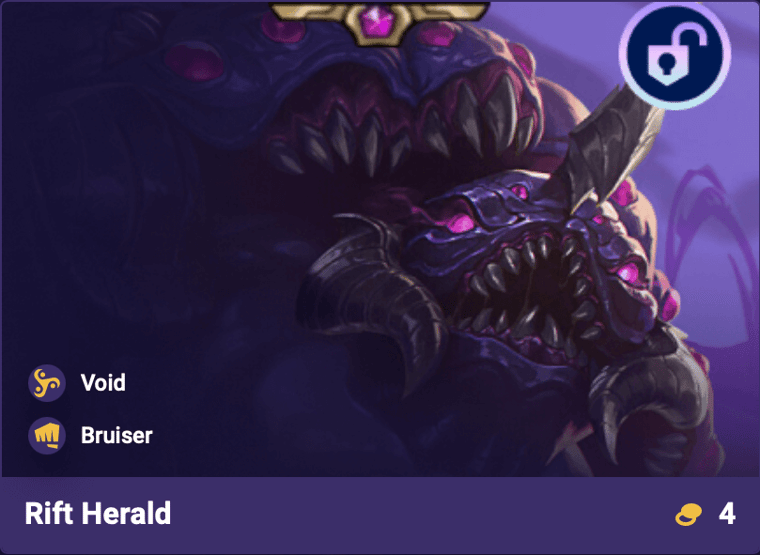
Unlock Condition: Have Void active for 8 player combats.
Ability: Warp Armor
Gain 350/450/1350 max Health and grow larger. Slam in a 2 Hex circle on the target, dealing 0.06 + 100/150/1500 (AP & Health) magic damage to enemies hit. For 4 seconds, gain (AP) Durability + 0.01% for each enemy targeting this unit.
Positioning: Frontline
First Impressions:
Rift Herald is awarded based on duration, incentivizing players to stick with Void for a number of rounds. In return you get a respectable tank that can help bolster your frontline.
If you wanted to, you could unlock this with as little as two pieces. However, I get the feeling it's best included in a more dedicated Void comp.
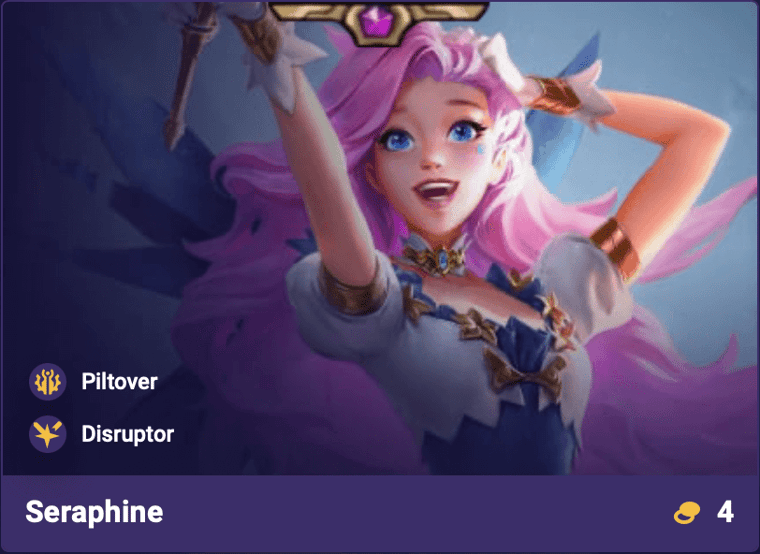
Gain 3 notes. For each one active, deal 25/40/200 (AP) magic damage to a nearby enemy.
While holding 12 notes on cast, consume them to project a wave of energy. Allies hit restore 60/90/400 (AP) Health. Enemies hit take 270/405/2200 (AP) magic damage, reduced by 0.3% for each enemy it's passed through.
Positioning: Backline
First Impressions:
Seraphine is an AP caster that has some additional healing utility. While relatively basic overall, Disruptor does add some value to her AoE ability.
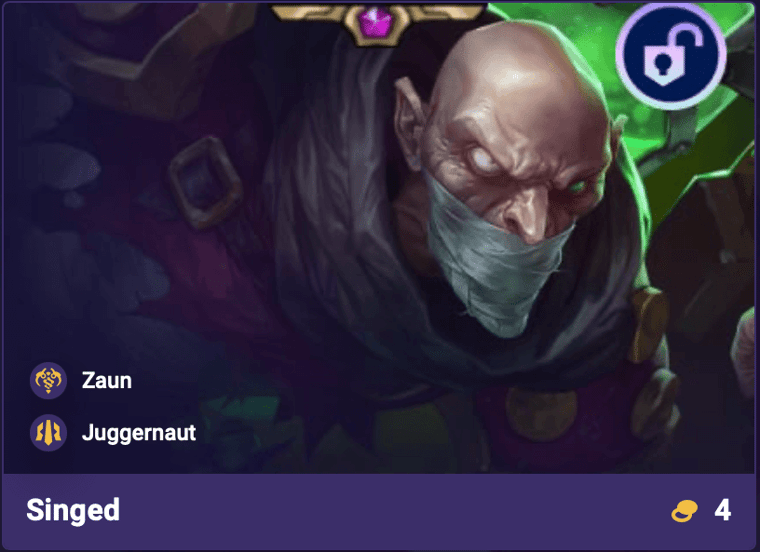
Unlock Condition: Take 30 damage and 4 Zaunites or Juggernauts.
Ability: Poison Trail
Passive: Run around the battlefield, leaving a poison trail that lingers for 4 seconds. Poison trails deal 25/38/160 (AP) magic damage per second to enemies within. Gain 10 (AS) Mana each second.
Active: For 4 seconds, gain increased Move Speed, restore 80/100/500 (AP) Health each second, and gain 50 Armor and Magic Resistance.
Positioning: Frontline
First Impressions:
Singed has a very unique unlock condition, but offers a ton of value in exchange. He passively spams poison trails around the battlefield, then heals and improves his defenses.
If enemies waste time chasing after him, he'll become quite the nuisance. Targeting matters a lot, so if Singed can get in the way, he's definitely a unit worth pursuing.
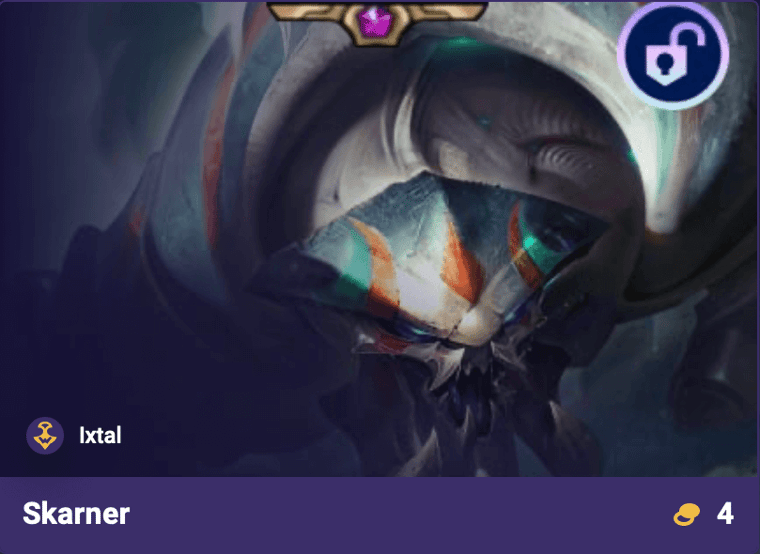
Unlock Condition: Field a non-Tank with a Gargoyle's Stoneplate in combat.
Ability: Impale
Passive: All allies gain 10/20/100 Armor.
Active: Gain 725/875/3000 (AP) Shield for 4 seconds. Impale up to three nearby enemies in a line, dealing 1.2/1.8/25 (Armor) physical damage and Stunning them for 2/2.25/8 seconds.
Positioning: Frontline
First Impressions:
Skarner offers great defensive utility with his passive Armor gain, and has a very solid multi-target Stun. Both of these are valuable assets on a tank, but unfortunately his lack of traits definitely limits his use outside of Ixtal.
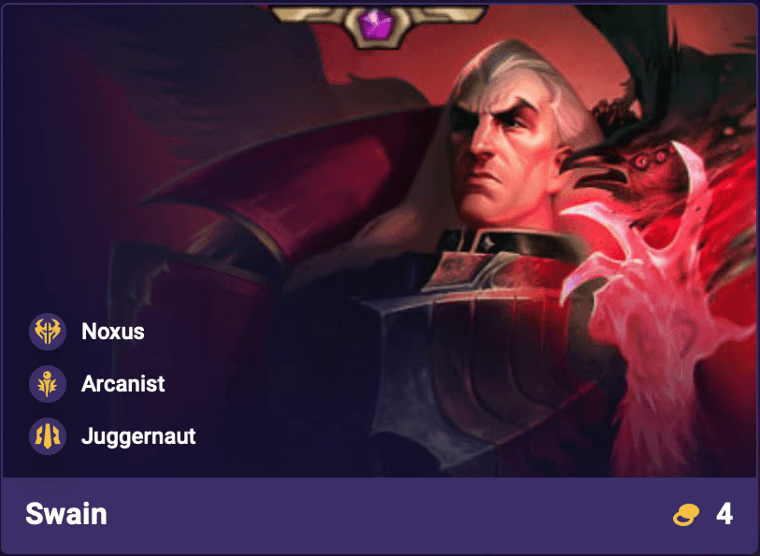
Passive: Each second, restore 22/24/100 + 0.015 (Health & AP) Health and deal 20/30/90 (AP) magic damage to enemies within 1 Hex.
Active: Open a demonic eye on the largest group of nearby enemies, dealing 100/150/1800 (AP) magic damage and Stunning them for 1.75/2/8 seconds.
Positioning: Frontline
First Impressions:
Swain is a major threat on the battlefield thanks to his passive Health regeneration and magic damaging ability. On top of that, he has an AoE Stun that aims at the largest group of nearby enemies. He's definitely a high priority for Noxus, but may also find a home in Juggernaut comps.
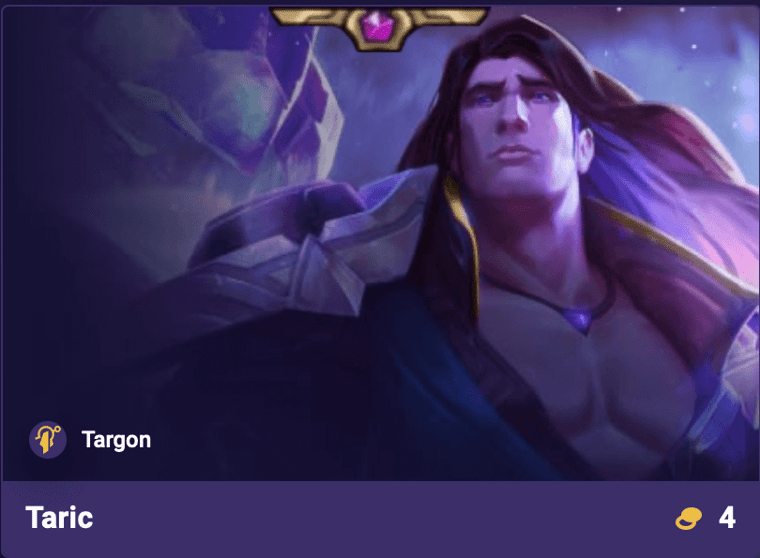
Passive: All allies gain 10/20/100 Magic Resist. Once per combat after dropping below 0.35% max Health, gain 0.9% Durability for 2 seconds.
Active: Gain 600/700/2500 (AP) Shield and grant the 2 lowest Health allies 125/150/1000 (AP) Shield for 4 seconds. The next 2/2/10 attacks deal 200/300/3000 (AP) bonus magic damage.
Positioning: Frontline
First Impressions:
Taric is essentially the MR equivalent of Skarner, and knowing he's from Targon, it all kinda makes sense now. After all, these passive bonuses are almost like having an extra trait, at least when they're alive in combat.
While he doesn't have a Stun, Starlight's Touch does provide decent Shield utility, letting him play more of a protection/supporting role.
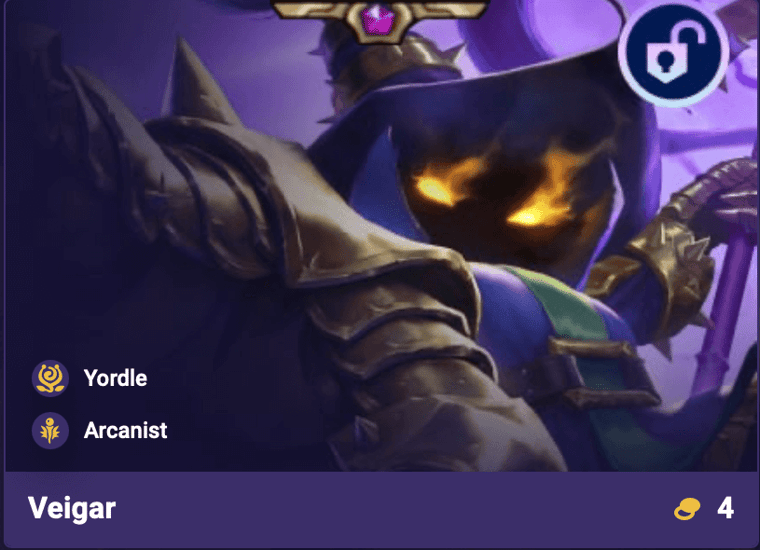
Unlock Condition: Field a unit with 2 Rabadon's Deathcaps in combat.
Ability: Dark Storm
Passive: Gain 0.5% more Ability Power from all sources.
Active: Call down a storm of 12/12/24 meteors across the battlefield that deal 60/90/135 (AP) magic damage each. They can innately critically strike. For each one that kills an enemy, permanently gain 1 Ability Power.
Positioning: Backline
First Impressions:
Veigar is a powerful spellcaster that has impressive scaling potential. Not only does he immediately benefit from your preexisting Deathcaps, but they provide even more stats thanks to his passive.
Dark Storm takes him to the next level, scaling AP on kill while having the ability to Crit naturally. There's a lot to like and I'm excited to see it in action.
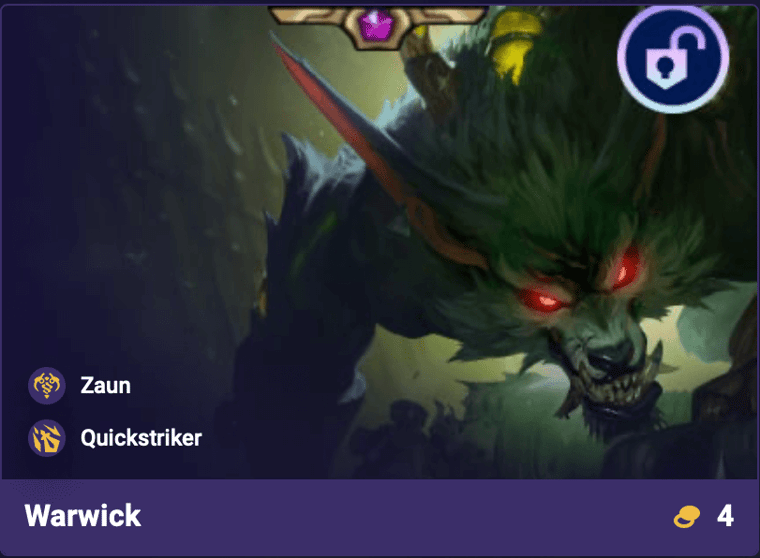
Gain 1/1/4% Attack Speed, 0.15% Omnivamp, increased Move Speed, and deal 45/70/550 (AD) bonus physical damage on attack for the rest of combat. While this effect is active, takedowns grant Warwick, Jinx, and Vi 0.2/0.2/0.5 (AP) Attack Speed for 3 seconds.
Positioning: Frontline
First Impressions:
Warwick is an aggressive frontliner that provides Attack Speed support for Jinx and Vi (naturally). Combined with their Shimmer-Fused Zaun bonus, they're able to accelerate quickly to improve their abilities.
The unlock condition is very fitting, and should come naturally if you're already playing into Zaun. Outside of that, Warwick probably isn't worth it.
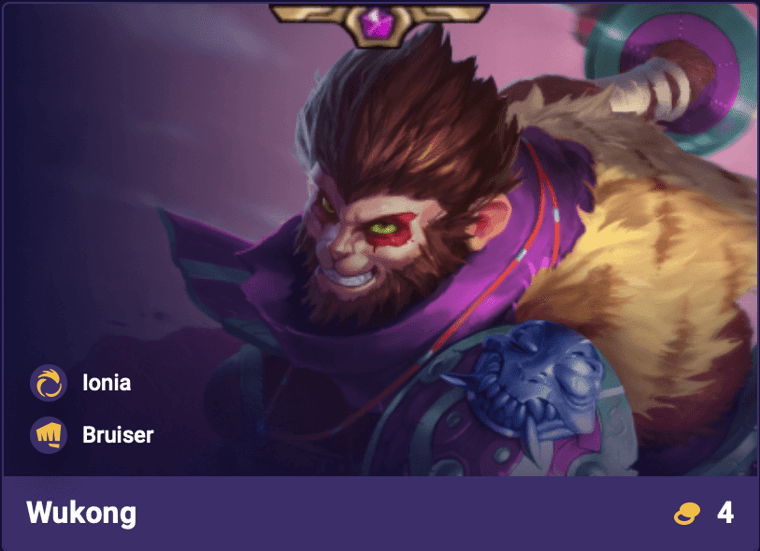
Passive: On death, summon a Stone copy with 150/200/2000 + 0.4 (Health) Health and Wukong's items.
Active: For 4 seconds, gain 100/110/400 (AP) Armor and Magic Resist. Then spin, dealing 150/225/3000 (AD) physical damage to all enemies within 2 hexes.
Positioning: Frontline
First Impressions:
Wukong excels at jumping into the fray, gaining incredible defenses when utilizing his Diverting Trickster ability. Having a passive cheat-death is also a notable benefit, making him likely worth investing in as a carry.
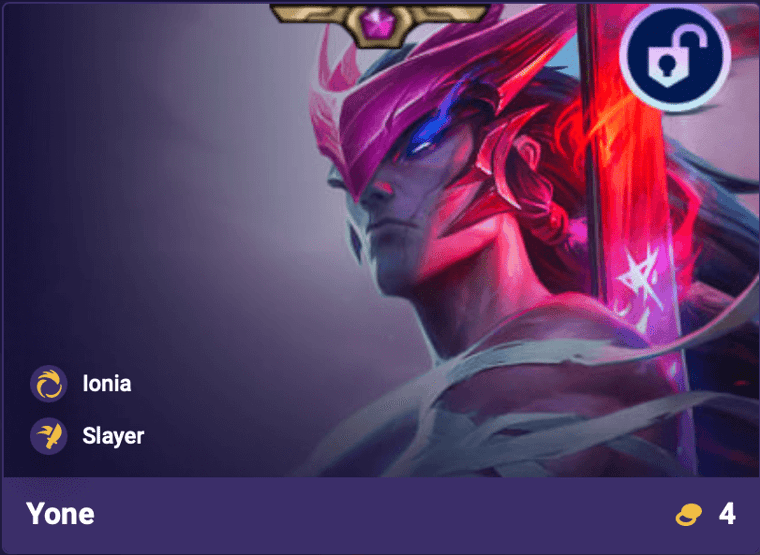
Passive: Attacks alternate between dealing 80/120/800 (AD) bonus physical damage and 140/210/1400 (AP) bonus magic damage.
Active: Strike through the most enemies possible within 3 hexes, knocking them up for 1.5 seconds and dealing 40/60/240 + 40/60/240 (AD & AP) physical damage and 40/60/240 + 40/60/240 (AD & AP) magic damage. Yone then splits 160/240/1080 + 160/240/1080 (AD & AP) physical damage and 160/240/1080 + 160/240/1080 (AD & AP) magic damage among all enemies hit.
Blade Brothers: When you field Yasuo and Yone, Yasuo assists Yone's casts.
Blade Brothers: When Yone casts, your strongest Yasuo blinks to each target, dealing bonus physical damage
Positioning: Frontline
First Impressions:
Yone is the real deal, providing an incredible carry for Ionia. If you can acquire the 3-star Yasuo, you're rewarded with a powerful threat that deals both physical and magic damage, plus has an AoE knockup.
Blade Brothers aligns them with each cast, making it likely worth itemizing the pair together. Is it good enough? We'll have to see, but at worst, it's another addition to a vertical Ionia comp.
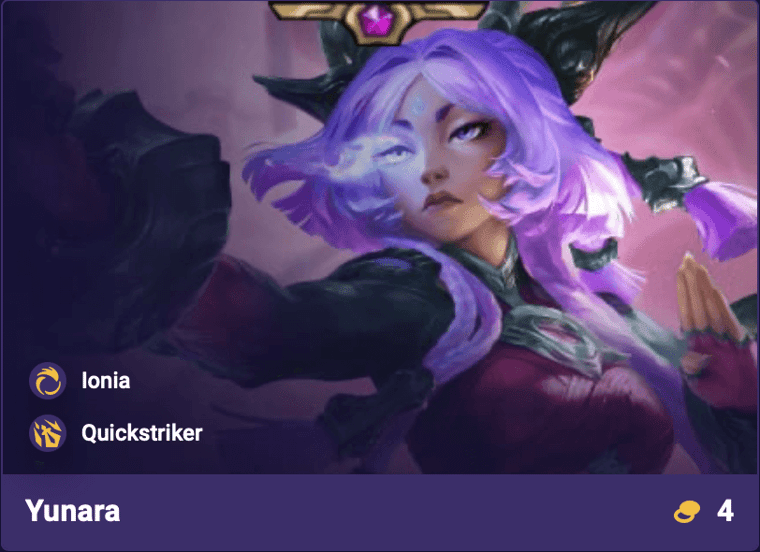
For the next 4 seconds, gain 0.75/0.75/3 (AP) Attack Speed, infinite range, and replace attacks with lasers. Lasers deal 85/130/450 (AD) physical damage in a line, reduced by 0.6/0.6/0.3% for each enemy they pass through. When lasers critically strike, they deal 0.33% bonus true damage.
Positioning: Backline
First Impressions:
Yunara is an AD backliner with excellent carry potential. The combination of fast Attack Speed, infinite range, piercing, and true damage gives her the ability to handle anything with enough time.
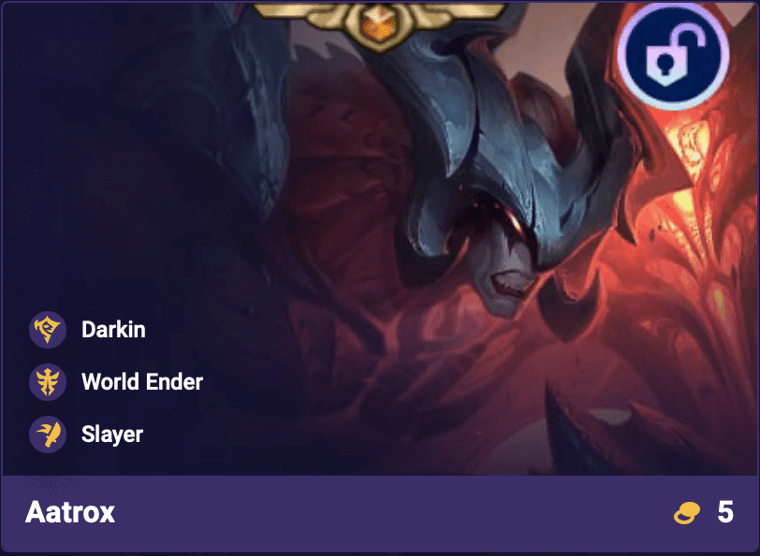
Unlock Condition: Field a unit with 40% Omnivamp in Combat + Level 8.
Unique Trait: World Ender
Aatrox gains Attack Damage equal to his Omnivamp.
On first death, he becomes briefly untargetable and heals back to full Health over 2 seconds. Afterwards, he reduces his maximum Mana by 20 and gains 25% Durability.
Ability: The Darkin Blade
On cast, cycle through one of the following abilities:
Slash in a line, dealing 150/225/2400 + 20/30/100 (AD & AP) physical damage to enemies hit and 20% Sundering them for 4 seconds.
Swipe in a cone, dealing 150/225/2400 + 20/30/100 (AD & AP) physical damage to enemies hit and knocking them up for 1 second.
Slam on target, dealing 150/225/2400 + 20/30/100 (AD & AP) physical damage in a 1 hex circle. Targets below 0.15% max Health are executed.
Positioning: Frontline
First Impressions:
Aatrox has a lot going for him and for a good reason. It's going to take the right setup in order meet the unlock condition, but the payoff is certainly evident. He's got an AoE Sunder, AoE knockup, an execute, and more.
To top it off, he has a built-in revive that makes him even stronger the second time around. Aatrox is nuts, and gets even better with more Darkin.
Annie summons Tibbers on your bench, who can be fielded and equipped with items separately. His star level is the same as Annie's.
Ability: Enraged Inferno
Erupt the entire battlefield in flames, permanently Burning and Wounding all enemies and dealing 1500/2250/8000 (AP) magic damage to each of them over 45 seconds.
Annie's max Mana is reduced by 140 for the rest of combat. Subsquent casts launch a fireball at target that deals 240/360/3000 (AP) magic damage.
Positioning: Backline
First Impressions:
Annie is an explosive caster with the ability to permanently Burn and Wound all enemies after just one cast. She deals an insane amount of damage, and can summon Tibbers for extra support. Even without synergies, Annie adds a ton of value to the team.
Azir deploys two Guards who can be placed anywhere on the battlefield. They do not move or attack, and die when Azir does.
Ability: Arise!
Passive: After witnessing 3 attacks from Azir, Sand Soldiers deal 100/150/3000 (AP) magic damage to their target.
Active: Summon a Sand Soldier near target and command them to strike. If 2 Soldiers are already out, they all immediately deal 70/105/1500 (AP) magic damage instead.
Positioning: Backline
First Impressions:
Azir stands at the backline and lets his Sand Soldiers dish out the damage. On his own he looks a bit underwhelming for a 5-cost unit, but knowing he's the catalyst to Shurima makes him far more interesting than he seems.
If you manage to get him early enough and start unlocking the rest of the crew, it's definitely got potential to take over the game.
Each time an enemy champion dies, gain 15 Mana. Casting abilities does not consume Mana.
All enemies lose 10 Armor and Magic Resist.
Ability: Crowstorm
Teleport into the largest cluster of enemies and Stun them for 1.75/1.75/99 seconds. Begin losing 20 mana per second. While casting, deal 95/140/6666 (AP) magic damage per second to all enemies within a 2 hex radius. The closest 2 enemies take 0.33% more damage.
Positioning: Backline
First Impressions:
Fiddlesticks has a lot going for him even without any synergies. At a baseline, he reduces enemy Armor/MR, making your team hit even harder. On top of that, his Crowstorm ability creates an AoE Stun on the largest cluster of enemies, ensuring its reliability.
Galio cannot be fielded in combat. Instead, his traits count from the bench and when Demacians Rally, he joins the fight.
On landing, he creates a 3-hex shockwave that deals 12% of his max Health as magic damage. Enemies hit are knocked up for 1.50 seconds, reduced by distance from the center.
Ability: Inspirational Might
Passive: Every 3rd attack deals 4/6/90 (MR) magic damage in a circle around the target.
Active: Dash into the largest group of units and inspire all allies within 2 hexes, granting them 500/600/2000 (AP) Shield for 4 seconds. Then crash down, dealing 5/7.5/50 (MR) bonus magic damage to all enemies with 2 hexes.
Positioning: Frontline
First Impressions:
Galio provides incredible support from the bench, functioning as another unit without occupying limited board space. Right from the first rally he immediately creates an impact, knocking up nearby enemies.
If you need an incentive to commit to Demacia, this is it.
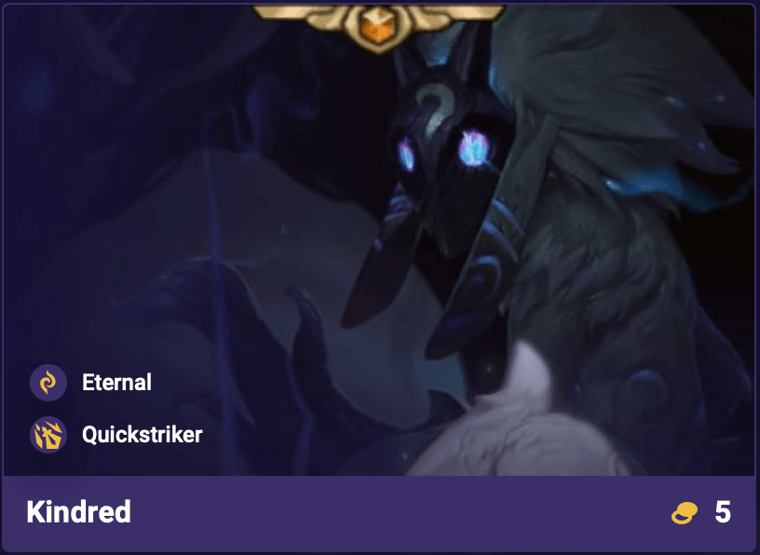
Every 3rd attack deals on the same enemy 350% damage, as Wolf mauls the target.
Ability: Lamb's Respite
Dash, then create a 2-hex radius zone for 2.5/2.5/99 seconds that prevents allies within from dying. While active, double current Attack Speed and on attack, fire a secondary arrow at a nearby enemy that deals 25/38/999 (AD) physical damage.
When the zone ends, heal all allies for 0.08 (AP) of damage dealt while it was up and dash away.
Positioning: Backline
First Impressions:
Kindred is a very unique champion that has the potential to greatly swing fights in their favor. Creating a "safe zone" of sorts could make all the difference if it keeps important units alive and fighting.
Overall it's tricky to evaluate as I imagine the effect is quite situational. Depending on timing and positioning it could range from incredible to useless. But if you can make it work, it's undoubtedly powerful.
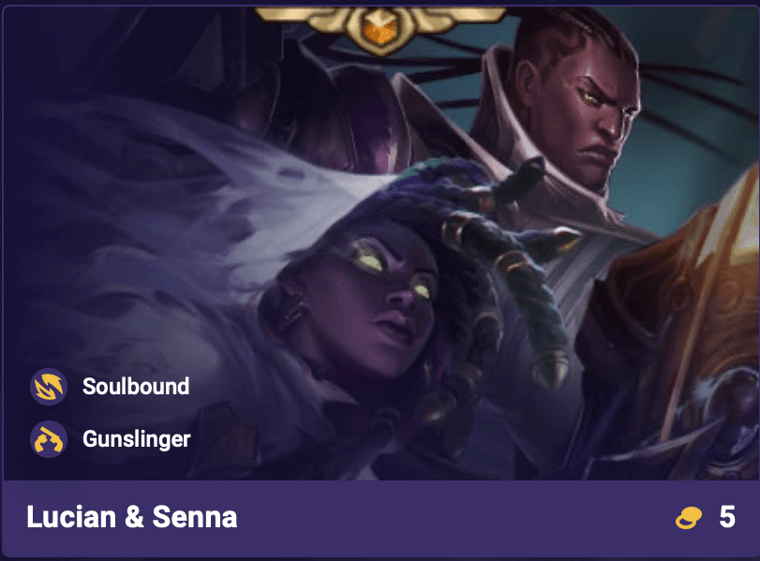
Lucian and Senna fight together, swapping when either casts. Each champion has a unique ability.
Your strongest Soulbound pair grants bonuses to your team. While Senna is out, all allies gain 7% Damage Reduction. While Lucian is out, all allies gain 7% Damage Amp.
Ability: The Culling
Fire (AS) shots towards target. Each shot explodes on the first enemy hit, dealing 100/150/800 + 8/12/100 (AD & AP) physical damage to all nearby enemies. If an enemy is afflicted with Black Mist, purify them, immediately draining their Armor for the total amount.
Positioning: Backline
First Impressions:
Lucian & Senna together is certainly an interesting concept, and having a flat Damage Reduction or Damage Amp effect is definitely nice. However, the continuous swapping effect may make it less useful due to the inconsistency.
They seem alright, but less flashy compared to other 5-costs.
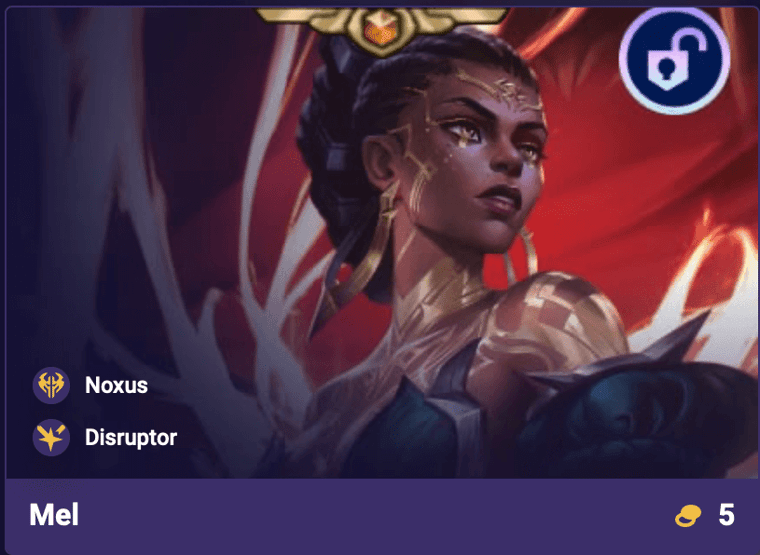
Unlock Condition: 2-star Ambessa with 1 item dies.
Ability: Radiant Eclipse
Passive: While gaining Mana, throw out 2/2/9 radiant orbs that orbit around target. They deal 40/60/90 (AP) magic damage in a 1 hex radius and drain 1 Mana from units hit each second. After draining 250/250/10 mana, gain a random Radiant Item.
Active: Detonate orbs on target, causing a 3 hex radius explosion that deals 1000/1500/10000 (AP) magic damage to them and 500/750/10000 (AP) damage to all other enemies hit.
Positioning: Backline
First Impressions:
Mel has a specific unlock condition that could be somewhat challenging to pull off, but doing so opens the door to a pretty wild effect. With enough time, Mel can actually create Radiant items!
As for her use in combat, it's hard to say. She seems like a fine caster, but I imagine her main purpose is to be a Radiant spawner.
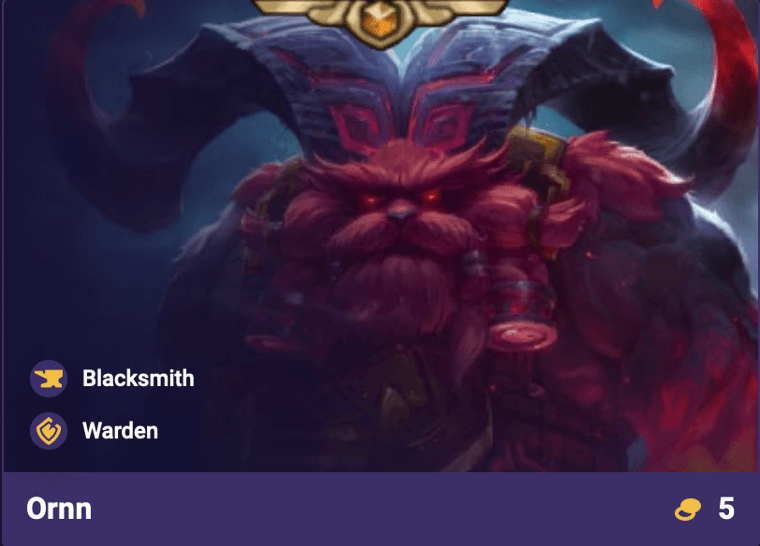
After each player combat your strongest Ornn participates in, he makes progress forging an Artifact item.
Each item he is equipped with grants him 200/400/2000 max Health. Artifacts grant 300% more.
Ability: Call of the Forge
Summon an elemental from behind the farthest enemy. It 20% Chills enemies hit for 3 seconds and deals 100/150/3000 (AP) magic damage to them.
When it arrives, headbutt it and redirect it toward another distant enemy, dealing 150/225/4500 (AP) magic damage instead.
Positioning: Frontline
First Impressions:
Ornn also provides a similar utility to Mel, and doesn't require an unlock to obtain him. His unique Blacksmith trait allows Ornn to eventually forge an Artifact, provided he's participating in combat.
While it's not clear as to how long this takes, the idea alone is awesome. Here's hoping the timeline is favorable, at least to the point where we can realistically see 1-2 items per game (or more!?).
Unlock Condition: Level 8 + Field only 1 unit in the first 2 rows of combat.
Unique Trait: The Boss
When Sett first drops below 45% max Health, he leaves combat to start doing sit-ups. Each sit-up restores 15% max Health and gives him 60% Attack and Move Speed.
If he reaches full Health, he returns to combat Pumped Up, converting all damage from his attacks and Ability to true damage. If all of his allies die, he immediately returns to combat.
Ability: The Show Stopper
Grab target and slam them forward, dealing 220/330/9999 (AP) + 0.08/0.12/9 (AP) of their max Health as magic damage to them. All other enemies within 3 hexes take 0.5% of the total damage.
Positioning: Frontline
First Impressions:
Sett's unique trait certainly puts on a show, but its usefulness will really depend on how long it takes. Losing your main frontliner isn't exactly ideal, as it puts the backline at great risk.
However, assuming it all comes together in a reasonable timeframe, there's no denying he'll strike back with full force. His "Pumped Up" buffs are insane, so if you can hold on long enough, "The Boss" can certainly carry.
On cast, Shyvana replaces her spell with Flame Breath. While transformed, all allies take 10% less damage from enemy Abilities.
Ability: Dragon's Descent / Flame Breath
Dragon's Descent: Transform into a dragon, gaining 600/1000/9999 max Health. Briefly gain 0.2/0.2/0.9% Durability and dive-bomb into the largest group of enemies, dealing 100/150/3000 (AD) physical damage in a 3 hex circle.
Flame Breath: Breath fire in a cone for 3.5 seconds, dealing 150/225/12345 + 20/30/1234 (AD & AP) physical damage each second to enemies hit.
Positioning: Frontline
First Impressions:
Shyvana can put a real dent into the enemy team once the dragon form takes over. Assuming she can cast quick enough, your team will also benefit from her defensive aura, making her generically useful.
Gain a Pilot Hex. Combat Start: the unit within jumps into T-Hex, granting her 80% of their Health and bonus stats based on their role and star level.
Tank: +15/25/40% Omnivamp
Fighter: +15/25/50% Attack Damage
Marksman: +10/18/40% Damage Amp
Caster: +3/6/9 Mana Regen
Assassin: +30/60/120% Crit Chance
On death, the pilot ejects while T-Hex knocks back and Stuns nearby enemies for 1.50 seconds.
Ability: Hextech Arsenal
Passive: Attacks fire a barrage of 4 bullets.
Active: Gain 300/400/66666 + 0.2 (Health) Shield and begin consuming 33 mana per second. Each second while casting, fire a laser that deals 135/200/2000 + 10/15/150 (AD & AP) physical damage, reduced by 0.15% per enemy hit up to 0.45%. Additionally, launch (AS) missiles split between 4 nearby enemies that each deal 135/200/2000 + 10/15/150 (AD & AP) physical damage.
Positioning: Frontline
First Impressions:
T-Hex is a splashy payoff for the Piltover comp, letting you create a monstrous contraption that's customized to your liking. It's hard to have a clear picture without seeing it in action, but hey, it's essentially free if you're playing the trait.
Once per Planning phase, you can feed Tahm Kench a champion, permanently granting him either Health, Attack Speed, or Ability Power based on their role and star level.
To feed, hold an ally from the bench over Tahm Kench until his mouth opens, then release.
Ability: Devour
Devour target for 2.5 seconds, dealing 850/1275/30000 (AP) magic damage and making them immune to other sources of damage. During this time, gain 0.3% Durability. If they are immune to crowd control, deal 600/900/20000 (AP) magic damage instead.
If they die while devoured, spit out a random component they were holding or the unit's cost in gold. Otherwise, spit them towards the farthest enemy, briefly Stunning targets on impact.
Positioning: Frontline
First Impressions:
Tahm Kench is amazing, plain and simple. He's tanky, has incredible CC, and can even generate component items and gold. It'll definitely take some work to unlock him, but he's well worth the investment to round out your comp.
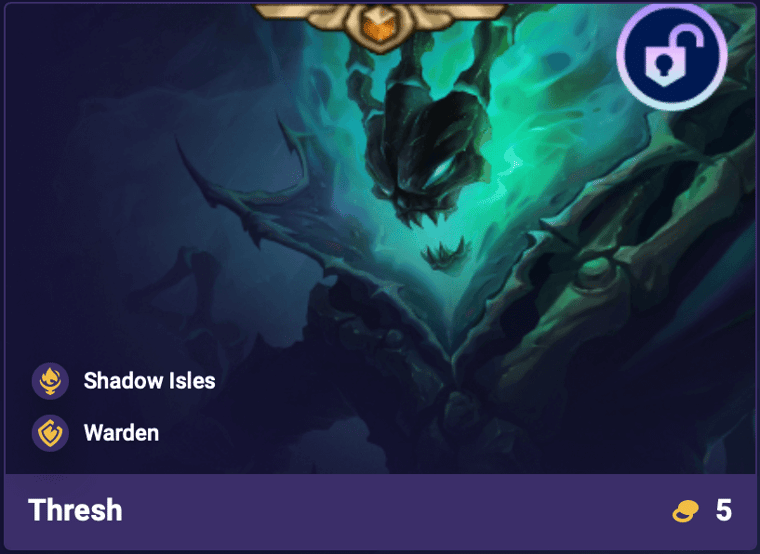
Passive: Each second, deal (AP & Souls) magic damage to all enemies within 2 hexes. Heal for 0.4% of the damage dealt by this effect.
Active: Create a prison of walls in a 2 hex radius that lasts 5/5/60 seconds. While active, the Passive's damage is doubled. When an enemy touches a wall, they take 100/150/4000 (AP) magic damage. If there are less than 2 enemies inside The Box at any time, drag an enemy in.
Positioning: Frontline
First Impressions:
Thresh caps off the Shadow Isles trait with a persistent AoE drain passive. Alongside the other champions, Thresh completes the full five-piece.
Ultimately, we'll have to see how difficult this is to pull off, but at a glance it looks very strong. It's hard to argue with long term permanent scaling.
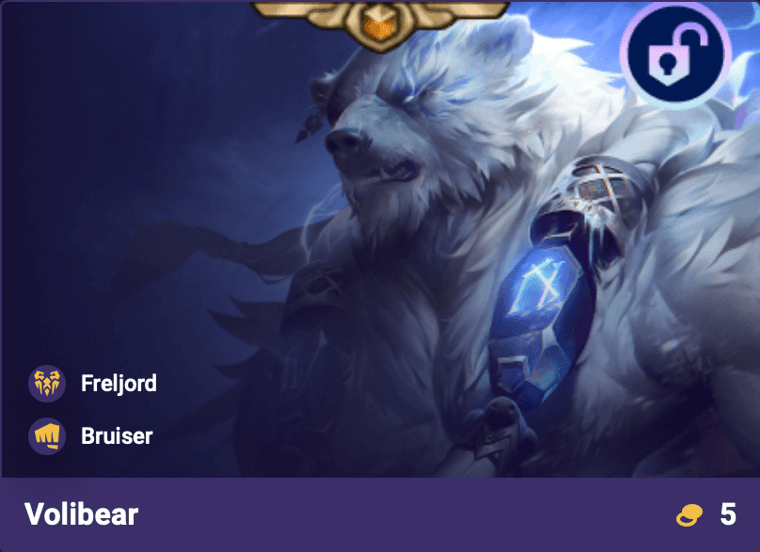
Unlock Condition: Level 8 + have a unit with 3800 Health.
Ability: The Relentless Storm
Bite the target and mark them, dealing 0.03 + 100/150/2000 (AD & Health) physical damage, increased by 0.6% if they are already marked. After casting 5/5/2 times, leap to a nearby hex, activating Stormbringer and dealing 0.03 + 100/150/2000 (Health & AD) physical damage to enemies within a two hex radius.
Stormbringer: Gain 400/550/9999 Health and 0.5/0.5/9.99% Attack Speed. Every 2/2/0.3 seconds, summon a lightning bolt on a nearby enemy, dealing 0.04 + 50/75/999 (Health & AP) magic damage. Takedowns summon a bolt on fallen enemies.
Positioning: Frontline
First Impressions:
Volibear is a giant AP Bruiser that rampages across the battlefield. He's essentially just a huge tank, but has the ability to ramp up even further over the course of the fight.
He could make a nice addition to a tanky comp, seeing as it requires 3800 Health in order to unlock him. Although outside of tanks or Freljord, I'm not sure there's much of a purpose.
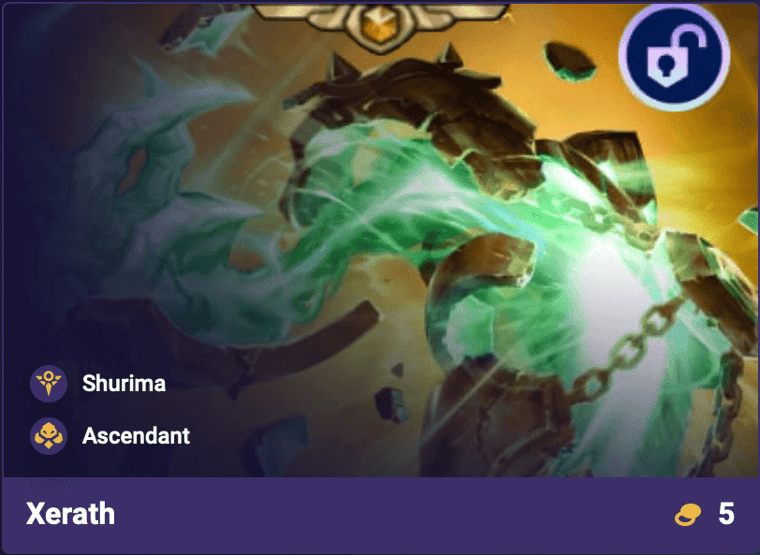
Unlock Condition: Alternate winning and losing 3/4/5 times with Azir.
Unique Trait: Ascendant
After each combat, an Ascendant Charm appears in your shop. These are powerful effects that can be bought for gold.
Ability: Eye of the Ascendant
Launch 10/10/99 arcane blasts randomly split between the closest 4/4/10 enemies that each deal 500/750/2500 (AP) magic damage.
Positioning: Backline
First Impressions:
Xerath is the final piece of the Shurima puzzle, unlocking after enough alternating wins/losses with Azir. It's unclear what Ascendant Charms do, but given the niche requirement, I suspect them to be pretty useful.
As a backline mage Xerath can certainly put in the work, but with all four aligned, there's no telling what "ascending to GODHOOD" could do!
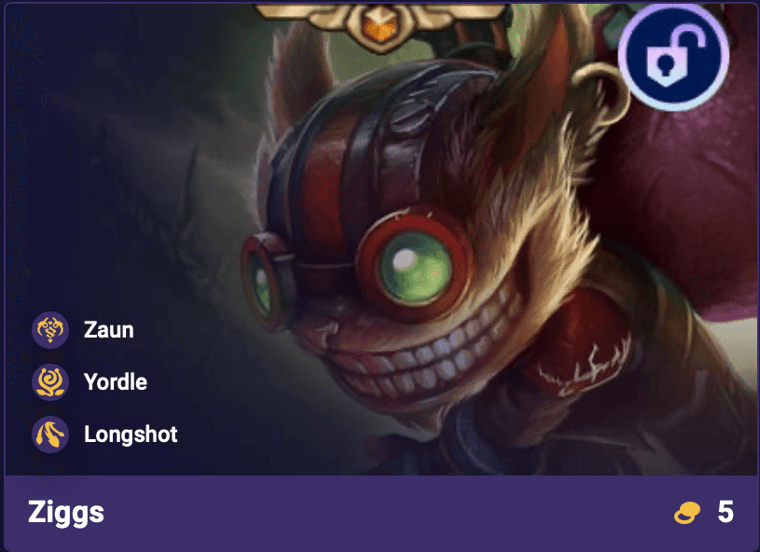
Unlock Condition: Field a Yordle or Zaunite with 3 items and Level 9.
Ability: Mega Inferno Bomb
Passive: Attacks are replaced with a bomb that bounces 1 time, dealing 1 + 30/45/500 (AD & AP) magic damage to units hit.
Active: Throw an enormous bomb at the largest 4-hex group of enemies that explodes on impact, dealing between 70/105/3000 (AP) and 500/750/7000 (AP) magic damage to enemies hit based on their distance from the epicenter.
Positioning: Backline
First Impressions:
Ziggs is a bit strange to me, as at the very minimum he requires you to reach Level 9. Since Yordle encourages early rerolls, it's unlikely you'll reach that point very often, though Zaun may be a different story.
He seems like a fine backliner, and at the end of the day, he's essentially free. So if you need the extra +1 to your trait, Ziggs will do the trick.
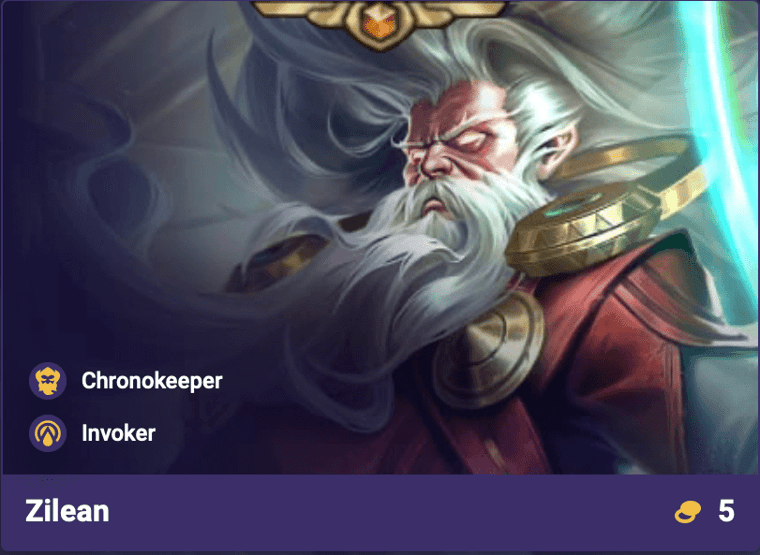
Every 2 casts, the Chronokeeper stores 1 XP. If he has enough stored for you to level up, he transfers you the required XP.
If you are level 10, he instead gains 15% Damage Amp.
Ability: Visions of the End
Throw a Time Bomb on the nearest enemy without one. Time Bombs deal 70/105/1000 (AP) magic damage each second. When the target dies, they explode, dealing 150/225/4000 (AP) magic damage in a 1 hex radius and grant Zilean 15 mana.
If a Time Bomb is on an enemy for 18/16/1 seconds and Zilean is alive, the enemy instantly dies.
Positioning: Backline
First Impressions:
Zilean could lead to some very interesting games if he's somehow acquired early. Being able to grant XP is quite unique, and does open the door to some different play patterns.
I don't expect a lot from him on the battlefield, but if you can somehow pull off the long awaited Time Bomb, all the power to you!
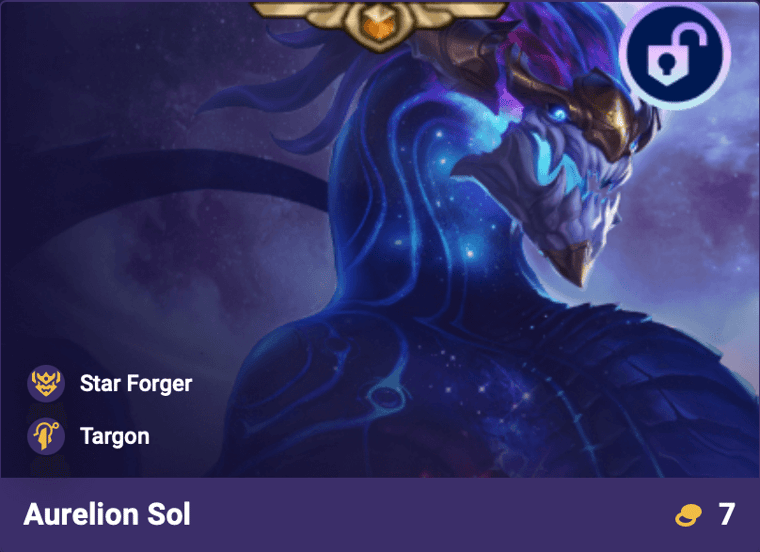
Aurelion Sol gains 40% increased Stardust for each other unique Targonian fielded in combat.
Ability: The Skies Descend
Passive: After dealing ability damage to an enemy, gain Stardust. Stadust makes The Skies Descend more powerful.
Active: Crash a star on target, dealing 400/600/5000 (AP) magic damage in a 2 hex radius.
Stardust Upgrades:
20: Create a shockwave that deals 50/75/1000 (AP) additional magic damage in a 3 Hex radius.
60: The star crash deals 0.12% more damage.
100: Shockwave increases to a 4 hex radius.
175: Knock up targets in the star crash for 2 seconds.
250: Shockwave increases to 10 radius.
400: The star crash deals 0.25% bonus true damage.
600: Also call down a meteor storm that deals 1000/1500/9999 (AP) magic damage split between living enemies.
1199: Summon a black hole at the epicenter, instantly killing enemies within.
Positioning: Backline
First Impressions:
Aurelion Sol gives players a reason to invest into multiple Targon units, despite their lack of traits. In fact, you need all five of them at once to unlock Aurelion Sol, so hopefully the reward is worth the effort.
The Skies Descend offers the highest ceiling you could ask for, with its ultimate form resulting in a complete enemy board wipe. Even at its lower tiers it can cause quite the impact, but having some inevitability is great for long drawn out fights.
It's certainly a steep requirement, but pulling it off would be amazing!
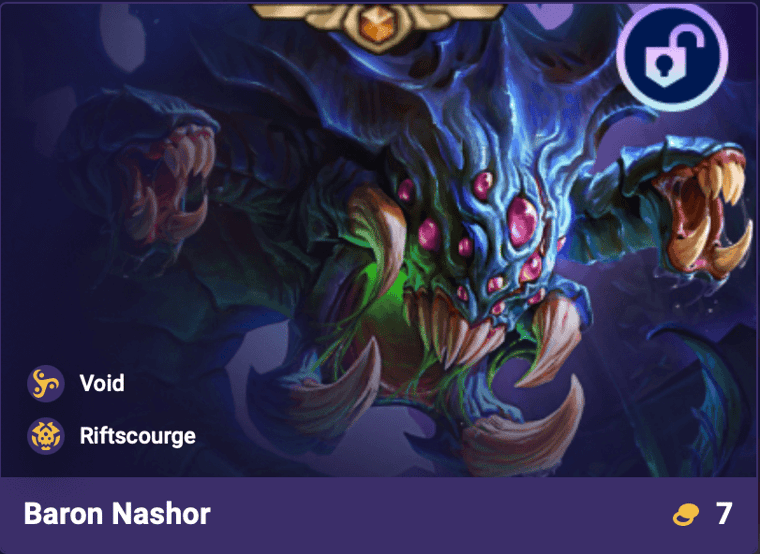
Baron Nashor takes up 2 team slots and grants +2 to the Void trait.
After 8 seconds, the board enters a Void Rift. The Rift grants Void units 30% Damage Amp and constantly strikes enemies with bolts of plasma, dealing 5% max Health as magic damage.
Ability: Wrath of the Void
Passive: Immune to Crowd Control effects. Attacks deal damage in a line on target. If no enemies are in range, dash to the next one and knock up adjacent enemies on arrival.
While in the Void Rift, erupt a tentacle below a random enemy every 3/3/0.25 seconds that knocks them up for 1.5 seconds.
Active: Slam and erect spikes in a 2 hex circle, dealing 250/375/20000 + 30/45/500 (AD & AP) physical damage to enemies hit. Then over 3 seconds, spit 10 globs of acid that deal 250/375/20000 + 30/45/500 (AD & AP) physical damage.
Positioning: Frontline
First Impressions:
Baron Nashor is the pinnacle of the Void, warping the literal rules of the game to suit its unique behavior. While he occupies two slots on the board, it really doesn't matter because he does basically everything.
Damage Amp? Check. CC? Check. Hits hard? Check. CC Immune? Check. Yep, it's all there, and I can't wait to test it out myself!
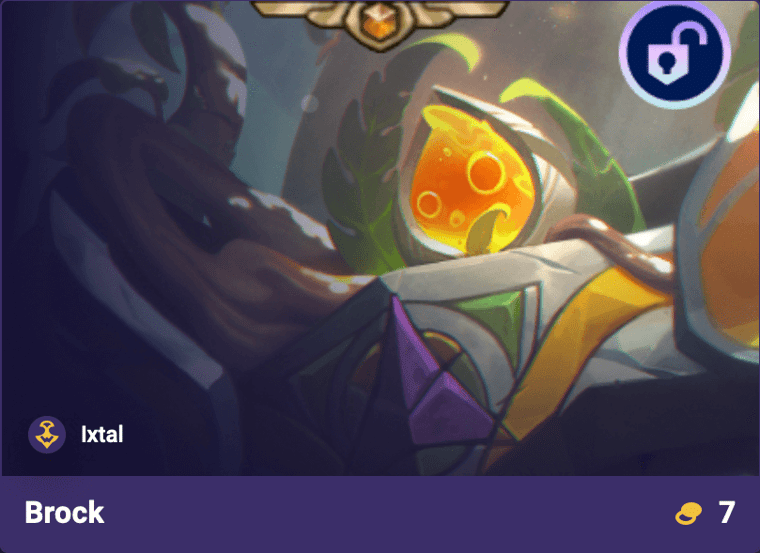
Passive: Immune to crowd control effects. Attacks briefly knock up the target and deal 0.5% damage in a 1 hex radius around them.
Active: Slam the ground, dealing 0.02 + 150/200/1500 (Health & AD) physical damage to ALL enemies, reduced by 0.15% for each hex from the center (down to 0.4%.) If this is the first time they've been hit by Seismic Slam this combat, knock them up for up to 1.75 seconds. 12 rocks fall around the battlefield, each dealing 250/375/600 + 20/30/100 (AD & AP) physical damage to enemies hit.
Positioning: Frontline
First Impressions:
Brock is a CC machine. Having a passive knockup effect is nuts, and his Seismic Slam ability takes this even further. We'll have to see how the Ixtal Quests play out to judge the overall difficulty, but if 500 Clues is reasonably obtainable, Brock will become a promising threat.
Unlock Condition: Field 4 region traits together in combat.
Unique Trait: Rune Mage
The Rune Mage benefits from all active Region traits, but contributes to none.
He harnesses the Runic power from active Region traits to modify his Ability, enhancing it in unique ways.
Ability: Runic Overload
Release a runic blast, dealing 300/450/1500 (AP) magic damage. It splits in two, dealing 0.33% of the damage to the closest two enemies. Each secondary blast splits an additional time.
Bilgewater: Blasts explode on impact, dealing 0.2% of the damage as physical damage to adjacent enemies.
Freljord: Chill targets for 4 seconds and deal 0.05 (Health) bonus true damage.
Ionia: Blasts split an additional time.
Ixtal: Gain a random Region's effect on combat start and every 10 seconds.
Noxus: Blasts now pierce targets, dealing 0.6% reduced damage per enemy hit.
Piltover: Every third cast is Overcharged, dealing 0.5% more damage.
Shadow Isles: Increase blast damage by (Souls).
Shurima: Knock up enemies for 1 second, with a chance to dredge up Gold or Treasures.
Targon: Heal the lowest Health ally for 0.1% of the damage dealt.
Void: Ignore 0.3% of enemies' Armor and Magic Resistance.
Yordle: Shrink targets hit, lowering their damage by 0.12% percent for 4 seconds.
Zaun: Poison targets, dealing 20/30/500 magic damage (AS) times over 4 seconds.
Positioning: Backline
First Impressions:
Ryze is the most flexible of the 7-costs, moving away from the vertical plan and leaning into having a more balanced comp. With several different combinations he's tricky to evaluate, but I'm excited to see what players come up with once we can finally dive in.
Unlock Condition: Sell a 2-star Jarvan, a 2-star Garen, and a 2-star Lux.
Unique Trait: Chainbreaker
Sylas rotates between 3 different Abilities, depending on which one is most useful at the moment. He cannot cast the same one twice in a row.
Ability: Stolen Might
Cast one of three spells:
Cataclysm: Leap on a nearby enemy. Deal 120/180/1000 (AP) magic damage to all enemies within 2 hexes and Stun them for 1.5/1.75/30 seconds.
Demacian Justice: Deal 700/1050/99999 (AP) magic damage to target. If they are below 0.15% max Health, execute them.
Final Spark: Gain 400/450/800 (AP) Shield for 2 seconds. Deal 360/540/1000 (AP) magic damage to all enemies in a line.
Positioning: Frontline
First Impressions:
Sylas combines the powers of Jarvan, Garen, and Lux to create an arsenal of impactful abilities. It's a pretty specific unlock condition, but depending on how things play out, may not be too difficult to achieve.
Not knowing which spell will be used does add some extra RNG into the mix, so hopefully the AI makes the smart decision. He also feels less polarizing compared to the other 7-costs, but we'll have to wait and see.
Unlock Condition: Get the Xin Zhao Champion Augment + field a 3-star Xin Zhao for 5 rounds.
Unique Trait: Immortal
While Xin Zhao is not on your board, Zaahen gains the Ionia, Demacia, and Warden traits.
On kill, Zaahen gains a stack of Focus for the rest of combat. If he has 3 or more Focus when dying, he spends it to revive and restore 60% max% Health.
Ability: Divine Challenge
Dash around target and slash in a circle, dealing 70/105/1500 + 20/30/200 (AD & AP) physical damage to target and 70/105/1500 + 20/30/200 (AD & AP) physical damage to all other adjacent enemies hit. If the target doesn't die, immediately cast again.
If this Ability is cast 25 times in a row, instead slam on target, instantly killing them and dealing 70/105/1500 + 20/30/200 (AD & AP) physical damage to all enemies within 3 hexes.
Positioning: Frontline
First Impressions:
Zaahen is by far the most specific unlockable in the game, requiring the (Gold) Trials of Twilight Augment in order to even have a chance. This can only be acquired on Stage 2-1, meaning there's only one window of opportunity.
Beyond that, you still need to obtain a 3-star Xin Zhao, then field him for five rounds, before inevitably feeding him to Zaahen.
That's a heck of a lot of hoops to jump through, but in return you get a ridiculous threat. Zaahen's Divine Challenge continues to recast until the target dies, and killing units grants stacks of Focus, which can lead to a 60% Health revive!
I suppose when something is challenging enough to achieve, it really doesn't matter what lies on the other side. But hey, if it's fun and exciting, I'm all for it. :)
Thanks for reading! Be sure to check out our meta team comps page, or head to our Team Builder to try and come up with your own comps.