Gear
Widowhail & Rearguard
In an ideal world, we would want to use a 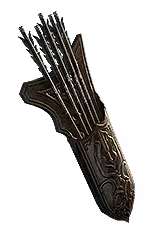 Feathered Arrow Quiver with Crit Multi, Crit Chance, Projectile Speed, and Life, but this build needs more Survivability Layers than just Freeze.
A Spell Suppression corrupted 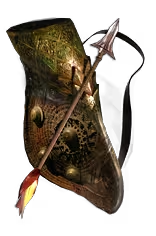 Rearguard solves our Defenses instantly. Capped Block, nearly capped Spell Block, and a big amount of Spell Suppression chance. We also get a little bit of %Damage and Proj. Speed making it a very strong choice.
To further enhance the Numbers we gain from Rearguard, we want to use a Volatile Corrupted 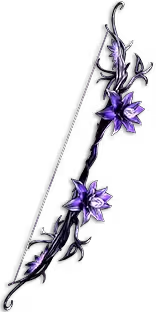 Widowhail with 275%+ Bonuses gained from equipped Quiver.
If you get your hands on a  Screams of the Desiccated with Acceleration and Resistance Shrine Effect, then we could replace the Bow & Quiver with a
 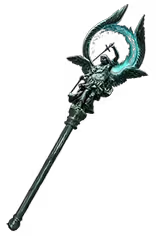 Nebulis and Rare Shaper Shield with Life on Block and Chance to Block, we get an insane Boost to Damage while retaining the Survivability.
Shrine Belt & the Gull
The core Item the Build is made around is the Screams of the Desiccated with Acceleration Shrine. To further amplify the Cast & Projectile Speed we gain, we want to use a Volatile Corrupted  The Gull. Focusing on Shrine Effect & Shrine Duration. The higher the better. The Helmet also grants us a temporary boost to survivability, sometimes via the lesser Shrines.
Expedition's End
 Expedition's End is another Keyunique that makes Warden work in the first place. While we could convert our Lightning Damage partialy to Cold via a
  Call of the Brotherhood, that would remove
  Unholy Trinity Support as a Support Option. Another alternative would have been a
  The Three Dragons, but here too we would lose The Gull. So Expedition's End is the best options to gain Freeze into the Build. The best corrupt is +1 to Socketed Gems, to increase the Level of our Exceptional Support Gems and/or 50% reduced Critical Damage taken.
Mana Cost Ring(s)
One of the biggest Issues to solve for the Build is the Mana Cost of Spark. With ~10 Casts per Second we consume an insane Amount of Mana even with  Inspiration Support. To counteract the insane Mana Consumption we want a
  Manifold Ring and a
  Kalandra's Touch.
The Ring is easy to craft. Fracture T1 Life onto it, Use Reforge Caster till you hit T1 Cast Speed. Craft Suffix can't be changed and slam a Veiled Chaos Orb, if you have no open Prefix, annull and if needed repeat, but most of the time you have 1-2 open Prefixes. Block any of the hybrid Element Flat Damage and unveil. It is a 1/4 for the 4 Different Mana Veiled Affixes. We want specifically the one with reduced Mana Cost. Once unveiled slam the last Prefix with a Foulborn Exalted Orb(block any Flat Damage to attacks) and craft -Mana Cost. Don't forget to Mana & Life or Prefix Catalys the Ring.
3rd Ring
As we are using  The Unseen Hand we can use a Third Ring. This third Ring should be an
  Amethyst Ring with Life, Chaos Res, All Res, Elemental Resistance and Mana Cost Craft. Idealy Fractured Life to use Veiled Chaos and get Hybrid Fire Cold Flat Damage.
The Reason we want/need any Source of Flat Fire & Flat Cold Damage is to apply Chill and Ignite. While we can freeze thanks to Expedition's End. That doesn't enable Chill and Ignite. But we want to apply those ailments as well for  Avatar of the Wilds and
  Yoke of Suffering.
Alternatively, get the Flat Sources on an Abyssal Jewel.
Amulet
We have 4 Options.
- Rare Amulet with Life, Gem Level, and Resistances works perfectly fine early on.
- Yoke of Suffering is also solving Resistances and instead of Gem Level we get increased Damage taken, which is neat.
 The Utmost is an expensive Alternative that helps with both Survivability and Damage. Do note that Damage Pen does nothing, so focus on the other Stats.
- Rare
 Focused Amulet with +4 or misted +8 to Spark (All Skills & Lightning Skills)
I personally really like Yoke of Suffering, as we can apply 5 Ailments easily. The 5th comes from a Chance to Poison Tatto and converting our Lightning Damage partially to Chaos Damage. Just a neat Way to use Yoke.
Best annoint is  Potency of Will
Gloves
If we have any source of Flat Cold Damage ( Ring or Abyss Jewel), we definitely want Temple Cold Mod on our Gloves for 50% increased Damage. We also want a lot of different Jewels, so another HUGE Affix for us is an Abyss Socket, which we can get by fracturing the Temple Cold Res Modifier and then using a Hollow Fossil to guarantee the Abyssal Socket. There are crafting Guides out there for attack builds. We are basically using the same Item, but we don't care about Attack Speed or Flat Damage to Attacks. Just Resistance and Life are important for us.
+2 Pierce from the Eater Influence is MASSIVE for us, but will take at minimum 2 Orb of Conflict, if not more. We can also get Chance to Unnerve from Exarch on Gloves.
Boots
Due to not using a rare Feathered Arrow Quiver with Essence of Insanity for Pierce, we really really want to use Hunter Influenced Boots with Elevated Pierce. Otherwise we'd have to use  Pierce Support which would mean we'd have to drop one of our Exceptional Supports and that is a no-go!
For a cheap Variant, just Elevated Chance to Pierce, veiled Movement Speed, and any amount of Resistances is fine(Pref. can't be changed + Reforge Lightning guarantees Lightning Res to be rolled)
If you want to go really fancy, you could go for Elevated Tailwind & Elevated Onslaught Hunter Redeemer Boots with Elevated Pierce. But those are incredibly rare and expensive.
Best Base for influenced Boots is  Fugitive Boots but a
  Two-Toned Boots (Evasion/Energy Shield) or Two-Toned Boots (Armour/Evasion) also works if needing the Resistances from the Implicit.
Jewels
This Build uses a LOT of unique Jewels to solve Specific issues or fix Specific Stats.
Elegant Hubris & Impossible Escape
 Elegant Hubris (Caspiro Supreme Ostentation) is a must. I recommend using it in the Jewel Socket near
  Elemental Equilibrium to replace it with Supreme Ostentation.
- We are almost exclusively in the Dexterity Section of the Tree, but
 Spark of the Nova has high Int requirements.
 - We want to use all our Attribute Nodes for Tattoos.
- We want to use a LvL 4
 Eclipse Support, which has insane Stat Requirement
Having Supreme Ostenation solves the Attribute issues and Elegant Hubris can have many other good Nodes replacing Notables in its range. IMPORTANT each Seed is different. Use the Find Timeless Jewel Function in Path of Building to find a usable one.
The ones I highly recommend to have is 80% Chance to avoid being shocked & 10% Chance to gain a Frenzy Charge on Hit. Mine also has a couple of additional Nodes that are nice to take, but not required. You can check out all Nodes in the PoB.
To save Passive Points on Travel Nodes that grant nothing, we want to use an Impossible Escape on Bloodsoaken Blade or Elemental Equilibrium. The better variant varies based on the Elegant Hubris you got!
Stormshroud
 Stormshroud combined with
  Thick Skin and its 3 small Nodes and the 80% Chance to avoid being Shocked from Elegant Hubris we are full Ailment Immune. If you cannot use Stormshroud use Soul of Lunaris for Freeze Avoidance.
Light of Meaning and Unnatural Instinct
A %Lightning Damage Light of Meaning in the Bottom Scion Node with a  Unnatural Instinct in the top right Node grants a ton of % Damage and various other Bonuses on Nodes we want to take anyway.
Watcher's Eye
We want to use a  Vitality Life on Hit and
  Grace Spell Suppression Watchers. This fixes the last bit of our Spell Suppression to cap it and we hit soooooo many times that we instantly recover any Life we lost.
Nadir Mode
 Nadir Mode is another Key Unique to enable insane DMG on our Build. On Paper it makes us lose Intensity Stacks we get from
  Pinpoint Support, but get us some % increase Critical Strike Chance.
But what it actually does is, it enables us to have near-permanent uptime on  Overloaded Intensity Support. Keep this in mind for now. I will explain what it does in the Skills Section.
Forbidden Flame & Flesh
As we are a  Warden we have access to
  Deadeye Ascendancy Nodes via the Forbidden Jewels. Our best option is
  Far Shot. As Spark travels quite fast and can hit a Enemy multiple Times before it despawns, this is a 'free' 30% More Damage Multiplier.
 Gathering Winds is not a great Option as we already get a ton of action Speed from our Belt.
The other nodes also don't give enough Damage to compete with Far Shot.
Foulborn Blue Nightmare
This is the secret Weapon to enable Unholy Trinity Support. Socketed in the Jewel Socket near  Pain Attunement and tattooing the 3 Intelligence Nodes leading up to it with %Lightning Resistance .
We convert enough of our Lightning Damage to Chaos to enable Unholy Trinity Support.
Abyss Jewel
We want 1 Abyss Jewel to get access to Flat Cold and Flat Fire Damage, this enables us to apply Chill and Ignite for Yoke of Suffering and Avatar of the Wilds. We can also get some amount of Crit Multi and Flat Life on it. Either Spell Damage or Spell Damage while wielding a Two-Handed Weapon. Either works for us while using the Widowhail.
Cluster Jewels
We want to use 2  Large Cluster Jewel and 2
  Medium Cluster Jewel
One Large Cluster with Lightning Damage and  Doryani's Lesson and
  Stormrider
Stormrider grants us access to Power Charges and Doryani's Lesson gives us Life Leech on top of our Life on Hit. Any Suffix Notable works.
The other Large Cluster should be with Elemental Damage and Inspired Oppression and Sadist. This needs Widespread Destruction to be set correctly.
We need the % increase Mana Regeneration and Sadist for more %increase Damage.
On the Medium Clusters, get 2x  Basics of Pain and Pressure Points, the best Notables we have on Medium Clusters.
 Oath of Winter makes our Spark perma Freeze anything that doesn't have the "Cannot be fully Slowed" Tag and even those walk around with minimum Action Speed. Freeze is one of the best Survivability Layer while mapping too, if something doesn't move it cannot kill you!
 Oath of Spring for 100% increased Damage taken. Even while using
  Petrified Blood and instantly recovering any Life lost via Life on Hit from a Watcher's Eye
 Greater Spell Echo Support to take the Build to the next Level.


 Spark of the Nova