menu
MobalyticsUse your favourite features in-game with our Desktop App

PoE Phantasm Necromancer League Starter

Creator
Featured
presentationWitch
presentationNecromancer
Starter
3.30 CoU
By Definitiv
Updated on Nov 13, 2026
Nov 13, 2026

Path of Building Code

Build Overview

Build Overview

Summon Phantasm Necromancer is, in my opinion, the strongest League Starter available. It ticks all the boxes, which is nearly impossible for a league starter. Well, except Soulwrest Necromancer.

  • Cheap
  • Tanky
  • Fast
  • Bossing Viable
  • Good at almost any Mapping Content

It got buffed in 3.28 where I league-started it and had my best League Start yet. Then had another huge QoL Buff with the Socket Changes and Mana-Infused Staff in 3.29 and now looking at the Revamped Atlas Passive Tree and Scarab -> Threads Change it looks like the perfect Allrounder Start, capable of adjusting to any content, whatever the Meta May be.

Build around the Core Unique Soulwrest and utilizing the Necromancer Unnatural Strength for Chaos Conversion and 'free' Wither allows Summon Phantasm Support to become a Poison Applying Machine.

While retaining an actual proper Defensive Package this time between Block Cap, Life Leech with Bone Barrier and Divine Shield for Energy Shield Recovery. On top of sitting at ~4k Life and ~2k ES. This build leaves nothing to be desired in terms of survivability.


The Primary Reason to start Soulwrest Phantasm over other Minion Builds is the unique Property of Soulwrest. It does not require to be 6-Linked, just Socketed. All Support Gems socketed into it apply to the Trigger Level 25 Summon Phantasm on Corpse Consumption. Making it incredibly cheap to "6-Link".

3.30 Update

With 3.30 I have completely overhauled the Leveling Approach to the build using Absolution instead of Fire Caster to have a smoother Campaign Experience and Progression into Maps. So even if for some crazy Reason no Soulwrest are available, the build can reach T16s without any major Respecing or Swapping. The Guide also now includes a Absolution + Soulwrest Hybrid Variant which is viable till the 2nd Soulwrest is setup.

The Build now utilizes Mana-Infused Staff for Block Cap and almost Spell Block Cap, freeing up the Offering to use Flesh Offering for better DpS, but Bone Offering is still viable for Hard Content. This also frees up a Ascendancy Point, Mistress of Sacrifice, so we can use Commander of Darkness or spec into Umbral Army as early as Lab 4 + Katarina Kill.



The Gem Setup has also been further optimized.

Pending Patch Note Changes: NO MAJOR BUFFS OR NERFS! HAVE FUN BLASTING!

Trade Budget

Assuming this build doesn't explode and everyone plays it, everything we need to get going is going to be giga cheap and the luxury upgrades (outside Progenesis) should also be a lot cheaper compared to other Builds and their Items.

From personal Experience at 10-20 Divines, I had close to everything already and was destroying all Non-Uber Content. At 50 Divines, which were mainly a couple of big luxury upgrades, I was even able to kill Uber Pinnacle Bosses and deal with up to 80% Delirium Content.

SSF Viability

This Build is technically SSF Viable, all Uniques can easily be selffarmed including Soulwrest. It is a fairly common Unique and can be target Farmed with Alone in the Darkness Divination Cards, which have a 1/4 Chance to return a Soulwrest.

The Darkness Enthroned and Ghastly Eye Jewel can be farmed from Abyss, which also drops the Alone in the Darkness Divination Card. (Amanamu's Gaze also, but bit rarer)

The Dark Monarch (Summoned Phantasms) Helmet and Aul's Uprising (Envy) can be technicaly target farmed by killing their respective Pinnacle Bosses, however are much more niche drops, though not required for the build to work. Elegant Hubris (Caspiro Supreme Ostentation) is the only thing that would require a different Build to farm effectively.

Strengths and Weaknesses

  • Giga Cheap to Start
  • Affordable Luxury Items
  • Uber Viable (at Stage 7)
  • Pinnacle & Nightmare Viable (at Stage 6)
  • Very Tanky
  • Easy Clear Swap (No Gem Swap, just press X)
  • Great for most League Mechanics
  • Double Ramp up Damage(summon Minions, then apply Poison)
  • Minion Playstyle is not for everyone

Build Variants

Recommended Leveling is Absolution starting Level 12. For Act 1 Kinetic Bolt is incredible Strong for Act 1, as long as you use a Iron Ring and Goat's Horn.

On Bosses use Summon Raging Spirit for additional Single Target Damage.

Recommended to Mule a Ranger for 3 additional Wisdom Scrolls and a Momentum Support.

[Mule or Muling is the Action of creating a Ranger, clearing the first Zone, checking Vendors for good 3 Links or Movement Speed Boots, then stashing everything and now going to start your additional Character, but with a Bonus]

Vendor Regex: "-\w-.-|-[rgbw]-|Runn|rint|derha|Litho"

Gem Regex: "ster at|^abs|^multis|voc|cal t|zy s|rit$|^hast|wrat|^lightning p|d of p|omation$|^minion da|^flesh o|ld ch|f thu|c burst su|^spell e|crate$|oly f"


Alternative Level as Fire Caster. However, since the Rolling Magma Changes in 3.29 it goes through to many hoops and skill setups, so the complexity outweighs its Power.

Equipment

Calling Wand
Two-Stone Ring
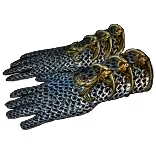
Mesh Gloves
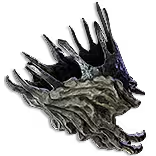
Lunaris Circlet
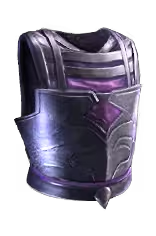
Silken Garb
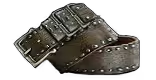
Heavy Belt
Jade Amulet
Two-Stone Ring
Goathide Buckler
Riveted Boots
Divine Mana Flask
Quicksilver Flask
Granite Flask
Divine Life Flask
Divine Life Flask

Weapons

Use Driftwood Wand into Goat's Horn. Dual Wield during Act 1. (Later, we use a Shield for Shield Charge)

Look for a Shield to prepare in your Offhand, preferably one with a 3-Link. At Level 8, you can Weapon Swap to use Shield Charge and swap back to your Wands for Killing Blue Packs, Rares and Bosses.

Goat's Horn can be White, or if you find an Essence of Woe can be used to force %Spell Damage on them. Preferably with 1 Open Prefix to craft Flat Fire to Spells during Act 3.

Gambling for a Dexterity Shield at end of Act 1 is a viable option if Gear is otherwise fine and you got 3-Links covered.

Ring

Highly advised to buy a Iron Ring after Muling a Ranger from the 3 Additional Wisdom Scrolls. The Flat Damage makes Kinetic Bolt way better. And the Iron Ring can later be vendored with Kinetic Bolt for a Sapphire Ring, once the swap to Absolution has been made.

Boots

Generally prioritize Movement Speed on Boots, but if needed for Sockets, use it for Sockets. Whirling Blades does not scale with our Movement Speed.

Sockets

Required: BBB, pref on Non-Wand to swap to a Goat's Horn when we find one.

GGR for Shield Charge but GR is also ok.

1 Red for Holy Flame Totem, which we drop later

Several Blue sockets for Various Gems.

Stats for Rest of Gear

Get any Amount of Resistances, Armour, Energy Shield or Life on Gear.

Passive Tree

main:
123
123
ascendancy:
8
8

Passive Node Priority

  1. Spell Damage Nodes
  2. Arcanist's Dominion
  3. Practical Application (Required to use Shield Charge)
  4. Path towards Enduring Bond

Skills

Kinetic Bolt | LvL 1
Kinetic Bolt
Prismatic Burst
Momentum
Added Lightning Damage
Shield Charge | LvL 8
Shield Charge
Momentum
Faster Attacks
Holy Flame Totem | LvL 4
Holy Flame Totem
Summon Phantasm
Flame Wall | LvL 4
Flame Wall
Frostblink | LvL 4
Frostblink
A3 Quest Amulet
Jade Amulet
Envy

1st Town Visit

Buy Prismatic Burst Support and Iron Ring

Get Kinetic Bolt

2nd Town Visit after Tidal Island

Get Frostblink

Buy Holy Flame Totem, Shield Charge (2 Wisdom Scrolls)

Get Quicksilver Flask, Frostblink, Flame Wall, Summon Phantasm Support


Use Kinetic Bolt + Prismatic Burst Support + Momentum Support

Flame Wall, Frostblink + Arcane Surge Support (optional)

Holy Flame Totem + Summon Phantasm Support

Keep Shield Charge

3rd Town Visit after Killing Dweller of the Deep

Get Added Lightning Damage Support & Lightning Warp

If able buy Faster Attacks Support (1 Transmutation)

Replace Momentum Support with Added Lightning Damage Support

If able link Arcane Surge Support with Frostblink or Flame Wall

Start using Shield Charge + Momentum Support + Faster Attacks Support

Lightning Warp to use in Offhand for Zone Skips (optional)

Gear Check, if needed, Gamble

  1. Any Shield, gamble for Evasion Shield
  2. Goat's Horn, check Vendor, any Links
  3. 2x 3-Links, later 3x

4th Town Visit

Get Flesh Offering

Buy Absolution, Summon Raging Spirit & if able Added Lightning Damage Support, Minion Damage Support (1 Transmute & 1 Wisdom minimum, +2 Transmmutes for the Supports)

Absolution and Swap to Absolution at Level 12. [See next Variant]

How it Plays

Mapping

Weapon Swap to Mapping Setup (by Default X Key)

  1. Channel Cyclone and move through the Map
  2. Move with Leap Slam if no Enemies around
  3. Use Frostblink if needing to Dodge or Reposition

Bossing

Weapon Swap to Single Target Setup (by Default X Key)

  1. Pre Summon 80% of all Phantasm by channeling Cyclone
  2. Apply Predator Support Signal Prey
  3. Apply Despair

  4. Continue to Summon Phantasm Support by channeling Cyclone
  5. Press Vaal Haste whenever Ready

Survivability Layers

  • Hybrid Life & Energy Shield Hit Pool (~4k Life & ~2k Energy Shield)
  • ~20k Armour & Divine Shield
  • Capped Block & Spell Block (with Bone Offering & Mistress of Sacrifice)
    • Recover 2% of Life & Es on Block (Staff Mastery), all Physical Damage blocked counts at 100% of Damage for Divine Shield
  • Molten Shell
  • Conditional Less Damage taken from Flesh and Stone and Infused Channelling Support
  • 10% less Physical Damage taken from Bone Barrier
    • also 1% Minion Damage leeched as Life (with 21-44 Phantasm that is a lot)
  • 5 Endurance Charges (20% Less Damage Taken)
  • 80% reduced Critical Damage taken (Mastery & Passive Point mix)
  • Recover 5% of Life & Mana every Second (if Corspe nearby from Desecrate from Disciple of Kitava Kitava's Teachings)

How it Works

Phantasm

Soulwrest summons 1 Phantasm for each Corpse Consumed. The Phantasm is a Minion that uses a Physical Spell Projectile, which always pierces. Per DB Entry, they also have a physical default Attack, however the Spell has no Cooldown, and the Phantasm always uses the Spell.

The Phantasm will inherit all Supports socketed into the Soulwrest, they do not have to be linked!

The Minion Limit by default is 11. If supported by Summon Phantasm Support the Limit of the Soulwrest Phantasm increases instead of summoning Seperate Phantasms. A level 21 Summon Phantasm Support increases the Limit to 22. If using a The Dark Monarch (Summoned Phantasms) the Limit increases to 44.

By using Unnatural Strength the full Damage of the Phantasm converts to Chaos Damage.

If using a Soulwrest in both you Weapon Set 1 and Weapon Set 2 and supporting both withSummon Phantasm Support, it is possible to Weapon Swap without the Phantasm despawning. They also dynamically use the Supports used in the current Soulwrest.

It cannot be supported by Enlighten Support, Enhance Support and Empower Support and it's Level cannot be increased with +1 to Minion or all Spell Skills.

To generate the Corpses, a Desecrate can be used, and the most effective way to consume them is with Bone Offering. This can either be automated with a Arcanist Brand or Cyclone + Cast while Channelling Support.

Amanamu's Gaze

Amanamu's Gaze is the current best Way to get Damage over Time Multiplier on your Minions. It counts all Ghastly Eye Jewel on your Character. Both on Tree and Gear. So it includes Jewels socketed in a Darkness Enthroned for example.

Abyss Jewel Crafting

Get any Level Ghastly Eye Jewel and use either Abberant Fossil or Harvest Reforge Chaos till you get Minion Chance to Poison. Exalt Slam for full Prefixes.

Other Good Modifiers to target at Higher Budget Levels:

  • Flat Life
  • Flat Energy Shield
  • Minion Added Physical Damage
  • Minion Added Chaos Damage

Changelog

10.11.2026 | Rewrote Leveling Section and improved Writing for 3.30

01.08.2026 | Added 3.29 Update

02.03.2026 | Initial Writeup

Comments

Video Guide

Stats

Stats are displayed for the "Poison Phantasm Swap {6}" Variant only
Character
Attributes
259 / 
144 / 
192
Movement Speed
140%
Bandits
Alira
Pantheon Major
TheBrineKing
Pantheon Minor
Abberath
Charges
Endurance Charges
4
Frenzy Charges
3
Power Charges
3
Defensive
Life
4,575
Energy Shield
2,078
Mana
865
Armour
19,563
Evasion Rating
24
Block
75%
Resistances
75% / 
75% / 
75% / 
54%
Simulated
Effective Health Pool
171K
Max Hit
17K / 
35K / 
35K / 
35K / 
12K
Skill DPS Estimation
Despair

36

Table of Contents

Featured Builds

[3.30] GIGA Ground Slam Berserker
Updated on Nov 13, 2026
[3.30] Marauder League Starter
Updated on Nov 13, 2026
[3.30] Cyclone Slayer League Starter to Endgame Guide - Beginner Friendly
Updated on Nov 13, 2026
[3.30] MasterT's Physical Soulwrest Necromancer
Updated on Nov 13, 2026
[3.30] MasterTs THUNDER ORB Tendrils Elementalist League Start to Endgame
Updated on Nov 13, 2026

Become a Creator

Want to earn rewards by sharing your builds with your community?